Table of Contents
Advertisement
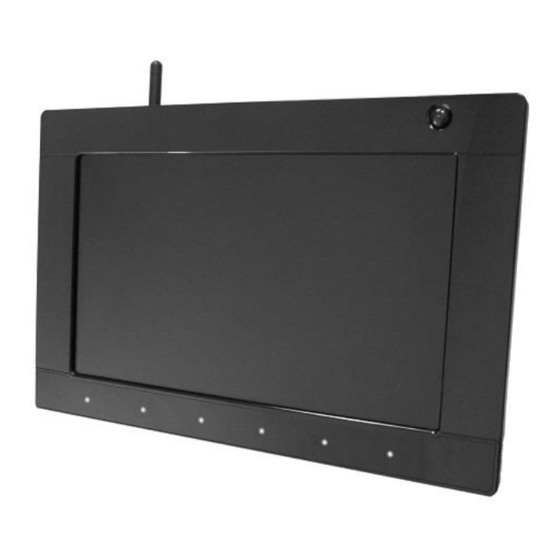
XDS-1060/1062 User's Manual
Notes about model variants
The XDS-1060 and XDS-1062 models are based on XDS-1060 with the following differences:
XDS-1060
Ethernet + Wi-Fi
Power over Ethernet applies to XDS-1062 only. All other aspects of operation are identical for each model.
XDS-1062
Power over Ethernet + Wi-Fi
Advertisement
Table of Contents

Related Manuals for IAdea XDS-1060


Summary of Contents for IAdea XDS-1060
- Page 1 XDS-1060/1062 User’s Manual Notes about model variants The XDS-1060 and XDS-1062 models are based on XDS-1060 with the following differences: XDS-1060 XDS-1062 Ethernet + Wi-Fi Power over Ethernet + Wi-Fi Power over Ethernet applies to XDS-1062 only. All other aspects of operation are identical for each model.
-
Page 2: Table Of Contents
Physical view and features 1.4. Installation Configuring the XDS-1060/1062 Digital Signboard 2.1. System connections 2.2. Basic settings 2.3. Connect the XDS-1060/ 1062 to your network 2.4. Time zone settings 2.5. Content settings 2.6. Player Information 2.7. Content configuration – AppStart 2.8. -
Page 3: Introduction
1. Introduction This document describes the hardware and software operations of the XDS-1060/1062 system set up, and frequently asked questions. 1.1. Features 10-inch widescreen LCD display and stereo speakers 4GB on-board flash local storage with SD card slot ... -
Page 4: Installation
1.4. Installation Fix the display stand Put the supplied display stand onto the screw socket. Insert the two supplied screws. Fasten the screws. Fix the Kensington lock Press Kensington lock’s button and aim at the lock hole. Plug the lock into the lock hole, and then lose the button. Open the back cover Lose the screw of the back cover. -
Page 5: Configuring The Xds-1060/1062 Digital Signboard
2. Configuring the XDS-1060/1062 digital signboard 2.1. System connections Attach the AC power adapter to power on the unit. After approximately 35 seconds booting animation will be displayed on screen as shown below : Player boot process takes approximately 60 seconds to complete. -
Page 6: Basic Settings
Auto playback can be canceled by click on the button while it’s counting down. User is able to enter Advanced Setting menu by clicking the Advanced button. 2.3. Connect the XDS-1060/1062 to your network Wireless connection Click the Wireless LAN setting, the wireless configuration UI will be launched. - Page 7 (Fig. 2.3.3) Click on the station name to connect. If the network requires authentication, you will be asked to provide the password for access. (Fig. 2.3.4) Wired connection To use the wired Ethernet connection, connect an Ethernet cable and disable the Wireless LAN interface first Click the Wireless LAN setting, the wireless configuration UI will be launched.
-
Page 8: Time Zone Settings
Static IP – manually assign network IP address Click the Ethernet to make static IP configuration. (Fig. 2.3.6) 2.4. Time zone settings Click the Time zone , configuration menu will be launched. (Fig. 2.4.1) Choose the correct time zone from available options. (Fig. -
Page 9: Content Settings
2.5. Content settings Click the Set content button, configuration menu will be launched. (Fig. 2.5.1) Input the content source URL and click Connect button, signboard will start playback immediately. (Fig. 2.5.2) 2.6. Player Information User can check the signboard’s basic information including the Health status; Firmware version; and Player ID. Click the Advanced button, advanced configuration menu will be launched. -
Page 10: Content Configuration - Appstart
Click on Information. The definitions of the Health Status: Green – Normal. The device connects to the URL server of the content source normally. Blue – Local. The device plays the contents from the USB drive or SD card. Gray – Disconnected. The device is in the disconnection state. (Fig. -
Page 11: Content Configuration - Easyplay
(Fig. 2.8.1) 2.9. Content configuration – EasyPlay The feature EasyPlay allows the signboard to play the media contents from the USB flash drive (or SD card) directly. When EasyPlay is enabled, the signboard will play the contents from the USB drive (or SD card) only. If user wants to play the contents from the URL server configured via ‘Set content’, EasyPlay must be disabled. - Page 12 (Fig. 2.9.2) Configure Movie Mode Click on Movie for choosing movies. Click on the button as marked in red below, and select the movie directory from the USB drive. Click Set button after the folder is selected. The files in the selected folders will be played while clicking on the Play button in the Basic settings or Advanced configuration menu.
- Page 13 (Fig. 2.9.4) The "On" time assigned in the time slots A-E are inclusive. For example a schedule assigned as the figure below, (Fig. 2.9.5) The exact playback time will be the time slots marked in Blue as shown in figure 2.9.6. The dark blue parts are the overlap time of C/D and D/E.
-
Page 14: Display Settings
2.10. Display settings Output Mode The default output mode is set to ‘Panel’ with resolution 800 x 480. (Fig. 2.10.3) If you are connecting to a monitor via the HDMI port, refer to the device specification for the best matching setting. - Page 15 (Fig. 2.10.3) Panel Brightness The default panel brightness is set to maximum, and it can be adjusted in the Display settings. Click the Advanced button, advanced configuration menu will be launched. (Fig. 2.6.1) Click the Display/sound button, and then click on Display. The Display Settings page will be launched. (Fig.
-
Page 16: Sound Settings
Screen orientation Screen orientation is to set the display to rotate 90/180/270 degrees. Click the Advanced button, advanced configuration menu will be launched. (Fig. 2.6.1) Click the Display/sound button, and then click on Display. The Display Settings page will be launched. (Fig. -
Page 17: System Configuration - Scheduled Reboot
(Fig. 2.11.1) Click on Volumes, the Volumes settings page will be launched. Drag the blue dots to adjust the volumes for the selected item, and then click on OK to save the new settings. (Fig. 2.11.3) Click on the checkbox on the right as marked in red to enable/disable the Touch sounds. (Fig. 2.11.2) (Fig. -
Page 18: System Configuration - Firmware Upgrades
Download the latest firmware and copy it to the root directory of a USB drive from http://support.IAdea.com Plug in the power cord into the device. Plug in a USB mouse to the device to enter Basic settings menu. -
Page 19: System Configuration - Factory Reset
(Fig. 2.13.2) 2.14. System configuration - Factory reset If you forget a system password you have set, you must reset the system to regain access to the signboard. Using the reset button PRESS and HOLD the reset button with a pen. RE-CONNECT the power cord. -
Page 20: System Configuration - Power Save
2.15. System configuration – Power save The feature Power save allows the signboard to power off automatically while stopping at the Basic settings page without any action is been taken for 10 minutes. Click the Advanced button, advanced configuration menu will be launched. (Fig. 2.6.1) Click on System, and click on Power save. -
Page 21: Content Management
4. Authoring in HTML5 A major advancement in the XDS-1060/1062 digital signboard is the ability to playback HTML5 content which can contain dynamic information. To find out more about using HTML5 for digital signage, visit http://widget.iadea.com. -
Page 22: Technical Data
6. Technical Data 6.1. Specifications XDS-1060 XDS-1062 Video format support POPAI Screen Media Standards S6 (MPEG-1 SIF, 3Mbps CBR) S7 (MPEG-1 480p, 10Mbps CBR) S8 (MPEG-1 720p, 15Mbps CBR) S9 (MPEG-2 480p, 6Mbps CBR) S10 (MPEG-2 720p, 12Mbps CBR) S11 (MPEG-4 AVC, 480p, 6Mbps CBR) -
Page 23: Appendix : Faq
If both connections are available, WiFi will be used. What is the maximum file size for a single video file? The maximum video file size for the XDS-1060/1062 is 2GB. We recommend reserving a safety margin to avoid exceeding the limit (i.e. limiting files to 1850MB). - Page 24 The signboard is not playing. What should I do? Play list errors and scheduling issues are two major causes of playback problems. To determine if the problem is caused by a bad play list, just delete the play list and restart signboard. The signboard should loop through all media files, indicating a fault with the play list.
- Page 25 IAdea reseller. Subject to the conditions of this warranty, IAdea will perform necessary service on the product without charge for parts or labor if, in the opinion of IAdea, the product is found to be faulty within the warranty period. IAdea’s sole warranty and obligation will be to repair or replace (at it sole discretion) such products that require warranty during the applicable warranty period in accordance with these conditions.
Need help?
Do you have a question about the XDS-1060 and is the answer not in the manual?
Questions and answers