Table of Contents
Advertisement
Quick Links
Advertisement
Table of Contents

Subscribe to Our Youtube Channel
Related Manuals for Genie GSD106


Summary of Contents for Genie GSD106
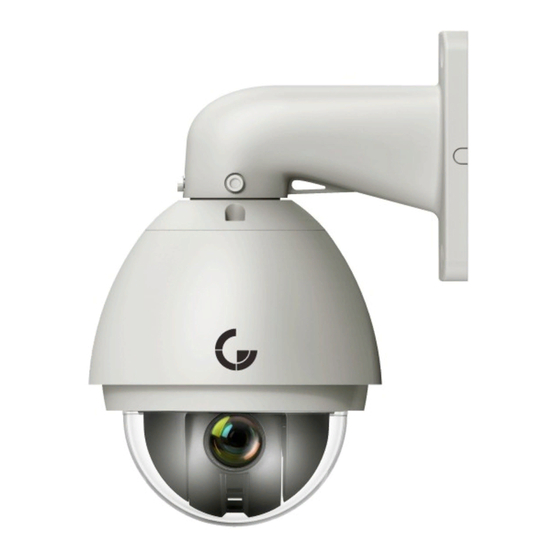
- Page 1 GSD106 10x Optical High Speed PTZ Dome Camera User Manual...
-
Page 2: Table Of Contents
Contents Chapter 1 Product Overview ..........................1 I. Performance Features ............................1 II. Functions ................................. 1 Chapter 2 Dome Wiring and Setup ........................2 I. Wiring the Dome ............................... 2 II. Setting the Device Communications ....................... 3 Chapter 3 Quick Operating Guide ........................5 I. -
Page 3: Chapter 1 Product Overview
Chapter 1 - Product Overview I. Performance Features 1. Dome Address from 1 - 255 2. Multiple protocols and auto protocol negotiation 3. Pan 360°continuous rotation 4. Tilt 90°action plus 2°angle adjustment 5. Pan manual operation speed ranging from 0.1°to 300°/S 6. -
Page 4: Chapter 2 Dome Wiring And Setup
Chapter 2 - Wiring and Setup of Dome System I. Wiring the Dome 1 Basic System Connection The basic system connections are shown below. When using this product for the first time, please read and carefully follow this electrical wiring schematic as incorrect wiring may lead to permanent damage of the dome or damage of other attached equipment. -
Page 5: Setting The Device Communications
2. Multi Dome Connection When connecting multiple domes together you can embed them in a multi-device system with auxiliary connection to devices, such as surge protectors, video matrixes, DVR’s and alarm boxes. AC24V: Power supply for the dome, which converts 220V/50H input to an AC24V output. - Page 6 1 Setting the dome’s protocol and baud rate. On/Off digit digit digit digit digit digit Protocol PELCO-D PELCO-P DYNACOLOR ULTRACK Note: The protocol and baud rate VICON of dome should match with those used by the controller. The dome needs to be restarted after revision. On/Off Baud Rate digit...
-
Page 7: Chapter 3 Quick Operating Guide
Chapter 3 - Quick Operating Guide I. Wiring BNC Video Output Display AC24V Input Power Supply of Dome Black Orange RS485A (+) Controller of the Dome Yellow RS485B (-) Connected to Yellow-Green Interphase Colour Ground Yellow-Green Interphase Colour External Connection for Alarm Input/Output . -
Page 8: Connecting The Power
V. Connect the Dome Power When power is applied to the Dome the product enters a self-test routine which outputs the video image to an attached monitor. Note: When the dome is self-testing it is normal to hear sounds made by the Dome’s pan and tilt motors. VI. -
Page 10: Chapter 4 Operation Menu
Chapter 4 – Operation Menu Operating Instructions <1>. Menu Operation Instructions 1. Input a Tilt movement command for cursor movement and option selection, namely the controller moves the Joystick up and down; hereinafter called Joystick Up/Down 2. Input a Pan movement command for entering into an option or for changing a setting value, namely the controller moves the Joystick left and right;... -
Page 11: Menu Tree List
0 1 2 3 4 5 6 7 8 9 A B C D E F G H —————— I J K LM NOPQ R S T UV W X Y Z PARK—— IRIS OPEN when done IRIS CLOSE when done IRIS CLOSE to exit IRIS CLOSE when done <4>. -
Page 12: Language Options
<2> All sub-menus can be seen in this tree list (English/Espanol/Polski) 1.Language Options <<Language Options Jovstick Left/Right to select 2.Display Options <<Display Options Press IRIS OPEN or Jovstick Left/Right to enter 2.1.Preset Setup <<Preset Setup Options ① Number <<Preset Number Selection Press IRIS OPEN or Jovstick Left/Right to enter 1~255 <<The default number after entering is 001 (hundred bit/ten... - Page 13 ④ Delete Preset <<Delete Preset Press IRIS OPEN or Joystick Left/Right to enter Select the number needed to be deleted from the number options.Move the cursor to Delete Preset. Joystick Left/Right or press IRIS OPEN to enter into the Delete Preset menu. Press IRIS OPEN to confirm the selection or IRIS CLOSE to cancel the selection and exit.
- Page 14 ① Number 1 <<Number Selection (1 ~ 8) Joystick Left/Right to select ② Name _ _ _ _ _ _ _ _ <<Name Editing Press IRIS OPEN or Joystick Left/Right to enter _ _ _ _ _ _ _ _ Press IRIS OPEN to enter ↑...
- Page 15 ⑦ Name Display <<Sector Name Display ON/OFF Joystick Left/Right to select IRIS CLOSE to exit 2.3. Co-ordinates <<Co-ordinates display On/Off Joystick Left/R ight to select 2.4. Crosshairs <<Crosshairs On/Off Joystick Left/Right to select 2.5.Start-Up Scr Msg <<Start-Up screen message display On/Off Joystick Left/Right to select 2.6.
-
Page 16: Control Options
3.Control Options <<Control Options Press IRIS OPEN or Joystick Left/Right to enter 3.1.Set Pan and Tilt <<Dome Pan/Tilt Setup Press IRIS OPEN or Joystick Left/Right to enter ① Pan Reverse << Pan Reverse ON/OFF Joystick Left/Right to select ② Tilt Reverse <<... - Page 17 ④ Operation <<Default function ON/OFF Joystick Left/Right to select IRIS CLOSE to exit 3.3. Speed Limit <<Operation speed limit ON/OFF Joystick Left/Right to select 3.4. Auto Flip <<Auto flip ON/OFF Joystick Left/Right to select 3.5. Auto Focus <<Auto focus options PTZ/OFF/Z Joystick Left/Right to select 3.6.
-
Page 18: System Options
4. System Options << System Options Press IRIS OPEN or Joystick Left/Right to enter Function Description: This option is used for data information management of the dome. The operating authority on this option is limited to the Administrator (with the correct password). 4.1. - Page 19 4.5. Dome Information <<Dome Information Press IRIS OPEN or Joystick Left/Right to enter <<Type of Camera module Camera: FCB-EX1020P <<Control Protocol Protocol: Pelco-D <<Baud Rate Baud Rate: 2400 <<Dome Number Dome No.:1 <<Communication Mode COMM MODE: HW <<Serial Number SN: 10000084 <<Press IRIS CLOSE to exit and return to upper level IRIS CLOSE to exit menu.
-
Page 20: Camera Options
5.Camera Options << Camera Options Press IRIS OPEN or Joystick Left/Right to enter 5.1. Zoom and Focus << Zoom and Focus Press IRIS OPEN or Joystick Left/Right to enter ① Zoom Speed << Zoom Speed Joystick Left/Right to select ② Digital Zoom <<Digital Zoom ON/OFF Joystick Left/Right to select... - Page 21 5.3. Mask Zone << Mask Zone Press IRIS OPEN or Joystick Left/Right to enter ① Number 1 << Number 1~24 Joystick Left/Right to select ② Mask Edit << Mask Edit Press IRIS OPEN or Joystick Left/Right to enter IRIS OPEN to begin <<Press IRIS OPEN to begin use FAR/NEAR WIDE/TELE to set the mask zone.
- Page 22 ④ R Gain AUTO <<R Gain Is adjustable under WB mode manual Joystick Left/Right to select ⑤ B Gain AUTO <<B Gain Is adjustable under WB mode manual Joystick Left/Right to select ⑥ Vertical Mirror << Vertical Mirror ON/OFF Joystick Left/Right to select ⑦...
- Page 23 6.2 WHITE BAL << White Balance Press IRIS OPEN or Joystick Left/Right to enter ① ATW <<Auto Trace White Balance adjusts the colour automatically, depending on the source of light. WHITE BAL MODE ATW-OUTDOOR: Use this mode for a broad range of colour ATW MODE temperatures.
- Page 24 6.4. MOTION DET OFF/ON << Mask Colour Joystick Left/Right to select. Press IRIS OPEN to enter MD SETUP DISP ALARM AREA SEL AREA1 AREA MODE _ _ _ _ _ _ _ _ _ _ _ _ _ _ _ _ _ _ BOTTOM _ _ _ _ _ _ _ _ _ LEFT...
- Page 25 ⑤ DISP ZOOM MAG OFF/ON Display the Zoom In/Out magnification level. ⑥ ZOOM POS INIT OFF/ON Initiate the Zoom position Joystick Left/Right to select ⑦ LENS INIT Initiate the Lens to the default setting Press IRIS OPEN to confirm 6.6. EXPOSURE Press IRIS OPEN or Joystick Left/Right to enter ①...
-
Page 26: Function Programming
7.Function Programming <<Special Function Programming Press IRIS OPEN or Joystick Left/Right to enter 7.1.PTZ Tour (Pattern) <<Pan/Tilt/Zoom Tour programming Press IRIS OPEN or Joystick Left/Right to enter ① Number (1 ~3) <<PTZ Tour number Joystick Left/Right to select ② Name _ _ _ _ _ _ _ _ <<Edit PTZ name Press IRIS OPEN or Joystick Left/Right to enter... - Page 27 ⑤ Delete a Tour <<Delete PTZ Tour Press IRIS OPEN or Joystick Left/Right to enter Joystick Left/Right to select a tour from the options.Joystick Up/Down to select the Delete a Tour menu. Press IRIS OPEN or Joystick Left/Right to enter Are you sure you want to do this? <<...
- Page 28 <<Joystick Left/Right when programming to Function number 1~255 select a Preset, and then press IRIS OPEN to confirm. Joystick Left/Right to select (0~9). ↑ Press IRIS OPEN to confirm. Press IRIS 0123456789 CLOSE to EXIT, or return to upper level IRIS CLOSE when done menu when programming is complete.
- Page 29 7.3. Alarm Program << Alarm Programming Press IRIS OPEN or Joystick Left/Right to enter Functional Description: The Dome has a total of 8 alarm input channels and 2 alarm output channels, with a flexible programming structure. ① Alarm In Programming Press IRIS OPEN or Joystick Left/Right to enter A) Channel Number <<Channel number (1 8)
- Page 30 E) Label Display << Label Display ON/OFF Joystick Left/Right to select F) Properties Setup << Properties Setup Press IRIS OPEN or Joystick Left/Right to enter a) Property Preset << Property Joystick Left/Right to select Preset / Vector / Tour / PanScan / DayNight / PicStill b) Number <<...
- Page 31 B) Edit Label ———— << Label Edit Press IRIS OPEN or Joystick Left/Right to enter Refer to Character Input Steps Instructions for details C) Label Display << Label Display ON/OFF Joystick Left/Right to select D) Trigger Alarm in 1 << Trigger Alarm in 1-8 Joystick Left/Right to select E) Enable...
-
Page 32: User Admin
8. User Management Press IRIS OPEN or Joystick Left/Right to enter Note: This authority only belongs to the Administrator. 8.1 Master Setup <<Master Setup Press IRIS OPEN or Joystick Left/Right to enter ① <<Edit Password Press IRIS OPEN or Joystick Left/Right to enter Refer to Numeric Input Steps Instructions to set a new password. -
Page 33: Date/Time
② Call Preset << Call Preset ON/OFF Joystick Left/Right to select ③ Camera Setup << Camera Setup ON/OFF Joystick Left/Right to select ④ Program PTZ Tour << Program PTZ Tour ON/OFF Joystick Left/Right to select ⑤ Run PTZ Tour << Run PTZ Tour ON/OFF Joystick Left/right to select ⑥... - Page 34 9.2 Assignment << Assignment Press IRIS OPEN or Joystick Left/Right to enter Note You can perform 8 Assignment options, to be executed automatically for the dome system.Namely, to execute the dome or camera functions automatically at the programmed designated time. If an executing task is terminated by manual operation, it restarts if a manual operation is not performed within 10 seconds after stopping.
- Page 35 9.3 Power Timer << Power Timer Setup Press IRIS OPEN or Joystick Left/Right to enter Note: A.You can perform a timed startup and shutdown for the dome. B.The interval period between startup and shutdown time is the System Startup Operating Status. While the shutdown time to startup time is the System Shutdown Status.
-
Page 36: Chapter 5 Shortcut Operations And Specification
Chapter 5 Shortcut Operation Table System Preset Operation Table System Preset Operation Table Preset 80 (Call 80) Run PTZ Tour 1 Preset 81 (Call 81) Run PTZ Tour 2 Preset 82 (Call 82) Run PTZ Tour 3 Preset 83 (Call 83) Start VectorScan 1 Preset 84 (Call 84) Start VectorScan 2... - Page 37 2. User Logon Operation Invoke Preset 92 for the Administrator logon. Invoke Preset 93 for the Operator logon. Factory Set Password: Administrator: 000000 Operator: 111111 Note: If the dome needs to be returned to the factory the Administrator password will be reset to default. 3.
-
Page 38: Chapter 6 Main Technical Parameters
Chapter 6 Main Technical Parameters Dome Address 1-255 Pan Rotate Range 360 degree continous rotation Tilt Rotate Range 0-90 degrees continous rotation Pan Manual Speed 0-300 degrees/second Tilt Manual Speed 0-120 degrees/second Call Preset Position 400 degrees/second Accuracy ±0.1 degree Preset Positions Languages English/Spanish etc. - Page 39 MEMO...
- Page 40 GENIE CCTV LTD. CCTV House, City Park, Watchmead, Welwyn Garden City, Hertfordshire, AL7 ILT Tel: +44 (0) 1707 330541 Fax: +44 (0) 1707 330543 www.geniecctv.com Edition. GN-January 2014...
Need help?
Do you have a question about the GSD106 and is the answer not in the manual?
Questions and answers