Table of Contents
Advertisement
Quick Links
Ether-GSH4T Ether-GSH4T Ether-GSH4T Ether-GSH4T Ether-GSH4T
Ether-GSH4T Ether-GSH4T Ether-GSH4T Ether-GSH4T Ether-GSH4T Ether-GSH4T
Ether-GSH4T Ether-GSH4T Ether-GSH4T Ether-GSH4T Ether-GSH4T
Ether-GSH4T Ether-GSH4T Ether-GSH4T Ether-GSH4T Ether-GSH4T Ether-GSH4T
Ether-GSH4T Ether-GSH4T Ether-GSH4T Ether-GSH4T Ether-GSH4T
Ether-GSH4T Ether-GSH4T Ether-GSH4T Ether-GSH4T Ether-GSH4T Ether-GSH4T
Ether-GSH4T
All Gigabit Ethernet Switch
Smart All Gigabit Ethernet Switch
with VLAN, Priority, Broadcast Storm Control and port-mirror Function
User's Manual
4 × 1000Base-TX Gigabit ports
NWay 10/100/1000BASE-TX
Ether-GSH4T V.1.0
August 1, 2002
Copyright © OvisLink Corp.
Advertisement
Table of Contents

Related Manuals for Ovislink Ether-GSH4T


Summary of Contents for Ovislink Ether-GSH4T
- Page 1 Ether-GSH4T Ether-GSH4T Ether-GSH4T Ether-GSH4T Ether-GSH4T Ether-GSH4T Ether-GSH4T Ether-GSH4T Ether-GSH4T Ether-GSH4T Ether-GSH4T Ether-GSH4T Ether-GSH4T Ether-GSH4T Ether-GSH4T Ether-GSH4T Ether-GSH4T Ether-GSH4T Ether-GSH4T Ether-GSH4T Ether-GSH4T Ether-GSH4T Ether-GSH4T Ether-GSH4T Ether-GSH4T Ether-GSH4T Ether-GSH4T Ether-GSH4T Ether-GSH4T Ether-GSH4T Ether-GSH4T Ether-GSH4T Ether-GSH4T Ether-GSH4T All Gigabit Ethernet Switch 4 × 1000Base-TX Gigabit ports...
-
Page 2: Fcc Warning
Trademarks All rights reserved. OvisLink and OvisLink Logo are registered trademarks of OvisLink Corp. Other product names and company names are trademarks or registered trademarks of their respective owners. FCC Warning This equipment has been tested and found to comply with the requirements for a Class A digital device, pursuant to Part 15 of the FCC Rules. - Page 3 Manual About About About About t t t t his This User’s Manual aims at helping users to know the key features of Ether-GSH4T Gigabit Ethernet Switch and to install it in a 10/100/1000BASE-TX Gigabit Ethernet Local Area Network (LAN).
-
Page 5: Table Of Contents
What is Priority Queuing? ....................4 What’s Port Mirroring? ....................4 What’s Broadcast Storm Control ..................4 Why Migrate to Gigabit Networking? ................4 Product Features ....................... 6 Basic Features ......................... 6 Advanced Features ......................6 Ether-GSH4T Gigabit Ethernet Switch... -
Page 6: Table Of Contents
Desktop Installation ......................13 Installation Site Preparation ..................14 Cabling Requirements ....................14 RJ-45 station port cable requirements:................15 Straight-through cabling requirements................15 Crossover cabling requirements ..................16 1000BASE-T cabling requirements ................16 Connecting to Power ....................... 17 Ether-GSH4T Gigabit Ethernet Switch... - Page 7 Virtual Workgroups....................... 23 Higher Performance and Reduced Latency..............24 Ease of Administration....................24 Saving Costs........................24 Security.......................... 24 Reduction of Routing for Broadcast Containment ............24 Infrastructural VLANs ....................24 LED INDICATORS................26 Comprehensive LEDs ..................... 26 Ether-GSH4T Gigabit Ethernet Switch...
- Page 8 VLAN Configurations..................... 37 Create a VLAN Group ....................38 Add/Remove a port to a VLAN Group ................. 38 Separate VLAN groups ....................39 Overlapping VLANs ..................... 39 Miscellaneous Configurations ..................40 Reset the Device to Default Setting................40 Ether-GSH4T Gigabit Ethernet Switch...
- Page 9 Table of Contents VLAN CONFIGURATION BASICS............42 Scenario: Setting up 3 Separate VLANs sharing 1 Server .......... 42 Procedures: ........................42 APPENDIX A PRODUCT SPECIFICATIONS..........44 APPENDIX B TROUBLESHOOTING .............. 46 Ether-GSH4T Gigabit Ethernet Switch...
- Page 10 Fig 7-1 VLAN Example....................42 Tables Table 3-1 Using straight-through and crossover cables ..........15 Table 3-2 1000BASE-T pin assignments for RJ-45 connector........16 Table 4-1 1000BASE-T pin assignments for RJ-45 connector........20 Table 5-1 Station Port LEDs ..................28 Ether-GSH4T Gigabit Ethernet Switch...
-
Page 11: Product Overview
Uplink port (shared with port #1). Each port provides up to 2000Mbps in full duplex mode. With its auto-sensing, Ether-GSH4T automatically detects the speed of the devices you plug into, and routes the incoming data to its destination. Its auto-negotiating function allows existing devices running at different speeds to communicate easily within the same network. -
Page 12: Best Solution For Server Farm Or Gigabit Backbone Switch
Before you can utilize console port for VLAN, ,Priority, and Port-Mirroring configuration, you must connect the console port of Ether-GSH4T to the COM port (RS-232 interface) of the host PC, using a RS-232 cable. For the detailed information of VLAN, Priority and Port-Mirroring configuration, please refer to the next section, VLAN, Priority &... -
Page 13: Vlan, Priority And Port-Mirroring Configuration Through Console Port
Ether-GSH4T is pre-installed with specific firmware in its nonvolatile flash memory to enable VLAN, Priority and Port-Mirroring configuration function. Through a RS-232 cable connection via its console port to the COM port of host PC, Ether-GSH4T allows network administrator to perform Smart Configuration from the host PC with convenience. -
Page 14: 802.1Q Vlan Standard
The “snooping port” is the port to view the traffic of the monitored port. The Ether-GSH4T go even one step further to let you choose whether to monitor incoming traffic, outgoing traffic, or both. - Page 15 It turns out that the most suitable solution is Gigabit Ethernet. As an ideal solution to the bandwidth need at the backbone or server side, Ether-GSH4T Gigabit Ethernet Switch provides exceptional bandwidth at very effective costs, while retaining the simplicity and manageability of Ethernet and Fast Ethernet.
-
Page 16: Product Features
13-inch standard rack-mountable Cabling distance up to 100 meters for twisted-pair cable Advanced Features Console interface for switch basic management and setup VLAN Port-based VLAN support: Support up to 4 VLAN groups via smart console configuration Ether-GSH4T Gigabit Ethernet Switch... - Page 17 Monitored Packets Broadcast Storm Control The Ether-GSH4T automatically filters out the broadcast traffic when the broadcast packets exceed 5% of the total traffic. Broadcast storm can significantly impede the performance of the network. The Ether-GSH4T protects your network from such situations.
-
Page 18: Preparation Before Installation
2 Preparation before Installation Preparation before Installation Unpack the Package Before you begin the installation of Ether-GSH4T Gigabit Ethernet Switch, make sure that you have all the necessary components that come with your package. Follow the steps below to unpack your package contents: Clear out an adequate space to unpack the package carton. -
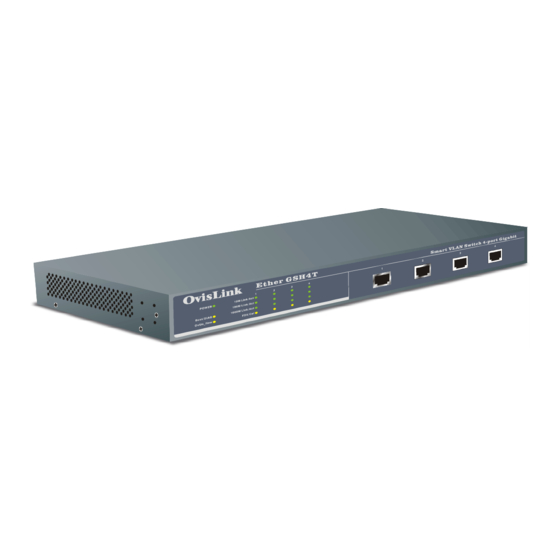
Page 19: The Front Panel
AC power outlet. The switch supports an input voltages ranging from 100 ~ 240 V @ 50~60 Hz and with a maximum power output of 40 watts. Ether-GSH4T Gigabit Ethernet Switch... -
Page 20: Console Port
The air holes on both sides of the switch also serve as heat vents to dissipate the heat. For proper ventilation, please be careful in your installation that in any case these openings should not be blocked. An adequate margin space for the rear and both sides of the switch should be provided. Be Ether-GSH4T Gigabit Ethernet Switch... -
Page 21: Fig. 2-5 Cooling Fan Housed Within Fan Tray
Since the switch is equipped with two cooling fans, heat dissipation can still function even if one fan stops running. But if you find either fan not functioning properly, please contact your local dealer for replacement. Fig. 2-5 Cooling Fan housed within fan tray Ether-GSH4T Gigabit Ethernet Switch... -
Page 22: Installation Of The Switch
(up to 550 m) than the twisted-pair cable. Thus, it is very convenient to choose a copper-wired gigabit switch such as Ether-GSH4T, since you can easily set up a gigabit backbone using the kind of twisted-pair cable so ordinarily used in 10/100BASE-TX environment, if the 100-meter distance limit and possible electromagnetic interference is of no concern. -
Page 23: Rack Mounting
3 Installation of the Switch Rack Mounting Ether-GSH4T Gigabit Ethernet Switch can also be mounted on a standard size 19-inch rack, which can in turn be placed in a wiring closet with other equipments. Before you can mount the switch on the rack, first you must attach the mounting brackets on both sides of the switch with screws, and then mount it as a unit on the rack. -
Page 24: Installation Site Preparation
Installation Site Preparation You can mount Ether-GSH4T Gigabit Ethernet Switch either on desktop or on a 19-inch rack. If you plan to mount the switch on desktop, please choose a steady, level surface in a well-ventilated area that is free from excessive dust. -
Page 25: Rj-45 Station Port Cable Requirements
The cabling system could be found in most existing Ethernet network installations. 100/1000BASE-T networks require Cat. 5 UTP/STP cabling system. The pin assignments for a straight-through cable are shown in Figure 3-5 and 3-6. Fig 3-5 10/100/1000BASE-T pin assignments for RJ-45 connector Ether-GSH4T Gigabit Ethernet Switch... -
Page 26: Crossover Cabling Requirements
Table 3-2 below. Therefore, the 1000BASE-T gigabit port does not require an external crossover cable when connecting to another Switch. If Ether-GSH4T interoperates with a device that cannot automatically correct for crossover, it makes the necessary adjustment prior to commencing auto-negotiation. If it interoperates with a device that implements MDI/MDIX crossover, a random algorithm as described in IEEE 802.3... -
Page 27: Connecting To Power
3 Installation of the Switch Connecting to Power Ether-GSH4T Gigabit Ethernet Switch features a universal auto-select power supply unit, which allows a power connection to a wide range of input voltages from 90 to 240V @ 50 ~ 60Hz. To establish its power connection, simply plug the female end of the power cord into the power connector on the rear of the switch and the male end of the power cord into a suitable power outlet. -
Page 28: Expanding Your Network
4 Expanding your Network Expanding Your Network Ether-GSH4T Gigabit Ethernet Switch is primarily designed as a central switching device to manage your workgroup/departmental traffic within Ethernet/Fast Ethernet/Gigabit Ethernet. Its secure VLAN feature offers security for virtual workgroups. With your existing Ethernet/Fast Ethernet infrastructure, you can very easily connect, expand or migrate to virtual workgroup computing in an Ethernet/Fast Ethernet environment. -
Page 29: Connecting To Another Switch/Hub
Straight-through Cable Connection When using a straight-through cable, the connection can be made through the Uplink daisy-chain port (MDI-II) of Ether-GSH4T to any station port (MDI-X) of the other switch/hub. Fig. 4-1 Connecting two switches RJ-45 Station Port Description The RJ-45 station ports (MDI-X) can be attached to any devices, which use a standard network interface (e.g., a workstation, server, bridge or router). -
Page 30: Rj-45 Gigabit Port Description
Table 4-1 1000BASE-T pin assignments for RJ-45 connector Summary: When connecting a computer to the station port/gigabit port of the Ether-GSH4T, use a straight-through UTP cable. When connecting the gigabit port of Ether-GSH4T to the station port of another hub/switch, use a straight-through cable. -
Page 31: Connecting Via Console Port To Host Pc
RS-232 cable to connect the console port of your Ether-GSH4T to one of the COM ports of your Host PC (as shown in Fig. 4-5). For detailed information on configuring VLAN, Priority and Port-Mirroring function, please refer to Chapter 6, Configuring Your Network for VLAN, Priority and Port-Mirroring. -
Page 32: Transmission Modes
Overlapping VLANs enable traffic between a centralized server and clients not belonging to that server’s VLAN, thus offering a switching efficiency that is better than the original routing solution. Fig. 4-6 Server Farm Ether-GSH4T Gigabit Ethernet Switch... -
Page 33: Gigabit Backbone Connections
4 Expanding your Network Gigabit Backbone Connections Ether-GSH4T Gigabit Ethernet Switch serves primarily as a backbone switch to connect your existing Ethernet/Fast Ethernet network to Gigabit networking environment. Ether-GSH4T can provide four 1000BASE-T gigabit backbone connections to another gigabit switch or high-end server. -
Page 34: Higher Performance And Reduced Latency
VLAN overlap occurs at network resources that must be shared by multiple workgroups. These resources are normally servers, but could also include printers, routers providing WAN access, workstations functioning as gateways, and so forth. The amount of VLAN overlap in the Ether-GSH4T Gigabit Ethernet Switch... - Page 35 However, most large enterprise networks are now experiencing one or both of these problems, which VLAN implementation can be an effective and cost-saving solution. Ether-GSH4T Gigabit Ethernet Switch...
-
Page 36: Led Indicators
5 LED Indicators LED Indicators Before connecting any network device to Ether-GSH4T Gigabit Ethernet Switch, you should take a few minutes to look over this chapter and get familiar with the front panel LED indicators of your Switch. The front-panel LED indicators of Ether-GSH4T Gigabit Ethernet Switch comprise three sets of LEDs: System Status LEDs, Diagnostic LEDs, and Gigabit Port LEDs. -
Page 37: Power Led
FDX LED shows the transmission mode of the connection. When in full-duplex transmission mode, FDX LED gives forth a solid yellow light. When in half-duplex mode, it will be off. When it is flashing, it means a network collision has occurred. Ether-GSH4T Gigabit Ethernet Switch... -
Page 38: Led Summary Table
A 100Mbps Connection is made Blinking Transmitting/Receiving No connection is made ● Green A 1000Mbps Connection is made 1000M Link/Act Blinking Transmitting/Receiving No connection is made FDX/COL ● Yellow Full Duplex Half Duplex Blinking Collision Table 5-1 Station Port LEDs Ether-GSH4T Gigabit Ethernet Switch... -
Page 39: Configuring Smart Management Functions
Making RS-232 Cable Connection to the Host PC The way to make a RS-232 cable connection is simple. Just prepare a proper RS-232 cable and, with it, connect the console port of your Ether-GSH4T and the COM port (either COM1or COM2) of your host PC. -
Page 40: Using Windows Hyperterminal For Smart Configuration Of Vlan, Priority And Port-Mirroring
Note: After you have established a RS-232 cable connection between Ether-GSH4T and your host PC, if your Ether-GSH4T or the host PC is not powered on, you should power them up before you can configure smart console functions. Using Windows HyperTerminal for Smart Configuration of... - Page 41 6 Configuring Smart Management Functions Step 3: Ether any name you would like to have for this connection (in this example, we use Ether-GSH4T as name for the connection) and choose an icon. Click OK. Step 4: The Connect to dialog box appear. Since the HyperTerminal connection is made through console port instead of a phoneline, you need only to configure the Connect using: drop-down combo box (that means the settings of the rest of the combo box or list boxes can simply be ignored).
- Page 42 The COM port properties dialog box (in this case, COM1 Properties dialog box) appears. Configure the various port settings such as followings: Bits per second: 9600 Data bits: 8 Parity: None Stop bits: 1 Flow Control: None Click OK. Step 6: Press “Control-S” when the blank screen appears Ether-GSH4T Gigabit Ethernet Switch...
-
Page 43: Hot Keys
6 Configuring Smart Management Functions Step 7: After the host PC has successfully connected to Ether-GSH4T, you will see the Switch Setup Main Menu appears. Hot Keys There are numerous hotkey sequences listed near the bottom of each menu. These hotkeys can help you quickly access the various configuration functions of your switch. -
Page 44: Port Configurations
Auto, which is also the default mode for per-port setting. Step 1: Press “2” to select “Port Config” on the Main Menu and the following submenu appears: Ether-GSH4T Gigabit Ethernet Switch... - Page 45 Class 0… priority is class 0(lowest) Class 1… priority is class 1 Class 2… priority is class 2 Class 3… priority is class 3(highest) Step 3: Press <Control-Q>. When asked whether to “Save Changes” , press <Y> to save. Ether-GSH4T Gigabit Ethernet Switch...
-
Page 46: Port Mirror Configurations
The “snooping port” is the port to view the traffic of the monitored port. The Ether-GSH4T go even one step further to let you choose whether to monitor incoming traffic, outgoing traffic, or both. -
Page 47: Vlan Configurations
Press <4> to select “VLAN Config” on the Switch Setup Main Menu and the following submenu appears: The VLAN Group Setup menu is where you can configure the VLAN groups. Ether-GSH4T supports up to 4 port-based VLANs. Since a single port can belong to more than two different VLANs, it is very easy to set up overlapping VLANs with maximum flexibility. -
Page 48: Create A Vlan Group
In the screen below, port 2 and 3 has been added to VLAN group 0. Add/Remove a port to a VLAN Group Step 1: Press <Tab> and <Backspace> keys to navigate, then press <Enter> key to change settings. Ether-GSH4T Gigabit Ethernet Switch... -
Page 49: Separate Vlan Groups
VLAN configurations looking similar to this ….. Overlapping VLANs To set up overlapping VLAN Groups with overlapping between VLAN groups, you should have your VLAN configurations looking similar to the following ….. In this case, Port 1 is the overlapping port Ether-GSH4T Gigabit Ethernet Switch... -
Page 50: Miscellaneous Configurations
Reset the Device to Default Setting The switch is delivered with a factory default setting, which you can always revert to when you want a “clean” setting for your switch. Ether-GSH4T Gigabit Ethernet Switch... - Page 51 Press <Control-D> at the Main Switch Setup menu and the switch’s setting will restore to factory’s default. WARNING: All previous setting will be lost when use this function. If you accidentally press the <Control-D> key, but do not wish to change the setting. Please do not save settings when exit. Ether-GSH4T Gigabit Ethernet Switch...
-
Page 52: Vlan Configuration Basics
7 VLAN Configuration Basics VLAN Configuration Basics Ether-GSH4T Gigabit Ethernet Switch supports up to 4 groups of port-based VLAN. On the VLAN Group Setup submenu, you can very easily configure VLAN group membership for any port. The following sections will introduce to you some basic configuration examples for the port-based VLAN. - Page 53 But they all have access to the server on port 4. For steps on how to operate the smart console to setup VLANs, please refer to the VLAN section in the previous chapter. Ether-GSH4T Gigabit Ethernet Switch...
-
Page 54: Appendix A Product Specifications
• Full Duplex Auto-negotiation • Active Flow Control IEEE 802.3x compliant flow control for full duplex Back Pressure for half duplex • Filtering Address Table 8 K per device • RAM Buffer 2Mbits shared data memory buffering Ether-GSH4T Gigabit Ethernet Switch... -
Page 55: Power Input
32 ~ 122 °F / 0 ~ 50 °C • Storage Temperature - 40 ~ 149°F / -40 ~ 65 °C • Humidity < 95% (non-condensing) • Safety / EMI Certificates UL, TUV, VDE, FCC Class A, CE Ether-GSH4T Gigabit Ethernet Switch... -
Page 56: Appendix B Troubleshooting
• If you find out where the problem is but cannot solve it by yourself, or you simply cannot locate what is at fault, please contact your local dealer for technical support. Ether-GSH4T Gigabit Ethernet Switch...
Need help?
Do you have a question about the Ether-GSH4T and is the answer not in the manual?
Questions and answers