Electrolux EHD68210P User Manual
Ceramic glass induction hob
Hide thumbs
Also See for EHD68210P:
- Specification (18 pages) ,
- User manual (16 pages) ,
- Dimension and installation manual (1 page)
Table of Contents
Advertisement
Advertisement
Table of Contents

Related Manuals for Electrolux EHD68210P


Summary of Contents for Electrolux EHD68210P
- Page 1 Ceramic glass induction hob EHD68210P...
-
Page 2: Table Of Contents
2 electrolux Electrolux. Thinking of you. Share more of our thinking at www.electrolux.com Contents Safety Information What to do if… Description of the appliance Disposal Operating the appliance Installation instructions Tips on cooking and frying Service Cleaning and care Warranty... -
Page 3: Description Of The Appliance
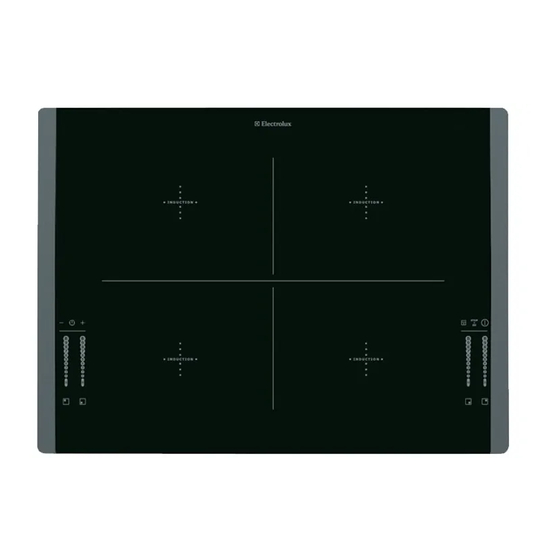
3 • Risk of burns! Do not place objects made • Cookware made of cast iron, cast alumi- of metal, such as knives, forks, spoons nium or with damaged bottoms can and saucepan lids on the cooking surface, scratch the glass ceramic if pushed across as they can get hot. - Page 4 4 electrolux Control panel layout Child lock with display STOP+GO with indicator On/Off with indicator Power function Heat setting indicator Automatic switch-off indicator Residual heat indicator Heat setting selection Timer Cooking zone indicators - Timer function Timer display Touch Control sensor fields plays and acoustic signals.
-
Page 5: Operating The Appliance
5 Displays Display Description Residual heat Cooking zone is still hot Fault Malfunction has occurred + number Pan detection Cookware is unsuitable or too small or no cookware has been placed on the cooking zone Automatic switch off Switch off is active. - Page 6 6 electrolux Control panel Display To switch on Indicator lights up Touch To switch off Indicator goes out Touch When you switch the appliance off, the locking function is automatically switched off. Switching the STOP+GO function on and on to the keep warm setting and then back to the heat setting that was previously set.
-
Page 7: Overriding The Child Safety Device
7 Using the child safety device The child safety device prevents unintention- al use of the appliance. Switching on the child safety device Step Control panel Pilot light lights up. The operational readiness Switch on appliance. Do not set a heat setting. - Page 8 8 electrolux Power Management When the power function is selected for one cooking zone, the power management makes the additional power for this cooking zone available by reducing the power of the corresponding other cooking zone. Example: the heat setting 8 is selected on one cooking zone.
-
Page 9: Automatic Switch Off
9 Setting the time Step Control panel Indicator Pilot light for the cooking zone selected Select cooking zone flashes Touch minutes After a few seconds the pilot light flashes more slowly. The time is set. The time counts down. -
Page 10: Tips On Cooking And Frying
10 electrolux Control panel nutes the indicator for the cooking zone • When the appliance is switched off, if one switches itself off. or more of the sensor fields on the control • If one of the cooking zones is not switched... -
Page 11: Cleaning And Care
11 If possible, always place a lid on the Examples of cooking applications cookware. The information given in the following table is for guidance only. Heat Cooking proc- suitable for Cook time Tips/Hints setting Off position Keeping food Keeping cooked foods... -
Page 12: What To Do If
12 electrolux move residues by sliding the blade over 2. Limescale rings, water rings, fat the surface. Wipe the appliance with a splashes, shiny metallic discolorations damp cloth and a little washing up liquid. should be removed after the appliance... -
Page 13: Disposal
13 Problem Possible cause Remedy Electronics fault Disconnect the appliance from and number are displayed the electrical supply for a few minutes (Take the fuse out of the house’s wiring system) If after switching on again, is dis- played again, call the customer... -
Page 14: Installation Instructions
14 electrolux Installation instructions on the back of the hob for wiring connec- Safety instructions tion diagram. The connection links should Warning! This must be read! be fitted according the appropriate con- nection diagram. Note for single phase The laws, ordinances, directives and stand-... - Page 15 15 Assembly 680 +1 490 +1 min. 5 min. 5 min. 20 min. 38 min. 25 min. 5 min. 5 min. 20 Warning! Surface temperature of base exceed 95°C, under bench access must be restricted by use of non-combustible barrier or installation.
-
Page 16: Service
Australia the period of 24 Electrolux branded appliances. It is an months and in New Zealand the peri- important document. Please keep it with od of 24 months;... - Page 17 Electrolux (if any) arising out of or in re- manship. Electrolux is not liable in the lation to the Appliance or any services...
-
Page 18: Important Notice
Appliances. Upon being re- to exchange information in relation to you to placed, parts and Appliances become enable Electrolux to meet its obligations un- the property of Electrolux; or der this warranty. – in the case of services, at its option, to... - Page 19 19...
- Page 20 892930417-B-032009...