Table of Contents
Advertisement
Quick Links
Advertisement
Table of Contents

Related Manuals for Oce 3050


Summary of Contents for Oce 3050
- Page 1 Océ 3050 User Manual...
- Page 2 Océ-Technologies B.V. This manual contains a description of the Océ 3050 and the microfilm scanning that can be done with it. The introduction (chapter 1) contains a general description of the working methods for using the microfilm scanner and it is recommended that you read at least this chapter.
-
Page 3: Table Of Contents
Chapter 1 Introduction The Océ 3050 Microfilm Scanner 8 General operation 9 Modes of operation 10 Chapter 2 System installation System requirements 12 Minimum PC requirements 12 Software installation 13 Preparing the PC for printing 13 Selecting a language 14... - Page 4 Chapter 4 The Viewing mode Viewing image files 40 The view screen 41 Chapter 5 Setting up the Océ 3050 Microfilm Scanner The scanner setup 44 SCANNER SETUP / IMAGING 45 Drawing Size 50 General Hollerith information 55 Hollerith Control 58...
- Page 5 Error messages 95 Appendix B Safety information Instructions for safe use 100 Safety data sheets 102 Safety data sheet Océ 3050 103 Appendix C Defining user defined file format User Defined file format 106 Header definition file 106 Header template file 108...
- Page 6 Océ 3050 User Manual...
- Page 7 Océ 3050 User Manual Chapter 1 Introduction This chapter contains a general description of the Océ 3050 Microfilm Scanner.
-
Page 8: The Océ 3050 Microfilm Scanner
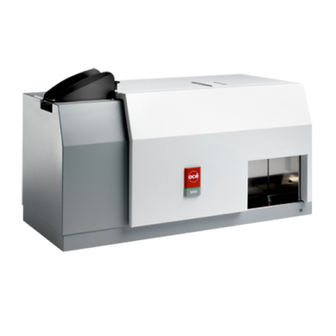
The Océ 3050 Microfilm Scanner The Océ 3050 Microfilm Scanner is a table-top machine which is controlled by the Océ 3050 Windows software running in the controlling PC. The figures on the inside of the cover of this manual show the main external features of the scanner. -
Page 9: General Operation
General operation A complete scanning and printing system comprises the Océ 3050 Microfilm Scanner, the controlling PC with the Océ 3050 Windows software and an Océ digital printer. The figure below shows an overview of the whole system. 18.5 SPRINKLER EL. 7150 Ø2"... -
Page 10: Modes Of Operation
■ VIEW the controlling PC without making paper copies or storing data files. For more detailed information on how to run a scanning session in the various modes (see ‘Scanning’ on page 17). Océ 3050 User Manual... -
Page 11: System Installation
Océ 3050 User Manual Chapter 2 System installation This chapter informs you how to install the Océ 3050 Microfilm Scanner and the Océ 3050 Windows software. -
Page 12: System Requirements
System requirements This section describes the hardware and software requirements for running the Océ 3050 Windows softwar, version 4.2. Minimum PC requirements Processor Pentium 4 - 2.8GHz or equalivent Memory 1 GByte RAM Hard Disk 40 GBytes Display 1024x768 pixels... -
Page 13: Software Installation
ADMINISTRATOR before starting the installation procedure. ▼ To install the Océ 3050 software: Insert the Océ 3050 installation CD ROM in the disk drive of the PC. Run ‘setup.exe’ from the CD ROM. Now follow the instructions on the screen. -
Page 14: Selecting A Language
Selecting a language You can specify the language in which the Océ 3050 Windows software is displayed on your screen. You can choose English, French, German or Italian. ▼ To select a language: Open the Control Panel menu in Windows. -
Page 15: Start/ Stop The Scanning Procedure
This section explains the procedure for start and stop the scanning, including switching on/off the scanner and the PC. ▼ To switch the scanner on: Switch the switch on the rear of the Océ 3050 Microfilm Scanner to the ‘I’ ( ) position (see figure 3). [3] The switch ▼... - Page 16 When the PC is shut down, switch the switch on the rear of the scanner to the ‘O’ ( ) position. Switch off the controlling PC (if not already switched off automatically). Océ 3050 User Manual...
-
Page 17: Scanning
Océ 3050 User Manual Chapter 3 Scanning This chapter gives an overview of the various parts of the Control window. It also provides all necessary information to run a scanning session in Batch, Single, Auto Feed and Hollerith Check mode. -
Page 18: Loading Cards
Place the first card of the batch in the input hopper, sliding it a bit forwards to make sure the card is gliding under the card guide plate. Place the rest of the cards on top. Put the card press on top of the batch of cards. Océ 3050 User Manual... -
Page 19: The Control Window
The Control window When the Océ 3050 Microfilm Scanner Windows application is activated, the Control window appears on the screen. The following figure displays the default Control window. [5] Default Control window The different parts of this window are described in the following paragraphs. -
Page 20: The Selection Buttons
Clicking the Job Management button brings up the Job Job Management Management window. It allows setting up the log file and file size limits for the job. More information is in ‘The Job Management Menu’ on page 85. Océ 3050 User Manual... -
Page 21: The Control Window
The Control window The Control window contains five entry boxes to set parameters for the scanning session and two control buttons for starting the job or clearing the scanner. [8] The control window The Running Mode entry box contains four radio buttons, Running Mode allowing you to choose from the various scanning modes: Batch, Auto Feed, Single and Hollerith check. - Page 22 72. Use this button to clear cards which may be trapped in the scanner. Clear This button starts the Océ 3050 Microfilm Scanner process as selected Start (batch or single). If Hollerith Naming is off, depending of your choice File or Print/File, the following window appears before scanning starts: 2068.tif...
-
Page 23: Scanning In Single Mode
Scanning in Single mode The Océ 3050 Microfilm Scanner feeds, scans and displays one card and waits for your command to print, file, reject or rescan the image. After the image has been accepted, the card is ejected into the output hopper. - Page 24 Click the Start button to start the scanning. If required, set the names for image files and log file (see figures 9 and 10 on page 22). The system switches to the Run-Time Display window (see figure 12 on page 30). Océ 3050 User Manual...
-
Page 25: Scanning In Batch Mode
Scanning in Batch mode The Océ 3050 Microfilm Scanner automatically feeds and scans a batch of cards placed in the input hopper of the scanner. After a card has been ejected into the output hopper, the scanner automatically feeds the next card. -
Page 26: Settings In The Control Window
If required, set the names for image files and log file (see figure 9 on page 22) and (see figure 10 on page 22). The system switches to the Run-Time Display window (see figure 12 on page 30). Océ 3050 User Manual... -
Page 27: Scanning In Auto Feed Mode
Scanning in Auto Feed mode The Océ Microfilm Scanner feeds, scans and displays one card at a time and awaits your command to print, file, reject or rescan the card. After the image has been accepted, the card is ejected into the output hopper of the scanner. The system automatically feeds and scans the next card and displays the image on the screen. - Page 28 Click the Start button to start the scanning session. If required, set the names for image files and log file (see figures 9 and 10 on page 22). The system switches to the Run-Time Display window (see figure 12 on page 30). Océ 3050 User Manual...
-
Page 29: Scanning In Hollerith Check Mode
Scanning in Hollerith Check mode The Océ 3050 Microfilm Scanner feeds a card, scans the card and displays the Hollerith data in the Run-Time Display window. Errors in the Hollerith coding can be corrected with edit in the Run-Time Display window. -
Page 30: The Run-Time Display Window
The button bar at the bottom of the window allows you to control the scanning session.The layout of the button bar depends on the running mode and the output mode.The following buttons can appear: File/Print/Print+File ■ Continue ■ Reject ■ Rescan ■ Accept ■ Océ 3050 User Manual... - Page 31 Edit ■ Frame ■ Pause ■ Stop ■ More detailed information on the buttons is given below: This button will appear, when on the Control window in File/Print/Print+File the Running Mode entry box Single, Hollerith Check or Auto Feed, is selected. The button allows you to accept the scanned image and generate the desired output.
- Page 32 Note: window, click More to get a list of all known sizes. If you have selected a standard frame size, click the left mouse button, move the frame to the required position, and release the button. Océ 3050 User Manual...
- Page 33 If you have selected Region, move the mouse to a corner of the frame you want to draw. Press and hold the left mouse button, move the mouse to draw the frame, and release the button. Click Rescan at the bottom of the screen. The area inside the defined frame will be rescanned.
-
Page 34: Choosing A Display Mode
This option provides a full screen display of the whole image, scaled to fit the available space in the window. The ‘zoom and pan’ facility is not available in this mode. 2074.tif [15] Run-Time Display window with a Full Image Océ 3050 User Manual... -
Page 35: Enlarged
The display area and zoom factor are retained for the duration of the scanning session so that the same area of other images using the Enlarged Display will be displayed. When switching the Océ 3050 Microfilm Scanner on, the display defaults to the full image. -
Page 36: Dual
‘zoom and pan’ facility. The display area and zoom factor are retained for the duration of the current scanning session so that the same area of other drawings using the Dual Display mode will be displayed. On Océ 3050 User Manual... -
Page 37: Zoom
Océ 3050 Microfilm Scanner on, the zoomed display is set to the bottom right hand corner of the image by default. Zoom In Enlarged or Dual Display mode, the zoom and pan facility allows you to take a closer look on a defined area of the image displayed on the screen. This facility is available both during scanning and during browsing. - Page 38 Océ 3050 User Manual...
- Page 39 Océ 3050 User Manual Chapter 4 The Viewing mode...
-
Page 40: Viewing Image Files
[18] File selection You select a file by double clicking the file name or you can select more files at once (see page 41). Océ 3050 User Manual... -
Page 41: The View Screen
The view screen Once a file has been selected for viewing, it is displayed on the screen. You can change the Display mode in the Display pull down menu. The following illustration is an example of a View screen: [19] The View screen If more than one file is selected, you can scroll to: the next image ■... - Page 42 Only the selected frame will be printed, using a zoom factor to fill up the chosen paper format. You leave the View mode by selecting Exit view in the Leaving the View mode View pull down menu. Océ 3050 User Manual...
-
Page 43: Chapter 5
Océ 3050 User Manual Chapter 5 Setting up the Océ 3050 Microfilm Scanner This chapter explains how to set the configuration of the Océ 3050 Microfilm Scanner and peripherals. -
Page 44: The Scanner Setup
■ parameters. button allows you to exit the Scanner Setup window without Cancel ■ updating the parameters. button allows you to enter the help screen of the Scanner setup. Help ■ Océ 3050 User Manual... -
Page 45: Scanner Setup / Imaging
CCD to become saturated on normal density images and hence it is important to return the LAMP BOOST setting to normal (zero) afterwards by resetting it to zero or by reselecting the NORMAL template. Setting up the Océ 3050 Microfilm Scanner... - Page 46 This second scan would be an optional choice for the customer since the information content is still present on the first scan. What is being provided is a means of improving the appearance of the image rather than detecting extra information. Océ 3050 User Manual...
- Page 47 This enables a previously defined set of parameters to be recalled for LOAD use. On pressing this button another window is displayed within which the name of the Template to load can be selected. Setting up the Océ 3050 Microfilm Scanner...
- Page 48 Select the Imaging card. Set the parameters as required in the Imaging card. Set the illumination level, Film Inverse, and Mode to the required settings. Click the Save button. The following window appears on the screen: Océ 3050 User Manual...
- Page 49 Select the Imaging card. Click the Delete button. The following window appears on the screen: [24] Deleting an imaging setup Click the setup you want to delete. Click OK to delete the setup. Setting up the Océ 3050 Microfilm Scanner...
-
Page 50: Drawing Size
When selecting one of the drawing sizes, the values for reduction ratio, drawing width and drawing length are filled in automatically and they are dimmed. To edit the drawing size (see page 51). In the software one file with standard definition of file sizes is available (DWGSIZES.DRG). Océ 3050 User Manual... - Page 51 [26] Drawing Size File After clicking the Edit File button in the ‘Drawing Size File’ entry box, the following window will appear. [27] Edit Drawing Size File window Setting up the Océ 3050 Microfilm Scanner...
- Page 52 Open the Scanner Setup window. Click the Edit File button to open the Edit Drawing Size File window. Select the size to delete in the size list. [28] Deleting a drawing size Click Delete Size. Click Update. Océ 3050 User Manual...
- Page 53 You can select a print size other than the drawing size if required. The size A4 or E can exist as portrait. Setting up the Océ 3050 Microfilm Scanner...
- Page 54 In this part of the window you can enter values in millimetres or inches. Units Control buttons Update The Update button stores the edited drawing size in the drawing size file. Cancel The Cancel button allows you to exit the window without making any changes. Océ 3050 User Manual...
-
Page 55: General Hollerith Information
General Hollerith information The hollerith reader possibilities of the Océ 3050 Microfilm scanner are experienced to be the most complicated part of the product. Many organisations punch their cards to easy their Basic hollerith explanation identification. Punched hollerith cards have the big advantage that they can be recognized by hollerith readers. - Page 56 (internal0 demands. Sometimes more than one structure exists: because also cards from other companies/subcontractors are in use ■ because in time the card structure changed to meet new demands ■ [31] Hollerith punches in horizontal direction Océ 3050 User Manual...
- Page 57 To benefit from the punched info the Hollerith codes in the Océ 3050 Océ 3050 Windows application needs to be set up to interpret the hollerith punches. Since this information will be stored in a so called Hollerith control file, programming of it has to be done once: how a company/project specific card can be identified (the so called ‘card...
-
Page 58: Hollerith Control
Size File window, or in the Control window before starting a scanning session. When this option is on, the Hollerith reader in the scanner Hollerith naming reads the name for the data files for scanned images from the cards, in accordance with the selected Hollerith Control File. Océ 3050 User Manual... - Page 59 [33] The Edit Hollerith Control File window This window has the following parts: The name of the Hollerith Control File ■ Card Keys ■ Filename ■ Size Keys ■ A table to switch on/off the Hollerith elements ■ Setting up the Océ 3050 Microfilm Scanner...
- Page 60 Choose the new created Control filename in the Hollerith Control entry box of the Scanner Setup window to return to the Edit Hollerith Control File window. Up to a 1000 different Hollerith Control Files can be defined. Note: Océ 3050 User Manual...
- Page 61 Hollerith element 1 and 2 in the Edit Hollerith Control FIle screen, (see figure 33). The number of Hollerith elements must equal the number of characters in the name of the Card Key (The length of the card key is not limited). Setting up the Océ 3050 Microfilm Scanner...
- Page 62 The card key function is now disabled.This setting can be stored under any Hollerith control filename (********.hcf). [38] View of the Edit Hollerith Control File window in case no card key is active Océ 3050 User Manual...
- Page 63 Click Update to confirm and go back to the Scanner Setup window. If you want to edit more in this window click Update later on. You can not delete the last card key. Note: Setting up the Océ 3050 Microfilm Scanner...
- Page 64 Click the File Name radio button in the Display elements entry box in the Edit Hollerith Control File window. [41] In this example the filename will be read in the Hollerith elements 4 to 11 Océ 3050 User Manual...
- Page 65 79 and 80. In this example an A2. To insert the place of the Hollerith Elements of the size keys (drawing formats) follow the next procedure. Setting up the Océ 3050 Microfilm Scanner...
- Page 66 Click the New Size Key in the Size Keys entry box, in this case type or look for A2. Choose in the Drawing Size a size which represents the size key. [44] The Size Keys settings Océ 3050 User Manual...
- Page 67 Click Update to confirm and go back to the Scanner Setup window. If you want to edit more in this window click Update later on. You cannot delete the last size key. Note: Setting up the Océ 3050 Microfilm Scanner...
-
Page 68: Predefined File Name
If you have not selected Hollerith Naming, you can specify the file name yourself as explained in this section. [46] Predefined File Name card of the Scanner Setup menu A predefined file name consists of a root name, followed by a variable part: Océ 3050 User Manual... - Page 69 Select the Predefined File Name card. Fill in the root file name, and select one of the complements: Numeric Count (specify the number of digits) ■ Date&Time ■ Log File Record ■ Click OK Setting up the Océ 3050 Microfilm Scanner...
-
Page 70: Automatic Card Selection
Automatic Card Selection The Océ 3050 can automatically decide to scan or not to scan a card, depending on its Hollerith string. If you activated Automatic Card Selection, the Hollerith string of each card will be compared with a list of Hollerith strings in a specified ASCII file. - Page 71 Specifying Automatic Card Selection Open the Scanner Setup window. Select the Automatic Card Selection card. Specify one of the operating modes, and select the ASCII file with Hollerith strings that is to be used. Click OK. Setting up the Océ 3050 Microfilm Scanner...
-
Page 72: The Printer Setup
The name of the selected printer appears in the Default Printer box in the top of the Printer Setup window. Click 'OK'to confirm your selection. The printer setup dialogue disappears and in the Print Control you will find the selected printer. [49] Main Window Océ 3050 User Manual... - Page 73 Press Ok to confirm or Cancel to cancel Add-Printer. ■ REMOVE: Click the name of the printer in the list of installed printers your would like ■ to delete. Press Remove and the printer will be removed. ■ Setting up the Océ 3050 Microfilm Scanner...
- Page 74 Press Ok to confirm or Cancel to cancel Add-Printer ■ Printer settings in the Main Window will overrule the settings in the RCF Note: file. Whenever an IP-address is entered the "Folder"-field will not be used. Note: Océ 3050 User Manual...
- Page 75 "Name" as the added printer has. In this folder OJT files can be found which will be included in the OJT header to enable OJT-support for those options which cannot be addressed in the UI of the microfilm scanner. Setting up the Océ 3050 Microfilm Scanner...
- Page 76 The contents of this file are inserted immediately after Block.OJT each IncludeBlock command. EndIncludeBlock.OJT The contents of this file are inserted immediately be- fore each EndBlock command. EndTicket.OJT The contents of this file are inserted immediately be- fore EndTicket command. Océ 3050 User Manual...
- Page 77 ENDBLOCK.OJT EndBlock BeginOutput IncludeBlock 1 BEGININCLUDEBLOCK.OJT MediaType paper MediaSource auto AddStrip leading 0 trailing 0 MediaFeed exact AdjustShift upperleft MediaDeposit stacker 2 CutMethod synchro AdjustRotate Auto Fold off ENDINCLUDEBLOCK.OJT EndOutput ENDTICKET.OJT EndTicket *OceJobData Setting up the Océ 3050 Microfilm Scanner...
-
Page 78: Configuration
Hollerith Add Mode: in Single and Auto Feed modes, you can add a ■ ‘Hollerith code’ to cards without Hollerith punches. The code is automatically added to the image file when an output is generated. Océ 3050 User Manual... - Page 79 To set the factory default settings: Click Utilities in the Control screen. Click Configuration in the pull down menu. Click Factory Settings. Click Update. The next time the system is started, the factory default settings will be used. Setting up the Océ 3050 Microfilm Scanner...
- Page 80 Océ 3050 User Manual...
-
Page 81: Chapter 6
Océ 3050 User Manual Chapter 6 File handling and administration... -
Page 82: The File Handling Setup
They can be stored either locally in the controlling PC or on a different system in a network. The path must already exist. Océ 3050 User Manual... -
Page 83: File Format
File format Each of the file format options causes a different header type to be placed at the beginning of the file, and –where applicable– selects the image data type to be used within the image file. This pull down menu allows you to select one of the 5 available File Format file formats: TIFF 4.0, 5.0 and 6.0... -
Page 84: Save Option
Process Queue. All images will be stored in the directory that is specified as ‘Process Queue Path’ at the top of the window. After storing the image, it can be processed by a separate program. Océ 3050 User Manual... -
Page 85: The Job Management Menu
The Job Management Menu The Job Management Menu allows the setup of the log file, the file size limits for the scanning job, and additional options concerning rejected cards and generating separate Hollerith files. Click the Job Management button to open the menu: 2120.tif [57] The Job Management menu... -
Page 86: Log File Usage
Note: Log file and Reject File Clicking this button displays the or the FILE on the View LOG FILE REJECT screen. The following illustration shows an example of a LOG FILE 2121.tif [58] The LOG FILE Océ 3050 User Manual... -
Page 87: Additional Functions
The scroll bar on the right allows you to scroll through the whole log file. The log file shows the following information: the job number ■ the file name ■ the date and time at which the scan was made ■... - Page 88 If you select this option, all information of each card will Single Line Record be contained in one line of the Log File. All items will be separated by a Field Separator, which you can specify yourself. Océ 3050 User Manual...
-
Page 89: Chapter 7
Océ 3050 User Manual Chapter 7 Maintenance and troubleshooting This chapter contains all information on clearing card jams. It also explains how to clean the scanner drum. -
Page 90: Card Jams
If this does not work, you should remove the card manually. Proceed as follows to do so. ▼ To clear a card jam: Open the Scanner access door. 2246 [59] Scanner access door Océ 3050 User Manual... - Page 91 Carefully turn the thumb-wheel clockwise to remove the card. The position of the thumb-wheel is shown in the illustration below. 2253 Thumb wheel [60] Thumb-wheel The card slides upwards as you turn the wheel in the direction indicated by the arrow.
-
Page 92: Cleaning The Drum
Put some isopropyl alcohol on the cloth. Hold the cloth with isopropyl alcohol against the drum as it rotates. When the drum is clean, click Motor Off on the screen. The drum stops rotating. Close the scanner access door. Océ 3050 User Manual... -
Page 93: Technical Specifications
Océ 3050 User Manual Appendix A Technical specifications... -
Page 94: Technical Specifications
Deskew - automatic* Centering - automatic* Log file capability SMART Assist Yes (Oce help) GENERAL SPECIFICATION Card generation odd/even Hollerith reading IBM, MIL STD 804B Film types silver/diazo | negative/positive Reduction ratio 7.5x to 36x (variable) Océ 3050 User Manual... - Page 95 Display 2 modes with zoom and pan Drawing sizes user defined within the limits of the tape window Scaling accuracy +/- 0.5% File formats - bitonal TIFF and CALS File formats- greyscale none (no greyscale) Check print capability Viewing facility Internal graphical diagnostics Agency approvals CE, TUV, UL, cUL...
-
Page 96: Error Messages
IDS_MSG22 SCSI address must be in the range 0 to 7. Please enter the required address. IDS_MSG23 No macro responses found. The ‘OCE.INI’ either does not exist or has been corrupted. IDS_MSG24 No macro commands found. The ‘OCE.INI’ is either missing or corrupt. - Page 97 Error code Error message IDS_MSG27 This combination of width, reduction ratio and Y off- set is outside the operating region of the scanner. IDS_MSG28 This combination of length, reduction ratio and X off- set is outside the operating region of the scanner. IDS_MSG29 Image width * resolution is outside the range 600 to 16000 pixels.
- Page 98 Hollerith text is present in the window area of the card. Press OK to erase the window area text and continue. Press Cancel to edit the Hollerith text. IDS_MSG1134 Unable to display the current image. [62] Error messages Océ 3050 User Manual...
- Page 99 Error code Error message IDS_MSG1135 Number of print copies must be in the range 1 to 99. IDS_MSG1136 Count must be greater or equal to 0. IDS_REJVIEW Reject file viewer IDS_SBOX_AVAIL Available IDS_SBOX_CARDS Cards Processed IDS_SBOX_MB MBytes IDS_SBOX_NOS Nos Prints IDS_SBOX_PRINT Print Queue Status IDS_SBOX_SCAN...
- Page 100 Océ 3050 User Manual...
- Page 101 Océ 3050 User Manual Appendix B Safety information...
-
Page 102: Instructions For Safe Use
If for some reason you have to move the machine yourself, please make sure ■ that the mains power point has the right fuse capacity. See the Océ 3050 safety data sheet in this appendix for information about maximum current. - Page 103 Do not place the machine in rooms which are too small and insufficiently ■ ventilated. See the Océ 3050 safety data sheet in this appendix for information about space and ventilation requirements. General Always use materials recommended by Océ and developed for this Océ...
-
Page 104: Safety Data Sheets
If and in so far as limitation of liability is permitted under the applicable laws, we do not accept liability for any inaccuracy that may occur in this information. Océ 3050 User Manual... -
Page 105: Safety Information
Safety data sheet Océ 3050 PRODUCT SAFETY DATA SHEET Océ (UK) Ltd Number E-638-b-UK Date October 1997 Model Océ 3000 Description MicroÞlm aperture card scanner Max. process speed 10 A4/min; 4 A0/min Dimensions Width 747 mm Depth 370 mm Height... - Page 106 Océ 3050 User Manual...
-
Page 107: User Defined File Format
Océ 3050 User Manual Appendix C Defining user defined file format This appendix gives an description of the procedure to define the User Defined file format. It informs you about the contents of the Header Definition file and the Header... -
Page 108: Header Template File
The Header Defenition file will always be called USER.DEF. It will always be found in the directory where you can find the OCE.EXE to start the 3050 software with (c:\ocei40a). a Header Template file containing a template for the image file header which provides the constant data or text to be used in every image header. - Page 109 The following data must exist for each header record: Record [Record_N] Padding character=<space|zero|any ASCII character> Data Format=<integer|string> Length=<length of the data field in bytes> Offset=<offset from the start of the image file> Data=<one of the parameter names> Record_N is the record number in the image file header. It is starting at Note: zero and increases depending on the number of records you used.
-
Page 110: Header Template File
Padding Character=0 Data Format=string Length=3 Offset=121 Data=resolution Header template file The Header Template file is a file which can have any valid DOS file name. This file has the same construction as the required image file header. Océ 3050 User Manual... -
Page 111: Checking The User Defined File Format
As default the extension .TPL is used. Note: Each record which has been specified in the Header Definition file is inserted into the header. It is overwriting the characters in the Header Template file which are in the position for that record as specified by its Offset entry. The layout of the header is completely unrestricted. - Page 112 ▼ Checking the created Header Definition file Start the Océ 3050 application. Scan a Hollerith card to file. Open an editor. Open the scanned file with the defined extension in the editor (in this example the file name is c:\image\*.usr)
- Page 113 Océ 3050 User Manual Appendix D Miscellaneous...
-
Page 114: Notation Conventions
There are a number of notation conventions used in this manual. This consistent style enables you to quickly become conversant with the use of this manual and consequently the Océ 3050. Each section or subsection contains a description of the feature or Description operation identified in the title. -
Page 115: Reader's Comment Sheet
Reader’s comment sheet Have you found this manual to be accurate? ❏ Yes ❏ No Could you operate the product after reading this manual? ❏ Yes ❏ No Does this manual provide enough background information? ❏ Yes ❏ No Is the format of this manual convenient in size, readability and arrangement (page layout, chapter order, etc.)? ❏... - Page 116 (Even if you prefer to remain anonimous, please fill in your occupation) Name Occupation: Company: Phone: Address: City: Country: Please return this sheet to: Océ-Technologies B.V. To the attention of ITC-User Documentation. P.O. Box 101, 5900 MA Venlo The Netherlands Océ 3050 User Manual...
- Page 117 EXIT Index ILE FORMAT - 68 PREDEFINED - 83 ORMAT FILE ALL_CARDS 57 FRAME - 32 AREA SCANNING FREQUENCY UALITY MODE UTOMATIC ELECTION EADER EFINITION FILE CALS, FILE FORMAT EADER DEFINITION FILE ARD JAMS EADER EMPLATE FILE CARD KEY EADER TEMPLATE FILE CARD PRESS HOLLERITH ADD MODE - 70...
- Page 118 USER DEFINED HEADER TYPE QUALITY MODE TILITIES MENU ’ EADER S COMMENT SHEET VIEWING MODE REJECT RESCAN RUNNING MODE TIME DISPLAY SAFETY DATA SHEETS SAFETY INFORMATION SCAN WINDOW SCANNING EED MODE ATCH MODE OLLERITH HECK MODE INGLE MODE Océ 3050 User Manual...
- Page 119 Index...
Need help?
Do you have a question about the 3050 and is the answer not in the manual?
Questions and answers