AJA KONA LHI Installation And Operation Manual
Hide thumbs
Also See for KONA LHI:
- Installation and operation manual (86 pages) ,
- Installation & operation manual (105 pages) ,
- Installation & operation manual (97 pages)

Related Manuals for AJA KONA LHI


Summary of Contents for AJA KONA LHI
- Page 1 Published: 1/11/13 Installation and Operation Guide B e c a u s e m a t t e r s .
-
Page 2: Notice
All other trademarks are the property of their respective holders. Notice Copyright © 2013 AJA Video, Inc. All rights reserved. All information in this manual is subject to change without notice. No part of the document may be reproduced or transmitted in any form, or by any means, electronic or mechanical, including photocopying or recording, without the express written permission of AJA Inc. -
Page 3: Limited Warranty
If a product proves to be defective during this warranty period, AJA Video, at its option, will either repair the defective product without charge for parts and labor, or will provide a replacement in exchange for the defective product. -
Page 5: Table Of Contents
AJA KONA System Test and Data Rate Calculation ....... . . - Page 6 Using KONA LHi with Professional Video /Audio Software ....... . .
-
Page 7: Chapter 1: Introduction
KLHi-Box are shipped with the KLHi-Box. Features The KONA LHi card offers a large number of unique features for optimum quality, ease of use, and support for a wide variety of workflows and environments. KONA LHi provides flexible standard definition and high definition capture and playback, a hardware down-converter for working in mixed SD/HD environments—and it supports both analog and digital audio/video... -
Page 8: Hardware
3-year warranty KONA LHi Audio KONA LHi supports 2-channel 24-bit 48kHz or 96kHz AES audio via XLR connections, and 8 channel embedded 24 bit 48kHz audio over HDMI or the same single SDI connection as the video. If you are using a digital deck—you’ll have the proper connections to the deck. -
Page 9: Understanding Typical Workflows
Data rate: 3+ MB/second standard definition only—supported by internal system drive Quality: Good DV is commonly input to an Apple computer via FireWire. KONA LHi can capture directly to DV compressed media from an uncompressed SDI source. For devices without FireWire (IEEE1394 or i.Link) connections, this allows the user to capture to this low data rate/... -
Page 10: Hdv
S-Video (Y/C) cables, so the HDV device must have an analog component HD output. The KONA LHi also has the ability to ingest analog audio, so the analog audio outputs of the HDV devices can be sent to the Kona card as well. -
Page 11: Apple Prores 422 And Apple Prores 422 Hq(Sd Or Hd)
Fibre Channel, or ATA drive array Quality: Excellent Uncompressed media is KONA LHi’s native storage format, offering the highest quality available. Capturing in uncompressed results in no compression artifacts, and video is sampled over the full raster at a 4:2:2 rate. -
Page 12: What's In The Box
• Registration Sheet—allows you to register your card by mail or online (details provided). Please save all packaging for shipping the KONA LHi should you wish to do so when moving or sending it in for service. System Requirements AJA Video recommends that your system meet minimum hardware and software requirements to achieve a satisfactory level of performance when operating it. -
Page 13: About Raids
A standard 42U rack can hold over 78TB of Xserve RAID storage. Note: When creating and striping an Xserve RAID for KONA LHi using the Apple Disk Utility provided with OS X, use RAID 50: in other words, the internal Xserve RAID drives are set up as RAID 5;... -
Page 14: Storage Capacity
Storage capacity No matter which storage system you choose, pick one that can scale to meet your needs over time. Ideally, you should be able to increase storage capacity or switch to a RAID level offering increased data protection in the future. Balance current and future storage needs with your budget and choose accordingly. -
Page 15: Cable Connections
KONA LHi Installation and Operation Guide — Cable Connections Cable Connections KONA LHi offers unsurpassed cable connectivity for a video/audio capture card. Connections are made via a supplied breakout cable, plus two BNCs and two HDMI connectors on the KONA LHi Card endplate. Using the Breakout... -
Page 16: Using Klhi-Box
Using KLHi-box The KLHi-box attaches to the KONA LHi card via cables that attach to the back of the box. These cables are supplied with the KLHi-Box. When you purchase the optional box, you get two-channel unbalanced audio output (2 RCA Jacks)—not available with the standard cable. - Page 17 YUV, Y/R-Y/B-Y, and YCbCr, are just some examples. Although these various formats have some differences in levels, they are all basically the same. KONA LHi uses the modern YPbPr terminology exclusively. KONA LHi supports three different types of YPbPr: SMPTE/EBU N10, Betacam (NTSC), and Betacam (NTSC Japan).
-
Page 18: In This Manual
Reference Video and LTC Input A single BNC on the standard KONA LHi cable—or two BNC connectors on KLHi-Box (it loops through)—allow you to synchronize KONA LHi outputs to your house analog reference video signal (or black burst). If you have a sync generator or central piece of video equipment to use for synchronizing other video equipment in your studio, then connect its analog composite output here. -
Page 19: Chapter 2: Installation
Chapter 2: Installation Installation Overview The installation and set up of a KONA LHi is very simple. All of the steps of installation and configuration are documented in this chapter, summarized as follows: 1. Unpack and examine the contents of the shipping box 2. -
Page 20: Aja Kona System Test And Data Rate Calculation
Note: Note: Most of the disk performance tests are generic and don’t require an AJA KONA Video Capture card. The DMA performance tests do require a KONA card and AJA KONA Driver software to operate. -
Page 21: Unpacking
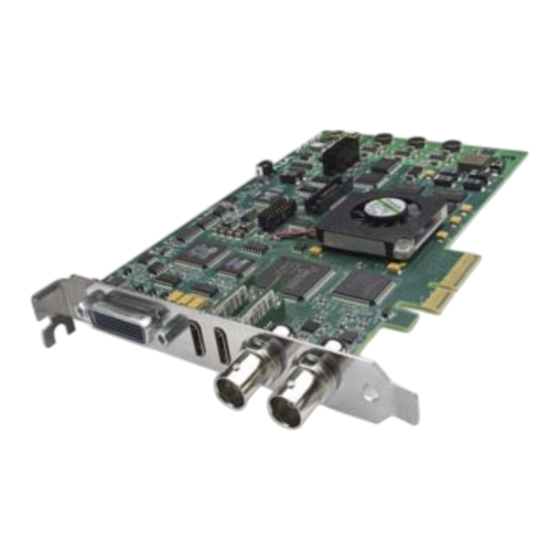
KONA LHi is shipped with a CD containing system software and an Installation and User manual (a PDF on the CD), and a cable. If you purchased the optional KLHi-box breakout Contents box, it ships with its own set of cables and instructions for connection to the KONA LHi card. AJA KONA LHi Card... -
Page 22: Installing The Kona Lhi Card Into A Macpro
3. Remove the side access door and described in your Apple User Manual. Lay the machine on its side, motherboard facing up. 4. Remove the KONA LHi card from its protective anti-static bag; place the card on top of the bag. - Page 23 KONA LHi Installation and Operation Guide — Installing the KONA LHi Card To Install: Remove Screw and Cover Plate Insert KONA Card Secure KONA with Screw Removed Earlier PCI-Express Slots Mac Pro Cardcage Access PCI-Express Slots Slot 3 is the preferred slot...
-
Page 24: Installing The Kona Card In A Windows Pc
5. To install the KONA card and RAID controller card (SCSI or Fibre Channel), refer to the AJA website for the latest installation updates at the URL provided. Because of hardware and software changes, AJA engineers are constantly testing and grading workstation performance. The AJA website is your best source of up-to-date approved workstation configurations. - Page 25 KONA LHi Installation and Operation Guide — Installing the KONA Card in a 6. Open the card retainer bar on the left side of the chassis cardcage. Remove the card edge access cover from the desired slot where you will be inserting the KONA card.
-
Page 26: Cabling The System
Can be Configured for Component, Analog Audio Composite, Channel 1 Output or Y/C Analog Audio Channel 2 Output RS422 Machine Control AES Input to VTR Channels 1 & 2 (9-pin) AES Output Channels 1 & 2 KONA LHi System Using The Breakout Cable... -
Page 27: Typical System
4. Connect two SDI cables between KONA LHi (BNCs are on the card endplate) and your digital VTR (Digital Betacam etc.): one from KONA LHi SDI In to the VTR SDI Out, and one from KONA LHi SDI Out to the VTR SDI In. The KONA LHi SDI connections have embedded audio so the VTR must be configured accordingly. -
Page 28: Installing Kona Lhi Software
Installing KONA Visit the AJA website for the latest driver version appropriate to your configuration. Alternately, if you have no internet connection, insert the KONA LHi CD in the Mac; as noted, Software for Mac this driver version may not be the most current. After securing the most recent KONA LHi driver package, read the details and requirements on the to ensure compatibility with your system configuration. -
Page 29: Installation Procedure
KONA LHi Installation and Operation Guide — Installing KONA LHi Software Installation Procedure 1. Locate the downloaded driver on the desktop or the KONA LHi CD icon on the desktop. 2. Locate the package file in the folder from the download or by double clicking on the CD;... - Page 30 8. The next screen lets you know that the installer will check your Mac to ensure it has the hardware and software resources required (see Minimum Requirements in Chapter 1). System Check Installer Screen 9. Read and agree to the Software License Agreement. KONA LHi Software License Agreement Screen...
- Page 31 10.At the next screen, click the Install button to place the software on your computer. Easy Install, Installer Screen 11.The installer will run and put all the necessary KONA LHi drivers, AJA Control Panel, presets and additional software on the desired hard drive. When it has completed installation, you’ll be asked to restart.
-
Page 32: Installing Kona Software For Windows
Software Installation Procedure Locate the AJA KONA Software download or CD ROM packaged with your system and follow the procedure below to install the required software on the host system. The KONA for PC software is intended for Windows 7 64-bit workstations. - Page 33 KONA LHi Installation and Operation Guide — Installing KONA LHi Software KONA for PCRetail Drivers Installer Package Note: Before installing KONA software, turn off any virus protection and security software that you have installed on your computer. This section describes the AJA Retail Software package installation. The subsequent installations are essentially the same but do not require restart of the computer.
- Page 34 License Agreement Read the KONA license agreement and check the Agreement box to accept. You will be asked to choose the type of installation you would like to perform. Installation Type...
- Page 35 KONA LHi Installation and Operation Guide — Installing KONA LHi Software If you don’t have all the KONA supported products installed on your workstation, you may choose to perform a Custom installation (default) and select only the software necessary for your applications.
- Page 36 Use the second level options choose the specific drivers and plugins you would like installed. Disabled selections are marked with a red X. Before clicking Next to install, you can verify your disk space availability by clicking the Disk Usage button. Workstation Disk Usage Display To return to the installation click OK.
-
Page 37: Re-Installation & Repair
When the installation is completed, a final screen will be displayed announcing that “Setup has finished installing AJA KONA on your computer. ” Click on the Finish button after the installation is complete. The AJA Retail installation requires you restart the computer after installation to activate the KONA card. -
Page 38: Updating Kona Firmware
Updating KONA Firmware When you update your KONA LHi software by downloading new versions from the aja.com website, it is possible that some versions may also require a firmware update to update the software stored in non-volatile memory on the board. Always carefully read the release notes that accompany each version to be installed. -
Page 39: Genlock And Your System
For video stability and proper system operation, you can genlock all equipment to house sync, however genlock is not required for KONA LHi due to excellent freerun accuracy. To connect genlock, use a black burst generator output looped through the system. On the KONA LHi... -
Page 41: Chapter 3: Operation
Chapter 3: Operation Using KONA LHi with Professional Video /Audio Software After you install the KONA LHi software and any AJA plug-ins to support your choice of 3rd- party software, you’re then ready to begin capturing and playing back video and audio. - Page 42 (such as the “Easy Setups”). It is important to realize that inside the host computer, many applications can use the KONA LHi (as you switch from window to window) and it may not always be obvious which currently controls it.
- Page 43 Input/Output Icon Conversion Icons—when an input or output is a different standard than the framebuffer, the KONA LHi may be up- down- or cross-converting the signal to the selected standard. This may be automatic, because it's detected an input signal that differs from the standard currently selected, or because you've explicitly told it to convert.
- Page 44 Red: the selected operation cannot be performed or an invalid selection has been made Yellow: reference video (black burst or other reference source) Green: indicates that the KONA LHi is performing some kind of active change to the video, to make it different from the Primary Format (e.g., up/down convert, format change, etc.).
-
Page 45: Control Screen
KONA LHi Installation & Operation Guide — Using The AJA Control Panel Control Screen The KONA LHi can be controlled by various software applications running on a host Mac as well as be used as a Macintosh Desktop extension. The Control Screen is where you select how the card directs video and is used by application software. - Page 46 Note: The graphic file will not be scaled to fit. If it's smaller than the current frame buffer format, KONA LHi will center it in the frame. If it's larger than the current frame buffer format, it will be cropped on the right and bottom. Also some graphics formats and bit depths may not be supported.
-
Page 47: Formats Screen
KONA LHi Installation & Operation Guide — Using The AJA Control Panel Formats Screen The Formats screen shows the video format currently in use by the KONA LHi framebuffer (called the Primary Format) and allows you to change it. All throughout the Control Panel, choices are always presented based on what KONA LHi can do with the signals available and the inputs/ outputs selected. - Page 48 Secondary Format area (if present). If you select an alternate value in the Primary Format using the pull-down, it will change the format used by the KONA LHi framebuffer. When a change is made via the Video Format pull-down or by clicking an icon (widget) and selecting a new format via a contextual menu, the block diagram will change to reflect the new format.
-
Page 49: Input Select Screen
Component (SMPTE/EBU N10) Component (Beta) Audio Input—This pulldown menu allows you to pick where the audio comes from. KONA LHi supports up to 8 channels of embedded digital audio, so you can choose out of the 16 channels that can be embedded in SDI, and pick which to bring in (from the group 1-8 or 9-... -
Page 50: Sdi Output Screen
The SDI Out screen shows the current settings for the SDI output. If an input/output has no video, it will be indicated on the block diagram (“No Video”). AJA Control Panel, SDI Out Screen SDI Output Screen Settings Information that can appear includes the following items. You can view the current setting or click on another to change to it: Primary—when selected, this indicates that the SDI output is set to the same format as the... -
Page 51: Hdmi Screen
KONA LHi Installation & Operation Guide — Using The AJA Control Panel HDMI Screen The KONA LHi’s HDMI input and output are shown and configured at this screen. The HDMI input pane shows if an HDMI input source has been detected and locked on, showing the format found. -
Page 52: Analog Out Screen
Analog Out Screen KONA LHi provides a high-quality analog component or composite output, generally used for monitoring. This screen shows the current settings for that analog output, and allows you to re-configure it when desired. AJA Control Panel, Analog Out Screen Analog Out Screen Settings Select—Primary or Secondary (conversion) -
Page 53: Video Setup Screen
KONA LHi Installation & Operation Guide — Using The AJA Control Panel Video Setup Screen The KONA LHi’s Analog Black level and QuickTime Video Output Display Filter are configured here. AJA Control Panel, Video Setup Screen Setup Screen Settings Analog Black Level—choices in the black Level pulldown menu are only available for the two Composite analog formats. -
Page 54: Audio Setup Screen
KONA card to get the audio gain setting application (if supported). Analog Audio Monitor Level—when a KLHi-Box is connected to KONA LHi, the button selected determines the audio level that will appear at the Analog Audio Output RCA connector pair (“FSD”... -
Page 55: Conversion Screen
KONA LHi Installation & Operation Guide — Using The AJA Control Panel Conversion Screen This screen is used to set conversion options. AJA Control Panel, ConversionScreen Conversion Screen Settings Pause On—these two choices determine what happens when your editing application is paused in stop mode: Full Frame: both fields are displayed resulting in some jitter while paused. -
Page 56: Ds Keyer Screen
Enable Custom LUTs—this checkbox enables a custom color lookup table (LUT). DS Keyer Screen The KONA LHi has a hardware-based downstream keyer that is ideal for putting logos, “bugs” or other video material with an alpha channel on top of video being played out or printed to tape. - Page 57 KONA LHi Installation & Operation Guide — Using The AJA Control Panel DS Keyer Screen Settings Downstream Keyer Mode: Downstream Keyer Off — when this pulldown menu item is selected the downstream keyer will be turned off Frame Buffer over Matte— places the keyed video with alpha channel currently in the Frame Buffer over a fixed color matte determined by the “Matte Color”...
-
Page 58: Timecode Screen
Timecode Burn-in—this pulldown selects whether the timecode value is “burned-in” on video output from KONA LHi. If set to “OFF”, timecode will not be keyed over the video. If set to “timecode”, then the timecode value will be keyed over the output video. This can be useful for synchronizing, choosing edit points, dailies, and many other purposes. -
Page 59: Presets Screen
Equipment manufacturers can use the meta data for different purposes. Presets Screen After configuring the AJA Control Panel screens, you can then save all your settings as a snapshot for later recall—called a preset. In this way, you can organize presets for all your typical tasks, eliminating time-robbing manual reconfiguration each time. -
Page 60: Firmware Screen
Firmware Screen Use the Firmware screen to access the firmware install screen. Click install to erase current firmware and load the firmware version contained in your current driver installation. Note the Installation message shown below. Firmware Update You will be required to power-cycle your computer to finish the update. Update Completed... -
Page 61: Info Screen
KONA LHi Installation & Operation Guide — Using The AJA Control Panel Info Screen This screen shows the KONA LHi software files that have been installed on your system. This information may be needed if you talk to an AJA Customer Service representative to determine if files are missing or need updating. -
Page 62: Using Multiple Aja Products
Note: Some third-party applications do not release the board if it is in capture mode. The AJA Control Panel "in-use" message will still indicate the application still has control even if the front application changes. -
Page 63: Notes On Using Multiple Aja Products
Io Express for its output. If you switch back to Premiere Pro, you would note that it is still using the KONA LHi for its input/output. Note that some applications, like AJA TV, have a provision for playing in the background, so playback on one product could even continue when switching the targeted device for use with another application. -
Page 65: Chapter 4: Troubleshooting
Chapter 4: Troubleshooting If You Run Into Problems One useful way to find the source of problems is to isolate your system to the smallest size where the problem still occurs and then note all the symptoms. This serves to eliminate areas not involved in the problem and makes finding the problem easier. -
Page 66: Updating Software
If the problem is a Mac Pro system issue, or Xserve RAID issue, then call Apple Customer Support for help. If the problem is an AJA Video KONA LHi issue, refer to “Contacting Support” on page ii contact AJA Video Customer Support. -
Page 67: Appendix A: Specifications
Appendix A: Specifications KONA LHi PCIe 4-lane compatible Video Input 3G SD and HD-SDI, SMPTE-259/292/296/424, 10-bits HDMI v1.3 Composite/S-Video (Y/C): NTSC, NTSCJ, PAL 12-bit A/D, 2x oversampling 3 line adaptive comb filter decoding SMPTE/EBU N10, Betacam 525 line, Betacam 525J, RGB... -
Page 68: Audio
12-bit D/A, 8x oversampling HD Component: YPbPr, RGB 12-bit D/A, 2x oversampling Audio Digital: 24-bit SDI embedded audio, 8 channel, 48kHz 24-bit AES audio, 2 channel, 48kHz 16-bit capable Analog: 24-bit A/D and D/A, 2 channel balanced XLR, 48kHz +24dbu Full Scale Digital +/- 0.2db 20 to 20kHz frequency response Up-Conversion Hardware 10-bit... -
Page 69: Sd To Sd Aspect Ratio Conversion
LHi Installation and Operation Guide — SD to SD Aspect Ratio Conversion SD to SD Aspect Ratio Conversion Letterbox: This transforms SD anamorphic material to a letterboxed image. H Crop: Will produce a horizontally stretched effect on the image; transforms anamorphic SD to full frame SD Pillarbox: Will produce an image in the center of the screen with black borders on the left and right sides and an anamorphized image in the center... -
Page 71: Index
KONA LHi Installation & Operation Guide for Mac & PC — Index Index Symbols 9, 20 .pkg Cable Connections Cable connector descriptions Numerics cables 10-bit video cables, what’s included Cabling the System 24 frames-per-second to 30 conversion camcorders 48kHz audio... - Page 72 DPXtoQTtranslator Info Screen DV (DV25) Input Pass through DV50 Input Screen DVCPRO HD Input Screen Settings 3, 4, 5 DVCProHD Input/Output Installation Overview Installation Software CD-Rom EBU N10 Installer Screen embedded audio Installing Io Software Installing the KONA Card Introduction, KONA 2 features Final Cut Pro and KONA 2 Foreground pre-multiplied (checkbox)
- Page 73 KONA LHi Installation & Operation Guide for Mac & PC — Index Primary Format Software For Striping Primary format software installation problem symptoms Software License Agreement Problems, what to do Software License Agreement Screen problems, what to do if you encounter...
- Page 74 video and audio input/output connections Video Format 43, 61 Video Input video input source Video Monitor video path Video/Audio connections VTR RS-422 Control Port VTR Xchange VTRs, Y/R-Y/B-Y Yellow YPbPr Zoom 14 Zoom Letterbox Zoom Wide...
Need help?
Do you have a question about the KONA LHI and is the answer not in the manual?
Questions and answers