Advertisement
Quick Links
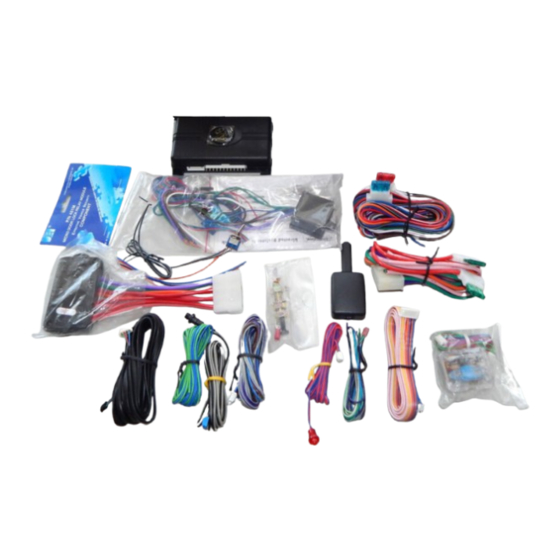
M M o o d d e e l l 8 8 7 7 1 1 X X P P
I I n n s s t t a a l l l l a a t t i i o o n n G G u u i i d d e e
NOTE:
This product is intended for installation by a professional installer only!
Any attempt to install this product by any person other than a trained professional
may result in severe damage to a vehicle's electrical system and components.
© 2004 Directed Electronics, Inc. Vista, CA
N567P 05-04
Advertisement

Related Manuals for Directed Electronics 871XP


Summary of Contents for Directed Electronics 871XP
- Page 1 This product is intended for installation by a professional installer only! Any attempt to install this product by any person other than a trained professional may result in severe damage to a vehicle’s electrical system and components. © 2004 Directed Electronics, Inc. Vista, CA N567P 05-04...
- Page 2 The Bitwriter ® (p/n 998T) 1 1 0 0 3 3 T T Keypad. Refer to the 103T requires chip version 1.4 or newer to program this unit. Owner’s Guide for details. © 2004 Directed Electronics, Inc. Vista, CA...
-
Page 3: Table Of Contents
........2 2 7 7 testing the neutral safety switch... . . 27 © 2004 Directed Electronics, Inc. Vista, CA... - Page 4 This testing should be performed by an authorized Directed Electronics dealer in accordance with the Safety Check outlined in this product installation guide. If the vehicle starts in gear, cease remote start operation immediately and consult with the user to fix the problem immediately.
-
Page 5: Before Beginning The Installation
■ When testing, don’t forget that this system is equipped with Nuisance Prevention Circuitry™(NPC™). NPC can bypass trigger zones, making them appear to stop working. See the Nuisance Prevention Circuitry section. ■ Review and complete the Safety Check section of this guide prior to the vehicle reassembly. © 2004 Directed Electronics, Inc. Vista, CA... - Page 6 ■ When mounting the control module, try to find a secure location that will not require you to extend the har- nesses’ wires (they are 1.5 meters long). Keep it away from the heater core (or any other heat sources) and any obvious leaks. © 2004 Directed Electronics, Inc. Vista, CA...
- Page 7 N N O O T T E E : : In many vehicles, tying the sensor to a steering column or screwing it to metal will result in poor sensitivity, especially at the rear of the vehicle. © 2004 Directed Electronics, Inc. Vista, CA...
- Page 8 ■ It is easiest to remove a small panel, such as a switch blank or a dash bezel, before drilling a -inch hole. ■ Use quick-disconnects near the LED wires if the panel is removable. This lets mechanics or other installers remove the panel without cutting the wires. © 2004 Directed Electronics, Inc. Vista, CA...
- Page 9 I I M M P P O O R R T T A A N N T T ! ! Do not remove the fuse holder on the red wire. It ensures that the control module has its own fuse, of the proper value, regardless of how many accessories are added to the main power feed. © 2004 Directed Electronics, Inc. Vista, CA...
- Page 10 6. Attempt to start the car. If the starter engages, reconnect it and go back to Step 3. If the starter does not turn over, you have the right wire. 1 1 0 0 © 2004 Directed Electronics, Inc. Vista, CA...
- Page 11 6. If the meter reads zero volts until the light goes out and then reads 12 volts, you have isolated the correct wire and the wire's polarity is positive. 1 1 1 1 © 2004 Directed Electronics, Inc. Vista, CA...
-
Page 12: Finding A (+) Parking Light Wire
■ At the dome light: This may not be your best choice if the vehicle has delayed domelight supervision, but it will work in many Hondas, or any vehicle with completely diode-isolated pin switches. 1 1 2 2 © 2004 Directed Electronics, Inc. Vista, CA... - Page 13 If you use tapping connectors such as 3M T-Taps (not to be confused with Scotch-Locks), avoid using them in higher-current applications (constant 12V, ground, etc.). Some tapping connectors are inferior in quality and should be avoided. 1 1 3 3 © 2004 Directed Electronics, Inc. Vista, CA...
- Page 14 ( ( - - ) ) S S E E C C O O N N D D U U N N L L O O C C K K O O U U T T P P U U T T 1 1 4 4 © 2004 Directed Electronics, Inc. Vista, CA...
- Page 15 ( ( - - ) ) 2 2 0 0 0 0 m m A A S S T T A A T T U U S S O O U U T T P P U U T T 1 1 5 5 © 2004 Directed Electronics, Inc. Vista, CA...
- Page 16 ( ( - - ) ) N N E E U U T T R R A A L L S S A A F F E E T T Y Y S S W W I I T T C C H H I I N N P P U U T T 1 1 6 6 © 2004 Directed Electronics, Inc. Vista, CA...
- Page 17 This wire supplies a (-)500 mA ground as long as the system is armed. This output ceases as soon as the system is disarmed. The orange wire may be wired to an optional Directed Electronics 8618 starter kill relay. H H 1 1 / / 2 2 W W H H I I T T E E ( ( + + / / - - ) ) s s e e l l e e c c t t a a b b l l e e l l i i g g h h t t f f l l a a s s h h o o u u t t p p u u t t As shipped, this wire should be connected to the (+) parking light wire.
- Page 18 In vehicles with factory delays on the domelight circuit, there is usually a wire that is unaffected by the delay circuitry. This wire will report Zone 3. 1 1 8 8 © 2004 Directed Electronics, Inc. Vista, CA...
- Page 19 Under dash brackets and door sheet metal are not acceptable ground points. It is rec- ommended that all remote start/security components be grounded at the same location. 1 1 9 9 © 2004 Directed Electronics, Inc. Vista, CA...
- Page 20 I I M M P P O O R R T T A A N N T T ! ! Never use this wire to drive anything but a relay or a low-current input! The tran- sistorized output can only supply 200 mA of current. Connecting directly to a solenoid, motor, or other high-current device will cause it to fail. 2 2 0 0 © 2004 Directed Electronics, Inc. Vista, CA...
- Page 21 N N O O T T E E ! ! A 1-amp diode must be installed in line on the factory wire between the wait-to-start indicator and the ECM. (See the following diagram for details.) 2 2 1 1 © 2004 Directed Electronics, Inc. Vista, CA...
- Page 22 ■ S S e e c c o o n n d d u u n n l l o o c c k k o o u u t t p p u u t t : : This output can also be programmed to provide a second unlock pulse whenever the 2 2 2 2 © 2004 Directed Electronics, Inc. Vista, CA...
-
Page 23: Heavy Gauge Wires
For anti grind or starter kill attach this wire to the key side of the starter wire for anti grind and for the starter kill to be active. N N O O T T E E : : If starter kill/anti-grind is not required this wire is not used. 2 2 3 3 © 2004 Directed Electronics, Inc. Vista, CA... -
Page 24: Ribbon Harness
O O R R A A N N G G E E ( ( - - ) ) 2 2 0 0 0 0 m m A A a a c c c c e e s s s s o o r r y y o o u u t t p p u u t t This wire supplies a 200mA output. Used when the vehicle has more than one accessory wire. 2 2 4 4 © 2004 Directed Electronics, Inc. Vista, CA... - Page 25 This wire MUST be connected to hood pinswitch. This input will disable or shut down the remote start when the hood is opened. It will also trigger the security system if the hood is opened while the system is armed and report Zone 6. 2 2 5 5 © 2004 Directed Electronics, Inc. Vista, CA...
- Page 26 ANY drive gear and that the override switch is functioning properly. F F i i g g u u r r e e A A F F i i g g u u r r e e B B 2 2 6 6 © 2004 Directed Electronics, Inc. Vista, CA...
- Page 27 7. Activate the remote start system. 8. If the starter engages, immediately depress the brake to shut the remote start system down. If the starter does not engage, no additional safety system is required. 2 2 7 7 © 2004 Directed Electronics, Inc. Vista, CA...
- Page 28 If the vehicle is not a General Motors product or a Dodge Dakota pickup, please call Directed Electronics Technical Support for an alternative shut-down method. Do not return the vehicle to the customer until this feature is prop-...
- Page 29 P P r r e e - - 1 1 9 9 9 9 6 6 D D o o d d g g e e D D a a k k o o t t a a p p i i c c k k u u p p s s w w i i t t h h 2 2 . . 5 5 l l i i t t e e r r m m o o t t o o r r s s : : 2 2 9 9 © 2004 Directed Electronics, Inc. Vista, CA...
- Page 30 N N O O T T E E : : When connecting to the VATS wires, it is not important which wire is cut. TO IGNITION KEY SWITCH PROPER RESISTOR VALUE H3/1 BLUE OR H3/2 BLUE/BLACK 87 87A (+) 12V CONSTANT FUSED TO VATS DECODER MODULE DIA-621 3 3 0 0 © 2004 Directed Electronics, Inc. Vista, CA...
- Page 31 This transponder system is comprised of two parts. The first part, the transceiver, circles the key switch and is activated when the key is placed in the key switch or turned to the run position. Upon activation, the transceiver 3 3 1 1 © 2004 Directed Electronics, Inc. Vista, CA...
- Page 32 (p p / / n n 9 9 9 9 8 8 T T ), they may have been locked. Before proceeding with reprogramming the learn routines, they must be unlocked with the 998T - this cannot be done manually with the Valet switch. 3 3 2 2 © 2004 Directed Electronics, Inc. Vista, CA...
- Page 33 Inputs shorter than 0.8 seconds will trigger the Warn Away® response, while inputs longer than 0.8 seconds will trigger full alarm sequence and report Zone Two. If installing an optional Directed Electronics dual stage sensor, connect to the green wire as shown below. The diagram below eliminates the need for diodes to isolate the sensors.
- Page 34 3 3 4 4 © 2004 Directed Electronics, Inc. Vista, CA...
- Page 35 Using the optional Directed Electronics Bitwriter™, the learn routine may be locked. Make sure the learn routine is unlocked before programming features. If the siren generates one long chirp when attempting to program the unit, the learn routine is locked and must be unlocked using the Directed Electronics Bitwriter™...
-
Page 36: Standard Configuration
H H O O L L D D I I N N G G it. For example, if you want to program Channel Three after programming Channel One, 3 3 6 6 © 2004 Directed Electronics, Inc. Vista, CA... - Page 37 .........operates ......Arm/Lock, Panic ON/Panic OFF .........operates ......Disarm/Unlock, /Panic OFF .........operates ......Start .........operates ......Channel 2—trunk release ....operate......Timer Mode 3 3 7 7 © 2004 Directed Electronics, Inc. Vista, CA...
- Page 38 I I g g n n i i t t i i o o n n . . Turn the ignition on, then back off. (The heavy gauge PINK wire of the relay satellite must be connected.) 3 3 8 8 © 2004 Directed Electronics, Inc. Vista, CA...
- Page 39 1. Press and hold the Valet®/Program switch. 2. After three seconds, the unit will advance to the next menu and the siren will chirp, indicating which menu has been accessed. 3 3 9 9 © 2004 Directed Electronics, Inc. Vista, CA...
- Page 40 C C o o d d e e H H o o p p p p i i n n g g o o n n Code Hopping off 4 4 0 0 © 2004 Directed Electronics, Inc. Vista, CA...
- Page 41 Rear defogger: latch 5 min./pulse OFF A A n n t t i i g g r r i i n n d d : : O O N N 3-12 Anti grind: OFF 4 4 1 1 © 2004 Directed Electronics, Inc. Vista, CA...
- Page 42 The default setting is 0.8 second door lock pulses. Some modification to the door lock harness (H2) is also necessary. (See (+/-) Door Lock Outputs Harness (H4) section, "Type E - Mercedes-Benz and Audi -1985 and Newer" diagram.) 4 4 2 2 © 2004 Directed Electronics, Inc. Vista, CA...
- Page 43 NPC™ only monitors sensor inputs, and does not bypass the door trigger or the ignition trigger at any time. If NPC™ is turned off, the system will respond to repeated triggers on the sensor inputs and will do so 4 4 3 3 © 2004 Directed Electronics, Inc. Vista, CA...
- Page 44 T T I I M M E E D D : : Channel Four can be programmed for these output configurations. The unit is set to the default validity output. To change the configuration, use the two-chirp setting to toggle through the different configurations. 4 4 4 4 © 2004 Directed Electronics, Inc. Vista, CA...
- Page 45 3 3 - - 7 7 S S H H O O R R T T R R U U N N / / T T U U R R B B O O : : When the buttons on the transmitter are pressed simultaneously, the vehicle will start for the programmed short run time. The factory default is 1 minute. 4 4 5 5 © 2004 Directed Electronics, Inc. Vista, CA...
- Page 46 NPC™ to bypass a faulty zone. When disarming the system, 5 chirps indicate NPC is activated. The LED will report the zone that has been bypassed. (See Diagnostics section of this guide.) 4 4 6 6 © 2004 Directed Electronics, Inc. Vista, CA...
- Page 47 Either way, the remote start system will restart the engine again in three hours. Timer Mode is exited automatically after the sixth run cycle. 4 4 7 7 © 2004 Directed Electronics, Inc. Vista, CA...
- Page 48 3. Release the Valet/Program button. 4. Press and release the Valet/Program button. The LED will report the last shutdown for one minute or until the ignition is turned on. 4 4 8 8 © 2004 Directed Electronics, Inc. Vista, CA...
- Page 49 N N O O T T E E : : The Warn Away triggers are not stored to memory and will not be reported. 4 4 9 9 © 2004 Directed Electronics, Inc. Vista, CA...
- Page 50 Once the system passes the three tests, the vehicle can be re-assembled and delivered. Do not the use the remote start system or finalize the installation if it fails any of the safety check tests. 5 5 0 0 © 2004 Directed Electronics, Inc. Vista, CA...
- Page 51 1. Check the harnesses and their connections. Make sure that the harnesses are completely plugged into the remote start module. Make sure there are good connections to the vehicle wiring. 5 5 1 1 © 2004 Directed Electronics, Inc. Vista, CA...
- Page 52 ■ T T h h e e c c l l i i m m a a t t e e c c o o n n t t r r o o l l s s y y s s t t e e m m d d o o e e s s n n o o t t w w o o r r k k w w h h i i l l e e t t h h e e u u n n i i t t i i s s o o p p e e r r a a t t i i n n g g t t h h e e v v e e h h i i c c l l e e . . Either the wrong accessory wire is being energized or more than one ignition or accessory wire must be ener- gized in order to operate the climate control system. 5 5 2 2 © 2004 Directed Electronics, Inc. Vista, CA...
- Page 53 5 5 3 3 © 2004 Directed Electronics, Inc. Vista, CA...
- Page 54 5 5 4 4 © 2004 Directed Electronics, Inc. Vista, CA...
- Page 55 5 5 5 5 © 2004 Directed Electronics, Inc. Vista, CA...
Need help?
Do you have a question about the 871XP and is the answer not in the manual?
Questions and answers