Table of Contents
Advertisement
Available languages
Available languages
Advertisement
Chapters
Table of Contents

Related Manuals for Honeywell MagicStat T8132


Summary of Contents for Honeywell MagicStat T8132
-
Page 1: Programmable Thermostat
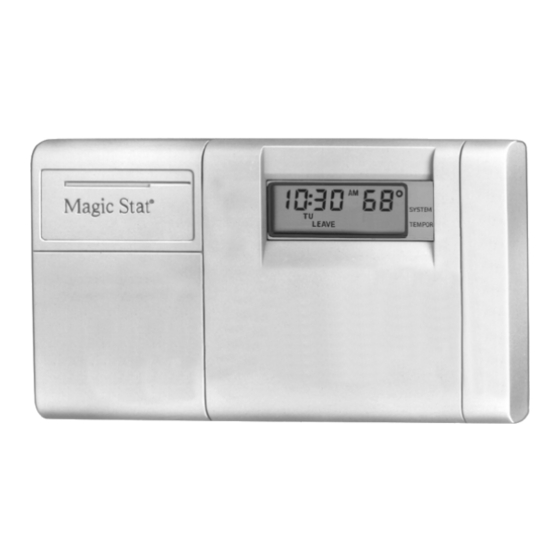
Honeywell PROGRAMMABLE Weekday/Weekend Programmable Heat and/or Cool THERMOSTAT Thermostat and Mounting Plate Model T8132 BY HONEYWELL MagicStat T8132 PROGRAMMING AND INSTALLATION INSTRUCTIONS Rev. 9-92 • Form Number 69-0740B—1... - Page 2 Welcome to the world of comfort and energy savings with your new Honeywell MagicStat programmable thermostat. Your new thermostat will automatically control the temperature in your home, keeping you comfortable while saving energy when programmed according to the instructions in this manual.
-
Page 3: Table Of Contents
Table Of Contents STEP 1 Prepare For Installation ....................2 STEP 2 Remove Old Thermostat ....................4 STEP 3 Install The Batteries ..................... 6 STEP 4 Program The Thermostat ..................... 8 STEP 5 Adjust Fan Operation Switch, as Required .............. 16 STEP 6 Adjust System On-Length as Required .............. -
Page 4: Step 1 Prepare For Installation
Heat Pumps/Multistage Equipment Not compatible with any 120/240 volt circuit. Will not work efficiently on steam or gravity systems. Compatible with 2-wire Honeywell zone valves. Isolating relay required for 3-wire thermo- stats for zone valves. Not compatible with 2-wire White-Rodgers #1361 valves. - Page 5 Acquire tools and items as needed (below). Also purchase two AA alkaline batteries; we recommend Energizer batteries CROSS-RECESSED HAND OR POWER SCREWDRIVER DRILL WITH 3/16 INCH DRILL BIT, IF NEEDED TO DRILL HOLES IN WALL MASKING TAPE, IF NEEDED WIRE CUTTER/STRIPPER OR SHARP TO LABEL WIRES AS THEY KNIFE, IF NEEDED TO STRIP WIRES ARE DISCONNECTED FROM...
-
Page 6: Step 2 Remove Old Thermostat
STEP 2 Remove Old Thermostat Test to make certain that your heating subbase, wallplate or wall, and lift away. and cooling systems are working properly. If Disconnect wires from old thermostat or either does not work, contact your local heating/ subbase. - Page 7 One or two extra wires? If you are replacing a Honeywell not compatible with such systems so return Chronotherm thermostat, you may find one the product to the place of purchase. If you or two wires that go to the C or C1 clock...
-
Page 8: Step 3 Install The Batteries
STEP 3 Install The Batteries IMPORTANT Batteries must be installed for programming and operation of the thermostat and heating/ cooling system. REMOVING Purchase two AA alkaline batteries; non- BATTERY alkaline batteries will not last as long. We recom- DOOR mend Energizer batteries. Make sure the thermostat is set in OFF position. - Page 9 will stay on without flashing to indicate the seconds of removing the old ones, you will not thermostat and heating/cooling system have have to reprogram the thermostat. However, if stopped working when the batteries are almost the display is blank, the batteries are dead or completely dead.
-
Page 10: Step 4 Program The Thermostat
STEP 4 Program The Thermostat After the batteries are installed, the thermostat “WAKE” is the time period you want the can be easily programmed in your hand, before house at a comfortable temperature after you it is installed on the wall. get up, while you get ready for work or school. - Page 11 sleeping. (Again, lower heat or higher cool. 26° C [78° F], 24 hours a day. Also, you do not Although for more comfortable sleeping, need to enter a time and temperature program some people choose not to raise the cool for all periods if your schedule does not require temperature during the night.) it.
-
Page 12: Personal Programming Chart
Personal Programming Chart HEATING PROGRAM Weekdays Start Time Heating Temperature WAKE LEAVE RETURN SLEEP Weekends WAKE SLEEP If you decide not to enter weekend programs, the WAKE and SLEEP from the weekday program will copy to the weekend schedule. The temperatures cannot be set any higher than 31° C [88° F] or any lower than 7°... - Page 13 COOLING PROGRAM Weekdays Start Time Cooling Temperature WAKE LEAVE RETURN SLEEP Weekends WAKE SLEEP If you decide not to enter weekend programs, the WAKE and SLEEP from the weekday program will copy to the weekend schedule. The temperatures cannot be set any higher than 31° C [88° F] or any lower than 7° C [45° F]. NOTE: If you decide not to program the thermostat, it will automatically control heating at 20°...
- Page 14 This guide can be used for programming your new thermostat. NOTE: Batteries are required for operation and programming. When inserting batteries, set system switch to OFF. Remove battery door (on thermostat left side) using a coin at the bottom. Follow instructions on pages 6-7. Set Current Time/Day Time Ahead...
- Page 15 Temp Time Warmer Ahead to program “WAKE” time and to program “WAKE” temperature for Back Cooler Mon-Fri. Repeat sequence for “LEAVE”, “RETURN”, “SLEEP”. Time Ahead Press until “WAKE”, “SA SU” and “SET” appear on display. Use to program Schedule Back Temp Warmer “WAKE”...
- Page 16 A quick guide for operating or making changes follows: NOTE: System switch must be set to Heat or Cool to perform the following. Temp Warmer Temporarily Change temperature for current period only— Cooler will cancel itself at next scheduled change, or to cancel sooner press Program Temp Warmer...
- Page 17 Schedule Back Permanently Change a program—Repeat steps under Heating Program or Cooling Program (page 12-13) as applicable. Return to normal program or start program — Program Questions? Call Honeywell Customer Assistance 1-800-468-1502. PROGRAMMING...
-
Page 18: Step 5 Adjust Fan Operation Switch, As Required
STEP 5 Adjust Fan Operation Switch, As Required The thermostat fan operation switch, labeled system, set the switch to “E”. The “E” setting will FUEL SWITCH (see figure on page 17) is factory- allow the fan to turn on immediately with the set in the “F”... - Page 19 NOTE: This thermostat does not have a setting for steam/gravity air. Cycles would not be long enough for accurate temperature control. IMPORTANT When using a high efficiency furnace such as a 90% or greater AFUE (Average Fuel Utilization Efficiency) unit, adjust screw A out one turn and screw B in. THERMOSTAT BACK ADJUST SCREWS THROUGH HOLES DISPLAY °F...
-
Page 20: Step 7 Mount Thermostat Mounting Plate
STEP 7 Mount Thermostat Mounting Plate WALL Position mounting plate on wall. Use spirit ANCHORS (2) level to make sure mounting plate is level. Use a pencil to mark the two mounting holes. WIRES THROUGH WALL OPENING WALL MOUNTING PLATE MOUNTING SCREWS (2) M1718... - Page 21 SPIRIT LEVEL Remove mounting plate from wall, and drill 3/16" holes in wall (if drywall) as marked. For firmer material such as plaster or wood, drill 7/32" holes. Gently tap anchors (provided) into drilled holes until flush with the wall. Reposition mounting plate over holes, pulling wires through wiring opening.
-
Page 22: Step 8 Wire Thermostat Terminals
STEP 8 Wire Thermostat Terminals NOTE: All wiring must comply with local codes Refer to masking tape labels you placed on wires and ordinances. If unsure about household when you removed your old thermostat. wiring procedures, call your local heating/air Match the letter of your old thermostat wire conditioning contractor. -
Page 23: Thermostat Operation
TABLE 2—TYPICAL WIRE COLORS AND FUNCTIONS. THERMOSTAT CONNECT TO WIRE COLOR a TERMINAL FUNCTION Green Yellow Cooling White Heating Blue Air Cond. Power Furnace Power a Wire colors are typical; verify at heating/cooling equipment connection. M3002 Loosen the terminal screws and slip each wire beneath its matching terminal. - Page 24 2-WIRE HEAT-ONLY (JUMPER INTACT) 4-WIRE HEAT/COOL (JUMPER INTACT) JUMPER HEATING COOLING JUMPER RELAY OR CONTACTOR VALVE COIL COIL HEATING RELAY OR VALVE COIL (HOT) RELAY (HOT) POWER SUPPLY. PROVIDE DISCONNECT MEANS AND POWER SUPPLY. PROVIDE DISCONNECT MEANS AND OVERLOAD PROTECTION AS REQUIRED. M1709A OVERLOAD PROTECTION AS REQUIRED.
- Page 25 5-WIRE HEAT/COOL (JUMPER REMOVED) 3-WIRE COOL-ONLY (JUMPER INTACT) JUMPER HEATING COOLING RELAY OR RELAY CONTACTOR VALVE COIL COIL COOLING CONTACTOR RELAY COIL (HOT) (HOT) (HOT) POWER SUPPLY. PROVIDE DISCONNECT MEANS AND OVERLOAD PROTECTION AS REQUIRED. M 848 POWER SUPPLY. PROVIDE DISCONNECT MEANS AND OVERLOAD PROTECTION AS REQUIRED.
-
Page 26: Step 9 Mount The Thermostat
Mount The Thermostat STEP 9 ENGAGE TABS AT TOP OF PRESS LOWER EDGE THERMOSTAT AND MOUNTING PLATE. OF CASE TO LATCH. NOTE: To remove thermostat from wall, first pull out at SWING COVER OPEN TO bottom of thermostat, removing top last. CHECK OPERATION. -
Page 27: Step 10 Check Thermostat Operation After Programming And Installing
Check Thermostat Operation After Programming And Installing STEP 10 HEATING Move the system switch to HEAT and Cool Heat Do NOT check heating system the fan switch to AUTO. operation by jumpering thermostat Auto terminals at the primary control, such as the gas valve, zone valve, oil burner control. - Page 28 COOLING Move the system switch to COOL Cool Heat To avoid possible compressor and the fan switch to AUTO. damage, do not operate the cooling Auto system when outside temperature is below 10° C [50° F]. See com- pressor manu-facturer’s instructions Press key until setting is about for further information.
-
Page 29: Step 11 Set The Fan And System Switches
STEP 11 Set The Fan And System Switches Auto First set the fan switch. FAN AUTO: Normal setting for most homes. A single-speed fan will turn on automatically with the air conditioner or furnace. A two-speed fan will usually run on high with the air conditioner and on low with the furnace. -
Page 30: Troubleshooting Guide
Troubleshooting Guide F… THEN… Display will not come on. Set the system switch to OFF; remove batteries; insert backwards for at least 5 seconds to reset thermostat; replace batteries correctly. Display should come on. Make sure batteries are fresh and installed correctly. Temperature display will not go °... - Page 31 If display is blank or says "bAt Lo," install fresh batteries. If temperature setting is higher than current tempera- ture, and SYSTEM ON indicator is lit, contact Honey- well Customer Assistance at 1-800-468-1502. Cooling will not come on. Check that switch on thermostat is set to COOL. Check the system fuse or circuit breaker and replace or reset if necessary.
- Page 32 If air conditioner does not come on after the 10 minutes and the SYSTEM ON indicator is lit, contact Honeywell Consumer Services at 1-800-468-1502 If 2- or 4-wire installation, verify that R-Rc jumper is installed.
- Page 33 The system cycle length Readjust according to instructions on pages 16-17. is too short or too long. The thermostat's current Check that the wiring hole in the wall behind the setting does not match the wallplate has been plugged with insulation to display temperature.
- Page 34 Toll-free Customer Assistance For all questions concerning this thermostat, please read and follow the instructions. If additional assistance is needed, call Honeywell Customer Assistance toll-free at 1-800-468-1502, Monday- Friday, 7:00 a.m. - 5:30 p.m. Central time. Before you call, please have the following information available—thermostat model number and date code, kind of heating/cooling system (i.e., hot water, warm air, oil, gas, etc.), number of wires...
-
Page 35: Limited One-Year Warranty
Scarborough, Ontario M1P 2V9 This warranty does not cover removal or reinstallation costs. This warranty shall not apply if it is shown by Honeywell that the defect or malfunction was caused by damage which occurred while the product was in the possession of a consumer. - Page 36 Seattle Montreal Salt Lake Pittsburgh Columbus Quebec Ottawa City Indianapolis St. John's Toronto *Based on 10°F (5°C) decrease—(5°F (3°C) decrease gives approximately 55 percent of these savings). Thermostat patents pending. M2416A Printed in Mexico • J.H. • ©Honeywell Inc. 1992...
- Page 37 THERMOSTAT Thermostat programmable et plaque de montage pour systèmes de chauffage et (ou) de PROGRAMMABLE refroidissement avec programmation pour la semaine et la fin de semaine DE HONEYWELL Modèle T8132 MagicStat T8132 MANUEL DE PROGRAMMATION ET D’INSTALLATION 9-92 • Publication n o 69-0740B—1...
- Page 38 Pour de plus amples renseignements sur ce thermostat, s’adresser aux Services à la clientèle de Honeywell en utilisant la ligne directe sans frais 1-800-468-1502 du lundi au vendredi entre 7 h et 17 h 30.
- Page 39 TABLE DES MATIÈRES ÉTAPE 1 Avant l’installation ....................2 ÉTAPE 2 Retrait de l’ancien thermostat ................4 ÉTAPE 3 Installation des piles ....................6 ÉTAPE 4 Programmation du thermostat ................8 ÉTAPE 5 Réglage du commutateur du ventilateur, au besoin .......... 16 ÉTAPE 6 Réglage des cycles de fonctionnement au besoin ..........
-
Page 40: Étape 1 Avant L'installation
Ne fonctionnera pas efficacement avec les systèmes à vapeur et à différence de densité. 1 Compatible avec les vannes de zone bifilaires de Honeywell. Un relais d’isolement est nécessaire avec les vannes de zone trifilaires. Non compatible avec les vannes bifilaires n... - Page 41 Se procurer les outils nécessaires (voir ci-dessous) et deux piles alcalines AA (nous recommandons les piles Energizer TOURNEVIS CRUCIFORME PERCEUSE MANUELLE OU ÉLECTRIQUE AVEC MÈCHE DE 3/16 po POUR PERCER DES TROUS DANS LE MUR RUBAN-CACHE, POUR COUPE-FILS, PINCE À DÉNUDER OU IDENTIFIER AU BESOIN, LES COUTEAU BIEN AFFÛTÉ...
-
Page 42: Étape 2 Retrait De L'ancien Thermostat
ÉTAPE 2 Retrait de l’ancien thermostat Vérifier si les systèmes de chauffage et de par le bas, vérifier si une vis ne le retient pas en refroidissement fonctionnent correctement. Si place. l’un d’eux ne fonctionne pas, communiquer Desserrer les vis qui retiennent le thermostat avec votre représentant en systèmes de à... - Page 43 Le thermostat n’est pas compatible avec de tels Si vous remplacez un thermostat Chronotherm systèmes. Retourner le thermostat au détaillant. de Honeywell, vous trouverez peut-être un ou Pour obtenir des renseignements quant aux deux fils qui doivent être raccordés aux bornes de thermostats compatibles avec votre système,...
-
Page 44: Étape 3 Installation Des Piles
ÉTAPE 3 Installation des piles IMPORTANT Les piles sont nécessaires au fonctionnement et à la programmation du thermostat. Se procurer deux piles alcalines AA (les autres REMOVING types de piles ne dureront pas aussi longtemps; BATTERY DOOR nous recommandons les piles Energizer S’assurer que le thermostat est à... - Page 45 indiquer que le thermostat et le système de bornes négative et positive. Si cette manoeuvre chauffage ou de refroidissement ne fonctionnent ne prend pas plus de 20 à 30 secondes, le plus car les piles sont presque complètement thermostat n’aura pas besoin d’êtrereprogrammer. déchargées.
-
Page 46: Étape 4 Programmation Du Thermostat
ÉTAPE 4 Programmation du thermostat Une fois les piles installées, vous pouvez “WAKE” correspond à la période pendant facilement programmer le thermostat dans votre laquelle vous désirez que la température main avant de l’installer au mur. de la maison soit confortable lorsque la famille se lève et se prépare à... - Page 47 “SLEEP” correspond à la période pendant nécessaire de programmer une heure et une laquelle on peut abaisser la température température pour toutes les périodes. Par (en hiver) ou élever la température (en été) exemple, il n’est pas nécessaire de programmer les pour économiser l’énergie pendant que la périodes LEAVE et RETURN, lorsqu’il famille dort.
- Page 48 Tableaux de planification de la programmation PROGRAMME DE CHAUFFAGE Semaine Heure de départ Température de chauffage WAKE LEAVE RETURN SLEEP Fin de semaine WAKE SLEEP 1 Si vous n’enregistrez pas de programme pour la fin de semaine, les périodes WAKE et SLEEP du programme de la semaine continueront à...
- Page 49 PROGRAMME DE REFROIDISSEMENT Semaine Heure de départ Température de chauffage WAKE LEAVE RETURN SLEEP Fin de semaine WAKE SLEEP 1 Si vous n’enregistrez pas de programme pour la fin de semaine, les périodes WAKE et SLEEP du programme de la semaine continueront à être en vigueur toute la fin de semaine. 2 Les températures doivent être réglées entre 31 °C (88 °F) et 7 °C (45 °F).
- Page 50 Ce guide peut servir à programmer votre thermostat. REMARQUE : Les piles sont nécessaires pour programmer et faire fonctionner le thermostat. Lors de l’installation des piles, régler le commutateur du système à OFF. Enlever la porte du compartiment de piles (côté gauche du thermostat) en utilisant une pièce de monnaie. Suivre les directives des pages 6 et 7.
- Page 51 programmer la température de la période “WAKE” du lundi au vendredi. Refaire pour les périodes “LEAVE”, “RETURN”, “SLEEP”. Appuyer sur , jusqu’à ce que “SA-SU” apparaisse à l’écran. Utiliser les touches Schedule Time Ahead pour programmer l’heure et les touches pour programmer la température de la période Back WAKE pour le samedi et le dimanche.
- Page 52 Ce guide peut servir à faire rapidement des modifications à la programmation du thermostat programmer. REMARQUE : le commutateur du système doit à la position HEAT ou COOL avant de passer aux étapes suivantes. Pour modifier temporairement la température pour la période en cours seulement — Temp Warmer appuyer sur...
- Page 53 Schedule Time Ahead Questions? apparaisse; puis, appuyer simultanément sur Communiquer Back avec les Services à la clientèle de Pour retourner au programme habituel ou pour commencer Honeywell au numéro un programme appuyer sur Program 1-800-468-1502. PROGRAMMATION...
-
Page 54: Étape 5 Réglage Du Commutateur Du Ventilateur, Au Besoin
ÉTAPE 5 Réglage du commutateur du ventilateur, au besoin Le commutateur du ventilateur «FUEL chauffage électrique, placer le commutateur à E. SWITCH» (voir figure page 17) est réglé en usine Cette position permettra au ventilateur de démarrer à la position «F». Ce réglage convient à la plupart simultanément avec le système de chauffage ou de des systèmes. - Page 55 REMARQUE: Le thermostat ne possède pas de réglages pour les systèmes à vapeur ou à différence de densité. Les cycles de fonctionnement ne seraient pas assez long pour une régulation précise de la température. ARRIÈRE DU THERMOSTAT ADJUST SCREWS THROUGH HOLES DISPLAY °F C–IN TO SELECT OPERATION DESIRED...
-
Page 56: Étape 7
ÉTAPE 7 Installation de la plaque de montage Installer la plaque au mur. Utiliser CHEVILLES (2) un niveau à bulle pour s’assurer que le thermo- stat est bien de niveau. Utiliser un crayon pour marquer l’emplacement FILS DANS des trous de fixation. L’OUVERTURE DU MUR PLAQUE DE... - Page 57 NIVEAU À BULLE Retirer la plaque du mur et percer des trous de 3/16 po dans un mur à maçonnerie sèche aux endroits indiqués. S’il s’agit d’un mur de plâtre ou de bois, percer des trous de 7/32 po aux endroits indiqués. Pousser doucement les boulons d’ancrage (fournies) dans le mur jusqu’à...
-
Page 58: Étape 8
ÉTAPE 8 Raccordement Des Bornes Du Thermostat REMARQUE: Tout le câblage doit être conforme faire correspondre la lettre du fil de l’ancien aux codes et règlements locaux. Si vous n’êtes thermostat à la borne portant la même lettre à pas certain des méthodes de raccordement, l’arrière de votre nouveau thermostat. - Page 59 TABLEAU 2 - COULEURS DES FILS ET FONCTIONS BORNE DU RACCORDER AU THERMOSTAT FIL COULEUR FONCTION Vert Ventilation Jaune Refroidissement Blanc Chauffage Bleu Alimentation refroidissement Rouge Alimentation chauffage Couleurs standard; vérifier les raccordements de l’équipement de chauffage-refroidissement. PROPER WIRING TECHNIQUE M3002A Desserrer les vis des bornes et glisser chaque CAVALIER...
- Page 60 4 FILS - CHAUFFAGE - REFROIDISSEMENT DEUX FILS - CHAUFFAGE SEULEMENT (CAVALIER INTACT) (CAVALIER INTACT) CAVALIER CAVALIER BOBINE DU RELAIS DE CONTACTEUR DE CHAUFFAGE REFROIDISSEMENT OU BOBINE L1 (SOUS DE VANNE TENSION) RELAIS DE CHAUFFAGE RELAIS DU OU BOBINE L1 (SOUS VENTILATEUR ALIMENTATION.
- Page 61 5 FILS - CHAUFFAGE-REFROIDISSEMENT 3 FILS - REFROIDISSEMENT SEULEMENT (CAVALIER ENLEVÉ) (CAVALIER INTACT) CAVALIER RELAIS DE CHAUFFAGE RELAIS DU BOBINE DU OU BOBINE DE VANNE VENTILATEUR CONTACTEUR DE REFROIDISSEMENT BOBINE DU CONTACTEUR DE RELAIS DU REFROIDISSEMENT VENTILATEUR L1 (SOUS TENSION) L1 (SOUS L1 (SOUS TENSION)
-
Page 62: Étape 9 Installation Du Thermostat
ÉTAPE 9 Installation du thermostat INSÉRER LES LANGUETTES DANS LES APPUYER SUR LA PARTIE INFÉRIEURE FENTES DE LA PARTIE SUPÉRIEURE DU DU BOÎTIER POUR ENCLENCHER LES THERMOSTAT ET DE LA PLAQUE DE MONTAGE. LANGUETTES. REMARQUE: Pour retirer le thermostat du mur, il faut OUVRIR LE COUVERCLE d’abord tirer la partie inférieure du thermostat puis POUR VÉRIFIER LE... - Page 63 Vérification du fonctionnement après ÉTAPE 10 la programmation et l’installation Appuyer sur cette touche jusqu’à ce que CHAUFFAGE la température soit environ 6 °C (10 °F) Warmer Ne PAS vérifier le fonctionnement au-dessus de la température ambiante. du système de chauffage en installant Le système de chauffage devrait se un cavalier entre les bornes du thermo- mettre en marche et le ventilateur devrait...
- Page 64 Cool Heat REFROIDISSEMENT position COOL et le commutateur du ventilateur à AUTO. Pour éviter d’endommager le compresseur, ne pas faire fonctionner Auto le système de refroidissement lorsque Appuyer sur cette touche jusqu’à ce que la température extérieure est inférieure à la température soit environ 6 °C (10 °F) 10 °C (50 °F).
- Page 65 Réglage des commutateurs du ÉTAPE 11 système et du ventilateur Auto Régler tout d’abord le FAN AUTO: Réglage normal pour la plupart des commutateur du ventilateur. résidences. Un ventilateur à une vitesse se mettra en marche automatiquement lorsque le système de chauffage ou de refroidissement fera de même.
-
Page 66: Guide De Dépannage
Guide de dépannage Si… DONC… Régler le commutateur du système à OFF; enlever le L’affichage ne s’allume pas. piles pendant au moins 5 minutes pour réarmer le thermostat ou jusqu’à ce que l’affichage disparaisse; remettre en place les piles. S’assurer que les piles sont bonnes et installées La température ne descend pas sous °... - Page 67 Si le réglage de la température est plus élevé que la température actuelle et que le voyant SYSTEM ON est allumé, communiquer avec les Services à la clientèle de Honeywell au 1-800-468-1502. Le système de refroidissement ne Vérifier si le commutateur du thermostat est à la position se met pas en marche.
- Page 68 10 minutes et que le voyant SYSTEM ON est allumé, communiquer avec les Services à la clientèle de Honeywell au 1-800-468- 1502. S’il s’agit d’un thermostat à 2 ou 4 fils, vérifier si le cavalier entre R et RC est installé.
- Page 69 Permettre au système de chauffage et au ventilateur Le voyant SYSTEM ON est allumé de se mettre en en marche avant de vérifier aux grilles mais qu’aucune chaleur ne provient à registre. (Vérifier si le cycle de fonctionnement du des grilles à registre. système est bien réglé...
-
Page 70: Garantie Restreinte Pour Un An
GARANTIE RESTREINTE POUR UN AN Honeywell Limitée garantit au consommateur que ce produit au consommateur, excluant les piles, est exempt de tout vice de fabrication ou de matière dans la mesure où il en est fait une utilisation et un entretien convenables et ce, pour une période d’un an (1) à compter de la première date d’achat par un consommateur. - Page 71 La présente garantie ne couvre pas les frais d’installation et de retrait de ce produit. La présente garantie ne s’appliquera pas s’il est démontré par Honeywell que la défectuosité ou le mauvais fonctionnement du produit est dû à un endommagement du produit alors que le consommateur l’avait en sa possession.
- Page 72 Ottawa City Indianapolis St-Jean Toronto * Une baisse de 5 °C (10 °F)—(une baisse de 3 °C (5 °F) Brevet en instance donne environ 55 % de ces économies d'énergie). MF2416A Imprimé à Mexique • J.H. • Honeywell Inc., 1992...
Need help?
Do you have a question about the MagicStat T8132 and is the answer not in the manual?
Questions and answers