Table of Contents
Advertisement
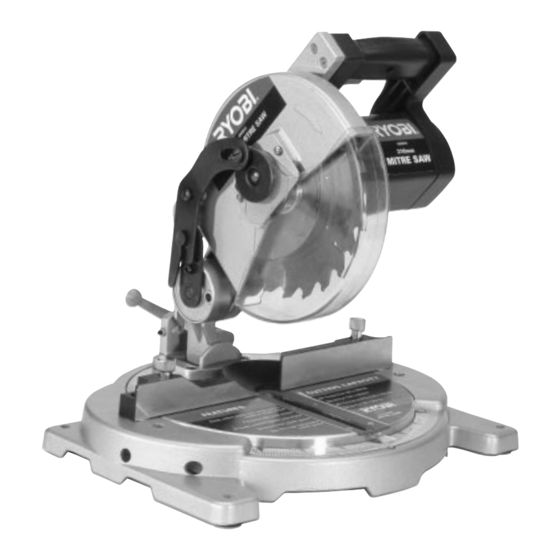
OWNER'S OPERATING MANUAL
210mm COMPOUND MITRE SAW
This Mitre Saw is designed for light consumer use. It is NOT designed for trade
or industrial use and is not covered by warranty for use in these applications.
THANKYOU FOR BUYING A RYOBI MITRE SAW
Your new Mitre Saw has been engineered and manufactured to Ryobi's high standard for dependability,
ease of operation and operator safety. Properly cared for, it will give you years of rugged, trouble free
performance.
CAUTION: Carefully read through this entire owner's manual before using your drill.
Pay close attention to the Rules for Safe Operation, Warnings and Cautions. If you use your saw properly and
only for what it is intended, you will enjoy years of safe, reliable service.
Thank you again for buying Ryobi tools.
MODEL CMS812
IMPORTANT NOTICE:
SAVE THIS MANUAL FOR FUTURE REFERENCE.
SPECIFICATIONS:
• Power Input .......................... 1200 watts
• No Load Speed...................... 4500 r.p.m.
• Blade Size .............................. 210mm
• Blade Bore Size .................... 16mm
• TCT Blade .............................. 24 tooth
• Cutting Capacities:
90° Cross Cut ........................50mm x 120mm
Bevel Cut................................25mm x 120mm
45° Compound Mitre Cut......25mm x 90mm
Mitre Cut ................................55mm x 85mm
• Weight .................................... 7kg
STANDARD ACCESSORIES:
• Dust Bag
Advertisement
Table of Contents

Related Manuals for Ryobi CMS812


Summary of Contents for Ryobi CMS812
- Page 1 THANKYOU FOR BUYING A RYOBI MITRE SAW Your new Mitre Saw has been engineered and manufactured to Ryobi's high standard for dependability, ease of operation and operator safety. Properly cared for, it will give you years of rugged, trouble free performance.
-
Page 2: Rules For Safe Operation
For service we 17. NEVER USE IN AN EXPLOSIVE ATMOSPHERE. Normal suggest you return the tool to your nearest Ryobi Authorised Service Centre for repair. When servicing, use only identical sparking of the motor could ignite fumes. -
Page 3: Tools Needed
■ 1200 WATT MOTOR Before attempting to use your saw, familiarise yourself with all Your CMS812 Compound Mitre Saw has a powerful 1200 watt the operating features (Fig 2, 2a & 2b) and safety motor with sufficient power to handle tough cutting jobs. It is requirements. -
Page 4: Glossary Of Terms For Woodworking
MAINTENANCE ■ EXTENSION CORDS WARNING: When servicing, use only identical Ryobi replacement parts. Use of any other part may create a The use of any extension cord will cause some loss of power. hazard or cause product damage. -
Page 5: Product View
■ CMS812 210mm Compound Mitre Saw Fig.2 Lower Blade Guard Upper Blade Guard Mitre Table Mitre Table Lock Knob Mitre Scale Rear Fence Throat Plate Trigger Switch Lock Down Pin 45° Stopper 0° Stopper Bevel Scale Bevel Lock Fig.2a Fig.2b... -
Page 6: Electrical Connection
If your tool does not operate when plugged into an outlet, double-check the power Your CMS812 mitre cuts from 0° to 45° both right and left, supply. with automatic locking of the index stopper at 5° increments. -
Page 7: Pin To Hold The Saw Arm In The Transport Position. (Fig
Head Screws Fig.5 SPECIAL NOTE Fig.8 Your CMS812 mitre cutting and bevel cutting angles have been preset at the factory but can and will be misaligned by rough handling and transportation. It is essential that your new saw be realigned before use. - Page 8 ■ SQUARING THE BLADE TO THE MITRE TABLE Correctly align the blade and mitre table using the set square and lock the bevel lock knob. (Fig 15) Pull the saw arm all the way down and engage the lock down pin to hold the saw arm in the transport position.
-
Page 9: Operations
If the saw arm cannot reach a full 45° position, the 45° bevel OPERATIONS positioning allen screw will have to be reset (Fig 18) so that when the saw arm is moved to the 45° bevel position the allen ■ CUTTING WITH YOUR COMPOUND MITRE screw bottoms out. -
Page 10: Bevel Cut
• Loosen the bevel lock handle and move the saw arm to the • When cutting long pieces of timber or molding, support the left to the desired bevel angle. opposite end of the stock. • Bevel angles can be set from 0° to 45° •... - Page 11 WARNING: To avoid serious personal injury, Fig.24 always keep your hands outside the no hands zone; at least 75mm from the blade. Never perform a cutting operation freehand (without holding the workpiece against the fence). The blade could grab the workpiece if it slips or twists.
-
Page 12: Cutting Crown Molding
■ CUTTING CROWN MOLDING ■ LAYING MOLDING FLAT ON THE MITRE TABLE Your compound mitre saw does an excellent job of cutting crown molding. In general, compound mitre saws do a better To use this method for accurately cutting crown molding for a job of cutting crown molding than any other tool made. -
Page 13: Cutting Warped Material
■ CUTTING WARPED MATERIAL When cutting crown molding by this method the bevel angle should be set at 33.85°. The mitre angle should be set at (See Figures 26 & 27) 31.62° either right or left, depending on the desired cut for the application. - Page 14 NOTES: Page 14...
- Page 15 RYOBI NEW ZEALAND PTY. LTD. AUCKLAND: 503 Mt Wellington Highway, Mt Wellington, N.Z. Tel: (09) 573 0230 - Free Call: 0800 279 624 - Fax: (09) 573 0231 - Email: info@ryobi.co.nz Contact during normal business hours. THIS WARRANTY FORM SHOULD BE RETAINED BY THE CUSTOMER AT ALL TIMES.
Need help?
Do you have a question about the CMS812 and is the answer not in the manual?
Questions and answers
Cant unlock. Tried pulling pin out and wd40 etc Its locked in the down position
To unlock the Ryobi CMS812 saw that is stuck in the down position, pull out the lock down pin and lift the saw arm to the upright position.
This answer is automatically generated