Table of Contents
Advertisement
Quick Links
Advertisement
Table of Contents

Subscribe to Our Youtube Channel
Related Manuals for O2 Xda Venn


Summary of Contents for O2 Xda Venn
- Page 1 User Guide Xda Venn We’re better, connected...
-
Page 2: Welcome
Thank you for choosing the ø Xda Venn smartphone, with the Microsoft® Windows® Mobile™ 6.1 Standard operating system. With its dual slider, the Xda Venn gives you the convenience of Windows® combined with a familiar handset design. Furthermore, by using ActiveSync®, you can keep your new smartphone and your PC synchronised at all times. -
Page 3: Please Read Before Proceeding
Important health, safety and legal information Please read before proceeding. The battery is not charged when you take it out of the box. Do not remove the battery pack when the phone is charging. Your warranty is invalidated if you dismantle or attempt to dismantle the phone. Privacy Restrictions Some countries require full disclosure of recorded telephone conversations, and stipulate that you must inform the person with whom you are speaking that the conversation is being recorded. -
Page 4: Prevention Of Hearing Loss
Safety Precautions for Proper Grounding Installation CAUTION: Connecting to an improperly grounded equipment can result in an electric shock to your smartphone. This product is equipped with a USB Cable for connecting with desktop or Notebook computer. Be sure your computer is properly earthed (grounded) before connecting this product to the computer. -
Page 5: Road Safety
Road Safety Vehicle drivers in motion are not permitted to use mobile phones, except in the case of emergency. In some countries, using handsfree phones as an alternative is allowed. Safety Precautions for RF Exposure • Avoid using your phone near metal structures (for example, the steel frame of a building). •... - Page 6 Avoid wet areas Never use the product in a wet location. DO NOT try to dry your phone in a microwave oven. If you do, sparks can occur and cause an explosion or fire. Avoid using your phone after a dramatic change in temperature When you move your phone between environments with very different temperature and/or humidity ranges, condensation may form on or within the phone.
-
Page 7: Table Of Contents
Contents Welcome ......................2 Section 1 Before Using Your Phone ..............19 Inside the Box ......................20 Handset Description ....................21 The Home Screen .......................22 Battery Usage ......................25 Section 2 Basic Operation ................28 Turning the phone on / off ..................29 Turning the phone on ..................... 29 Turning the phone off ..................... - Page 8 Browsing files and folders ..................33 Silencing the ring tone of an incoming call ............... 33 Making an emergency call ..................33 Entering text and numbers ..................34 Switching between uppercase, lowercase, and caps lock ......... 34 Changing the Multipress timeout ................34 Deleting characters ....................
- Page 9 Contacts ........................41 Creating a new contact ................... 41 Sending a contact....................41 Calling a contact from contact information .............. 41 Calling a contact from the contact list ..............42 Changing the default number for a contact ............. 42 Duplicating a contact ....................42 Copying selected contacts to Device / SIM ...............
- Page 10 Dialling the last number called ................. 48 Inserting an international country code ..............48 Sending an e-mail via Call History ................49 Section 4 Voicemail and Messaging ...............50 Voicemail ........................51 Calling your voicemail box ..................51 Text messaging ......................51 Creating a text message ..................51 Deleting all messages ....................
- Page 11 Adding a voice recording to an e-mail message ............60 Setting up an Internet e-mail account ..............60 Deleting a message ....................61 Deleting an account....................61 Editing predefined text .................... 61 Emptying the Deleted Items folder ................61 Forwarding a message..................... 61 Inserting predefined text into a message ..............
- Page 12 Notepad ........................68 To access Notepad: ....................68 Creating a memo ....................68 Viewing a memo ..................... 68 Sending a memo ..................... 69 Deleting a memo ..................... 69 Calculator ........................69 Using the calculator ....................69 World Time .........................69 Using the world time ....................69 Tasks ..........................70 Creating a task ......................
- Page 13 Windows® Live ......................78 Hotmail® ........................78 Windows® Live spaces ..................... 78 Live Search for Windows® Mobile ................79 Section 8 Camera ....................80 Camera / Camcorder mode ..................81 Selecting video quality ..................... 81 Copying an image to your phone ................81 Making video clips using a timer ................
- Page 14 Section 9 Internet Explorer ................90 Using Internet Explorer .....................91 Adding a Web page to the Favourites list ..............91 Changing connection options .................. 91 Changing Web page display options ................ 91 Clearing History, cookies, or temporary files ............. 92 Creating a new folder in Favourites ................92 Deleting a Favourite ....................
- Page 15 Changing settings for an information type ............... 99 Connecting your phone ..................100 Deactivating the USB modem ................100 Connecting to a PC using a chargeable USB cable ..........100 Connecting to a PC using Bluetooth® ..............100 Changing e-mail security options ................101 Excluding an e-mail address from Reply All ............
- Page 16 Slide Options ......................116 Sounds ........................117 Changing sounds or turning them on or off ............117 Deleting a sound ....................117 Copying a sound from your PC to your Xda Venn ...........117 Profiles ........................118 Viewing the list of profiles ..................118 Editing a profile ......................118 Changing the current profile ...................118...
- Page 17 Deleting a GPRS connection ...................121 Deleting a Proxy connection ...................121 Changing an intranet URL ..................122 Making your Xda Venn visible to other devices ............122 USB to PC ......................122 Modem Link ......................122 Enrolling in a domain ..................... 122 Security ........................123...
- Page 18 Section 13 Games .................... 130 Bubble Breaker ......................131 How Bubble Breaker works ..................131 The Breaker Bonus ....................131 Undoing a move .....................131 Starting a game of Bubble Breaker ................131 Setting Bubble Breaker options ................131 Viewing Bubble Breaker statistics ................132 Solitaire ........................132 Starting a game of Solitaire ...................
-
Page 19: Section 1 Before Using Your Phone
Section 1 Before Using Your Phone This section covers the very first things you need to know about your phone including: Inside the Box • Handset Description Home Screen • Battery Usage... -
Page 20: Inside The Box
We’re better, connected We’re better, connected Getting Started CD Full user manual access available via the Getting Started CD Pouch to protect your Xda Venn Xda Venn All rights reserved. Portions © 2008 Microsoft Corporation Getting Started With Windows Mobile software. Includes Microsoft®... -
Page 21: Handset Description
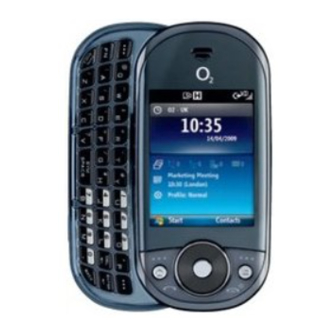
Handset Description The Xda Venn weighs about 151.4 g. Its dimensions are 106 x 51 x 21.6 mm. Number pad view Earpiece Display Navigation key Left soft key Right soft key Home key Clear/back key Send key End key Voicemail microSD™... -
Page 22: The Home Screen
The Home Screen The home screen plays a key part in helping you navigate around your Smartphone. It is the first screen displayed every time the phone is turned on. You can easily return to the home screen by pressing the [ ]. Indicators for Phone status Date and Time Select and press the... - Page 23 Indicator Description Indicator Description Bluetooth® ON Windows® Live Messenger Busy Windows® Live Messenger Missing SIM card Appear Offline Voice Command Enabled Windows® Live Messenger Offline microSD™ card inserted Windows® Live Messenger Away Speaker phone on HSDPA in use Windows® Live Messenger Conversation HSDPA available Windows®...
-
Page 24: Using The Qwerty Keyboard
Using the QWERTY Keyboard Your phone, with its specifically designed QWERTY keyboard, allows easy and comfortable text writing. You can use all the phone functions with the keyboard closed or open. When you open the keyboard you have the benefit of a full QWERTY keyboard, which you can use to write e-mail messages, notes, and so on. Function Press to access the Main Menu or the Menu functions displayed on the left at the bottom. -
Page 25: Battery Usage
2. Push the battery down until it locks into place. Battery Removal Again, place the Xda Venn on a flat surface and use an even, steady pressure when removing the battery. 1. Pull the release latch upwards, lift up the battery. -
Page 26: Battery Usage Times
Please Note: • The battery may not be fully charged at the time of purchase. • Fully charge the battery before use. • The battery must be connected to the phone in order to charge it. • Battery operating time gradually decreases over time. •... - Page 27 Don’ts • Don’t use a damaged battery or charger. • Don’t attempt to take the battery apart – it is a sealed unit with no serviceable parts. • Don’t accidentally short circuit the battery by carrying it in your pocket or purse with other metallic objects, such as coins, clips and pens.
-
Page 28: Section 2 Basic Operation
Section 2 Basic Operation This section covers the basic functions of your phone including: Turning the phone on / off • Call functions • Basic functions Making an emergency call • Entering text and numbers... -
Page 29: Turning The Phone On / Off
If the phone turns off, unsaved data may be lost. Call functions Your Xda Venn phone has many options. This section will show you how to use basic functions such as making and receiving calls, locking and unlocking your phone, and changing the appearance and settings of your phone. -
Page 30: Making A Call From The Call History List
Making a call from the call history list Call History displays calls you have made, received, and missed. 1. On the home screen, press Start > All Programs > More > Call History. 2. Select the name or phone number to call. 3. -
Page 31: Inserting A Pause In A Dialling Sequence
Setting up Voicemail All unanswered calls to your Xda Venn are sent to voicemail, even if your phone is turned off. You’ll want to set up your voicemail and personal greeting as soon as you activate your Xda Venn. Your service provider has assigned your voicemail number to the [ ]. -
Page 32: Auto-Locking The Keypad
5. Press Done. Setting the idle timer Your Xda Venn will automatically return to the home screen after a period of inactivity. You can adjust the amount of time before the Xda Venn defaults to the home screen. 1. On the home screen, press Start > All Programs > More > Settings or select Settings and press All Settings. -
Page 33: Viewing Operating System Information
Viewing operating system information There may be instances when you wish to see basic information about your phone’s operating system. This option allows you to see summaries of all the settings on your phone. 1. On the home screen, press Start > All Programs > More > Settings or select Settings and press All Settings. 2. -
Page 34: Entering Text And Numbers
Entering text and numbers You can enter text, numbers and symbols by using the keypad. The phone supports four input modes for entering text, numbers and symbols: Multipress, XT9, Numeric and symbols. Multipress and XT9 modes are used for entering text, Numeric mode is used for entering numbers, and Symbols mode is used for entering symbols like “@”, “/”, “$”... -
Page 35: Entering Numbers In Text Boxes
Entering numbers in text boxes To enter numbers, use numeric mode. If you need to enter a number within a line of text, change to numeric mode to enter the number, and then revert back to multipress or XT9 mode to finish entering the text. 1. -
Page 36: Turning On Caps Lock
Turning on Caps Lock You can toggle back and forth between having the caps lock on and off. The status indicator will tell you which mode you are in. 1. In Multipress or XT9 mode, press the [ ] until the status indicator for the text input mode appears in all capitals. -
Page 37: Section 3 Calendar, Contacts, Call History
Section 3 Calendar, Contacts, Call history This section covers using the calendar and contacts menu on your phone: Calendar • Contacts • Call history... -
Page 38: Calendar
Calendar Scheduling an appointment Your calendar allows you to schedule appointments and reminders by day, by time, or by event. 1. On the home screen, press Start > All Programs. 2. Select Calendar > [OK]. 3. Press Menu > New Appointment. 4. -
Page 39: Viewing Appointments For The Week
Viewing an appointment Your appointments should be easily viewable from the main calendar menu. The calendar menu is accessible via the Start from the home screen. 1. On the home screen, press Start > All Programs. 2. Select Calendar > [OK]. 3. -
Page 40: To Make An Appointment Recurring
To make an appointment recurring If you’ve already entered a single appointment in your calendar and would like to change it to a recurring appointment, use the Occurs selection after selecting the appointment. 1. On the home screen, press Start > All Programs. 2. -
Page 41: Contacts
Contacts Using the Contacts feature of your Xda Venn, you can manage all the phone information you need. There are many options for adding contacts, retrieving contacts, and managing the information for each contact. Creating a new contact To enter a new contact manually, without having the caller on the phone, you can use the Contacts selection from the home screen. -
Page 42: Calling A Contact From The Contact List
Calling a contact from the contact list If you do not select one of the contacts’ phone numbers, but you press [ ], your phone will dial the default number for that contact. 1. On the home screen, press Start > All Programs > Contacts or directly press Contacts. 2. -
Page 43: Copying All Contacts To Device / Sim
Copying all contacts to Device / SIM This feature allows you to copy all contacts in Device or SIM to the other location. (Device -> SIM, SIM -> Device) 1. On the home screen, press Start > All Programs. 2. Select Contacts > [OK]. 3. -
Page 44: Finding A Contact
Finding a contact The contact section of your phone has an auto-fill feature that will allow you to find contacts more quickly. While entering the number or name of the contact, the phone will auto-fill the rest of the information as you press the keys, until you find the right contact. -
Page 45: Adding A Photo To A Contact
Adding a photo to a contact You may wish to add a photo to a contact record. You can add an existing picture, or you can put the phone in camera mode to take a photo and add it to the contact. 1. -
Page 46: Assigning A Ring Tone To A Contact
Assigning a ring tone to a contact To easily identify who is calling you by the ring tone, you can assign a custom ring tone to each contact. 1. On the home screen, press Start > All Programs. 2. Select Contacts > [OK]. 3. -
Page 47: Deleting A Speed Dial
Deleting a speed dial You can delete a speed dial at any time by following these instructions. 1. On the home screen, press Start > All Programs. 2. Select Applications > Speed Dial > [OK]. 3. Select the speed dial to delete. 4. -
Page 48: Viewing The Details Of A Call
Viewing the details of a call To review all the stored information about a call, you access the Call History function. 1. On the home screen, press Start > All Programs > More. 2. Select Call History > [OK]. 3. Select a call to view details and press [OK]. Creating a contact from Call History While you are in the Call History function, you can select any of the calls and automatically add that caller to your contact list. -
Page 49: Sending An E-Mail Via Call History
Sending an E-mail via Call History To use this function, the e-mail address of the person you’re e-mailing must be included in their contact information card. 1. On the home screen, press Start > All Programs > More. 2. Select Call History > [OK]. 3. -
Page 50: Section 4 Voicemail And Messaging
Section 4 Voicemail and Messaging This section covers Voicemail, Text, Multimedia Message and E–mail Messaging on your phone: Voicemail • Text Messaging • Multimedia Message • E–Mail... -
Page 51: Voicemail
Creating a text message The Xda Venn allows you to create text messages quickly. You create a text message by typing in a phone number or by selecting a contact first. -
Page 52: Multimedia Messaging
Multimedia Messaging The Multimedia Messaging Service allows you to send messages which can include text, graphics and ring tones. Creating a Multimedia message Creating a Multimedia message is simple. You can add images or attachments to a text or email message. 1. - Page 53 Menu option Description Check Name Press Menu > Check Name, convert phone number to corresponding name, if that number is registered in contact list. Add Item You can add content such as text, image, sound, video, vCard, vCalendar, and Attachments. Press Menu >...
-
Page 54: Viewing A Multimedia Message
Menu option Description Page Layout You can set the layout of Multimedia message in preview. Press Menu > Page Layout > Image Top: Place image on top and text below in preview. Press Menu > Page Layout > Text Top: Place text on top and image below in preview. -
Page 55: Replying With A Multimedia Message
Replying with a Multimedia Message After selecting Multimedia message from the Messaging menu, you can use the Menu to go through each field that is available when composing a message. 1. On the home screen, press Start > All Programs > Messaging > [OK]. 2. -
Page 56: E-Mail
E-mail The Xda Venn allows you to send e-mails with several options. You can copy, blind copy, set priority, and store e-mails just as you would from a computer. The Xda Venn uses Outlook as the default mail program. You can send and receive e-mail messages in one of these ways: •... -
Page 57: Creating An E-Mail Account
Creating an E-mail Account You need to create a new account to be used for retrieving and sending e-mail messages. To make a new account: 1. From the main Messaging screen, select Setup E-mail. 2. Enter your e-mail address. If you want to save your password, enter your password and select Save Password >... -
Page 58: Overview Of E-Mail Security
Overview of e-mail security You can help prevent impersonation, tampering, and eavesdropping when sending e-mail messages from your Outlook e-mail account by using Secure Multipurpose Internet Mail Extensions (S/MIME) digital signatures and encryption. A signature helps prevent impersonation and tampering. Impersonation occurs when a hacker sends e-mail messages while pretending to be someone else. -
Page 59: Selecting A Folder For Synchronisation
Sending and receiving Internet e-mail messages Using the Xda Venn you can connect to the Internet to send and receive e-mails. 1. On the home screen, press Start > All Programs > Messaging. -
Page 60: Adding A Voice Recording To An E-Mail Message
Adding a voice recording to an e-mail message Inserting a voice recording is useful when you want to verbally explain information that is contained in the message. 1. In the message area of an e-mail message, press Menu > Insert > Voice Note. 2. -
Page 61: Deleting A Message
Deleting a message Messages from any account can be deleted. Select the Messaging function from the home screen. 1. On the home screen, press Start > All Programs > Messaging > [OK]. 2. Select an account. 3. Select the message to delete. 4. -
Page 62: Inserting Predefined Text Into A Message
Inserting predefined text into a message To save time when entering text, you can insert predefined text into messages. 1. On the home screen, press Start > All Programs > Messaging > [OK]. 2. Select an account and press Menu > New. 3. -
Page 63: Moving Quickly Between Accounts
Setting the language for reading or composing a message The Xda Venn has many languages and character sets to choose from. Each message can be read or composed in whatever language you require. To choose a language for reading a message: 1. -
Page 64: To Stop Adding A Signature To Messages
To stop adding a signature to messages If you have previously added a signature to an account and wish to stop using it, you can turn the signature off for that account. 1. On the home screen, press Start > All Programs > Messaging > [OK]. 2. -
Page 65: Viewing The List Of Accounts
Viewing the list of accounts If you have added accounts to your phone, you can see a list of all the accounts at once, if you wish. 1. On the home screen, press Start > All Programs > Messaging > [OK]. 2. -
Page 66: Section 5 Organiser
Section 5 Organiser Alarm • Voice Note • Notepad • Calculator • World Time • Tasks... -
Page 67: Alarm
• Alarm1 (or 2) volume: Adjust alarm volume. Voice Note In addition to making and receiving calls, scheduling and keeping contacts, the Xda Venn allows you to save your own reminders and messages in voice format. Creating a voice note To create a voice note, you follow a simple procedure, then just speak into the microphone as you would when making a call. -
Page 68: Deleting A Voice Note
Deleting a voice note When you have no further need for a voice note, you can delete it completely from the phone. 1. On the home screen, press Start > All Programs > Organiser > Voice Note > [OK]. 2. Select the voice note to delete. 3. -
Page 69: Sending A Memo
Sending a memo You can send your notes as part of an SMS or email message. 1. Scroll to the memo you want. 2. Press Menu > Send via Email or Send via Text Message. 3. Compose and send a message. Deleting a memo 1. -
Page 70: Tasks
Tasks Creating a task The Xda Venn allows you to create a new task with reminders for your task list, from your phone or from your PC. 1. On the home screen, press Start > All Programs > Organiser > [OK]. -
Page 71: Marking A Task As Complete
Marking a task as complete To show a task has been finished, you can mark it as complete through the Tasks menu. 1. On the home screen, press Start > All Programs > Organiser > [OK]. 2. Select Tasks > [OK]. 3. -
Page 72: Section 6 Windows Media Player
Section 6 Windows Media player ® ® This section covers Windows® Media Player®, which lets you play and manage media files. Windows® Media Player®... -
Page 73: Windows® Media Player
Windows® Media Player® Your ø Xda Venn smartphone comes with Microsoft® Windows® Media Player® 10.3. You can play Windows® Media Audio, Windows® Media Video, and MP3 audio files that are stored on your phone, on a memory card, or on the Web. -
Page 74: Playing Media Files
To access libraries, press Menu from the player screen and then select Library. The library screen contains categories, such as My Music, My Videos, My TV and My Playlists. From the library screen, press Menu and you can see following options: •... -
Page 75: Setting Up A Playlist
Playing media files on a network 1. On the Library screen, press the Menu > Open URL. 2. Enter a URL address in the URL field, or scroll to one of the URL address that you have used from the History field. - Page 76 Changing the Windows® Media Player® Settings You can customise the screen and functionality of Windows® Media Player®. On the player screen, press the Menu > Options. You can choose from the following: • Playback: Select the options for playback. You can select the way time is displayed on the player screen, or whether or not to pause playback when you launch another program, or resume playback after a phone call.
-
Page 77: Section 7 Messenger, Office Mobile, Windows Live
Section 7 Messenger, Office Mobile, Windows Live ® Messenger • Office Mobile • Windows® Live... -
Page 78: Messenger
Messenger Windows® Live Messenger Your smartphone enables you to connect to Instant Messaging. First create an active account using your PC, then you can connect and chat using Windows® Live Messenger: 1. On the home screen, press the Start > All Programs > More > Messenger. Office Mobile Excel®... -
Page 79: Live Search For Windows® Mobile
Live Search for Windows® Mobile • Find the info you need, when you need it – like traffic updates, restaurant info, movie screening times, and more. • Get the latest news headlines, stock updates, and sports scores. • Save your PC bookmarks to your mobile phone. -
Page 80: Section 8 Camera
Section 8 Camera This section covers picture and video functions including: Camera / Camcorder Mode • Camera / Camcorder Operations Camera / Camcorder Controls... -
Page 81: Camera / Camcorder Mode
Camera / Camcorder mode Use the camera program to take, view, and edit pictures, as well as record and playback video clips stored on your phone or on a memory card. You can also send photos and video clips, or set a picture as the background of the home screen. -
Page 82: Adjusting Pictures And Video According To Lighting Conditions
2. Press Menu > Edit > New Folder. Editing a picture You can actually edit pictures and videos on the Xda Venn using the Menu. 1. On the home screen, press Start > All Programs > Applications > File Explorer > My Pictures. -
Page 83: Viewing Pictures As A Slide Show
Viewing pictures as a slide show However you have stored your pictures and videos, you can view them one after another, in a slide show format. 1. On the home screen, press Start > All Programs > Applications > File Explorer > My Pictures. 2. -
Page 84: Viewing Pictures On Your Phone
Viewing pictures on your phone You can view pictures stored on your phone or on a memory card. 1. On the home screen, press Start > All Programs > Applications > File Explorer > My Pictures. 2. Select the picture > [OK]. TIP: To view pictures located on a memory card, press Start >... -
Page 85: Snapshot
Snapshot To take a quick photo, you can use the phone’s snapshot feature. Afterwards, you can store your picture, delete it, or forward it. 1. On the home screen, press Start > All Programs > Applications > Camera. 2. Press Options > Camera to change to photo mode 3. -
Page 86: Camcorder Menu
Item Description Effect Choose the colour effect in Options > Settings > Effects. Default value is Normal. Normal: Colour effect is normal. Grey: Colour effect is grey Sepia: Colour effect is sepia Negative: Colour effect is negative Self-Timer Choose Self-Timer in Options > Settings > Self-Timer. Default value is Off. -
Page 87: General Settings
Item Description White Balance Choose White Balance in Options > Settings > W/B. Default value is Auto. Daylight: Control of the white value. Cloudy: Setting of the white value. Fluorescent: Setting of the white value. Incandescent: Setting of the white value. Effect Choose the colour effect in Options >... -
Page 88: Camera Settings
Item Description Time Out Choose Time Out in list Default value is 1 Min. 1 Min: Time Out is 1 Min. 2 Min: Time Out is 2 Min. 3 Min: Time Out is 3 Min. Never; Time Out is off. Storage You can choose where files are stored. -
Page 89: Video Settings
Video Settings Camcorder Settings allows you to control how long you record for, whether or not you record sound, and the video file prefix. On the home screen, press Start > All Programs > Applications > Camera. 1. Press Options > Settings. 2. -
Page 90: Section 9 Internet Explorer
Section 9 Internet Explorer This section covers Internet services and web browsing. For more detailed information contact your service provider. Using Internet Explorer... -
Page 91: Using Internet Explorer
Using Internet Explorer Adding a Web page to the Favourites list Internet Explorer functions on your phone much the same as it does on your PC. You can keep a list of web sites in your Favourites list, adding each site to the list via the Internet Explorer menus. 1. -
Page 92: Clearing History, Cookies, Or Temporary Files
Clearing History, cookies, or temporary files Internet Explorer usually stores a list of the sites you’ve visited (your History), cookies (files simplifying your return to a site), or temporary files. Clearing any of these is simple. 1. On the home screen, press Start > All Programs > Internet Explorer. 2. -
Page 93: Go To A Link
Go to a link If you have previously set up links, you can access them from the main page of Internet Explorer. 1. On the home screen, press Start > All Programs > Internet Explorer. 2. Scroll vertically or horizontally to see all available links. 3. -
Page 94: Viewing A Favourite
Viewing a Favourite To visit a Favourite site at any time, just go into your Favourites list and select it. 1. On the home screen, press Start > All Programs > Internet Explorer. 2. Press Favourites. 3. Select a Favourite and press Go. Viewing a list of recently visited Web pages The History function of Internet Explorer lets you select a site you’ve already visited and return to that site. -
Page 95: Sending A Link Via E-Mail
Sending a link via e-mail Your smartphone enables you to send links to web pages via e-mail. To do so, use the Tools menu on the Internet Explorer menu bar. 1. On the home screen, press Start > All Programs > Internet Explorer. 2. -
Page 96: Section 10 Pc Connectivity, Internet Sharing, Remote Desktop, Bluetooth® And Activesync
Section 10 PC Connectivity, Internet Sharing, Remote Desktop, Bluetooth® and Activesync® This Section Covers Bluetooth® And Activesync® Functions. Activesync® • Internet Sharing • Remote Desktop • Bluetooth®... -
Page 97: Activesync
ActiveSync® Microsoft® ActiveSync® synchronises data between your phone and PC. ActiveSync® is already installed on your smartphone, but you need to install it on your PC before you can synchronise data. Installing and setting up ActiveSync Install ActiveSync® on your PC, as described on the Windows® Mobile Getting Started Disc. After Setup has completed, the Sync Setup Wizard automatically starts when you connect your phone to the PC. -
Page 98: Changing Activesync® Settings
Changing ActiveSync® settings Once you’ve set up synchronisation using the Sync Setup wizard on your PC, you can change your synchronisation settings: • To change the settings for synchronising with your PC, use ActiveSync® on the PC. For more information, see Changing the amount of information synchronised in ActiveSync®... -
Page 99: Starting And Stopping Synchronisation
NOTE: The phone’s power-down timer is reset each time you synchronise. If you schedule a synchronisation interval that is shorter than the time interval set for the phone to automatically power down, the phone will never turn off to save battery power. TIP: To change peak time settings to more accurately reflect periods of e-mail volume for you, press Menu >... -
Page 100: Connecting Your Phone
Connecting to a PC using a chargeable USB cable The Xda Venn provides a USB connector for transferring data to and from your computer via a USB cable. 1. Plug the USB Data Cable into a standard USB connector on your computer. -
Page 101: Changing E-Mail Security Options
Changing e-mail security options ActiveSync® lets you set up S/MIME e-mail encryption and signing. You will have to obtain a valid certificate for signing or encrypting e-mail before you can do so successfully. 1. From the phone’s home screen, press Start > All Programs > ActiveSync > [OK]. 2. -
Page 102: Internet Sharing
Internet Sharing Internet Sharing via Bluetooth® Enabling your PC to access the Internet via Bluetooth® wireless. You can access the Internet from your PC, via Bluetooth® Internet Sharing. 1. Turn on Bluetooth® on your phone and make it visible. 2. Launch Internet sharing – press Start > All Programs > More > Internet Sharing. 3. -
Page 103: Bluetooth
Bluetooth® Your phone supports Bluetooth® wireless pairing (also called linking or bonding). You can pair your phone with a Bluetooth® headset or car kit, or with a computer to exchange and synchronise files. NOTE: The use of wireless devices and their accessories may be prohibited or restricted in certain areas. Always obey the laws and regulations on the use of these products. -
Page 104: Sending Objects To Another Device
Sending objects to another device You can use Bluetooth® pairing to send Outlook e-mail, Contacts, Tasks, Voice Notes, Calendar Items, Audio, Ring Tones, Images and Videos from your phone to a computer or other Bluetooth® device. 1. On the home screen, press Start > All Programs > More > Bluetooth > [OK]. 2. - Page 105 Cancelling your phone’s pairing with another Bluetooth® device 1. On the home screen, press Start > All Programs > More > Bluetooth > [OK]. 2. Select Bluetooth Manager > [OK]. If necessary, press Yes to turn on Bluetooth® power. 3. Select Hands-free > device name > Disconnect. Sending an item to another device 1.
-
Page 106: Section 11 Applications
Section 11 Applications Camera • File Explorer • Java • Jetcet PDF Speed Dial • System Info • Task Manager • Voice Commander... -
Page 107: Camera
Your Xda Venn is loaded with File Explorer, which opens an explorer window, similar to Microsoft® Windows®. File Explorer lets you locate folders and files, and then manage, delete, copy, or edit them on your Xda Venn. 1. On the home screen, press Start >All Programs > More > Applications > [OK]. -
Page 108: Speed Dial
Speed Dial Your Xda Venn has Speed Dial, which lets you use shortcut numbers to quickly dial a phone number or access an e-mail or URL address. 1. On the home screen, press Start >All Programs > Applications > [OK]. -
Page 109: Voice Command Features
Voice command features 1. Dialling by name • You can use “Voice Commander” to call people whom you mention by name. • Command: Call <Contact> at <Home/Work/Mobile>. For example, “Call Michael Archer”, “Call Mary Smith at home”. NOTE: Voice Commander will automatically keep a maximum of 2000 contacts in the recognition database. To change this setting, refer to Contacts Setting Page. - Page 110 8. Checking your e-mail • You can use “Voice Commander” to look up unread e-mails. • Command: Read E-mail. 9. Reading your SMS • You can use “Voice Commander” to look up unread SMS. • Command: Read SMS. 10. Checking the time •...
-
Page 111: Voice Commander Settings" Main Functions
“Voice Commander Settings” main functions “Voice Commander Settings” helps you personalise your system. There are five major functions: “Contacts”, “Application”, “Music”, and “Advanced Settings”. Here is how to start “Voice Commander Settings”: Start > All Programs > More > Applications > Voice Commander > Menu > Settings. 1. - Page 112 3. The “Music” Setting Page After running “Voice Command setting”, press Menu > Music. The setting page will list the music file names found on your Xda Venn. Whenever you download a media file, it will automatically fall under the voice command system.
-
Page 113: Section 12 Settings
Section 12 Settings Choosing the Settings option from the home screen allows you to view and, in some cases, change the status of your phone, the hardware and software version, the phone number and other important reference information. Phone • Sound • Profiles • Home Screen • Clock and Alarm Connections •... -
Page 114: Phone
Phone Auto Answer This lets you set how quickly calls are automatically answered during hands-free operation. These settings do not apply when the ringtone is Silent. Auto Lock Refer to the basic functions in Section 2, Basic Operation. Band Select This lets you select a band type. -
Page 115: Call Options
• Text messages service centre: When you insert your SIM card into your Xda Venn, SMS accesses the number by default. If not, you can manually enter the numbers given to you by your service provider. -
Page 116: Fixed Dialling
Fixed Dialling This option lets you restrict outgoing calls on your Xda Venn to a limited list of numbers. You can limit calling to just the numbers that are included in the Fixed Dialling Number list or, if you prefer, allow those which begin with the same digit(s) as a phone number on the list. -
Page 117: Sounds
Copying a sound from your PC to your Xda Venn Once a sound file is on your Xda Venn, you can use it as a ringtone if you like. Sound files in .wav, .mid, mp3 or .wma formats can be used. -
Page 118: Profiles
TIP: To revert to the default profile settings, select a profile and press Menu > Reset to default. Changing the current profile If you have more than one profile on your Xda Venn, there is a simple way to switch to another profile. 1. On the home screen, use the [ ] to select Profile >... -
Page 119: Clock And Alarm
You can turn the power off to all your wireless connections in one go. This is a quick way to preserve battery power or to prepare your Xda Venn for a flight. 1. On the home screen, press Start > All Programs > More > Settings > Connections. -
Page 120: Creating A Gprs Connection
Creating a GPRS connection Every network connection is different. You should gather all of the relevant information or network settings you need before starting this process. 1. On the home screen, press Start > All Programs > More > Settings > Connections. 2. -
Page 121: Creating A Vpn Connection
Creating a VPN connection Every network connection is different. You should gather all the relevant information or network settings you need before starting this process. 1. On the home screen, press Start > All Programs > More > Settings > Connections. 2. -
Page 122: Changing An Intranet Url
ActiveSync® connection. Enrolling in a domain Enrolling in a domain will connect your Xda Venn with company resources. 1. On the home screen, press Start > All Programs > More >Settings. 2. Press Connections > Domain Enroll. -
Page 123: Security
Security Your Xda Venn has several easy-to-use security features. You can enable the Device Lock or security certificates such as SSL. To enable the Device Lock 1. On the home screen, press Start > All Programs > More. 2. Select Settings > [OK]. -
Page 124: Changing The Sim Pin
Changing the SIM PIN This function will only be displayed when the SIM PIN is set to enable. 1. On the home screen, press the Start > All Programs > More. 2. Select Settings > Security > Change SIM PIN. 3. -
Page 125: Deleting A Security Certificate
Deleting a security certificate Be careful when deleting certificates: select only the one you intend to delete. Root certificates should only be deleted when you are certain you do not need that security on the phone. 1. On the home screen, press Start > All Programs > More. 2. -
Page 126: Removing Programs
Removing Programs You can remove programs that have been added to the phone at any time. Be sure to select the right program before removing it. 1. On the home screen, press the Start > All Programs > More. 2. Select Settings > OK. 3. -
Page 127: Accessibility
Accessibility The accessibility settings will determine the size of the text and characters, the time outs, call alerts, and volumes on the phone. 1. On the home screen, press Start > All Programs > More. 2. Select Settings > [OK]. 3. -
Page 128: About
About You can use this setting to see important information about your phone, such as the Windows® Mobile® version and software version. 1. On the home screen, press Start > All Programs > More. 2. Select Settings > [OK]. 3. Select More... > [OK] > About. Device Name Your phone uses this information to identify itself to other devices. -
Page 129: Customer Feedback
Customer Feedback If you would like to participate in our Customer Experience Improvement Program, please enable the Customer Feedback reporting setting. 1. On the home screen, press Start > All Programs > More. 2. Select Settings > [OK]. 3. Select More... > [OK] > Customer Feedback. Windows®... -
Page 130: Section 13 Games
Section 13 Games Your Xda Venn includes the following games: Bubble Breaker • Solitaire... -
Page 131: Bubble Breaker
Bubble Breaker How Bubble Breaker works Bubble Breaker is easy to learn, yet difficult to master. The objective is to align similar bubbles to form large blocks of bubbles before bursting them. The more bubbles you have in the block before they’re burst, the more points you collect. -
Page 132: Viewing Bubble Breaker Statistics
Viewing Bubble Breaker statistics Bubble Breaker records your statistics for each playing style. 1. Press Menu > Statistics. • Games: The total number of games played. • Average: The average score across all games played in that style. • High: The high score for the particular style. •... -
Page 133: Section 14 Additional Safety Information
Section 14 Additional Safety Information This section covers some additional safety guidelines and precautions to follow when using and, finally, disposing of your phone. Please make sure you’re aware of them before you start. WEEE Notice • SAR Information • Safety Information for Battery Usage Declaration of Conformity (R&TTE) -
Page 134: Weee Notice
WEEE Notice The Directive on Waste Electrical and Electronic Equipment (WEEE), which came into force as European law on 13th February 2003, resulted in a major change in the treatment of electrical equipment at end-of-life. The purpose of this Directive is, as a first priority, the prevention of WEEE, and in addition, to promote the reuse, recycling and other forms of recovery of such wastes so as to reduce disposal. -
Page 135: Safety Information For Battery Usage
Safety Information for Battery Usage • Do not dismantle or open, crush, bend or deform, puncture or shred. • Do not modify or remanufacture, attempt to insert foreign objects into the battery, immerse or expose to water or other liquids, expose to fire, explosion or other hazards. •... -
Page 136: Declaration Of Conformity (R&Tte)
Declaration of Conformity (R&TTE) We, Pantech Co.,LTD. declare under our sole responsibility that the product Product Name: Xda Venn Product Type: GSM phone to which this declaration relates, is in conformity with the following standards and/or other normative documents. SAFETY EN 60950 – 1 : 2001 + A11 : 2004 EN 301 489 –...
Need help?
Do you have a question about the Xda Venn and is the answer not in the manual?
Questions and answers