
Related Manuals for O2 XDA FLAME


Summary of Contents for O2 XDA FLAME
- Page 1 Chapter 1 Before using your O Xda Flame What’s in the box? Familiarizing yourself with your O Xda Flame Features LED status Display information...
-
Page 2: Before Using Your O
Xda Flame 1.1 What’s in the box? Thank you for selecting the O Xda Flame. Please check if your package comes with the following items. If any of them is missing, please contact your retailer. • Universal AC adapter with... - Page 3 1.2 Familiarizing yourself with your O Xda Flame Item Description Press and hold to record a voice note. Press and release Record immediately to access Notes. To project image to TV or projector, connect the plug and play TV TV Out connector.
- Page 4 Press to launch the camera function and take a picture or high Camera & Video key quality video. Press here with the stylus to soft reset your O Xda Flame. For Soft reset information about hard reset, please see 2.11 Resetting your O Xda Flame.
- Page 5 Item Description Self-portrait mirror The preview mirror for self-portrait. Flash light White LED strobe flash Battery cover To remove or replace battery, push and slide out the battery cover. The CMOS camera supports 2 mega-pixel resolution with auto- Camera lens focus function for high quality color photos or high quality video recording when switched to video mode.
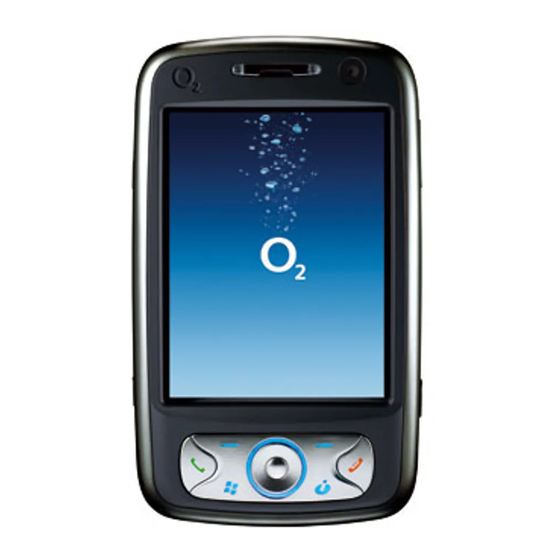
- Page 6 1.3 Features Like a standard cell phone, your O Xda Flame supports basic dialing features. However, it also integrates Personal Digital Assistant (PDA) capability. The following section provides more information about the phone’s features: • Touchscreen: 3.6” TFT LCD display with 65536 effective colors . (Hardware supports 262K colors).
-
Page 7: Led Status
1.4 LED Status The O Xda Flame has a LED light that varies in color depending on the status of the phone. The colors of the LED will vary depending upon whether or not the GSM network is available. Missed calls, unread messages and low battery condition statuses are given priority over the status of Wireless LAN and Bluetooth, for all of these conditions the LED blinks Amber ( a brighter amber for low battery). -
Page 8: Display Information
1.5 Display information Windows Start menu Tap on the Windows Start menu on the top The screen displays the following left of the screen to bring up a menu. To information: return to the Today screen at any time, Tap Start menu Status &... - Page 9 Start menu area Tap Start to bring up a list of menu options. Description Quick access to a program. Recently accessed programs. Access program folder. Please refer to the following Programs table for a detailed program list. Device settings. Please refer to the following Settings table for a detailed setting list. Help information.
- Page 10 Programs Your O2 Xda Flame contains a list of programs, allowing you to get the most out of your phone. Icons Programs Description Games Provides games such as Bubblebreaker and Solitaire. Synchronizes information between your O2 Xda Flame and a...
- Page 11 Icons Programs Description Modem Link Links your O2 Xda Flame to a modem. Notes Creates notes, drawings, and recordings manually or by typing. AutoInstaller User can choose to install O selected programs. Connect to the O website and downloads the latest software Connect updates.
- Page 12 Icons Programs Description Contains handy traveling information such as time zones, area WorldMate codes, currency conversions and clothing sizes (Option to install in O AutoInstaller). Internet Sharing Allows the user to share internet access Remote Control Turns the device into a multifunction remote control. WiFi Turns on / off wireless functionality.
-
Page 13: Settings Menu
Assigns an application program to a hardware button. Input Sets up the input method option of your O Xda Flame. Restricts access to your O Xda Flame and prevents Lock unauthorized use. Menus Customizes the Start menu list. Provides complete MSN settings such as passwords, Hotmail MSN Options account, and Messenger. - Page 14 System Icons Settings Description About Shows important information relating to your O Xda Flame. Configures the backlight settings and adjusts the brightness Backlight level to save power. Certificates Information about the certificate issuer and expiration date. Clock & Alarms Sets the time and alarm.
- Page 15 Connections Icons Settings Description Beam Sets your O Xda Flame to receive or disables IrDA signals. Bluetooth Sets up Bluetooth connection. Connections Configures connection settings. Wi-F Configures Wireless Networks. USB to PC Enables advanced network functionality. Activates phone, GPRS, Bluetooth and Wireless Wireless Manager LAN.
- Page 16 Status and icons area This area indicates the application or menu you are using: When you go from the Today screen to the Calendar screen, the area changes from Calendar screen, the area changes from Calendar Start to Calendar. The icon display is on the top right of the Today screen. Please refer to the following table for some of the more frequently encountered icons.
- Page 17 Type Icons Description GPRS in range GPRS connected Radio connected / Radio off No radio service / Radio searching GPRS synchronisation GPRS signal strength 3G in range 3G synchronisation 3G Connected Synchronisation Synchronisation Error Connection Bluetooth Wireless LAN on WiFi connected Wireless LAN in range Data connected Data disconected...
- Page 18 Please note Your O Xda Flame is designed to notify in a number of ways including an alert tone, vibration, an icon on the screen or a fl ash of light. To choose reminder types and sounds for your O...
-
Page 19: Main Display
Main Display The main body of the Today screen displays the following items for quick access and convenient viewing: Function Description Displays date and time. Tap the phone icon to set divert Divert Profile profile Wireless Manager Tap to control wireless connections. Owner Information Tap to change the owner details. - Page 20 To lock/unlock your O Xda Flame: 1. Tap Device Unlocked to lock the phone; the screen will now display Device locked. 2. Tap Unlock on the command bar to unlock the phone and tap the Unlock button on the screen again to confi rm.
- Page 21 Chapter 2 Getting started Inserting the battery & SIM card SIM card Battery Switching the device on or off Screen tapping and Calibration Screen Orientation Entering information Recording a message Data backup 2.10 Memory expansion 2.11 Resetting your O Xda Flame...
-
Page 22: Getting Started
2. Getting started 3. Insert the SIM card with the metallic part facing down and the clipped corner Before start using your O Xda Flame, you to the left. need a fully charged battery and a valid SIM card. 2.1 Inserting the battery &... - Page 23 SIM card is inserted. Your O approval given to the phone. Unplug Xda Flame will display a warning message if the charger from the power supply the SIM card is not inserted properly.
-
Page 24: Charging The Battery
Flame to your PC’s USB port with the and the charger plug into the connector USB cable supplied in your package of your O2 Xda Flame. Note the as shown below. orientation when plugged in. Please note •... -
Page 25: Checking The Battery
2.5 Screen tapping and Calibration When you fi rst start up your O Xda Flame, you will be asked to calibrate the screen by tapping the center of a cross with your stylus as it moves around the screen. This process ensures that, when you tap the screen with your stylus, the tapped item is activated. -
Page 26: Screen Orientation
The Portrait mode allows you to get a better view or a better operation of certain programs on your O Xda Flame, while Landscape may be optimal for viewing longer text fi les. 2.7 Entering information You can enter information on your O Xda Flame in the following ways: •... - Page 27 When you tap the displayed word, it is automatically inserted into your text at the insertion point. The more you use your O Xda Flame, the more words it learns to anticipate. Please note To change the keyboard size displayed on the screen, tap the arrow beside the keyboard icon and select Options.
-
Page 28: Letter Recognizer
Letter Recognizer To punctuate in Transcriber: 1. Tap the keyboard button on the tool bar. With the Letter Recognizer, you can write letters using the stylus just as you would on 2. Tap the desired punctuation. paper. 3. Tap the keyboard button again to hide the 1. -
Page 29: Writing On The Screen
Writing on the screen 4. Write the letters of a word closely and leave big gaps between words so that the In any program that accepts writing, such as device can easily tell where words begin Notes, and in the Notes tab in Calendar, and end. -
Page 30: Recording A Message
fi rst button from the top on the left side a recording in a written note. If you want to of your O Xda Flame. include the recording in a note, open the note fi rst. To quickly create a recording, hold down the Record button. -
Page 31: Data Backup
Xda Flame; in opened programs may be lost. Your O ActiveSync will start automatically. Xda Flame returns to the same status as the last time you used it. However, a hard 2.10 Memory expansion reset turns the battery off, returns the... - Page 32 Xda Flame was fi rst delivered to you. Press and hold the power button, and then use the stylus to press the soft reset button at the same time.
- Page 33 Chapter 3 Settings Personal settings System settings Connection settings...
- Page 34 3. Settings The following is an overview of the Settings menu. Personal Buttons Input Menus MSN Options Owner Information Lock Sounds & Phone Today Notifications System About Backlight Certificates Clock & Alarms Error Reporting Memory Power Regional Settings Remove Programs Screen Device Information In4Mobility Fee...
-
Page 35: Personal Settings
3.1 Personal settings Buttons To customize the program hardware buttons to open your most frequently used programs: 1. Tap the Start > Settings > the Personal tab > Buttons > the Program Buttons tab. 2. Under Select a Button, tap the button you want to assign to a program and then select a program from Assign a Program. -
Page 36: Msn Options
3. On the Notes tab, enter any additional text you want to display when the device is turned on, such as: “Welcome!’ 4. On the Options tab, select which message will display when your O Xda Flame is turned Lock A strong password must have at least 7 characters that are a combination of uppercase and lowercase letters, numbers, and punctuation. -
Page 37: Phone Tab
Phone You can easily view and change settings, such as ring type, ring tone and keypad tone. You can also protect your phone from unauthorized use. There are two ways to change phone settings: • Tap Start > Settings > the Personal tab > Phone. To change phone settings from the Phone keypad, tap Menu >... -
Page 38: Services Tab
With network settings, you can view available networks, determine the order in which your O Xda Flame accesses another network (if the current one is unavailable) and specify whether you want to change networks manually or automatically. The current network will remain active until you change it, lose your signal, or change your SIM card. - Page 39 Sounds & Notifi cation Turning off sounds and notifi cations helps conserve battery power. To change the ring type and volume: 1. Tap Start > Settings > the Personal tab > Sounds & Notifi cations. 2. On the Sounds tab, you can select when to play a sound. 3.
-
Page 40: System Settings
Tap the More tab to display the clock in the title bar of all programs. Please note To change the way the date or time is displayed on your O Xda Flame, go to Regional Settings by tapping Start > Settings > the System tab > Regional Settings. Device Information This feature displays system information. - Page 41 Under the Programs tab, you can choose the port your phone uses for GPS data. Under the Hardware tab, you can specify the hardware port to which your GPS device is connected. Settings include GPS hardware port and Baud rate. Under the Access tab, you can activate Manage GPS automatically.
-
Page 42: Regional Settings
Chapter 1. Before using your O Chapter 1. Before using your O Chapter 1. Before using your O Xda Flame Xda Flame Under the Clear Type tab, you can select Enable Clear Type to smooth the edges of screen fonts for many programs. -
Page 43: Connection Settings
3.3 Connection settings For detailed information, please refer to Chapter 10. Wireless Connectivity... - Page 44 Chapter 4 Basic phone functions Making a call Ending a call Receiving/Ignoring a call International calls Video telephony Emergency calls In-call options Contact information Device security...
-
Page 45: Basic Phone Functions
4. Basic phone functions Like a standard mobile phone, you can use your O Xda Flame to make / receive calls and send SMS messages. You can also take notes while talking, dial directly from Contacts, and easily transfer contacts between your SIM card and your O Xda Flame. - Page 46 Turning off the power of you can unblock it with the PIN Unblocking your O Xda Flame doesn’t turn off the Key (PUK) from the Network Operator. phone function. You must disconnect the connection to the wireless network.
- Page 47 While Flying You can turn off the wireless connections while still using the O Xda Flame for other purposes. 1. Tap Settings in the Start menu. 2. Tap the Connections tab > Wireless Manager. 3. Tap All Wireless Off; when all buttons/ icons are colorless, wireless functions are off.
-
Page 48: Making A Call
4.1 Making a call With your O Xda Flame, you can make a call by entering the phone number, or selecting a number from Contacts, Speed Dial, and Call History. Making a call from the Phone Dialler screen 1. Press... -
Page 49: Making A Call From Contacts
Making a call from Contacts 1. Tap Contacts on the Today screen or Phone Dialler screen. 2. Tap the entry, and then tap Call or Call Mobile. To view/search the contact list: When you access Contacts, you see a contact list. You may view contacts in the following ways: •... -
Page 50: Making A Call From Call History
Making a call from Call History: 1. In the Phone Dialler screen, tap Call History. 2. Find a number from different Call Histories by tapping Menu > Filter and selecting Filter and selecting Filter Calls, Missed, Outgoing, Incoming, and By Caller. 3. -
Page 51: Ending A Call
4.4 International calls is your voice mailbox. When you insert your SIM card into your O Xda Flame, it When you make an international call from will automatically detect and set the voice any country, you need to insert a special mailbox number of your network operator. -
Page 52: Video Telephony
4.5 Video Telephony Tapping the Video Call button allows you to communicate with other O Xda Flame users via the camera phone. Item Description Call Duration Displays the length of the video call. Callers Image Displays the users image Brightness Use + and - to increase or decrease the screen brightness. -
Page 53: Emergency Calls
If your O Xda Flame has been put into Device Lock mode, you have to unlock the device fi rst before placing an emergency call. (Refer to Page ??, Section ?) 1. Press the “Unlock” on Left soft key. -
Page 54: In-Call Options
1. During the call, press and hold the or tap the Menu tab > Turn Speakerphone On. 2. To turn the speakerphone off, tap the feature again. Warning To avoid damaging your hearing, do not hold your O Xda Flame against your ear when in speakerphone mode. -
Page 55: Adding A Note
To make a conference call: 1. In either of the above two situations, tap Conference. 2. If the conference connection is successful, the word Conference will appear at the top of the Phone Dialler screen. 3. To add additional people to your conference call, tap Hold to enter the new number and then tap Resume to return and continue. -
Page 56: Contact Information
Contacts can be imported in the following ways: • From your SIM card: Use your SIM card in your O Xda Flame and another device; while using the other device you create one or more new contacts on the SIM card. •... -
Page 57: Call History
(for whom you have previously assigned a photo in Photo Contacts) calls you, that photo will appear on your O Xda Flame’s incoming call screen. Use the rich set of features provided to have the photos displayed with the size, position and animated template you want. - Page 58 3. Scroll to the Picture fi eld and tap Select a picture. 4. Tap on a desired picture and it will be assigned to the entry. (To delete the picture from the Contacts edit screen tap Menu tab > Remove Picture). Alternatively, you can assign a picture to a contact.
-
Page 59: Device Security
4.9 Device security You can guarantee your phone’s security by making use of the following security features: Device lock The keypad lock turns off keypad functionality. This is a helpful feature when your O Flame is turned off and in your pocket, when you don’t want it pressed accidentally. 1. - Page 60 This phone lock feature protects your O Xda Flame from unauthorized access. When the phone lock is activated, your O Xda Flame will automatically lock after a specifi ed period of inactivity. A screen will be displayed requiring your O Xda Flame’s “lock password” to be entered before access is granted.
-
Page 61: Locking Your Sim Card
Locking your SIM card You can protect your O Xda Flame from unauthorized use by assigning a PIN (Personal Identifi cation Number). Your fi rst PIN is assigned by the Network Operator. 1. Tap Start > Phone or alternatively tap the Phone button on the Today screen. - Page 62 Chapter 5 Messaging Text Multimedia messages (MMS) Voicemail E-mail Pocket MSN...
- Page 63 Xda Flame by either synchronizing your Outlook E-mails or connecting to the Internet. • IMS (Instant Messaging service): Your O Xda Flame is equipped with the Pocket MSN application. To send instant messages, you need to connect to the Internet.
-
Page 64: Write A Text Message
5.1 Text Write a text message To create a text message: 1. Tap Start > Messaging and select the Inbox folder. 2. Tap the New tab and add recipients in the To: fi eld. Alternatively, tap the Menu tab > Add Recipient. - Page 65 3. Tap on the edit screen to start editing. For the entry method, please refer to ?? Entering information. 4. To add predefi ned text, tap Menu > My Text and select a text. 5. When you fi nish editing text, you can start the spell check by tapping Menu >...
-
Page 66: Read Messages
Read messages Text messages are automatically received when your phone is turned on. Otherwise, messages are held by your network operator until the next time your phone is connected to the operator network. To read text message(s): 1. Tap Start > Messaging. 2. - Page 67 Tap Menu to access more options: Tap Go To to switch your current • account to Text Messages, Outlook E- Mail, Hotmail, MMS and My Outllook E-mail. • Tap Tools to Sort By, Manage Folders, Empty Deleted Items, Clear “Text Messages”, create a New Account, and view Options (change settings for Accounts, Message, Address, and...
- Page 68 Settings Text Message settings allow you to customize Accounts, Message, Address and Storage. To access available options tap Menu > Tools > Options Accounts: Tap an account to change • settings. For example, tap Text Messages to change Request delivery notifi...
-
Page 69: Multimedia Messages (Mms)
5.2 Multimedia messages (MMS) Your O Xda Flame allows you to create and share your own MMS messages (with photos, videos, text, and audio) with your friends and family. You can even use the O Xda Flame’s... -
Page 70: Create An Mms Message
Launching the MMS composer screen You can access MMS directly by tapping Start > Messaging and selecting the MMS folder. Your device also provides several ways to launch the MMS composer screen: • From Pictures & Photos: Select any picture in the My Pictures folder, tap Menu > Send and select an account—MMS. - Page 71 Enter the recipient’s address To: and the Subject of the message. Scroll up to view the Bcc and Cc fi elds. Tap Menu to view more options: tap Insert Picture/Video or Menu > Insert > Picture to access the image selection screen.
- Page 72 Tap Menu to get more editing options. For details, please refer to the following MMS menu options. The MMS composition screen menu includes the following options: Items Description Add Recipient Add a new contact from your Contacts list. This option helps you search for the names beginning with letters Check Names entered in the To, Bcc, or Cc fields.
- Page 73 Items Description A list of pre-defined text that can be inserted into your MMS message. My Text Remove Recipient/ Depending on the cursor location, the Remove item varies. If the cursor Subject, Picture/ is on the Insert Audio field this item shows Remove Audio. Video/Audio/Text) You can create/delete slides in your message, navigate between the next and previous slides, or specify the display duration of each slide.
- Page 74 MMS folder options: In each message box, you can tap and hold an individual message to see various options. Items Description Delete the selected message. The deleted message will be stored in the Delete Deleted Items folder. Reply only to the selected message’s sender. After selecting this option, you are taken to the message composition page where you can Reply compose a message as a reply.
- Page 75 Items Description This option helps you to Sort By, Manage Folders, Empty Deleted Items, Clear “MMS”, create New Account, and access more features. • Sort by: Choose how to view the MMS messages by Message Type, From, Received, and Subject.: •...
- Page 76 Read MMS messages You have several options when viewing a message: 1. Use playback controls (Play/Pause, Stop) to view a message. You can pause it anytime. 2. Tap Objects to see a list of fi les. If you want to save a particular fi le, tap it and then choose Save from the Tools menu.
-
Page 77: Setting Up An Account
5.4 E-mail The Outlook E-mail account on your O Xda Flame is used to store messages that you send and receive through synchronization with a PC. Account names appear when you open the folder list, located on the left, under the navigation bar, in the message list view. - Page 78 Tap Menu > Tools > New Account and set up an account. The E-mail Setup screen will prompt you to fi ll in the necessary information to complete the setup. 5 From the drop down menu select Other (POP3/IMAP) Fill in your E-mail address and tap Next.
- Page 79 The E-mail Setup will attempt to connect your O Xda Flame to your E-mail server and automatically download the necessary connection settings. If the auto confi guration is unsuccessful, contact your ISP or network administrator. If you know your E-mail settings, press Next to proceed.
-
Page 80: Downloading Messages From A Server
New messages are downloaded to your O Xda Flame Inbox folder, messages in your O Xda Flame Outbox folder are sent, and messages deleted from the server are removed from your O Xda Flame Inbox. Tap a message in the message list to open it. - Page 81 E-mail viewing screen options: After selecting an E-mail from an account, tap Menu to access the following options: Items Description Delete the selected message. The deleted message will be stored in the Delete Deleted Items folder. Reply to only the selected message’s sender. After selecting this option, you are taken to the message composition page where you can Reply compose a message as a reply.
-
Page 82: Receiving Attachments
Receiving attachments An attachment sent with an E-mail message or downloaded from the server appears as an icon at the bottom of the message in its own window panel. Tapping the attachment icon opens the attachment if it is fully downloaded. You can mark an attachment for downloading (IMAP4 account only) the next time you connect. -
Page 83: Creating An E-Mail
Creating an E-mail 1. Tap Start > Messaging and select Outlook E-Mail or the desired E-mail account. For account menu options, please refer to the following section. 2. Tap New. Enter the E-mail address of one or more recipients, separating them with a semicolon. - Page 84 Account menu options: When you select an account, tap Menu to access the following options: Items Description Delete the selected message. The deleted message will be stored in the Delete Deleted Items folder. Reply to only the selected message’s sender. After selecting this option, you are taken to the message composition page where you can Reply compose a message as a reply.
- Page 85 Items Description This option helps you to Sort By, Manage Folders, Empty Deleted Items, Clear “Hotmail”, create New Account, and access more features. • Sort By: Choose between Message Type, From, Received and Subject • Manage Folders: On selecting this option, you get the list of MMS folders where you can create new folders, rename, delete and view folder options.
-
Page 86: Managing Messages And Folders
Managing messages and folders or a PC. This synchronization of folders occurs whenever you connect to your mail Each E-mail account and text message server, create new folders, or rename/delete account has its own folder hierarchy with folders when connected. fi... - Page 87 • Set up an account on MSN Messenger. • Sign in to MSN Messenger. Setting up an account Before you can use MSN Messenger, you must set up the instant messaging account(s) to use. For MSN Messenger service, you must have a MSN Messenger service, you must have a MSN Messenger Microsoft Passport or Hotmail account.
-
Page 88: Msn Messenger
MSN Messenger The hotmail mail inbox behaves in the same way as all other e-mail in boxes. Signing in 1. To use MSN Messenger Service, set up a connection to the Internet; to use Exchange Instant Messaging, set up a connection to your corporate network. -
Page 89: Msn Hotmail
MSN Hotmail MSN Mobile Home The hotmail mail inbox behaves in the same Loads Internet explorer and displays the mobile. way as all other e-mail in boxes. (See section msn.com/pocketpc website. 6.4) 1. Tap the links for further infromation. Pocket MSN Help Displays the help file of MSN Messenger Compose Hotmail 1.
Need help?
Do you have a question about the XDA FLAME and is the answer not in the manual?
Questions and answers