Table of Contents
Advertisement
Quick Links
Download this manual
See also:
User Manual
o2.co.uk
Telefónica O2 UK Limited, 260 Bath Road, Slough, Berks, SL1 4DX.
Registered in England No.1743099. Registered office as above.
© Telefónica O2 UK Limited 2009. Correct at time of going to press (04/09).
O2CN887N 6149VCCP04/09 04/10
6149 Mustang Guide QSG.indd 1-2
00
00
O2 ODM
O2 ODM
GC
GC
30 04 09
30 04 09
127x127
127x127
ARTWORK
Client Amend Yes
Quick Start Guide
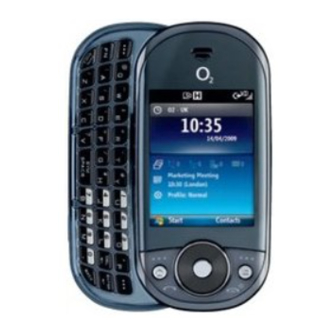
Xda Venn
–
–
3mm
3mm
100
100
No
No
Artwork
Simp
Med
We're better, connected
Comp
1/5/09 09:45:41
Advertisement
Table of Contents

Subscribe to Our Youtube Channel
Related Manuals for O2 Xda Venn


Summary of Contents for O2 Xda Venn
- Page 1 Telefónica O2 UK Limited, 260 Bath Road, Slough, Berks, SL1 4DX. Registered in England No.1743099. Registered office as above. © Telefónica O2 UK Limited 2009. Correct at time of going to press (04/09). O2CN887N 6149VCCP04/09 04/10 We’re better, connected 6149 Mustang Guide QSG.indd 1-2...
-
Page 2: Table Of Contents
Contents Getting to know your Xda Venn Organising your contacts This quick start guide will help you get your Xda Venn up and running Adding a contact What’s in the box? as smoothly as possible. This Smartphone makes life easier on the go, Inserting your microSD™... -
Page 3: Getting To Know Your Xda Venn
• Carefully follow the step-by-step instructions in this guide to set up your Smartphone. • Review the Full User Manual (by selecting the appropriate link) on the Getting Started CD to learn about the full power of the Xda Venn. What’s in the box? -
Page 4: Inserting Your Microsd™ Card
A microSD™ card is a removable memory card that will increase the storage capacity of your Xda Venn by up to 32GB. To insert a microSD™ card into your Smartphone, first remove the cover on the bottom where it reads microSD™ . Then, insert the narrow end of the microSD™... -
Page 5: Inserting Your Sim Card
Inserting your sim card Charging the battery Before you start using your Xda Venn you’ll need to insert your sim card. This contains To charge the battery, first plug the AC travel charger your mobile phone number. Make sure the Xda Venn is turned off. Remove the back into a standard AC wall outlet. -
Page 6: Changing Backlight Settings
Changing backlight settings Opening your Xda Venn Press the LEFT SOFT key to enter the Start menu. Select Settings, then select Power Management. Scroll down to Display time out, or Backlight time out on battery. Press the LEFT RIGHT side of the... -
Page 7: Learning To Navigate & Type
Navigaton key Left soft key Right soft key Function key Enter key CAPS/Shift key Back key 6149 Mustang Guide QSG.indd 9-10 1/5/09 09:46:54 O2 ODM O2 ODM – – 30 04 09 30 04 09 127x127 127x127 ARTWORK Client Amend Yes... -
Page 8: Home Screen
• Full wireless 3G data coverage. • Full wireless coverage (no data coverage). Please refer to the Full User Manual to see the status indicators and their symbols. 6149 Mustang Guide QSG.indd 11-12 1/5/09 09:46:58 O2 ODM O2 ODM – – 30 04 09... -
Page 9: Finding Applications
Camera, Speed Dial, and Voice Command. Select Contacts to view your contact list or add a new contact. 6149 Mustang Guide QSG.indd 13-14 1/5/09 09:47:02 O2 ODM O2 ODM – – 30 04 09 30 04 09 127x127... -
Page 10: Making Your First Call
Note: to turn the speakerphone on or off during a call, press and hold the SEND key. Setting up voicemail 1. Press and hold the key on your Xda Venn to connect to the voicemail system. 2. Create your password. 3. Record your name. 4. Record a greeting. Checking voicemail 1. -
Page 11: Organising Your Contacts
Microsoft Outlook on 5. Select Add to Speed Dial. your computer. 6149 Mustang Guide QSG.indd 17-18 1/5/09 09:47:08 O2 ODM O2 ODM – – 30 04 09 30 04 09 127x127... -
Page 12: Using Text & Picture Messaging
4. To reply, enter your message then select Send. Menu and then select Close. 5. To end a conversation, select 6149 Mustang Guide QSG.indd 19-20 1/5/09 09:47:12 O2 ODM O2 ODM – – 30 04 09 30 04 09 127x127... -
Page 13: Taking & Sending A Picture
1. Press and hold the CAMERA key on the bottom right hand side of your 1. Press and hold the CAMERA key on the bottom right hand side of your Xda Venn. Xda Venn. RIGHT SOFT key to enter the menu, and select Camcorder. -
Page 14: Browsing The Internet
5. Select 5. Confirm or change the name and address, then select a folder. 6. In the text field that appears, type the URL (e.g. www.o2.co.uk) that you wish to 6. Select to store the bookmark and return to the web page. -
Page 15: Personalising Your Xda Venn
• When prompted, type the passkey for the Bluetooth® enabled device on your Xda Venn, and press OK. • Once the Bluetooth® is paired with your Xda Venn, you are ready to use Bluetooth®. 6149 Mustang Guide QSG.indd 25-26 1/5/09 09:47:17... - Page 16 • Select the type of Bluetooth® device you wish to connect to. • Select the name of the previously paired Bluetooth® device. • Once the Bluetooth® is paired with your Xda Venn, you are ready to use Bluetooth®. 6149 Mustang Guide QSG.indd 27-28 1/5/09 09:47:23 O2 ODM –...
Need help?
Do you have a question about the Xda Venn and is the answer not in the manual?
Questions and answers