Table of Contents
Advertisement
•¦ ‚² Žg —p ' O‚É‚± ‚Ì •à –¾ •' ‚ð —Ç ‚ - ‚¨ "Ç ‚Ý‚É‚È‚è •[ •ª ‚É—• ‰ ð ‚ µ ‚Ä‚- ‚¾‚³ ‚¢ •B
Before use, please carefully read the explanations!
THE FINEST RADIO CONTROL MODELS
'g —§ • ^ Žæ ˆµ•à –¾ •'
INSTRUCTION MANUAL
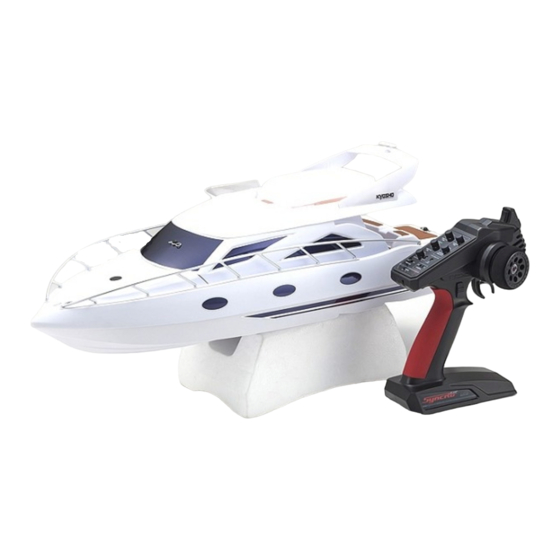
RADIO CONTROLLED ELECTRIC POWERED CRUISER
–Ú •@ ŽŸ •@ INDEX
•œ ƒLƒbƒg‚Ì '¼‚É‚» ‚ë ‚¦ ‚é •¨
•@ REQUIRED FOR OPERATION
•œ 'g —§ ‚ Ä 'O‚Ì '• ˆÓ
•@ BEFORE YOU BEGIN
•œ ƒvƒ• ƒ| ‚Ì •€ "õ
RADIO PREPARATION
•œ –{ 'Ì ‚Ì 'g —§ ‚ Ä
•@ ASSEMBLY
•œ ƒj ƒJƒhƒoƒbƒeƒŠ •[ ‚Ì Žæ ˆµ ‚¢ ‚Ì '• ˆÓ
•@ PRECAUTIONS WHEN USING A NI-CD BATTERY
•œ "d"® ƒ{•[ ƒg‚Ì Žæ ˆµ‚¢
•@ HOW TO HANDLE ELECTRIC POWERED BOATS
•œ ƒX ƒyƒA ƒp•[ ƒc•EƒI ƒvƒV ƒ‡ƒ" ƒp•[ ƒcƒŠ ƒX ƒg
•@ SPARE PARTS & OPTIONAL PARTS
ˆÀ'S‚Ì ‚½‚ß ‚Ì '• ˆÓŽ–•€
‚± ‚Ì –³ •ü '€ •c –Í Œ^ ‚ Í Šß ‹ï ‚Å ‚Í ‚ ‚è ‚Ü‚¹ ‚ñ !
•œ‚± ‚Ì •¤ •i ‚Í •‚ ‚¢ •« "\ ‚ð "- Šö ‚· ‚é ‚æ‚¤ ‚É•ÝŒv ‚ ³ ‚ê ‚Ä‚¢ ‚Ü‚· ‚Ì ‚Å'g —§ ‚ Ä‚É•s Šµ ‚ê ‚È•û
‚Í •A–Í Œ^ ‚ ð —Ç ‚ - 'm‚Á‚Ä‚¢ ‚é •l ‚ɃA ƒhƒoƒC ƒX ‚ð Žó‚¯ Šm ŽÀ ‚É'g —§ ‚ Ä‚Ä‚- ‚¾‚³ ‚¢ •B
•œ'g —§ ‚ Ä•ì ‹Æ ‚Í •A—c Ž ™ ‚Ì Žè‚Ì ‚Æ‚Ç‚©‚È‚¢ •Š‚Å•s ‚Á‚Ä‚- ‚¾‚³ ‚¢ •B
•œ"®‚©‚µ ‚ÄŠy‚µ ‚Þ•ê •Š‚Í –œ ˆê‚Ì Ž–ŒÌ ‚ ð •l ‚¦ ‚Ä•AˆÀ'S‚ð Šm "F‚µ ‚Ä‚©‚ç •Ó"C‚ð ‚à ‚Á‚Ä‚¨ Šy
‚µ ‚Ý‚- ‚¾‚³ ‚¢ •B
•œ'g —§ ‚ Ä‚½Œã ‚ à •à –¾ •' ‚ª ‚¢ ‚Â‚Å‚à Œ© ‚ ç ‚ê ‚é ‚æ‚¤ ‚É'å •Ø‚É•ÛŠÇ ‚µ ‚Ä‚- ‚¾‚³ ‚¢ •B
¥•s —v ‚ É ‚È ‚Á ‚½ƒj ƒJƒh"d 'r ‚Í •A‹M•d ‚È Ž' Œ¹ ‚ ð Žç‚é ‚½‚ß ‚É "p Šü ‚µ ‚È ‚¢ ‚Å ƒŠ ƒTƒC ƒN ƒ‹ ‹¦ —Í " X‚Ö‚¨ Ž• ‚¿ ‰º ‚ ³ ‚¢ •B
¥The product you have purchased is powered by a rechargeable battery. The battery is recyclable. At the end of its useful life, under
various national / state and local laws, it may be illegal to dispose of this battery into the municipal waste stream. Check with your local
solid waste officials for details in your area for recycling options or proper disposal.
Ni-Cd
•¦ •» •i ‰ü — Ç ‚ Ì ‚½‚ß •A—\ • • ‚È‚- Žd —l ‚ ð •Ï •X‚· ‚é •ê •‡ ‚ª ‚ ‚è ‚Ü‚· •B*SPECIFICATIONS ARE SUBJECT TO CHANGE WITHOUT NOTICE.
© 1999 KYOSHO•^ ‹Ö–³ 'f "] •Ú•¡ •»
R
•œ
•œ
•œ
•œ
LENGTH : 630mm (25")
SAFETY PRECAUTIONS
This radio control model is not a toy.
First-time builders should seek the advice of experienced modellers before
commencing assembly and if they do not fully understand any part of the
construction.
Assemble this kit only in places out of children's reach!
Take enough safety precautions prior to operating this model. You are responsible
for this model's assembly and safe operation!
Always keep this instruction manual ready at hand for quick reference, even after
completing the assembly.
ƒA ƒgƒ‰ ƒ"ƒeƒB ƒI 600
2
2•` 3
3
4•` 21
22
23•` 24
24
No. 40881
Advertisement
Table of Contents

Related Manuals for Kyosho Atlantio 600


Summary of Contents for Kyosho Atlantio 600
-
Page 1: Instruction Manual
•¦ •» •i ‰ü — Ç ‚ Ì ‚½‚ß •A—\ • • ‚È‚- Žd —l ‚ ð •Ï •X‚· ‚é •ê •‡ ‚ª ‚ ‚è ‚Ü‚· •B*SPECIFICATIONS ARE SUBJECT TO CHANGE WITHOUT NOTICE. © 1999 KYOSHO•^ ‹Ö–³ ’f “] •Ú•¡ •»... -
Page 2: Required For Operation
Check all parts. If you find any defective or missing parts, contact your local dealer or our Kyosho Distributor. •à –¾ •‘ ‚ÉŽg ‚í ‚ê ‚Ä‚¢ ‚é ƒ}•[ ƒN Symbols used throughout the instruction manual, comprise: ‚ð... -
Page 3: Radio Preparation
2•j BEFORE YOU BEGIN (2) ‚± ‚Ì ƒLƒbƒg‚É ‚Í •AŒ` ‚ Ì ‚¿ ‚ª ‚¤ ƒr ƒX‚â ’· ‚³ ‚ª ‚¿ ‚ª ‚¤ ƒr ƒX TPƒr ƒX‚Í •A•” •i ‚É ƒl ƒW ‚ð •Ø‚è ‚È ‚ª ‚ç ‚µ ‚ß ‚ ‚¯ ‚é ƒr ƒX ‚ª... - Page 4 ƒ‰ ƒ“ ƒi •[ •t ƒvƒ‰ ƒp•[ ƒc”z ’u •} / ARRANGEMENT OF PLASTIC PARTS ON RUNNERS Die Kunststoffteile an den Spritzlingen / Nomenclature des grappes de pièces plastique Cƒp•[ ƒc C Parts Aƒp•[ ƒc A Parts Dƒp•[ ƒc D Parts Bƒp•[ ƒc B Parts •”...
-
Page 5: Upper Side
‘D‘ä Stand –Í —l ‚ Ì —L ‚ é –Ê •B Patterned side. ‘D‘Ì Hull ƒoƒŠ ‚ð ‚Æ ‚é •B Remove the flashing. ƒoƒŠ ‚ð ‚Æ ‚é •B Remove the flashing. ‘D‘Ì 1.5mm Hull 1.5mm < •ã –Ê > < Upper side >... - Page 6 ƒLƒƒƒr ƒ“ 1.5mm Cabin < •ã –Ê > 1.5mm < Upper side > 1.5mm < ‰º – Ê > < Lower side > ‘D‘Ì Hull ‚· ‚« ŠÔ ‚ª –³ ‚¢ —l ‚ É •Ú’… •Ü‚ð —¬ ‚ · •B Close gaps with CA adhesive.
- Page 7 “h‘• ƒX ƒvƒŒ •[ ƒJƒ‰ •[ ‚ð Žg—p ‚ · ‚é •ê •‡ •AŠÊ ‚Ì •à –¾ ‚ð —Ç ‚ - “Ç‚ñ ‚Å ‚- ‚¾‚³ ‚¢ •B Painting CAUTION: Before using Kyosho Spray Colors, always read the explanations! ’• ˆÓ...
- Page 8 ƒ• ƒJƒ{ ƒbƒN ƒX Radio Box ƒLƒƒƒbƒv ƒR •[ ƒhƒu•[ ƒc Cord Boots ƒA ƒ“ ƒeƒi ƒO ƒ• ƒ• ƒbƒg Antenna Grommet ƒ• ƒJƒ{ ƒbƒN ƒX Radio Box 9 ƒLƒƒƒbƒv 12 ƒt ƒŒ ƒLƒV ƒuƒ‹ ƒu•[ ƒ c•i L•j Flexible Boots (L) ƒ•...
- Page 9 ƒvƒ• ƒ| ‚Ì •à –¾ •‘ ‚ð ŽQ •l ‚É ƒR ƒl ƒN ƒ^•[ ‚ð •Ú‘± ‚· ‚é •B ƒ• ƒJƒ{ ƒbƒN ƒX Connect refer to radio instruction manual. Radio Box ƒXƒC ƒbƒ` Switch “d ’r ƒ{ ƒbƒN ƒX Battery Box ƒX ƒC ƒbƒ` Switch ‚Í...
- Page 10 ƒ• ƒJƒ{ ƒbƒN ƒX Radio Box ƒXƒs•[ ƒhƒR ƒ“ƒgƒ• •[ ƒ‹ƒXƒeƒBƒbƒN ’† —§ With the speed control stick in neutral. ƒI ƒt 0.5mm ƒXƒs•[ ƒhƒR ƒ“ƒgƒ• •[ ƒ‹ƒXƒeƒBƒbƒN ‘O•i With the speed control stick pushed up. ƒI ƒ“ 0.5mm‚Ì ‚· ‚« ŠÔ ‚ª •o —ˆ ‚ é ‚æ‚¤ ‚É ‚· ‚é •B Ensure a gap of 0.5mm.
- Page 11 ƒ• ƒJƒ{ ƒbƒN ƒX Radio Box ƒX ƒ| ƒ“ ƒW ƒe•[ ƒv•i ‘e –Ú •j Sponge Tape (Coarse type) ‚· ‚« ŠÔ ‚ª –³ ‚¢ —l ‚ É “\ ‚é •B Apply sponge tape around the entire rim, leaving no gaps. ƒ•...
- Page 12 ƒ• ƒJƒ{ ƒbƒN ƒX 30 8 x 3 x 3.5mm ƒJƒ‰ •[ 3 x 8mm TPƒr ƒX Collar Radio Box TP Screw •ã ‚©‚ç 5”Ô–Ú ‚Ì –Ú •· ‚É •ã ‚©‚ç 4”Ô–Ú ‚Ì –Ú •· ‚É •‡ ‚í ‚¹ ‚é •B •‡...
- Page 13 ƒ‚ •[ ƒ^•[ 4 x 4mm ƒZƒbƒgƒr ƒX 3 x 8mm TPƒr ƒX Set Screw TP Screw Motor ˜ZŠp ƒŒ ƒ“ ƒ` •i 2.0mm•j Hex Wrench (2.0mm) 4x4mm 3x8mm 4x4mm •½‚ç ‚È –Ê ‚É ƒZƒbƒgƒr ƒX 3x8mm ‚ð ŒÅ ’ è ‚· ‚é •B Firmly tighten the set screw onto the flat spot.
- Page 14 ƒ‰ ƒ_•[ ƒX ƒy•[ ƒT•[ Rudder Spacer •½‚ç ‚È –Ê ‚É ƒZƒbƒg ƒr ƒX ‚ð ŒÅ ’ è ‚· ‚é •B Firmly tighten the set screw onto the flat spot. ‘D‘Ì 2 x 6mm TPƒr ƒX TP Screw Hull 2.6 x 12mm ƒr ƒX •ã...
- Page 15 ‘D‘Ì ƒO ƒ• ƒ• ƒbƒg Grommet Hull ŒŠ ‚ ª ‚Ó‚³ ‚ª ‚é —l ‚ É •Ú’… •Ü‚ð —¬ ‚ µ •ž ‚Þ •B Insert the pulpit, beginning at the stem, or front. Secure ti in place using CA adhesive. ˆó...
- Page 16 ƒ‰ ƒ_•[ Rudder ƒvƒ• ƒ| ‚Ì ƒX ƒC ƒbƒ` ‚ð “ü ‚ê •Aƒ‰ ƒ_•[ ƒT•[ ƒ{ ‚ª ƒj ƒ… •[ ƒgƒ‰ ƒ‹ ‚Ì Žž ‚ª ‚Ü‚Á ‚· ‚®‚É ‚È ‚é —l ‚ É •‡ ‚í ‚¹ •AƒZƒbƒgƒr ƒX ‚ð ’÷ ‚ß •ž ‚Þ •B Switch on the radio.
-
Page 17: Battery Holder
ƒoƒbƒeƒŠ •[ ƒzƒ‹ ƒ_•[ Battery Holder ƒJƒbƒg‚· ‚é •B Cut the double - sided tape. —¼ – Ê ƒe•[ ƒv Double-sided Tape ƒX ƒ| ƒ“ ƒW ƒe•[ ƒv•i •× –Ú •j Sponge Tape (Fine type) ‚ð ’Ê ‚µ ‚Ä ‚©‚ç ‚ð... - Page 18 ƒZƒ“ ƒ^•[ ƒnƒbƒ` 3 x 8mm TPƒr ƒX Center Hatch TP Screw 3x8mm 3x8mm 3x8mm ƒZƒ“ ƒ^•[ ƒnƒbƒ` Center Hatch •Â‚¶ ‚é •B Close. ŠJ‚¯ ‚é •B Open. ƒX ƒN ƒŠ ƒ… •[ 3 x 3mm ƒZƒbƒgƒr ƒX ˜ZŠp ƒŒ ƒ“ ƒ` •i 1.5mm•j Propeller Set Screw Hex Wrench (1.5mm)
- Page 19 ƒLƒƒƒr ƒ“ 2.6 x 12mm TPƒr ƒX TP Screw Cabin ƒX ƒ| ƒ“ ƒW ƒe•[ ƒv•i •× –Ú •j ‚· ‚« ŠÔ ‚ª –³ ‚¢ —l ‚ É “\ ‚é •B Sponge Tape (Fine type) Attach sponge tape without gaps. 2.6x12mm 2.6x12mm ƒLƒƒƒr ƒ“...
- Page 20 ƒLƒƒƒr ƒ“ Cabin ƒLƒƒƒr ƒ“ 2 x 6mm TPƒr ƒX Cabin TP Screw 2x6mm 2x6mm ƒLƒƒƒr ƒ“ 2.6 x 12mm TPƒr ƒX Ž~‚ß —Ö 2 x 6mm TPƒr ƒX Cabin TP Screw Stopper Ring TP Screw 2x6mm 2.6x12mm ŽÎ •ü •” ‚ð ƒJƒbƒg‚· ‚é •B 2mm‚Ì...
- Page 21 ƒLƒƒƒr ƒ“ 2.6 x 12mm TPƒr ƒX TP Screw Cabin 2.6x12mm 2.6x12mm ƒ{ ƒf ƒB ƒsƒ“ ƒLƒƒƒr ƒ“ Body Pin Cabin ‹È‚° ‚é •B Bend ƒJƒbƒR ‚Ì ’† ‚Í ”½‘Î ‘¤ —p ‚ Ì ƒf ƒJ•[ ƒ‹ ƒi ƒ“ ƒo•[ ‚Å ‚· •B ƒf ƒJ•[ ƒ‹...
- Page 22 Žæ ˆµ ‚¢ ‚Ì ’• ˆÓ OPERATING YOUR MODEL SAFELY Ž–ŒÌ ‚ â ƒP ƒK “™ ‚Ì Šë Œ¯ – hŽ~‚Ì ‚½‚ß •AŽŸ ‚Ì ‚± ‚Æ ‚ð •K‚¸ ‚¨ Žç‚è ‚- ‚¾‚³ ‚¢ •B In order to avoid accidents and personal injury, be sure to observe the following: •œ...
- Page 23 ‘– •q Žè•‡ PROPER OPERATING PROCEDURES ‘— •M‹@ ‚Ì ƒX ƒC ƒbƒ` ‚ð “ü ‚ê ‚é •B ‘– •q —p ‚ Ì ƒoƒbƒeƒŠ •[ ‚ð •[ “d •B ‘— •M‹@ ‚Ì ƒA ƒ“ ƒeƒi ‚ð ‚Ì ‚Î ‚· •B Switch on the transmitter. Fully charge the Ni-Cd battery.
-
Page 24: Everyday Maintenance
“ú •í ‚Ì •®”õ EVERYDAY MAINTENANCE ‚Ë ‚¶ •Aƒi ƒbƒg‚Ì ‚ä ‚é ‚Ý •A˜V‰» ‚ ð ƒ` ƒF ƒbƒN •B Make sure screws and nuts are securely tightened ‰ñ “ ] •” •ª ‚É ‚Í ƒO ƒŠ ƒX ‚ð “h ‚Á ‚Ä ‚¨ ‚- •B and other parts are not worn.
Need help?
Do you have a question about the Atlantio 600 and is the answer not in the manual?
Questions and answers