Table of Contents
Advertisement
Advertisement
Table of Contents

Related Manuals for Moog Minitaur


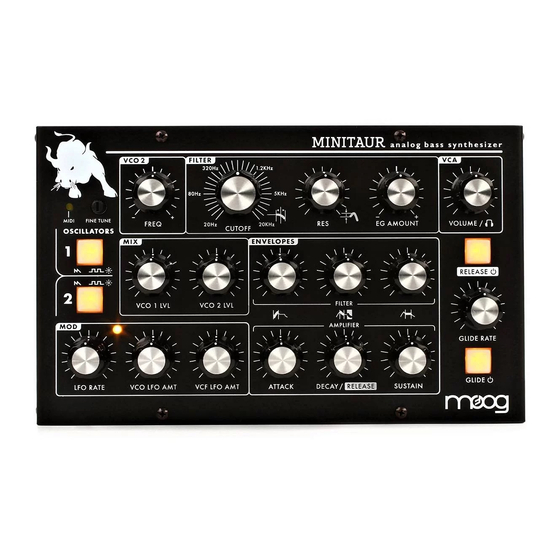
Summary of Contents for Moog Minitaur
- Page 2 Setup and Connections section to get going. At some point, we encourage ringing in your ears, you should consult an audiologist. you to spend some time with this manual to discover all that the Minitaur has to offer. Don’t forget - Experimentation and learning will reward you with a lifetime of 4.
-
Page 3: Table Of Contents
MIDI OUT of your MIDI controller and the MIDI IN on the Minitaur. The Minitaur is set to receive messages on MIDI Channel 1, so make sure your controller is set to transmit on MIDI Channel 1. If you are using USB MIDI, connect the USB cable from the Minitaur to a USB port on your computer. -
Page 4: Overviews And Features
Set the amplifier volume to a comfortable listening one knob per function design in a rugged performance package that is small level, and then slowly bring up the volume on the Minitaur as you play a few notes. enough to take with you anywhere. -
Page 5: Signal Flow
Finally, the signal is routed to the Output section, where the final level is set by the Volume control knob. For most users, MIDI will be the main source of control for the Minitaur. Each time the Minitaur receives a MIDI “Note On” command, it produces a Pitch CV and Gate signal in response. -
Page 6: Basic Operation
FINE TUNE: Adjusts the frequency of both VCOs by approximately +/-1 semitone. The The Minitaur responds to MIDI messages on both DIN and USB MIDI Inputs. FINE TUNE control does not transmit MIDI. In addition, the Minitaur’s knobs and switches transmit MIDI Control Change (CC) commands via MIDI USB, allowing parameter adjustments to be captured by any MIDI-recording device. -
Page 7: Glide
The FILTER is a classic Moog 24dB/ GLIDE RATE (CC# 5): Octave Low-Pass Filter design with Sets the rate of GLIDE that occurs when the note controlling the Minitaur changes. resonance. It has controls for CUTOFF frequency which determines the range... -
Page 8: Envelopes
EG moves back to zero at the rate set by this control. accepts 0 to +5 volts, or an expression pedal like the Moog EP-2. This time ranges from 1 msec to 30 seconds. The Release segment of the Envelope is determined by the state of the RELEASE switch (ON/OFF). -
Page 9: Release
RELEASE LFO MIDI SYNC ON/OFF (CC# 87): The RELEASE switch enables or disables the Release segment of Enables or Disables the ability of the Minitaur’s LFO to sync to MIDI both Envelope Generators. When enabled, the Envelope Release Clock messages. -
Page 10: Volume
Minitaur has no provisions for adjusting the level of this input on Output level. A voltage of 0 Volts silences the Minitaur and a voltage of the front panel, the level is adjustable up to 200% via MIDI CC# 27. -
Page 11: Midi Operations
The Minitaur sends and receives on a single MIDI channel. By default, hear the external audio signal without issuing a MIDI NOTE the Minitaur is set to MIDI Channel 1, but it can be set to any MIDI ON message, apply +5V to the GATE jack. This will leave Channel (1-16). - Page 12 GLIDE RATE Adjusts the Glide (portamento) 5(MSB) the Minitaur sound engine from direct control by the panel. Per the MIDI rate time spec, only values of ‘0’ and ‘127’ work (0 = OFF, 127 = ON). If you are conn-...
- Page 13 MIDI CC VALUES FOR THE LFO CLOCK DIVIDER (CC# 86) CONTROL/ SECTION FUNCTION VALUE/RANGE PARAMETER TIME VALUE DIVISION VALUE 23(MSB) 0-127 VCF ATTACK Adjusts the filter envelope attack 55(LSB) time. 1/64 Note Triplet 1/64 T 122-127 1/32 Note Triplet 1/32 T 116-121 VCF DECAY/ Adjusts the filter envelope decay...
-
Page 14: Midi Implementation Chart
FUNCTION TRANSMITTED RECOGNIZED REMARKS BASIC CHANNEL MOOG LIMITED WARRANTY Moog Music warrants its produc t s to be free of defects in materials and Default workmanship for a period of one year from the date of purchase. During Changed 1-16... -
Page 15: Using The Cp-251
APPENDIX C - CARING FOR THE MINITAUR COMPLEX TIMBRAL MODULATION Clean the Minitaur with a soft, slightly moist cloth only – do not use solvents 1. Using a 1⁄4” patch cable, connect the CP-251 LFO Triangle or abrasive detergents. Heed the safety warnings at the beginning of the output to an Attenuator Input manual. -
Page 16: Specifications
•AMOUNT TO VCF: 0 to 100% *Specifications subject to change without notice PERFORMANCE CONTROLS: •FINE TUNE: ± 1 Semitone •GLIDE: On/Off •RELEASE: On/Off •MASTER VOLUME © 2012 MOOG MUSIC Inc. 160 Broadway St. Asheville, NC 28801 Phone: 828.251.0090 Email: info@moogmusic.com Website: www.moogmusic.com...
Need help?
Do you have a question about the Minitaur and is the answer not in the manual?
Questions and answers