Table of Contents
Advertisement
Advertisement
Table of Contents

Related Manuals for Hyundai HLT-3272


Summary of Contents for Hyundai HLT-3272
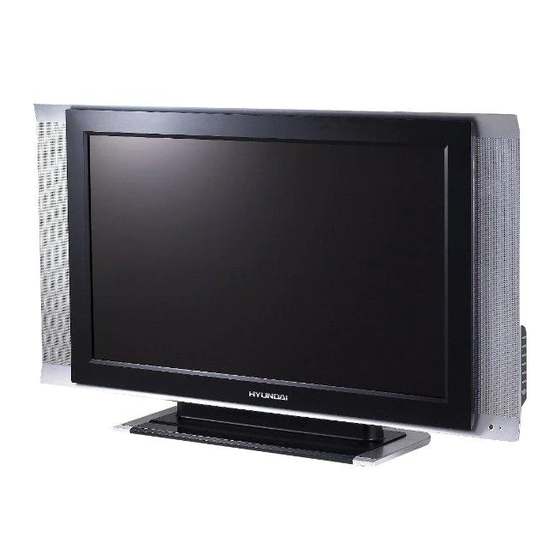
- Page 1 <English> 32” TFT LCD TV OWNER’S MANUAL HLT-3272...
- Page 2 Please read this manual carefully before operating your set. Retain it for future reference. Record model number and serial number of the set. See the label attached on the back of the set and quote this information to your dealer when you require service.
-
Page 4: Table Of Contents
Important Safety instructions First step Safety instructions LCD TV Overview Front and side view Connection Panel Overview Remote Control Key Functions Using the remote control Accessories Equipment Connections and Setup VCR Setup Cable Box Setup DTV Setup DVD Setup PC Setup DVI Setup Basic Features Setup and Operation Turning on the TV... - Page 5 OWNER’S MANUAL 1) Read all of these instructions. 2) Save these instructions for later use. 3) Follow all warnings and instructions marked on the product. 4) Follow all instructions. 5) Do not use the TV near water. 6) Clean only with dry cloth. 7) Do not block any ventilation openings.
-
Page 6: Fcc Information (U.s.a.)
FCC INFORMATION (U.S.A.) Note: This equipment has been tested and found to comply with the limits for a Class B digital device, pursuant to part 15 of the FCC Rules. These limits are designed to provide reasonable protection against harmful interference in a residential installation. -
Page 7: Safety Instructions
OWNER’S MANUAL Indoor Installation WARNING Do not place the TV in direct sunlight or near heat sources such as radiators, fires and stove etc. • This may cause a fire hazard ! NOTES When unpacking or moving the TV two people will be necessary to lift it safely. -
Page 8: Outdoor Installation
Outdoor Installation WARNING Do not use the TV in a damp place such as a bathroom where it is likely to get wet. • This may cause a fire or an electric shock hazard ! WARNING In case of using a receiver (VCR, Digital Set Top Box), do not place an antenna in the vicinity of power lines. - Page 9 OWNER’S MANUAL Power NOTES Do not place heavy objects on the power cord • This may cause a fire or an electric shock hazard ! NOTES Hold the plug firmly when unplugging. If you pull the cord the cord may be damaged. •...
- Page 10 Using NOTES In case of impact shock or damage to the monitor switch it off and unplug it from the outlet and contact your service center. • This may cause a fire or an electric shock hazard ! NOTES Do not drop the TV or allow impact shock. •...
- Page 11 OWNER’S MANUAL Others WARNING Do not watch the TV while driving or walking. • This may cause an accident. NOTES The distance between eyes and the screen should be about 1.5m. • If not, eyes will strain. NOTES Do not place heavy objects on the TV. •...
- Page 12 1. DVI IN : Digital Video Interface. 2. RGB-DTV / PC INPUT : PC OR DTV Video Source Input. 3. PC AUDIO IN : Connect the audio cable from the PC to the PC AUDIO IN of the set. 4. L. R : Audio(L / R) Input in case of S-VIDEO or COMPONENT mode. 5.
-
Page 13: Using The Remote Control
OWNER’S MANUAL - When using the remote control aim it at the remote control sensor on the TV 1. POWER Turns on TV or off from st/by mode. 2. MUTE Turns the sound on and off. 3. NUMBER buttons Selects programme numbers. 4. -
Page 14: Installing Batteries
TV/AV select button on the remote control Each press of this button changes the mode as shown below RGB-DVI MULTI MEDI select button on the remote control Each press of this button changes the mode as belows. COMPONENT RGB-DVI Installing batteries OWNER’S MANUAL COMPONENT RGB-PC... - Page 15 OWNER’S MANUAL Notes for using the remote control Make sure these are no objects between the remote control and its sensor. Accesories Remote control Owner’s Manual Option D-sub 15 pin cable AUDIO cable PC sound cable Don’t place the remote control near a heater or damp place.
- Page 16 • Connect an antenna or a RCA Cable between the ANTENNA jack on the rear of the TV and the ANTENNA OUT jack on the VCR. • Connect the RCA Jack of the VCR to the RCA AV1 or AV2 of the set. •...
- Page 17 OWNER’S MANUAL • After subscribing to cable TV service from a local provider and installing a converter, you can watch cable TV programs. Connection of external equipment T i p s • For further information regarding cable TV service, contact your local cable TV service proviser(s). To watch Cable TV Press TV/AV button on the remote control and select VIDEO source.
-
Page 18: Connection Of External Equipment
- To watch digital broadcast programs, purchase/connect a digital SET-TOP BOX. How to connect a DTV • You can use either the Monitors COMPONENT (DVD/DTV/INPUT) inputs or the single RGB-DTV/PC INPUT for video connections, depending on your Set Top Box connectors. Then, make the corresponding Audio connections. - Page 19 OWNER’S MANUAL How to connect a DVD (digital video disk player) • Connect DVD video inputs to Y, Pb, Pr of COMPONENT (DVD/DTV INPUT) and audio inputs to Audio jacks of AV INPUT. • Component Input is available to 480i/p, 720p, 1080i mode. How to use •...
-
Page 20: Pc Setup
PC Setup • First, turn on the PC computer and press the ON/OFF button on the TV to apply power to it. Second, turn on the display by pressing the button on the TV or by pressing the POWER button on the TV remote control. - Page 21 OWNER’S MANUAL PC Setup • First, turn on the PC computer and press the ON/OFF button on the TV to apply power to it. Second, turn on the display by pressing the button on the TV or by pressing the POWER button on the TV remote control.
-
Page 22: Turning On The Tv
- When using the remote control, aim it at the sensor on the TV. Turning on the TV just after installation Connect power cord correctly. At this moment, the TV is switched to Standby mode. Press the POWER button on the TV or press the POWER Button or associated with TV button on the remote control and then the TV will be turn on. - Page 23 OWNER’S MANUAL Press the PR+/- button. Press the VOL ( +) button to select a feature to adjust, and then press the PR+/- buttons to adjust the selected item. Press the MENU button to exit. • Sleep Timer turns the TV off after a preset time Press the SLEEP button to set sleep time.
- Page 24 Use APC to set the TV for the best picture appearance APC (Auto Picture Control) Press the APC button. Press the APC buttons to select your desired picture condition. • Each press of APC button changes the screen display as shown below. STANDARD •...
-
Page 25: Auto Sound Control
OWNER’S MANUAL ASC(Auto Sound Control) Press the MENU button and then VOL+/- button to select a SOUND setup. Press PR- button and then VOL+ button to select a sound setup. • Each press of ASC or PR+/- button changes the screen display as shown below. STANDARD SURROUND •... - Page 26 Up to 125 TV stations can be stored by programme numbers (1 to 125). Once you have preset the stations, you will be able to use the PR+/PR- or NUMBER buttons to scan the stations you programmed. Stations can be tuned using automatic or manual modes. Note : In some models up to 181 CH stations can be stored.
- Page 27 OWNER’S MANUAL Press the PR+/- button to select the programme number. Press the VOL+ button to select the ADD and ERASE. Select the desired programme number (1 to 125) with the PR+/- button. Press the ENTER button. Press the PR+/- button to select FINE. Press the VOL+ button.
- Page 28 Press the MENU button and then press the VOL+/- button to select ETC menu. Press the PR - button. Press the PR+/- button to select Language and then press the VOL (+ ) button. Press the PR+/- button to select the desired language. Press the ENTER button.
- Page 29 OWNER’S MANUAL Press the MENU button and then press the VOL+/- button to select ETC menu. Press the PR- button. Press the PR+/- button to select CLOSED CAPTION and then press the VOL (+ ) button. Press the VOL+/- button to select the desired CLOSED CAPTION. Each press of this button changes the mode as belows.
- Page 30 Press the PR+/- button to select SET PASSWORD and then press the VOL+ button. Enter your current password using the number buttons on the remote control. (The default password is 0000) Re enter the password to confirm. your new password is active. Press the ENTER button.
-
Page 31: Mpaa Ratings
OWNER’S MANUAL Press the PR+ button and then PR+/- button to select AUX CONTROL and then press the VOL+ button. Press the VOL+/- button to select the desired rating. Press the ENTER button. TV Guidelines TV-MA Mature audiences only. This program may contain mature themes, profane language, graphic violence and explicit sexual content. - Page 32 Press the MENU button and then press the VOL+/- button to select ETC menu. Press the PR - button. Press the PR+/- button to select 3D COMB FILTER. Press the VOL+ button to select OFF. Press the VOL+ button to change the state of ON or OFF. Press the ENTER button.
- Page 33 OWNER’S MANUAL Press the MENU button and then press the VOL+/- button to select ETC menu. Press the PR- button. Press the PR+/- button to select PC CONTROL and then press the VOL (+) button. Use the VOL +/- button to make appropriate adjustments and then Press the ENTER button. Press the PR+/- button to select other items.
- Page 34 Press the PR+/- button to select ON TIME and then press the VOL(+) button. Press the PR+/- button to select time and PR, VOL, ON/OFF. Press the ENTER button. Press the PR+/- button to select AUTO SLEEP and then press the VOL(+) button. Press the PR+/- button to select ON/OFF.
- Page 35 OWNER’S MANUAL Press the ARC button to select a desired picture format. • Each time you press ARC button, you can select 16:9 or 4:3 or ZOOM or PANORAMA alternatively. - PIP PICTURE will let you view two seperate inputs on your TV screen at the same time. - Color of main picture may be different from PIP°Øs in PIP PICTURE.
- Page 36 Change the main picture and the sub picture Press the SWAP button in PIP mode. When the main picture is TV/AV1/AV2/S-VIDEO, the sub picture input is TV / AV1 /AV2 / S-VIDEO. How to use twin picture Press the SIZE button to select twin picture. Each time you press SIZE button, you can select TWIN or PIP alternatively.
-
Page 37: Multi Pip
OWNER’S MANUAL Changing the picture of main and sub picture - PIP/TWIN PICTURE let you view different inputs on your TV screen at the same time. - Color of main picture may be different from PIP’s in PIP/TWIN PICTURE.Press the SWAP button in twin picture mode. - When the main picture input is TV / AV1 / AV2 / S-VIDEO/, the sub picture input is TV/AV1/AV2/S-VIDEO. - Page 38 Problem No picture on screen and no sound from speakers. No picture/No picture from AV terminal. Picture is displayed, but no sound from the speakers. Picture is too light Picture is too dark. Remote control does not work. No picture from AV OUT terminal.
- Page 39 PC (Analog) Stereo RCA (S-VIDEO, Component), Input Sound Sound Approx. 120W 814 X 230 X 485.9 (With Stand) 17Kg (NET) HLT-3272 Low-CH: E2 - S10 High-CH: E5 - S41 CH: E21 - E69 Ϊ 1,0Vp-p / 75 Ϊ 1,0Vp-p / 75 Ϊ...
-
Page 40: Cleaning The Screen
Cleaning the screen �Always disconnect your TV from any power source when cleaning. �Do not use substances such as glass cleaners, solvents, and thinners,. �Do not apply abrasive or ammonia-based window cleaners. �The screen of your TV has been specially treated, and can be scratched or damaged easily. Wipe the surface gently using only a cleaning cloth or a soft, lint-free cloth. - Page 41 OWNER’S MANUAL...
Need help?
Do you have a question about the HLT-3272 and is the answer not in the manual?
Questions and answers