Table of Contents
Advertisement
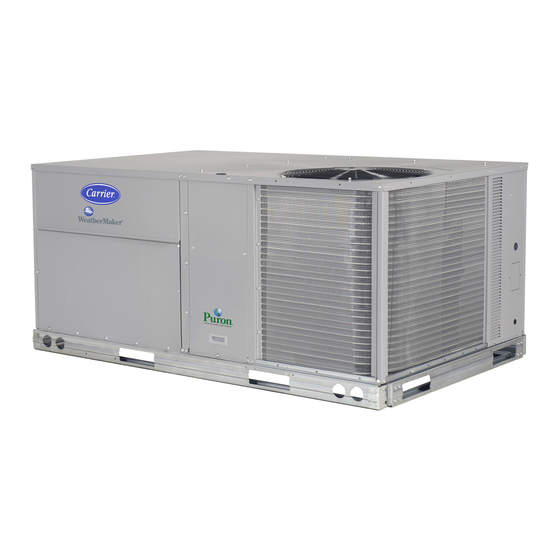
50TCQD
Single Package Rooftop
Heat Pump
with Puronr (R---410A) Refrigerant
Sizes 17 & 24
NOTE: Read the entire instruction manual before starting
the installation
TABLE OF CONTENTS
. . . . . . . . . . . . . . . . . . . . . . . . . . . . . . .
. . . . . . . . . . . . . . . . . . . . . . . . . . .
Installation Instructions
. . . . . . . . . . . . . . . . . . . .
. . . . . . . . . . . . . . . . . .
. . . . . .
. . . . . . . . . . . . . . . . . . .
. . . . . . . . . . . . . . .
. . . . . . . . . . . . . . . . . . . .
. . . . . . . . . . . . . . . . . . . . . .
. . . . . . . . . . . . . . .
. . . . . . . . . . .
. . . . . . . .
. . . . . . . . . . . . . . . . . . .
. . .
SAFETY CONSIDERATIONS
Improper installation, adjustment, alteration, service,
maintenance, or use can cause explosion, fire, electrical
shock or other conditions which may cause personal
1
injury or property damage. Consult a qualified installer,
service agency, or your distributor or branch for
6
information or assistance. The qualified installer or
6
agency must use factory- - authorized kits or accessories
7
when modifying this product. Refer to the individual
instructions packaged with the kits or accessories when
7
installing.
7
Follow all safety codes. Wear safety glasses and work
10
gloves. Use quenching cloths for brazing operations and
10
have a fire extinguisher available. Read these instructions
11
thoroughly and follow all warnings or cautions attached to
the unit. Consult local building codes and appropriate
12
national electrical codes (in USA, ANSI/NFPA70,
.
13
National Electrical Code (NEC); in Canada, CSA C22.1)
13
for special requirements.
42
It is important to recognize safety information. This is the
42
safety- - alert symbol
unit and in instructions or manuals, be alert to the
43
potential for personal injury.
Understand the signal words DANGER, WARNING,
CAUTION, and NOTE. These words are used with the
safety- - alert symbol. DANGER identifies the most serious
hazards which will result in severe personal injury or
death. WARNING signifies hazards which could result in
personal injury or death. CAUTION is used to identify
unsafe practices, which may result in minor personal
injury or product and property damage. NOTE is used to
highlight suggestions which will result in enhanced
installation, reliability, or operation.
1
. When you see this symbol on the
Advertisement
Table of Contents

Related Manuals for Carrier 50TCQD


Summary of Contents for Carrier 50TCQD
-
Page 1: Table Of Contents
50TCQD Single Package Rooftop Heat Pump with Puronr (R---410A) Refrigerant Sizes 17 & 24 Installation Instructions SAFETY CONSIDERATIONS NOTE: Read the entire instruction manual before starting the installation Improper installation, adjustment, alteration, service, TABLE OF CONTENTS maintenance, or use can cause explosion, fire, electrical... - Page 2 WARNING WARNING PERSONAL INJURY AND ENVIRONMENTAL ELECTRICAL SHOCK HAZARD HAZARD Failure to follow this warning could cause personal Failure to follow this warning could cause personal injury or death. injury or death. Before performing service or maintenance operations Relieve pressure and recover all refrigerant before on unit, always turn off main power switch to unit and system repair or final unit disposal.
- Page 3 C10135 Fig. 1 - - Unit Dimensional Drawing – Size 17 Units...
- Page 4 C10136 Fig. 1 - - Unit Dimensional Drawing – Size 17 Unit (cont.)
- Page 5 C10137 Fig. 2 - - Unit Dimensional Drawing – Size 24 Unit...
-
Page 6: Installation
C10138 Fig. 2 - - Unit Dimensional Drawing – Size 24 Unit (cont.) INSTALLATION Jobsite Survey 36” (914) Complete the following checks before installation. 42” (1067) 1. Consult local building codes and the NEC (National Electrical Code) ANSI/NFPA 70 for special installa- tion requirements. -
Page 7: Step 2 - Plan For Sequence Of Unit Installation
Table 1 – Operating Weights 50TCQD UNITS LB (KG) UNITS LB (KG) Component Base Unit 2035 923) 2200 (998) Economizer 245 (111) 245 (111) Powered Outlet 32 (15) 32 (15) Curb 14--- in/356 mm 243 (111) 273 (124) 24--- in/610 mm... - Page 8 C10139 Fig. 4 - - Roof Curb Details – Size 17 Units...
- Page 9 C10140 Fig. 5 - - Roof Curb Details – Size 24 Units...
-
Page 10: Step 5 - Field Fabricate Ductwork
WARNING PERSONAL INJURY HAZARD Failure to follow this warning could cause personal injury. For vertical supply and return units, tools or parts MAXIMUM ALLOWABLE could drop into ductwork and cause an injury. Install DIFFERENCE IN. (MM) a 90- - degree turn in the return ductwork between the unit and the conditioned space. -
Page 11: Step 7 - Duct Connection
PLACE ALL SEAL STRIP DETAIL A IN PLACE BEFORE PLACING "914-1371" UNIT ON ROOF CURB. (36"-54") "B" SEE DETAIL A DUCT END "C" "A" C09107 DIMENSIONS MAX WEIGHT UNIT 50TCQD17 2070 127.8 3249 58.7 1491 52.3 1328 50TCQD24 2358 1071 141.5 3595 58.7... -
Page 12: Step 8 - Install Outside Air Hood
Step 8 — Install Outside Air Hood Apply Seal Strips to the back of Apply Seal Strip these surfaces to the front of this flange Economizer and Two Position Hood Removal - - Apply Seal Strip to the front of this flange Factory Option Apply Seal Strips... -
Page 13: Step 9 - Install External Condensate Trap And Line
Step 9 — Install External Condensate Trap and Step 10 — Make Electrical Connections Line WARNING The unit has one -in. condensate drain connection on the end of the condensate pan (see Fig. 14) See Fig. 1 (or ELECTRICAL SHOCK HAZARD Fig. - Page 14 WARNING Units Without Disconnect Option FIRE HAZARD Failure to follow this warning could result in intermittent operation or performance satisfaction. Do not connect aluminum wire between disconnect switch and air conditioning unit. Use only copper wire. (See Fig. 16.) Disconnect 208/230-3-60 460-3-60 575-3-60...
- Page 15 Non- - powered type: This type requires the field Control Box Access Panel installation of a general- - purpose 125- - volt 15- - A circuit powered from a source elsewhere in the building. Observe Electric Disconnect national and local codes when selecting wire size, fuse or Switch breaker requirements and disconnect switch size and Convenience...
- Page 16 - installed option or as field- - installed accessory, for rubber grommet located on the corner post adjacent to the use on a Carrier Comfort Network or as a stand alone control box access panel. Route wire through the grommet...
- Page 17 Set heat anticipator settings at 0.14 amp for the first stage and 0.14 amp for second- - stage heating, when available. Electric Heaters 50TCQD units may be equipped with field- - installed accessory electric heaters. The heaters are modular in design, with heater frames holding open coil resistance wires strung through ceramic insulators, line- - break limit switches and a control contactor.
- Page 18 Table 2 – Heater Model Number Bare Heater Model Number Heater Sales Package PNO Includes: Bare Heater Carton and packing materials Installation sheet CONTL BOARD Plug Assembly Field Connections BRN BRN Elec Htr HR1: On Heater 1 in Position #1 HR2: On Heater 2 in Position #2 (if installed) C09149 Fig.
- Page 19 (SAT) Sensor — FIOP- - equipped 50TCQD unit, the unit is supplied with a airstream downstream of the cooling coil and any heating supply- - air temperature (SAT) sensor (33ZCSENSAT). devices. Be sure the probe tip does not come in contact This sensor is a tubular probe type, approx 6- - inches with any of the unit’s heater surfaces.
- Page 20 C10180 Fig. 29 - - PremierLink Wiring Schematic...
- Page 21 - shipped configured for Space Sensor Mode. A J6-6 Carrier T- - 55 or T- - 56 space sensor must be used. T- - 55 C08212 space temperature sensor provides a signal of space Fig. 31 - - PremierLink T- - 55 Sensor Table 3 –...
- Page 22 LEGEND: --- Space Temperature Sensor FSD --- Fire Shutdown --- Space Temperature Sensor IAQ --- Indoor Air Quality (CO --- Carrier Comfort Network (communication bus) OAQ --- Outdoor Air Quality (CO CMPSAFE --- Compressor Safety RH --- Relative Humidity FILTER...
- Page 23 Connect T- - 56 - - See Fig. 32 for T- - 56 internal If the 50TCQD unit is equipped with factory- - installed connections. Install a jumper between SEN and SET smoke detector(s), disconnect the factory BLU lead at terminals as illustrated.
-
Page 24: Sizes
Economizer controls — To wire the return air enthalpy sensor, perform the following: Outdoor Air Enthalpy Control (PNO 33CSENTHSW) - - 1. Use a 2- - conductor, 18 or 20 AWG, twisted pair cable The enthalpy control (33CSENTHSW) is available as a to connect the return air enthalpy sensor to the enthal- field- - installed accessory to be used with the EconoMi$er2 py controller. - Page 25 OAQ sensor. See Fig. 37. Connect the 4 to 20 mA For each sensor, use two 2- - conductor 18 AWG (American terminal to the TB1- - 13 terminal of the 50TCQD . Wire Gage) twisted- - pair cables (unshielded) to connect...
- Page 26 PremierLink causes the filter status point to Space Relative Humidity Sensor — The RH sensor is not read “DIRTY”. used with 50TCQD models at this time. Using Filter Timer Hours: Refer to Form 33CS- - 58SI for instructions on using the PremierLink Configuration Power Exhaust screens and on unit alarm sequence.
- Page 27 enters another building, the shields must be connected to Connect the CCN (+) lead (typically RED) to the unit’s the grounds at a lightning suppressor in each building (one TB1- - 12 terminal. Connect the CCN (ground) lead point only). (typically WHT) to the unit’s TB1- - 14 terminal.
- Page 28 RTU- -MP control system The RTU- - MP control is factory- - mounted in the 50TCQD unit’s main control box, to the right of the CTB. See Fig. 47. Factory wiring is completed through harnesses The RTU- - MP controller, see Fig. 46, provides expanded connected to the CTB.
- Page 29 C10182 Fig. 48 - - RTU- - MP System Control Wiring Diagram...
- Page 30 (SAT) Sensor EconoMi$er2 (option or accessory) for outdoor air FIOP- - equipped 50TCQD unit, the unit is supplied with a management. The damper position is controlled directly supply- - air temperature (SAT) sensor (33ZCSENSAT). by the RTU- - MP control; EconoMi$er2 has no internal This sensor is a tubular probe type, approx 6- - inches (12.7...
- Page 31 Phoenix connectors and then reconnect the connectors to the board. Space Temperature (SPT) Sensors A field- - supplied Carrier space temperature sensor is required with the RTU- - MP to monitor space temperature. COM- PWR+...
- Page 32 Allow at least 3 ft (0.9 m) between the sensor and any On 50TCQD units equipped with factory- - installed Smoke corner. Avoid mounting the sensor where it is influenced Detector(s), the smoke detector controller implements the by the supply air;...
- Page 33 THERMOSTAT and networking. C08464 Fig. 54 - - RTU- - MP Power Exhaust Connections Space Relative Humidity Sensor - - The RH sensor is not used with 50TCQD models at this time. SW3 Protocol Selection PROTOCOL BACnet MS/TP Unused Select Baud...
- Page 34 Local Access Virtual BACview Virtual BACview is a freeware computer program that BACview Handheld functions as the BACview Handheld. The USB Link The BACview is a keypad/display interface used to interface (USB- - L) is required to connect a computer to connect to the RTU- - MP to access the control information, the RTU- - MP board.
- Page 35 Smoke Detectors Smoke detectors are available as factory- - installed options on 50TCQD models. Smoke detectors may be specified for Supply Air only or for Return Air without or with economizer or in combination of Supply Air and Return Duct smoke sensor Air.
- Page 36 Completing Installation of Return Air Smoke The sensor uses a process called differential sensing to prevent gradual environmental changes from triggering Sensor: false alarms. A rapid change in environmental conditions, 1. Locate the magnet; it is shipped in the control box such as smoke from a fire, causes the sensor to signal an area.
- Page 37 Table 9 – Unit Wire/Fuse or HACR Breaker Sizing Data ELEC. HTR NO C.O. or UNPWR C.O. NO P .E. w/ P .E. (pwrd fr/unit) FUSE FUSE CRHEATER DISC. SIZE DISC. SIZE (kW) ***A00 HACR HACR BRKR BRKR NONE 68.3 90.0 80.1 100.0...
- Page 38 Table 9 — Unit Wire/Fuse or HACR Breaker Sizing Data (cont) ELEC. HTR w/ PWRD C.O. NO P .E. w/ P .E. (pwrd fr/unit) FUSE FUSE CRHEATER DISC. SIZE DISC. SIZE (kW) ***A00 HACR HACR BRKR BRKR NONE 73.1 90.0 84.9 100.0 279A00...
- Page 39 Table 9 — Unit Wire/Fuse or HACR Breaker Sizing Data (cont) ELEC. HTR NO C.O. or UNPWR C.O. NO P .E. w/ P .E. (pwrd fr/unit) FUSE FUSE CRHEATER DISC. SIZE DISC. SIZE (kW) ***A00 HACR HACR BRKR BRKR NONE 92.7 125.0 104.5...
- Page 40 Table 9 — Unit Wire/Fuse or HACR Breaker Sizing Data (cont) ELEC. HTR w/ PWRD C.O. NO P .E. w/ P .E. (pwrd fr/unit) FUSE FUSE CRHEATER DISC. SIZE DISC. SIZE (kW) ***A00 HACR HACR BRKR BRKR NONE 97.5 125.0 109.3 125.0 279A00...
- Page 41 Legend and Notes for Table 9 LEGEND: Example: Supply voltage is 230-3-60 BRKR --- Circuit breaker AB = 224 v --- Convenient outlet BC = 231 v --- Direct drive AC = 226 v indoor fan motor DISC --- Disconnect --- Full load amps (224 + 231 + 226) --- Indoor fan motor...
-
Page 42: Step 11 - Adjust Factory- -Installed Options
Unit Without Economizer or Economizer 2 Position Damper 2 Position Damper C10183 Fig. 62 - - EconoMi$ert IV Wiring Step 11 — Adjust Factory- -Installed Options EconoMi$er IV (with control and integrated barometric relief) Smoke Detectors — EconoMi$er2 (without control/for external signal and Smoke detector(s) will be connected at the Controls integrated barometric relief) Connections Board,... -
Page 43: Appendix - Typical Wiring Diagrams
APPENDIX — TYPICAL WIRING DIAGRAMS C10187 Fig. 63 - - 50TCQ Typical Unit Wiring Diagram - - HP Control 460V, 575V 3 Phase... - Page 44 C10186 Fig. 64 - - 50TCQ Typical Unit Wiring Diagram - - Power 460V, 575V 3 Phase Catalog No: 50TCQ---08SI Copyright 2011 Carrier Corp. D 7310 W. Morris St. D Indianapolis, IN 46231 Printed in U.S.A. Edition Date: 01/11 Manufacturer reserves the right to change, at any time, specifications and designs without notice and without obligations.
Need help?
Do you have a question about the 50TCQD and is the answer not in the manual?
Questions and answers