Table of Contents
Advertisement
Quick Links
Advertisement
Table of Contents

Related Manuals for Audio Research VSi75


Summary of Contents for Audio Research VSi75
-
Page 1: User Guide
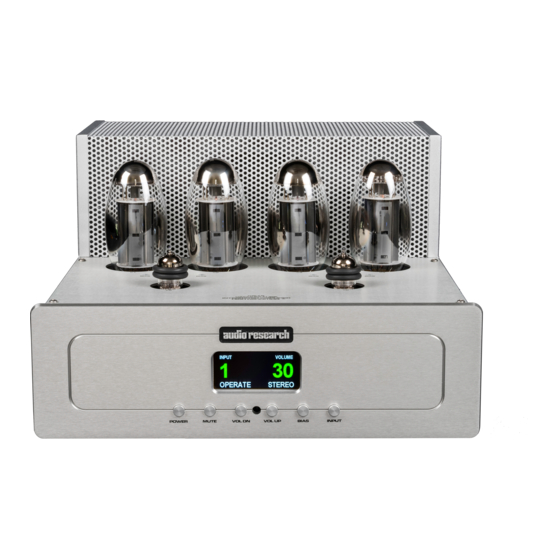
User Guide VSi75 Integrated Amplifier H I G H D E F I N I T I O N ®... -
Page 2: Table Of Contents
Contents Preface 3 Illustrations 4 Warnings 5 Installation Vacuum Tubes 6 In your System 7 Connections Rear Panel Connections 8 AC Power Connection 9 Operation Power-up Procedure 10 General Notes about Usage 11 Resetting Controls 11 Automatic Mute Function 12 Front Panel Control Functions 13 Remote Control Functions 14 Maintenance... -
Page 3: Preface
Preface Thank you for selecting the VSi75 as part of your music listening system. The engineers and designers at Audio Research have spent countless hours of listening and testing to create an Integrated Amplifier of the highest caliber for music reproduction. The VSi75 has been designed to provide you many years of playback. -
Page 4: Illustrations
VOL UP BIAS INPUT POWER Rear Panel WARNING VSi75 TO PREVENT FIRE AND SHOCK HAZARD, DO NOT INTEGRATED AMPLIFIER EXPOSE THIS DEVICE TO RAIN OR MOISTURE. UNIT MUST BE OPERATED IN A HORIZONTAL POSITION. -DO NOT OPERATE WITH COVERS REMOVED- UNIT CONTAINS VOLTAGES WHICH MAY BE HAZARDOUS. -
Page 5: Warnings
Warnings Do not touch hot tubes. Keep away from children. To prevent fire, or shock hazard, do not expose your VSi75 to rain or moisture. This unit contains voltages which can cause serious injury or death. Do not operate with top plate removed. Refer servicing to your authorized Audio Research dealer or other qualified personnel. -
Page 6: Installation
If you are using the optional tube cover, be sure the VSi75 is first turned off. Remove the top cover screws, and install the cover on top of the top plate. -
Page 7: In Your System
If the unit is to be operated in an enclosed equipment cabinet, an exhaust fan is desirable so as not to operate the VSi75 in overheated ambient air. The “ambient” operating temperature should never exceed 120° F or 49°... -
Page 8: Connections
Connect the black or “-” speaker terminal to the wire that connects to the “0” terminal on the VSi75. Connect the red or”+” speaker terminal to the wire that connects to the “4” or “8” terminal on the VSi75, and tighten the speaker terminals securely to ensure best sonic results. -
Page 9: Ac Power Connection
It is essential that the amplifier be connected to a wall AC power receptacle, or a similar heavy-duty source. If it is connected to convenience receptacles on preamplifiers, etc., the full sonic capabilities of both the VSi75 and the preamplifier will be compromised. -
Page 10: Operation
Make sure you have read and complied with the Installation and Connection instructions prior to attempting operation. Press the “Power” switch. The Audio Research logo will appear for a few seconds, then “Mute” will flash and a numeric countdown will show on the LCD display while power supply stabilizes, indicating operation of automatic muting circuit. -
Page 11: General Notes About Usage
Operation General Notes about Usage If you turn off the VSi75 wait at least five minutes before turning it on again. This brief cool down period will reduce stress on the output tubes and potential damage to them. Audio Research does not recommend leaving your VSi75 on 24 hours a day as is the custom of some listeners to achieve maximum sonic performance on demand. -
Page 12: Automatic Mute Function
VSi75 is effective down to 100VAC (120V units) without serious sonic degradation. 2. The automatic muting of the VSi75 is designed to be effective only against power line interruptions and power line failures. It will not mute against subsonic signal transmissions from your input source. -
Page 13: Front Panel Control Functions
In “operate” position (indicated on the LCD display), the signal passes normally to the outputs. BIAS: Puts the VSi75 into bias mode for adjusting vacuum tube bias (see page 15 for further details on adjusting bias). -
Page 14: Remote Control Functions
In addition to the functions on the front panel, the handheld remote also offers the following functions: MONO: Toggles the VSi75 between Stereo and Mono mode. “STEREO” or “MONO” are displayed in the bottom right of the LCD display, indicating mode. -
Page 15: Maintenance
15-20 minutes of uninterrupted stabilization time. Pressing the “BIAS” button on the remote or front panel enters the VSi75 into bias mode, beginning with tube V1. Using the included plastic alignment tool, adjust the bias via the labeled adjustment port located in front of each tube which corresponds with the “V”... -
Page 16: Servicing
9700. Cleaning To maintain the visual appearance of your VSi75, occasionally wipe the front panel and top cover surfaces with a soft damp (not wet) cloth to remove dust. A mild, non-alkaline soap solution may be used to remove fingerprints or similar smudges. -
Page 17: Limited Warranty
In the unlikely event that technical service beyond the ability of the importer is required, Audio Research will fulfill the terms and conditions of the Limited Warranty. Such product must be returned at the purchaser’s expense to... -
Page 18: Specifications
Weight: 36.4 lbs. (16.5 kg) Net; 49.3 lbs. (22.4 kg) Shipping. This unit is RoHS compliant H I G H D E F I N I T I O N ® Specifications subject to change without notice. ©2013 Audio Research Corporation.
Need help?
Do you have a question about the VSi75 and is the answer not in the manual?
Questions and answers