Table of Contents
Advertisement
Advertisement
Table of Contents

Related Manuals for Raidon GearRAID GR3630-2S-SB2+


Summary of Contents for Raidon GearRAID GR3630-2S-SB2+
- Page 1 GearRAID GR3630-2S-SB2+ / WBS2 User Manual v.1.2 (January, 2010)
- Page 2 Should you have any doubts regarding Raidon Technology’s product, or should you need to know the latest product information, application manual or firmware, please contact us at supporting@raidon.com.tw, we would reply you as soon as possible.
-
Page 3: Table Of Contents
Index Chapter 1 An introduction to RAID ............4 What is RAID?................. 4 Comparison of RAID 0 and RAID 1..........4 Chapter 2 Characteristics and specifications ......... 5 Product appearance and accessories guide........5 Product detailed specifications............8 Precautions before application............9 Chapter 3 Installation of GR3630 .............. -
Page 4: Chapter 1 An Introduction To Raid
Chapter 1 An introduction to RAID 1.1 What is RAID? The idea of RAID (Redundant Array of Inexpensive Disks) was first proposed by David A. Patterson, Garth Gibson and Randy H. Katz at University of California, Berkeley in 1988. The purpose of RAID is to store the same data in multiple hard disks at different places, and to improve the performance of storage system. -
Page 5: Chapter 2 Characteristics And Specifications
The following is a comparison of two RAID levels: Minimum Basic operation Disk applicable Data transmit RAID Level Data reliability hard disk principle space rate requirement Total hard disk Partition storage Fast capacity Minimum hard Mirroring High Slow disk capacity Chapter 2 Characteristics and specifications 2.1 Product appearance and accessories guide Front view... - Page 6 6. Failure warning light(red) It will light up when there is an interior fault, including three status of hard disk failure, fan failure, and when temperature is too high. 7. Hard disk tray handle 8. Hard disk tray button The operation key for removing the hard disk tray 9.
- Page 7 Rear view (GR3630-2S-WBS2) Mute USB2.0 e-SATA 1394B Please ensure each plug is properly connected before turing on power. 1. AC power socket 2. Power switch 3. Warning sound effect switch (Mute) The product is built in with a buzzer. Whenever there is an error during the application process, apart from lighting up the warning light at the front, the product will also emit a warning sound.
-
Page 8: Product Detailed Specifications
Parts list Item GR3630-2S-SB2+ GR3630-2S-WBS2 GR3630 main unit AC power cord USB 2.0 connecting cable eSATA connecting cable 1394b connecting cable Quick installation guide CD (user guide) Screw pack ※ After opening the package of this product, please ensure that the related accessories of the model you purchased are complete with nothing missing, and the appearance and functions are all intact. -
Page 9: Precautions Before Application
2.3 Precautions before application 1. Although GR3630 allows users to use hard disks of different capacities, but if you want to get best application performance and best product compatibility, we suggest you to use brand new hard disks of same specifications, model number and brand. 2. -
Page 10: Product Connection And Booting
2. Install two brand new SATA hard disks in the hard disk trays and secure each of them with screws at four positions as indicated in the diagram using the screw pack provided. Finally, insert the hard disk trays into GR3630. 3.2 Product connection and booting 1. -
Page 11: Windows Operating System
3.3.1 Windows operating system 1. Enter into device manager of your computer. ※ Use the mouse to click on My Computer and then click the right mouse button to select Management option. ※ Click on Disk Management Installation of GR3630 ... - Page 12 2. Add in GR3630 hard disk and format it. ※ During the setting process, we suggest you to choose NTFS format. ※ Move the mouse to the upper region of Non-configured area and click the right button; it will display the list of New Disk Partition ※ According to Disk Management Wizard instructions, click Next to proceed the process until finish.
- Page 13 3. Setting is finished, you can start using this product. ※ After finish setting and formatting the hard disk, it will display a disk drive code (I:) as shown in the diagram. ※ After finish setting, your computer will display a disk code (I:) to note that you can now use GR3630 normally.
-
Page 14: Mac Operating System
3.3.2 MAC operating system 1. Enter into Disk Utility of your computer. ※ Click on this hard disk device Installation of GR3630 ... - Page 15 2. Add in GR3630 hard disk name and do formatting operation. ※ Choose hard disk formatting and disk drive name setting (can be set as GR3630) ※ Click on Erase key and start formatting the hard disk. ※ After finish setting the disk drive, click Erase key and start formatting the hard disk.
- Page 16 3. Setting is finished, you can start using this product. ※ After finish formatting the hard disk, it will display the disk drive name GR3630. ※ The desktop will automatically create a disk drive name GR3630, you can start using this product. Installation of GR3630 ...
-
Page 17: An Introduction To Other Functions
3.4 An introduction to other functions 3.4.1 LCD monitor operation guide ※ GR3630-2S-SB2+ GR3630-2S-SB2+ PASSWORD CHANGE RAID MODE Booting ... 0000 Enter Enter Down SETUP PASSWORD Pri HDD : OK Sec HDD : OK Down GR3630-2S-SB2+ RAID - 1 V090707.1 Down SYSTEM TEMP 35 C Down... -
Page 18: Lcd Monitor Message Guide
8. Use UP/DOWN key to input custom password. Password changing is to allow users to customize their personal preferences. After it has been changed, please record the password personally. Should you forget about it, it would cause disturbances to application. ※ GR3630-2S-WBS2 GR3630-2S-WBS2 RAID - 1 V100.0812... -
Page 19: Gui Software
Should you discover any problem while using the product, you may seek solutions to the problem through the customer service staff supporting@raidon.com.tw. The customer service staff will provide you with a new firmware and this software to allow you to update the firmware through this software. -
Page 20: Appendix A Frequently Asked Questions
Appendix A Frequently asked questions Q: Is it alright to use RAID 1 to do hard disk backup function? A: Yes. RAID 1 is a mirror function itself. If your hark disk requires RAID 1 to do backup function, please place your hard disk containing data in Pri HDD (Source) position to set as RAID 1, and after booting, place the new hard disk in Sec HDD (Target) position. - Page 21 1. Sec HDD has found to be damaged 2. Remove the damaged Sec HDD 3. Insert a new hard disk into Sec HDD position 4. After about 5 seconds, the system will ask you whether or not to rebuild? If you do, please click on ENTER key;...
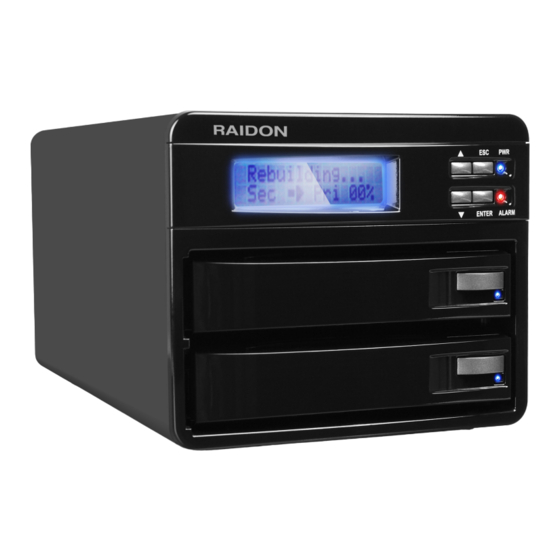
- Page 22 5. After confirming to rebuild data, GR3630 will start to copy hard disk data and display the working progress. 6. After finish copying the data, it will return to standby screen. 7. If you choose to abandon data rebuilding, the screen will return to a screen that reminds user that Pri HDD has been destroyed (same as screen 1).
Need help?
Do you have a question about the GearRAID GR3630-2S-SB2+ and is the answer not in the manual?
Questions and answers