Advertisement
Quick Links
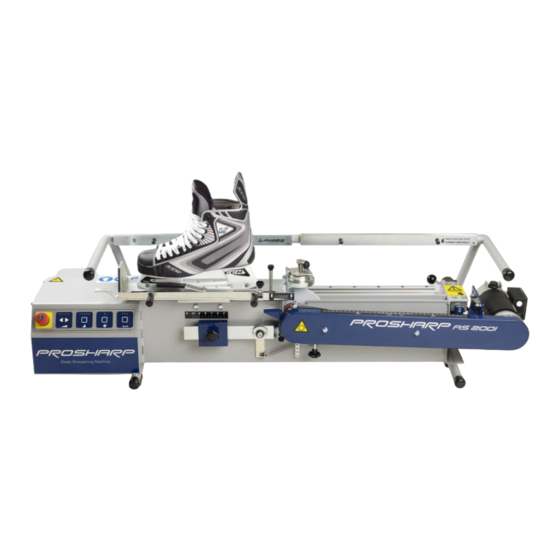
AS 2001- Allpro
ORIGINAL INSTRUCTIONS
Read the installation and operating instructions carefully before using the machine.
Usage that is not in accordance with the instruction manual and/or disregard safety
instruction, may cause injury or death, and damage the machine.
page 1
Advertisement

Related Manuals for Prosharp AS 2001-Allpro


Summary of Contents for Prosharp AS 2001-Allpro
- Page 1 AS 2001- Allpro ORIGINAL INSTRUCTIONS Read the installation and operating instructions carefully before using the machine. Usage that is not in accordance with the instruction manual and/or disregard safety instruction, may cause injury or death, and damage the machine. page 1...
-
Page 2: Installation Instructions
5. Use the machine in a warm, dry and well lit room. 6. The AS 2001-Allpro includes: 1 x transportation box, 1 x AS 2001-Allpro skate sharpener, 1 x Grinding wheel MA70 (mounted), 1 x diamond tool NDT3 (mounted), 1 x instruction manual, 1 x power cord, 1 x 19mm wrench, 2 x key for emergency stop. - Page 3 4. Guard against electric shock. Avoid body contact with earthed or grounded surfaces (e.g. pipes, radiators, ranges, refrigerators) 5. Keep other persons away. Do not let persons, especially children, not involved in the work touch the machine or the extension cord and keep them away from the work area. Make workshop kip proof with padlocks, master switches, or by removing starter keys.
- Page 4 Control Panel Manual page 4...
- Page 5 Designation ProSharp AS 2001-Allpro is a skate sharpening machine and should be used only to sharpen ice skates. Safety Information and Recommendations Before using the machine check the grinding wheel for cracks. If there are cracks in the wheel (can be caused in transport), change the wheel to a new wheel before grinding.
- Page 6 = Never lay your hands on the machine when the sharpening procedure is on! Connection Connect tab single-phase A.C, 100-240 VAC 50-60 Hz. Release the emergency button. All lights flashing = put in a skate Lights are walking 1 by 1, machine is ready to sharp. ...
- Page 7 The ProSharp AS 2001- Allpro delivery includes: 1 Skate Sharpening Machine ProSharp AS 2001- Allpro 1 Grinding wheel MA70 1 Dressing-tool NDT3 7 Contouring templates 1 Power cord 1 Key for grinding wheel change, 19mm ...
-
Page 8: Maintenance Instructions
For best grinding result, use only special-balanced ProSharp grinding wheels. After 800-1000 pairs: Check the dressing-tool. The diamond must be pointed and even for best grinding result. Use only special-centered dressing-tool, NDT1 or NDT3, for exact dressing and best grinding-result. - Page 9 Test run without grinding until there is no slippage. After 3000-5000 pairs: Service should be made by an authorized service technician. (1-2 seasons) Please contact us for support about the machine! page 9...
- Page 10 Dressing of the grinding wheel 1. When dressing the grinding wheel always adjust the grinding wheel sideways to position 3.0 mm. See Picture 1. Never put the skate in place when you are Picture 1. dressing the grinding wheel. 2. Choose the hollow by moving the skate-holder device by using the arrows from “SPEED”...
- Page 11 Grinding 1. Check the desired hollow radius and adjust if needed. Referring to the dressing of the grinding wheel. (Page 9.) 2. Adjust the grinding wheel sideways to the right blade thickness. (Picture 5.) Always remember to measure both blades because there are sometimes differences even between the blades in the same pair! HTC-tool is perfect for this! Picture 5.
- Page 12 b. Use a flat template to set a correct height on the heel of the blade so that the grinding wheel will not make the heel rounded. Then by pressing the “SHARP” button start the grinding. Push the button again to turn the skate-holder device back just before the toe-picks of the skate.
- Page 13 8. Important! If you wish to reset the grinding push quickly 2 times the “SHARP” button when the skate-holder is going from left to right. When the skate- holder is moving from right to left only one push is needed for “reset”. Never start the machine without a skate unless you are dressing the grinding wheel! 9.
- Page 14 rotates over the whole template the skate has been profiled from the whole (chosen) length of the blade. 7. Radius profiling. Choose a radius template and put the template into the right position. Adjust the guide-roll so that it will profile the desired surface of the blade.
- Page 15 Change of the grinding wheel Changing of the wheel and all service work may only be done when the main power is switched off. But before switching the power off please read these instructions. Drive the skate-holder to the left by using the arrows at “SPEED” Now switch the power off.
Need help?
Do you have a question about the AS 2001-Allpro and is the answer not in the manual?
Questions and answers