Advertisement
Table of Contents
For the latest User Installation Guide please visit: www.ergotron.com
User's Guide - English
Guía del usuario - Español
Manuel de l'utilisateur - Français
Gebruikersgids - Deutsch
Benutzerhandbuch - Nederlands
Guida per l'utente - Italiano
Användarhandbok - svenska
888-61-101-G-00 rev.A • 05/14
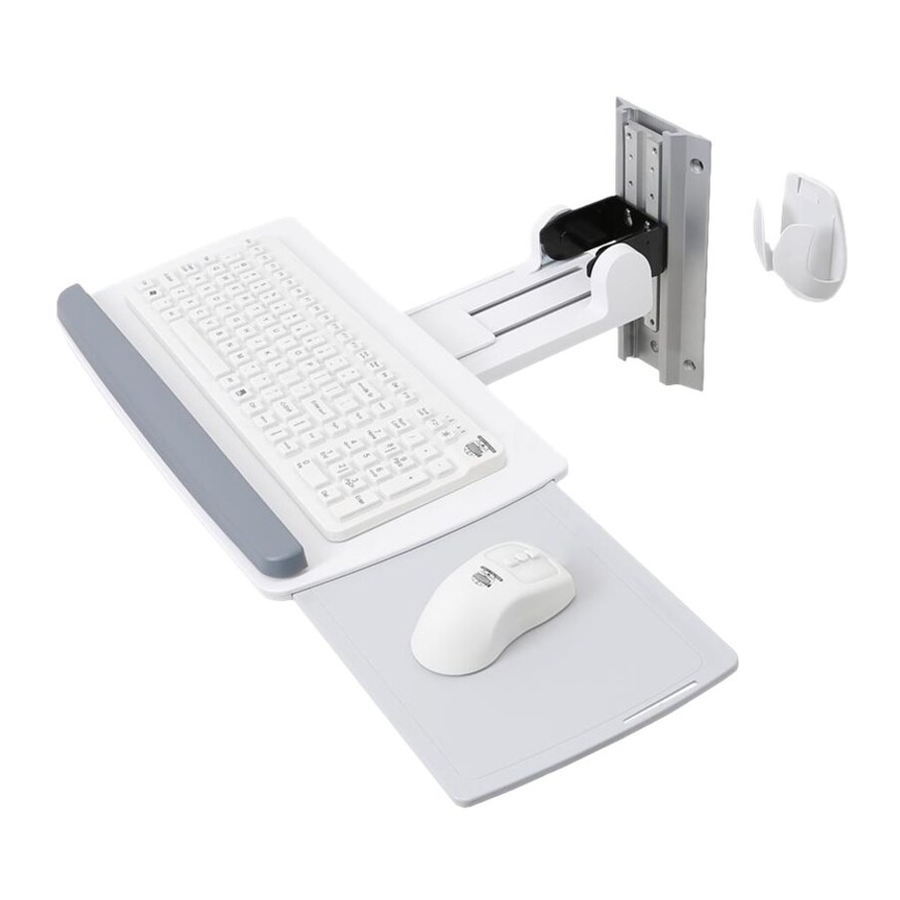
Neo-Flex Slide-out Keyboard Tray
User's Guide
Wall Mount
1 of 9
Advertisement
Table of Contents

Related Manuals for Ergotron Neo-Flex Slide-out


Summary of Contents for Ergotron Neo-Flex Slide-out
-
Page 1: Wall Mount
User's Guide Neo-Flex Slide-out Keyboard Tray Wall Mount For the latest User Installation Guide please visit: www.ergotron.com User's Guide - English Guía del usuario - Español Manuel de l’utilisateur - Français Gebruikersgids - Deutsch Benutzerhandbuch - Nederlands Guida per l’utente - Italiano Användarhandbok - svenska... - Page 2 1/4-20 x 2" 1/8" 8-32 x 1/2" 3/32" 1/4-20 x 1/2" set screw ST6.3 x 50 mm M6 x 70mm ST6.3 x 50 mm See Wall Mounting Options for additional tools needed for your type of wall installation. 1/2" 1/2" Determine Ergonomic Mounting Height Set Your Workstation to Work For YOU! Height Position top of screen slightly below eye level.
-
Page 3: Wall Mounting Options
Wall Mounting Options 2“ (51mm) 1“ 0.5“ (25mm) (13mm) WARNING: Ensure that the wall structure is capable of supporting four times the total 8“ weight of mounted equipment. Mounting to wall surfaces that do not meet this (203mm) criteria may result in an unstable, unsafe condition which could lead to personal injury and/or property damage. - Page 4 Attach to Wall Wood Studs ≥ 25 gauge steel Stud Finder Wood Ø 3/16" (5 mm) ST6.3 x 50 mm Studs ≥ 25 gauge steel ST6.3 x 50 mm NOTE: Fasteners may unwind due to vibration caused by movement of mounting solution over time.
-
Page 5: Hollow Wall
≥ 5/8” Attach to Wall Hollow Wall Sheetrock Ø 1/2" (13 mm) 1. Push anchor plate into hole. 2. Pull loop back so plate opens fl at against inside surface of wall. 3. Push collar into hole. 4. Snap off loop. 1/4-20 x 2"... - Page 6 Attach to Wall Concrete Ø 3/8" (10 mm) 3-1/8" (80 mm) WARNING: Mounting holes must be at least 3-1/8” (80mm) deep and must be located within solid con- crete, not mortar or covering material. If you drill into an area of concrete that is not solid, reposition mounting holes until both anchors can be fully inserted into solid concrete! WARNING: Anchors that are not fully set in solid concrete will not...
- Page 7 Attach Keyboard Tray 8-32 x 1/2" 1/8" 1/4-20 x 1/2" set screw NOTE: Fasteners may unwind due to vibration caused by movement of mounting solution over time. Inspect mounting solution for loose fasteners on a routine basis. If desired, apply a light duty thread locking adhesive to fasteners before installation to prevent back-out.
-
Page 8: Range Of Motion
Range of Motion This product is designed to adjust quickly and easily according to your needs – refer to following steps for adjustment. Tilt – Forward and Backward 1/2" 1/2" Increase Friction If this product moves too easily from side-to-side, then you'll need to 90˚... - Page 9 Attach Mouse Pouch Attach Cable Management For local customer care phone numbers visit: http://contact.ergotron.com 888-61-101-G-00 rev.A • 05/14 9 of 9...
Need help?
Do you have a question about the Neo-Flex Slide-out and is the answer not in the manual?
Questions and answers