
Related Manuals for Trust 1220S PowerC@m Optical Zoom


Summary of Contents for Trust 1220S PowerC@m Optical Zoom
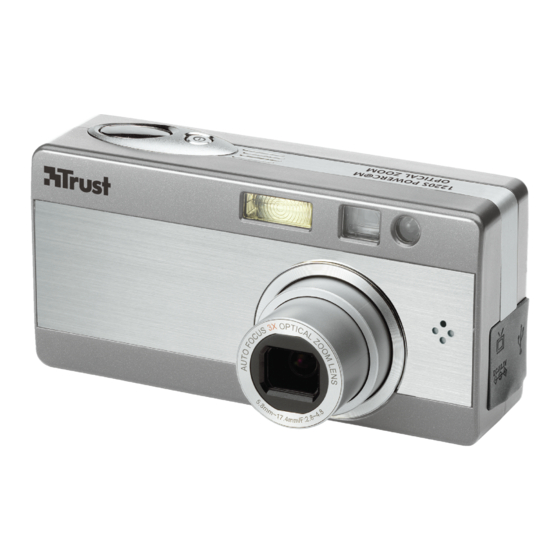
- Page 1 1220S POWERC@M OPTICAL ZOOM User’s manual V1.0...
- Page 2 Thank you for your purchase. Register your product via our Internet site at www.trust.com/register, so that you will be eligible for optimal guarantee and service support. You will also be automatically informed of the development of your and other Trust products.
- Page 3 1220S POWERC@M OPTICAL ZOOM Fig. 1 Fig. 2 Fig. 3 Fig. 4 Fig. 5 Fig. 6...
- Page 4 1220S POWERC@M OPTICAL ZOOM Fig. 7 Fig. 8 Fig. 9 Fig. 10 Fig. 11...
- Page 5 1220S POWERC@M OPTICAL ZOOM Fig. 12 Fig. 13 Fig. 14...
-
Page 6: Table Of Contents
1220S POWERC@M OPTICAL ZOOM Read the ‘Quick Installation Guide’ before using the camera for the first time. Contents INTRODUCTION....................3 ............. 3 ENERAL COMMENTS REGARDING PHOTOGRAPHY SAFETY......................3 ......................3 ATTERIES APPROVAL ....................4 DESCRIPTION OF THE CAMERA ..............4 ................. 4 ESCRIPTION OF THE BUTTONS ........ - Page 7 OTHER ......................23 17.1 ....................23 RIPOD STAND 17.2 ..................23 TTACHING THE STRAP TRUST PHOTO SITE / TRUST PHOTO UPLOAD SOFTWARE ....23 ULEAD PHOTO EXPLORER 8 SE BASIC (WINDOWS)......24 19.1 ....................24 NSTALLATION 19.2 ........................ 24 USE WITH AN APPLE MACINTOSH ............25 INSTALLATION...................
-
Page 8: Introduction
1220S POWERC@M OPTICAL ZOOM Introduction This instruction manual is for users of the 1220S POWERC@M OPTICAL ZOOM. This camera is an advanced model for the demanding user. The various possibilities built into the camera allow it to be used not only for taking photos but also as a video camera and a dictaphone. -
Page 9: Approval
1220S POWERC@M OPTICAL ZOOM Never throw the batteries onto an open fire. The batteries may explode. Never drill holes into the batteries. Keep the batteries out of reach of small children. Only use AA alkaline or rechargeable AA NiMh (minimum 1800 mAh) batteries with this camera. -
Page 10: Description Of The Mode Dial And The Control Button
1220S POWERC@M OPTICAL ZOOM See Figure 3. Item Description Function “LCD” button Switches the LCD screen on and off and displays certain details. For more information see Section 4.3. “AE/AL lock” button Button for setting the exposure method. See Section 7.7 “Flash”... -
Page 11: Lcd Screen
1220S POWERC@M OPTICAL ZOOM Display mode Display the photos and videos recorded 8, 14 and plays the recorded sound. Video mode Record a video with sound. Audio mode Record a sound or memo. Setup mode Set the basic camera settings... -
Page 12: Making The Camera Ready For Use
This camera has a 14 MB internal memory which allows number of photographs to be saved on it, see Table 19 and Table 20. Trust recommends that a certified SD (Secure Digital) or MMC (Multi Media Card) memory card with greater capacity be purchased. This allows more photos to be saved in the memory. -
Page 13: Setting
1220S POWERC@M OPTICAL ZOOM Remove the memory card by pushing it so that the lock is released. Remove the memory card from the camera Format the memory card before using it for the first time. See Section 6.2. N.B.: the memory card can only be inserted into the camera in one way. Do not force the card into the slot. -
Page 14: Taking Photographs
1220S POWERC@M OPTICAL ZOOM BASIC USE Taking photographs Turn the camera on (2, Figure 1). Set the camera to recording mode ( ) using the mode dial. The camera will make the correct settings automatically when in this mode. Look through the image finder or on the LCD screen and fix the object that you want to photo. -
Page 15: Macro Recording
1220S POWERC@M OPTICAL ZOOM Slow Sync The flash will go off automatically but a little bit later than the shutter. This setting can be used if a longer exposure time is being used. Switched on The flash is switched on and will flash with every photo. -
Page 16: Display (Photo) Recordings
1220S POWERC@M OPTICAL ZOOM Now aim the camera so that the picture to be taken is shown in the image finder. Press the shutter button. AF lock: Correct focus on objects which are not in the middle of the image. -
Page 17: Connecting To Ausb Port
1220S POWERC@M OPTICAL ZOOM N.B.: the latest drivers are always available on www.trust.com/13818. Check whether a new version is available and if so use it for your installation. N.B.: in the example, ‘D:\’ is used to indicate the CD-ROM drive. This may be different for your computer. -
Page 18: Connecting The Camera To A Tv
1220S POWERC@M OPTICAL ZOOM Carry out the procedure given below for Windows ME, 2000 and XP to disconnect your camera from the computer. Close the program that is using the “Removable disk”. Click once with the left-hand mouse button on the USB pictogram in the task bar. -
Page 19: Taking Pictures
1220S POWERC@M OPTICAL ZOOM Note: if you do not see an image and hear a loud humming sound through the speakers, then you may have connected the image plugs to the wrong connection. Check the connections and try again. ADVANCED SETTINGS Taking pictures 11.1... -
Page 20: Manual Settings
1220S POWERC@M OPTICAL ZOOM symbol Mode Description background will be given normal exposure because of the long shutter time. Sunset [Sunset] Setting for taking pictures at sunset. Beach Taking pictures on the beach, with excess blue [Beach] colours. Backlight For taking pictures with backlight by setting the [backlight] light measurement differently. - Page 21 1220S POWERC@M OPTICAL ZOOM The camera can be set manually. The setttings with a short description are shown in the table below. Set the camera to Recording mode. Press the “Menu” button. The settings in the table below can be set according to your wishes.
- Page 22 1220S POWERC@M OPTICAL ZOOM Item Symb. Explanation Auto White balance Tip: Follow these steps for One-touch WB Press OK to confirm one-touch WB. To set the desired WB press the "OK" button. Take pictures by pressing the shutter button with the new WB setting.
- Page 23 1220S POWERC@M OPTICAL ZOOM Item Symb. Explanation Focus Area You can move the Crop mark. Use the control button to move the Crop mark. Press “OK” to confirm. Now take the picture. Tip: (Follow these steps for Focus Area) The crop mark will be removed once the focus area function is confirmed.
-
Page 24: Recording Video Clips
1220S POWERC@M OPTICAL ZOOM 1/2, 1/4, 1/8, 1/15, 1/30, 1/60, 1/125, 1/250, 1/500, 1/1000, 1/2000 sec. Table 13: overview of exposure/shutter speed settings Recording video clips Moving images can be recorded when in video mode ( Note: The length of a video recording depends on the available internal memory or the free space on your SD memory card. -
Page 25: Viewing Images Enlarged
1220S POWERC@M OPTICAL ZOOM A maximum of 9 thumbnail images can be viewed at one time when in thumbnail mode. The buttons “ “, “ ”, “ “ and “ ” can be used to browse through the thumbnails. Select a photo and press the zoom button ( ) (9x -> 4x -> 1x) or the "OK" button to return to screen filling display mode. -
Page 26: Settings
1220S POWERC@M OPTICAL ZOOM The following options are possible: Symbol Description Options Comments Delete Erase Current: delete the selected photo. [Erase] Erase all: delete all photos. Photos which are protected against deleting will not be deleted. Protect Current/All: protect selected/all photos... -
Page 27: Directory Structure
1220S POWERC@M OPTICAL ZOOM Symbol Setting Note Date and Set the date (year, month, day) and time (hours, time minutes and 12/24 hour clock. Self-timer Set the time length for the self-timer (3 sec / 10 sec*) option Slide show... -
Page 28: Other
Install Trust Photo Upload from CD-ROM (Trust Installer Install software Trust Photo Upload) Use (Windows) The manual for the Trust PhotoSite is given on the CD-ROM. You can read here how to install and use the software. (Trust Installer Read manual Trust PhotoSite) -
Page 29: Ulead Photo Explorer 8 Se Basic (Windows)
“Ulead Photo Explorer 8.0”) For more information: www.ulead.com (this link can change without warning) 19.1 Installation Insert the CD-ROM into your CD-ROM drive. Trust Installer “Install software” “Ulead Photo Explorer 8 SE Basic”. Click on “Next”, “Yes” (license Agreement), and “Next” (4x).“... -
Page 30: Use With An Apple Macintosh
Start – Settings – Control Panel - System – Device control Windows XP/2000 - Disk Drives – Trust 1220S PowerC@m USB Device (2x) - Storage Volumes – Generic volume (2x) - Universal Serial Bus Controllers – USB Mass Storage Device Windows ME - Disk Drives –... -
Page 31: Removing Software
1220S POWERC@M OPTICAL ZOOM 21.2 Removing software If you wish to remove the Ulead Photo Explorer 8 software or Trust Photo Upload from the computer then follow the steps given below Go to software in the Control panel (Start Settings... - Page 32 1220S POWERC@M OPTICAL ZOOM The batteries have Reinsert the batteries (see Section been inserted 5.1). incorrectly. Camera is still Disconnect the USB cable. The connected to your camera controls do not work if it is computer. connected to the computer.
- Page 33 1220S POWERC@M OPTICAL ZOOM Compare the photograph to other The monitor has not photographs (for example, on the been set correctly. Internet) where you know the colour is correct. Adjust your monitor correctly (see the instruction manual provided with your monitor).
- Page 34 Check the Windows Media Player, cannot be played file format found. Apple Quicktime website and/or back. (Macintosh). Trust FAQ for ASF support for Macintosh. Burst cannot be set. Flash is switched on. Turn off the flash (see Section 7.3) The memory is almost Delete images from the memory.
-
Page 35: Technical Information
Details for the votage adapter: 3.3Vdc, 2A. If you still have problems after trying these solutions, please contact one of the Trust Customer Care Centers. You can find more information at the back of this instruction manual. -
Page 36: Overview Of Indicators
1220S POWERC@M OPTICAL ZOOM USB: USB 1.1 (12 Mbps) Menu languages on OSD English, French, German, Italian, Spanish Video output PAL / NTSC Compatibilities Windows 98, ME, 2000, XP: Mac OS 9.1 or later Supports MSDC File formats MPEG4 (*.ASF), JPEG, EXIF 2.2, DPOF Batteries 2x AA Alkaline, or Ni-MH(>1800 mAh) -
Page 37: Overview Of Messages On Lcd Screen
1220S POWERC@M OPTICAL ZOOM Camera status Status van AF/Timer Led behaviour Indicator Indicator voltage. replace the batteries. USB plug in green TV-Out green Self-timer green Self-timer switched on. (flashes) Will flash faster when the picture has nearly been taken. Video/Audio... - Page 38 Copyright disclaimer This manual or any part of it may not be reproduced without the permission of Trust International B.V.
- Page 39 SERVICE CENTRE 24 HOURS free service: www.trust.com Residents in the UK and Ireland should contact: UK Office Mon - Fri Phone +44-(0)845-6090036 From 8:00 - 16:00 +31-(0)78-6543299 I residenti in Italia possono contattare: lun - ven Ufficio italiano 9:00 – 17:00...
Need help?
Do you have a question about the 1220S PowerC@m Optical Zoom and is the answer not in the manual?
Questions and answers