Table of Contents
Advertisement
Quick Links
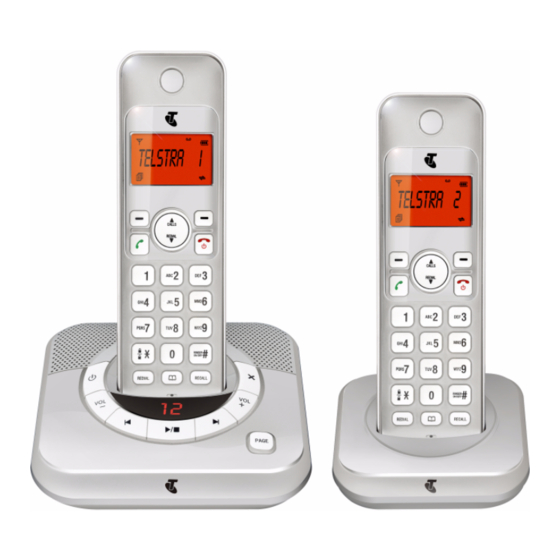
TELSTRA 8850
DECT CORDLESS PHONE WITH
INTEGRATED ANSWERING MACHINE
USER GUIDE
This telephone has been
designed for ease of use.
Please read the instructions
and keep it handy for future
reference. If you have any
problems with your phone,
refer to the Help section of
this User Guide.
This User Guide covers the
models:
Telstra 8850
Telstra 8850 TWIN
Telstra 8850 TRIPLE
Advertisement
Table of Contents

Related Manuals for Telstra 8850 TRIPLE


Summary of Contents for Telstra 8850 TRIPLE
- Page 1 Please read the instructions and keep it handy for future reference. If you have any problems with your phone, refer to the Help section of this User Guide. This User Guide covers the models: Telstra 8850 Telstra 8850 TWIN Telstra 8850 TRIPLE...
-
Page 2: Answering Machine
Introduction To your Telstra 8850 Digital Cordless Telephone with Answering Machine • Phonebook - lets you store up to 50 IMPORTANT names and numbers for easy This equipment requires dialling. electricity to work. You will • Telstra’s Calling Number Display* - not be able to make any lets you see who’s calling. - Page 3 • 2 rechargeable batteries • 1 User Guide Need help? PLEASE LOOK IN THE HELP SECTION AT If you have purchased a Telstra 8850 THE END OF THE USER GUIDE IF YOU multi handset pack you will also have EXPERIENCE ANY OPERATIONAL...
-
Page 4: Table Of Contents
In this guide Important Safety Instructions Call from the call list Call from the redial list Call timer Getting Started Answer a call Location End a call Setting up Adjust earpiece and Battery performance handsfree volume Setting up for multiple packs Mute a call Date and time To turn the ringer off... -
Page 5: In This Guide
View the details of the Set alert tones call list entry Rename the handset Flashing Message Indicator Choose the information to Telstra Home Messages 101® or be displayed in idle MessageBank® Set the auto answer To call Telstra Home Base settings Messages 101®... - Page 6 Replacing the handset batteries Safety Answer Machine Cleaning Turn on / off the answering Environmental machine Telstra accessories and Listen to the messages in the replacement items answering machine How many telephones Delete all messages in the can you have?
-
Page 7: Important Safety Instructions
Important Safety Instructions When using your telephone 6. Unplug this product from the equipment, basic safety wall outlet and contact TechHelp precautions should always be on 1300 369 193 under the followed to reduce the risk of fire, following conditions: electric shock and injury, •... - Page 8 Important Safety Instructions 9. Use only the supplied NiMH 14. Telephone receivers produce (Nickel Metal Hydride) batteries. magnetic fields that can attract The operation periods for the small metallic objects such as handsets are only applicable pins or staples. To avoid injury, with the default battery do not place the handset where capacities.
-
Page 9: Getting Started
Location where you locate the base. Putting it as high as possible ensures the best Place your Telstra 8850 within 2 signal. The maximum range between metres of the mains power socket and the base station and the handset is telephone socket so that the cables approximately 300 metres. -
Page 10: Battery Performance
Getting Started 2. To fit the NiMH rechargeable batteries WARNING into the handset, remove the battery Do not place your Telstra 8850 in the compartment cover by sliding it out. bathroom or other humid areas. Place the batteries as indicated, IMPORTANT following the polarity. -
Page 11: Setting Up For Multiple Packs
Mains power Setting up for multiple packs wall socket If you have purchased a Telstra 8850 multiple pack, you will need to Mains power cable prepare additional handsets and chargers for use. -
Page 12: Date And Time
Getting Started Date and time 4. Press . Then use the keypad to If you have subscribed to Telstra's enter the time from time format Calling Number Display service, the 12HR/24 HR (To change time date and time is set automatically for... -
Page 13: Getting To Know Your Phone
Getting to know your phone Handset buttons 1. EARPIECE 2. CALL LIST / UP In idle mode: Press to access the call list In menu mode: Press to scroll up the menu items In Phonebook list / Redial list / Call List: Press to scroll up the list During a call: Press to increase the volume... - Page 14 Press to insert a digit / character / * / # off the handset key in idle mode: Press and hold to In idle mode (when the handset is access the Telstra Home Messages 101® powered off): Press and hold to power or MessageBank® on the handset Press and hold key during a conversation to answer Call-Waiting.
- Page 15 During ringing: Press to answer a call 7. RECALL 12. LEFT SOFT KEY (MENU / OK) To activate Recall for use with Telstra In idle mode: Press to access the main Network services such as Call Waiting. menu 8. PHONEBOOK...
-
Page 16: Base Overview
Getting to know your phone Base overview 4. PAGE Press Page on the base to page your handset. The handset will ring for approximately 60 seconds. 5. 7-Segment LED DISPLAY When answering machine is OFF Steady: No voice messages in TAM Flashing: There are XX new voice messages received where XX is from 01 to 59 or... - Page 17 Getting to know your phone --/XX 6. PLAY / STOP Flashing XX alternatively Press to play the message. with - -: Time is not set and there are XX new voice Press to stop the message playback. messages received where 7.
-
Page 18: Display Icons And Symbols
Getting to know your phone Display icons and symbols Indicates that the ringer is The LCD display gives you switched off. information on the current status of Steady when an alarm is set. the telephone. Flashes when the alarm sounds. Indicates that the keypad is locked. - Page 19 / unmute during a call. Indicates when you have new messages on your Telstra Home Messages 101® or MessageBank® services. Indicates an unanswered call within the Call List.
-
Page 20: Menu Structure
Getting to know your phone Menu structure In idle mode, press to access the main menu. Use to scroll through the menu. Refer to the following for the menu structure. Main Menu Call List Phonebook BS Settings HS Settings Registration Default Ans. Machine Sub Menu Review Review... -
Page 21: Character Set
Getting to know your phone Character set Alphanumeric editing Number editing (For phonebook name editing and renaming handset) (For phone number editing, date / time editing) Number of presses Key 1st 2nd 3rd 10th space 0, P (Pause) ‘ &... -
Page 22: Using Your Phone
Using your phone Make a call press then to access the Call List from the main menu. Preparatory dialling Enter the phone number then press Call from the redial list to dial the number. Press Press to access the redial list then clear the entry. -
Page 23: End A Call
Using your phone End a call To turn the ringer off During a call connection, press In idle, press and hold to turn off end the call. the handset ringer. The icon is displayed on the screen. Put the handset on the base to end Turn on the keypad lock the call. -
Page 24: Store A Redial Number Into The Phonebook
Using your phone Delete a redial number 3. Press to dial to the selected redial number. 1. In idle mode, press to access the redial list. Note: If there are no numbers in the redial list, EMPTY If redial entry is shown with a name, the display shows press to view the number. -
Page 25: Using Multiple Handsets
Using your phone pressing on any handset or 3. When the called handset rings, press on the called handset to on the base again. establish the internal call. Note: If there is an incoming call during paging, paging will cease and the phone will Note: If only two handsets are registered to ring with the incoming call instead. -
Page 26: Make A 3-Way Conference Call
Using your phone 3. The external call is put on hold handset, press the handset number automatically and the called on the keypad. If you press handset rings. the keypad all handsets will ring. 4. Press on the called handset to 3. -
Page 27: Phonebook
Phonebook Your phone can store up to 50 Search a phonebook entry phonebook entries with names and In idle: numbers. Each phonebook entry can 1. Press to access the phonebook. have a maximum of 20 digits for the 2. Press the relevant keypad button, phone number and 12 characters for e.g. -
Page 28: Edit A Phonebook Entry
Phonebook Edit a phonebook entry Delete the entire phonebook In idle: 1. Press to access the phonebook. 1. Press to access the phonebook. 2. Press then to select DELETE ALL 2. Press to select the desired phonebook entry. 3. Press to confirm. -
Page 29: Telstra Network Services
When the call list is full, the oldest call Calling Number Display will be replaced by a new call. An unanswered call which has not been If you have subscribed to Telstra’s read is marked with a at the Calling Number Display service, and centre of the bottom line of the provided the caller’s number is not... -
Page 30: Delete An Entry In The Call List
3. Press then to select Flashing Message Indicator DELETE The Telstra 8850 is designed to provide 4. Press to confirm. visual indication when a new message is left in your Telstra Home Delete the entire call list Messages 101® or MessageBank®... -
Page 31: Telstra Home Messages 101® Or Messagebank
Note: Alternatively after answering a call You can get voice messages from your wait you can set up a 3-way chat by pressing Telstra fixed home phone when you and holding are away from the phone, busy on another call or using the Internet. -
Page 32: Phone Settings
Phone settings Your Telstra 8850 comes with a choice Change the time format of settings that you can personalise. 1. Press then to select HS SETTINGS Date and time settings 2. Press then to select You will need to set the correct time DATE &... -
Page 33: Set The Date
Phone settings Set the date Note: a. The alarm will turn off when the alarm 1. Press then to select time is reached or by pressing any key HS SETTINGS while the alarm is sounding (even if the 2. Press then to select handset keypad is locked.) -
Page 34: Set The Alarm Time (If The Alarm Is Set To Be On)
Phone settings 4. Press to confirm. Handset settings Note: If ON is selected, you will be asked to Set the ringer melody for internal set the alarm time in accordance with the calls section below. 1. Press then to select HS SETTINGS Set the alarm time (if the alarm is set to be on) -
Page 35: Set The Ringer Volume
Phone settings 4. Press then to select the key tone. You can also turn on the desired ringer melody (10 melodies alert tones when low battery and out are available for external calls). of range are detected. Low battery tone will also be emitted while you 5. -
Page 36: Choose The Information To Be Displayed In Idle
Phone settings Choose the information to be Base settings displayed in idle The current settings are marked with an asterisk in the relevant menu, You can choose to display time or which is displayed at the right-hand handset name in your idle screen. side of the menu item. -
Page 37: De-Register A Handset
Phone settings 4. Press to confirm. Change the Recall (Flash) time The default setting of Recall Time is Note: Ringtones will be played at the 100ms( Short). It is unlikely that you highlighted ringer volume while browsing should need to change this setting the volume list. -
Page 38: Registration
Phone settings 3. Press then enter the old system If the handset registration is successful, PIN. will stop flashing. The handset will automatically be allocated the 4. Press then enter the new next available handset number. This system PIN. handset number is shown in the 5. -
Page 39: Answer Machine
Answer Machine Your Telstra 8850 includes a telephone Turn on / off the answering answering machine that records machine unanswered calls when it is switched You can turn the answering machine on. The LED message counter (two on or off through the base or handset. -
Page 40: Listen To The Messages In The Answering Machine
Answer Machine Through the handset: Listen to the messages in the answering machine 1. Press then to select When new messages are recorded on ANS. MACHINE the answering machine, flashes 2. Press then to select on the handset display and the ON/OFF message counter on the base flashes 3. - Page 41 Answer Machine Listen to new messages through the 5. Press to select STOP, FORWARD, handset: PREVIOUS, DELETE to perform these functions during message 1. Press then to select playback. ANS. MACHINE STOP: Stop the current message 2. Press then to select playback and return to the previous MSG PLAYBACK menu.
-
Page 42: Delete All Messages In The Answering Machine
Answer Machine Press twice to skip backward to 4. Press to delete all old messages. the previous message. Note: If there are no more messages in the Press to skip to play the next EMPTY answering machine, will display and message. -
Page 43: Answering Machine Settings
Answer Machine Answering machine settings Record your own outgoing You can use the TAM SETTINGS menu message (OGM) through the handset to change the You can record your own OGM for ANS settings of your answering machine. & REC mode or ANSWER ONLY mode. When you record your own OGM, it will Set the answer mode be used when the answering machine... -
Page 44: Playback And Delete The Outgoing Message (Ogm)
Answer Machine Playback and delete the 7. Press to stop the OGM playback and return to the previous menu. outgoing message (OGM) You can playback your own Note: If a personalised OGM is not recorded, personalised OGM or the pre-set OGM the preset OGM will be played. -
Page 45: Set The Answer Delay
Answer Machine Set the answer delay 3. Press then to select RECORD TIME (Available options: 60, You can set the number of rings before 120, 180 seconds or UNLIMITED). the answering machine answers and starts playing your OGM. You can set 4. - Page 46 TAM SETTINGS 3. Press then to select You can ring your Telstra 8850 from CHANGE PIN another tone-dialling phone to switch the answering machine on or off then 4. Press to enter the old PIN. listen to your messages remotely.
-
Page 47: Call Screening
Answer Machine 4. Press the appropriate keys from the table on the next page to carry out your desired function. Note: If your Answering Machine is switched off, it will answer after 14 rings and play the ANSWER ONLY OGM. Press , then enter the 4-digit remote access PIN (Default Remote Access PIN is 0000 to activate the remote... - Page 48 Answer Machine Keys Functions While message is NOT playing While message is playing Delete the current message playback Skip to repeat playing the current message from the beginning. Press twice to skip backward to the previous message. Play the message Stop the current message playback Skip to play the next message Turn on the answering machine...
-
Page 49: Help
Buzzing noise on my radio, TV, • Check that the base is connected to computer or hearing aid the mains power and switched on. • Sometimes, your Telstra 8850 and other cordless telephones can Handset always shows interfere with other electrical SEARCHING... - Page 50 • Check that the handset has slotted • Another handset registered to your correctly into the base. Telstra 8850 may be on the line. • Check that the handset batteries have been correctly fitted. Answering machine does not...
- Page 51 • Has remote access been disabled? To enable remote access, page 45. No Calling Number Display number / name displayed • Have you subscribed to Telstra’s Calling Number Display service? See page 29. • The caller may have blocked their number.
-
Page 52: General Information
General Information Replacing the handset batteries Safety After a time, you may find that the • Only use the power supply included handset batteries are running out of with the product. Using an charge more quickly. unauthorised power supply will invalidate your warranty and may This is a standard sign of wear and the damage the telephone. -
Page 53: Cleaning
/ veneered wood. Please note Telstra accepts no responsibility for damage caused to • Do not stand your product on your Telstra 8850 handset by using carpets or other surfaces, which any other type of batteries generate fibres, or place it in locations preventing the free flow •... -
Page 54: Telstra Accessories And Replacement Items
(REN), which is used to calculate the number of items which may be connected to any other telephone line. Your Telstra 8850 has a REN of 0.1. A total REN of 3 is allowed, if the total REN of 3 is exceeded, the telephone may not ring. -
Page 55: Customer Service & Product Warranty
Voluntary Product Warranty is subscribe to the service, contact not valid, you may be charged a fee Telstra on 13 22 00 for residential or 13 under this Voluntary Product 20 00 for business. Warranty for the service and for any... - Page 56 Customer service & Product warranty You will need to ensure that: The benefits conferred by this Voluntary Product Warranty are in You provide proof of purchase; addition to other rights and remedies Your product is suitably packaged that are available to you under law, (original packaging is not which cannot be excluded.
- Page 57 Customer service & Product warranty IMPORTANT NOTE: THIS IS NOT A PRODUCT RETURN OR SERVICE ADDRESS - PLEASE CONTACT TECHELP BY PHONE OR EMAIL FOR PRODUCT AND WARRANTY SUPPORT. NO LIABILITY WILL BE ACCEPTED BY VTECH FOR PRODUCTS RETURNED TO THIS ADDRESS UNDER THIS VOLUNTARY PRODUCT WARRANTY.
- Page 60 (electronic, mechanical, photo copying, microcopying, scanning, recording or otherwise) be reproduced, stored in a retrieval system or transmitted without prior permission from Telstra Corporation Limited ABN 33 051 775 556. ® Registered trade mark of Telstra Corporation Limited...
Need help?
Do you have a question about the 8850 TRIPLE and is the answer not in the manual?
Questions and answers