Table of Contents
Advertisement
Quick Links
WIRED REMOTE
CONTROLLER
OPERATION MANUAL
Proper Use for Effective Energy Saving
• Thank you for purchasing the wired remote controller.
• This manual describes safety precautions required for the use of the
product.
Read this manual carefully and be sure you understand the
information provided before attempting to use the product.
Keep this manual where it is readily accessible after reading it through.
If another user operates the product in the future, be sure to hand over
this manual to the new user.
BRC1E52A7
Advertisement
Table of Contents

Related Manuals for Daikin BRC1E52A7


Summary of Contents for Daikin BRC1E52A7
- Page 1 WIRED REMOTE CONTROLLER OPERATION MANUAL BRC1E52A7 Proper Use for Effective Energy Saving • Thank you for purchasing the wired remote controller. • This manual describes safety precautions required for the use of the product. Read this manual carefully and be sure you understand the information provided before attempting to use the product.
-
Page 2: Table Of Contents
Configuration ............52 Current Settings............56 Clock & Calendar............ 57 Language..............60 Maintenance Filter Sign Resetting ..........61 Maintenance of Unit and LCD ........ 62 Useful information Error code Display ..........63 After-sale Service ........... 64 Operation manual BRC1E52A7 4PW71265-1 – 10.2011... -
Page 3: Safety Precautions
WARNING • Do not install the remote controller by yourself. Improper installation may result in electric shocks or fire. Consult your Daikin dealer. • Do not modify or repair the remote controller. This may result in electric shocks or fire. -
Page 4: Items To Be Strictly Observed
• Never disassemble the remote controller. Touching the interior parts may result in electric shocks or fire. Consult your Daikin dealer or authorized contractor for internal inspections and adjustments. • To avoid electric shocks, do not operate with wet hands. - Page 5 Do not operate the air conditioner in that case, or otherwise a malfunction, electric shock, or fire may result. • Be sure to use a dedicated power supply for the air conditioner. The use of any other power supply may cause heat generation, fire, or product failures. BRC1E52A7 Operation manual 4PW71265-1 – 10.2011...
- Page 6 In the event of a gas leakage, build-up of gas near the air conditioner may result in fire hazards. • Do not sit or stand on any unstable base at the time of operating or maintaining the air conditioner. The base may topple down and injury may result. Operation manual BRC1E52A7 4PW71265-1 – 10.2011...
- Page 7 Failure to do so may result in an electric shock or injury. • Do not wash the interior of the indoor and outdoor units by yourself. Always consult your Daikin dealer. The use of an incorrect washing method or incorrect detergent may damage the resin parts of the indoor unit or cause water leakage.
-
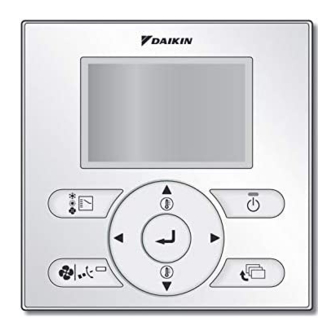
Page 8: Names And Functions
• Do not pull or twist the remote controller cord. Otherwise, the remote controller may malfunction. • Do not press the buttons on the remote controller with objects with sharp ends. Otherwise, the remote controller may be damaged or malfunction. Operation manual BRC1E52A7 4PW71265-1 – 10.2011... -
Page 9: Setting Button
• Used to change the item selected. 6. Right button (Be sure to press the part with the symbol • Used to highlight the next items on the right-hand side. • Each screen is scrolled in the right-hand direction. BRC1E52A7 Operation manual 4PW71265-1 – 10.2011... - Page 10 -- : -- 15. ( ) display Auto control function) Cool 14. Detailed selection °C Heat (with no detailed 12.Airflow direction °C items selected) (with no airflow direction function) Return Setting <Detailed display example 2> Operation manual BRC1E52A7 4PW71265-1 – 10.2011...
-
Page 11: Operation Mode
(VRV only) units is provided with the corresponding function. • Displayed on the remote controller if the remote controller has no cooling/heating selection eligibility mode (see page 21). BRC1E52A7 Operation manual 4PW71265-1 – 10.2011... - Page 12 • No detailed items are by default selected. display • Displayed to inform that the clock needs to be set again. • The schedule timer function will not work unless the clock is set again. Operation manual BRC1E52A7 4PW71265-1 – 10.2011...
- Page 13 BRC1E52A7 Operation manual 4PW71265-1 – 10.2011...
-
Page 14: Basic Operation Method
The cooling or heating mode cannot be selected if the above is displayed on the remote controller. See page 21 if Changeover under control display blinks. Operation manual BRC1E52A7 4PW71265-1 – 10.2011... - Page 15 * In auto mode setting, the fan speed setting is adjusted automatically according to setpoint and indoor temperature. In case Fan only the fan speed setting is high. BRC1E52A7 Operation manual 4PW71265-1 – 10.2011...
- Page 16 (The airflow is blowing horizontally so that people in the room are not in direct line of the cold air.) • Under continuous operation with the airflow blowing horizontally. Heating mode includes automatic operation. Operation manual BRC1E52A7 4PW71265-1 – 10.2011...
- Page 17 • When the system goes into heating operation, the fan will go into breezing operation in order to prevent cold air from blowing out of the (VRV only) system in defrosting operation. (In that case, " " (Defrost/Hot start) will be displayed on the remote controller.) BRC1E52A7 Operation manual 4PW71265-1 – 10.2011...
-
Page 18: Program Dry Operation
• If the hot air stays around the ceiling and your feet feel cold, the use of a circulator is recommended. For details, consult your Daikin dealer. Program Dry Operation Preparation •... - Page 19 • Do not turn power OFF soon after the system stops operating. Be sure to wait for at least 5 minutes so that the drain discharging device will finish discharging the residual drain. Otherwise, water leakage or failures may result. BRC1E52A7 Operation manual 4PW71265-1 – 10.2011...
-
Page 20: Setback
Operation Method The setback can not be enabled when a centralized control is connected. The setback icon flashes when the unit is turned on under the setback control. Cool Setback Cool °C Operation manual BRC1E52A7 4PW71265-1 – 10.2011... -
Page 21: Interlocked With Total Heat Exchanger
The Operation lamp (green) will be lit and the total heat exchanger will start operating. • The Operation lamp will be turned OFF and the total heat exchanger will stop operating when On/ Off button is pressed again. BRC1E52A7 Operation manual 4PW71265-1 – 10.2011... -
Page 22: Setting Method Of The Cooling/Heating Selection Eligibility
Then the cooling/heating selection eligibility will be set and the display " " (Changeover under control) will disappear. The display " " (Changeover under control) will appear on the other remote controllers. Cool Set to Cool °C Operation manual BRC1E52A7 4PW71265-1 – 10.2011... - Page 23 Other remote controllers the selection eligibility Set to "Fan" mode. (without " " (with " " (Changeover under (Changeover under control) displayed) control) displayed) • The system cannot be set to other modes except fan mode. BRC1E52A7 Operation manual 4PW71265-1 – 10.2011...
-
Page 24: Key Lock
" will appear. All buttons are disabled when the keys are locked. Cool Set to • To cancel the key lock mode, continue pressing Cool °C Menu/Enter button for at least 4 seconds. (During backlight lit) Operation manual BRC1E52A7 4PW71265-1 – 10.2011... - Page 25 BRC1E52A7 Operation manual 4PW71265-1 – 10.2011...
-
Page 26: Quick Reference Of Main Menu Items
(stop) (only if the automatically stop the air conditioning. sensing sensor is installed) Setpoint Auto Reset Even if the set temperature is changed, it returns to the preset temperature after progress of a defined period of time. Operation manual BRC1E52A7 4PW71265-1 – 10.2011... - Page 27 This function is available only on the model Filter Auto Clean whose panel has automatic cleaning function of filter. For detailed operation refer to the operation manual of these models. Used to display the service contact and Maintenance Information model information. BRC1E52A7 Operation manual 4PW71265-1 – 10.2011...
- Page 28 Set them in the main remote controller. • Energy Saving Options • Schedule • Setback Outdoor unit 2 remote controllers • Filter auto clean in control Operation manual BRC1E52A7 4PW71265-1 – 10.2011...
- Page 29 BRC1E52A7 Operation manual 4PW71265-1 – 10.2011...
-
Page 30: Menu Manipulation
• To go back to the basic screen from the main menu screen, press the Cancel button. Caution • While setting items, if a button is not pressed for 5 minutes, the screen will automatically go back to the basic screen. Operation manual BRC1E52A7 4PW71265-1 – 10.2011... -
Page 31: Individual Air Flow Direction
No Ind Set : No Individual Setting. Return Return Setting Setting Blocked : Individual air flow is blocked. Main screen • Pressing Menu/Enter button confirms the settings and takes you back to the basic screen. BRC1E52A7 Operation manual 4PW71265-1 – 10.2011... - Page 32 UnitA Outletmark Air direc. Indiv. • Press Cancel button to go back to the main menu Auto Auto screen. Auto Auto Return Setting Operation manual BRC1E52A7 4PW71265-1 – 10.2011...
-
Page 33: Quick Start (Skyair Only)
Maintenance Information Press Menu/Enter button to return to the basic Return Setting screen. • Quick Start will appear on the basic screen. • Quick Start is now on. Cool Set to Cool °C Quick Start BRC1E52A7 Operation manual 4PW71265-1 – 10.2011... - Page 34 • Quick Start will run for a maximum of 30 minutes before the unit automatically returns to normal operation. • Activating mode selector will return the air conditioner to normal operation. • In heating mode, fan speed may increase and the wind temperature may decrease. Adjust the operation as desired. Operation manual BRC1E52A7 4PW71265-1 – 10.2011...
-
Page 35: Ventilation
• Select the desired ventilation rate. Pressing Menu/ Enter button confirms the settings and takes you back to the basic screen. (Pressing Cancel button takes you back to the previous screen without changing the ventilation rate.) BRC1E52A7 Operation manual 4PW71265-1 – 10.2011... -
Page 36: Auto Mode
Heat exchanger and Bypass. Energy reclaim Outside air undergoes Heat exchange and is supplied to inside the room. ventilation mode Bypass mode Outside air is supplied to inside the room without undergoing heat exchange. Operation manual BRC1E52A7 4PW71265-1 – 10.2011... -
Page 37: Energy Saving Options
The confirmation screen will appear. Return Setting • Press buttons to select on the Energy Saving List Save the settings? confirmation screen. Pressing Menu/Enter button confirms the settings and takes you back to the basic screen. Return Setting BRC1E52A7 Operation manual 4PW71265-1 – 10.2011... - Page 38 The confirmation screen will appear. Return Setting • Press buttons to select on the Setpoint Range Set Save the settings? confirmation screen. Pressing Menu/Enter button confirms the settings and takes you back to the basic screen. Return Setting Operation manual BRC1E52A7 4PW71265-1 – 10.2011...
- Page 39 The confirmation screen will appear. Return Setting • Press buttons to select on the Set back Condition Save the settings? confirmation screen. Pressing Menu/Enter button confirms the settings and takes you back to the basic screen. Return Setting BRC1E52A7 Operation manual 4PW71265-1 – 10.2011...
- Page 40 The confirmation screen will appear. Return Setting • Press buttons to select on the Sensing Sensor (low) Save the settings? confirmation screen. Pressing Menu/Enter button confirms the settings and takes you back to the basic screen. Return Setting Operation manual BRC1E52A7 4PW71265-1 – 10.2011...
- Page 41 The confirmation screen will appear. Return Setting • Press buttons to select on the Sensing Sensor (stop) Save the settings? confirmation screen. Pressing Menu/Enter button confirms the settings and takes you back to the basic screen. Return Setting BRC1E52A7 Operation manual 4PW71265-1 – 10.2011...
- Page 42 The confirmation screen will appear. Return Setting • Press buttons to select on the Setpoint Auto Reset Save the settings? confirmation screen. Pressing Menu/Enter button confirms the settings and takes you back to the basic screen. Return Setting Operation manual BRC1E52A7 4PW71265-1 – 10.2011...
- Page 43 The settings confirmation screen will appear. • Press button to select on the settings Off Timer Save the settings? confirmation screen. Pressing Menu/Enter button confirms the Off Timer settings and takes you back to the basic screen. Return Setting BRC1E52A7 Operation manual 4PW71265-1 – 10.2011...
- Page 44 Return Press cancel button to return to the previous Electricity consumption screen. This week Total 60.2 kWh S M T W T F S Return Electricity consumption This year Total 150 kWh Return Operation manual BRC1E52A7 4PW71265-1 – 10.2011...
-
Page 45: Schedule
Month 01 Tuesday 12 : 00 Return Setting • Press buttons to select the desired function Schedule on the schedule settings screen and press Menu/ Enable/Disable Schedule nr set Enter button. Holidays Settings Return Setting BRC1E52A7 Operation manual 4PW71265-1 – 10.2011... - Page 46 • Press buttons to select on the Schedule Save the settings? confirmation screen. Pressing the Menu/Enter button confirms the daily patterns in the schedule and takes you back to the basic screen. Return Setting Operation manual BRC1E52A7 4PW71265-1 – 10.2011...
- Page 47 – – :– – – – Holiday – – – – :– – – – – – – – :– – – – – – – – :– – – – – – Return Setting BRC1E52A7 Operation manual 4PW71265-1 – 10.2011...
-
Page 48: Schedule Settings
– – :– – – – – – – – :– – – – – – temperature setpoints become disabled. – – :– – – – – – – – :– – – – – – Return Setting Operation manual BRC1E52A7 4PW71265-1 – 10.2011... -
Page 49: Main Menu Screen
• Press buttons to select "Yes" on the Schedule Save the settings? confirmation screen. Pressing the Menu/Enter button confirms the settings for each day and takes you back to the main menu screen. Return Setting BRC1E52A7 Operation manual 4PW71265-1 – 10.2011... - Page 50 • Press buttons to select on the Schedule Save the settings? confirmation screen. Pressing Menu/Enter button confirms the enable/ disable setting for the schedule and takes you back to the basic screen. Return Setting Operation manual BRC1E52A7 4PW71265-1 – 10.2011...
-
Page 51: Filter Auto Clean
• This function is available only on the model whose Filter Auto Clean panel has automatic cleaning function of filter. 0:00 - 3:00 • For detailed operation refer to the operation manual of these models. Return Setting BRC1E52A7 Operation manual 4PW71265-1 – 10.2011... -
Page 52: Maintenance Information
* The error code record may also appear. If it is not blinking, the unit is working properly. The error code record will disappear if you press On/Off button for more than 4 seconds. Operation manual BRC1E52A7 4PW71265-1 – 10.2011... -
Page 53: Configuration
Draft prevention Save the settings? confirmation screen. Pressing Menu/Enter button confirms the enable/ disable setting for the draft prevention and takes you back to the basic screen. Return Setting BRC1E52A7 Operation manual 4PW71265-1 – 10.2011... -
Page 54: Display Mode
Display Mode settings screen. Standard • Then, press Menu/Enter button to confirm settings and return to the basic screen. Return Setting * Refer to Setting the detailed display item selection to change detailed display selection. (See below.) Operation manual BRC1E52A7 4PW71265-1 – 10.2011... - Page 55 (if it is in direct sunlight, for e.g.) and unit operation during defrosting. • After setting, press Menu/Enter button to confirm settings and return to the basic screen. BRC1E52A7 Operation manual 4PW71265-1 – 10.2011...
-
Page 56: Contrast Adjustment
• On the Contrast adjustment settings screen press Contrast adjustment buttons until you reach the desired contrast. After setting, press Menu/Enter button and return Dark to the basic screen. Light Return Setting Operation manual BRC1E52A7 4PW71265-1 – 10.2011... -
Page 57: Current Settings
Display items Ventilation rate Display Mode Ventilation mode Display Item Schedule Filter auto clean Quick Start * Display items may differ depending on the model. Only the items that can be set are displayed. BRC1E52A7 Operation manual 4PW71265-1 – 10.2011... -
Page 58: Clock & Calendar
Return Setting • Select "Month" with buttons. Date & Time Year 2011 Change the month with buttons. Month Holding down the button causes the number to Thursday 12:00 change continuously. Return Setting Operation manual BRC1E52A7 4PW71265-1 – 10.2011... - Page 59 Caution: The following period has adopted Daylight Saving Timer. [Start] Last Sunday, March 2:00 [End] Last Sunday, October 3:00 Please consult your Daikin dealer to change the setup. • Press button to select on the Date & Time Save the settings? confirmation screen.
- Page 60 • Press buttons to select on the 12H/24H Clock Save the settings? confirmation screen. Pressing the Menu/Enter button confirms the 12H or 24H and takes you back to the main menu screen. Return Setting Operation manual BRC1E52A7 4PW71265-1 – 10.2011...
-
Page 61: Language
Language button. Return Setting • Press buttons to select "Language" on the Language language screen. English/Deutsch/Français/Español/Italiano/ English Eλληνικά/Nederlands/Portugues/Pyccĸий/Тürkçe/ Polski Return Setting • Pressing Menu/Enter button to confirm settings and return to the basic screen. BRC1E52A7 Operation manual 4PW71265-1 – 10.2011... -
Page 62: Maintenance
Schedule button. Reset Filter Indicator Ventilation Maintenance Information Return Setting Cool Set to Cool °C • The message shown in Step 1 will disappear from the basic screen when the filter sign is reset. Operation manual BRC1E52A7 4PW71265-1 – 10.2011... -
Page 63: Maintenance Of Unit And Lcd
• Do not use flammable materials (e.g., hairspray or insecticide) near the air conditioner. Do not clean the product with organic solvents such as benzine or paint thinner. The use of organic solvents may cause crack damage to the product, electric shocks, or fire. BRC1E52A7 Operation manual 4PW71265-1 – 10.2011... -
Page 64: Useful Information
• The error code blinks and the contact address and Error code:A1 model name will appear. Contact Info 0123 – 4567 – 8900 • Notify your Daikin dealer of the Error code and Model name. Indoor unit ––– /000 ––– /000... -
Page 65: After-Sale Service
• Failure conditions: As precise as possible. • Your address, name, and telephone number „Relocation The relocation of the remote controller requires special technology. Consult your Daikin dealer. Actual expenses required for the relocation of the remote controller will be charged. „Repairs after Warranty Period Consult your Daikin dealer. - Page 68 4PW71265-1 10.2011...
Need help?
Do you have a question about the BRC1E52A7 and is the answer not in the manual?
Questions and answers
Daikin Control pad - When the AC is turned on the green light keeps flasing
The green light on the Daikin BRC1E52A7 control pad flashes when a malfunction occurs in the air conditioner. This indicates an error or issue that requires attention. You can check the error code by pressing the Menu/Enter button and follow the troubleshooting steps or contact your Daikin dealer for support.
This answer is automatically generated