Table of Contents
Advertisement
Quick Links
Advertisement
Table of Contents

Related Manuals for Sony Ericsson Vivaz


Summary of Contents for Sony Ericsson Vivaz
- Page 1 Sony Ericsson Vivaz ™ Extended User guide...
-
Page 2: Table Of Contents
Contents Additional Help................5 Getting started................6 Assembly....................6 Help in the phone................8 Phone overview...................9 Menu overview*.................10 Navigation..................11 Using other networks................14 Status icons..................15 Calls.....................16 Making and receiving calls..............16 More calling features.................17 Entering text................20 Handwriting..................20 Using on-screen keyboards..............21 Address Book ................24 Messaging...................25 Before you use Messaging..............25 Messaging overview................25 Text and multimedia messages............25 Conversations...................26... - Page 3 Internet..................51 Bookmarks..................51 History pages..................51 More browser features..............51 Web feeds..................52 Tools ...................53 File manager ..................53 Clock....................53 Calendar...................54 Google™..................54 Notes....................55 Converter..................55 Calculator..................55 Adobe™ PDF..................55 Quickoffice™..................56 Search....................56 RoadSync™..................56 Applications................58 Applications on memory card............58 Radio....................58 Voice recorder...................59 Transferring and handling content...........60 Using a USB cable................60 Sending content to another phone............61 Updating your phone..............63 Connectivity................64...
- Page 4 Hearing Aid Compatibility............79 Hearing Aid Settings................79 Hearing Aid Compatibility and New Technologies......79 Hearing Aid Compatibility Rating............79 Legal information...............80 Index....................82 This is an Internet version of this publication. © Print only for private use.
-
Page 5: Additional Help
Additional Help The complete user documentation for your phone consists of: • Help texts – help in your phone on most applications. • Extended User guide – an up-to-date User guide with step-by-step instructions and additional information on features available in your phone. You can access this document at www.sonyericsson.com/support. -
Page 6: Getting Started
Getting started Assembly Before you start using your phone, you need to insert a SIM (Subscriber Identity Module) card and the battery. To insert the SIM card Remove the battery cover by inserting your finger nail in the bottom corner of the phone and pulling the battery cover firmly. -
Page 7: Turning On The Phone
Turning on the phone To turn on the phone Press and hold down Enter your SIM card PIN, if requested, and select OK. The first time you turn on the phone, follow the instructions to use the setup wizard for basic settings and useful tips. You may need a PIN (Personal Identification Number) to activate the services and functions in your phone. -
Page 8: Help In The Phone
To charge the phone using the power adapter • Connect the phone to a power outlet using the USB cable provided and the power adapter. You can use your phone while it is charging. You can charge the battery at any time and for more or less than 3 hours using the power adapter. -
Page 9: Phone Overview
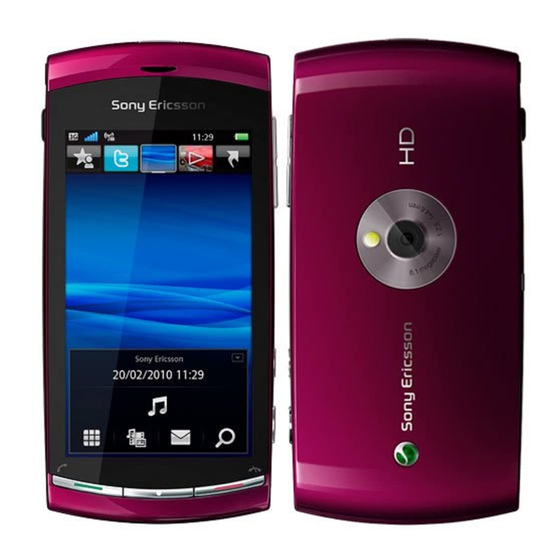
Phone overview 1 On/off key, lock key 2 Ear speaker 3 3.5 mm headset connector 4 Connector for USB cable 5 Loud speaker 6 Touch screen 7 End key 8 Main menu key 9 Call key 10 Volume, digital zoom keys 11 Camera light 12 Camera 13 Video key... -
Page 10: Menu Overview
Menu overview* AT&T GPS Music Phone Video Date and time AT&T Navigator Language YPmobile YouTube Display AT&T Maps Download settings AT&T FamilyMap AT&T Music Sensor settings Where My music Touch input Loopt Shop Music Accessories AllSport GPS Shazam Application sett. Shop GPS AT&T Radio Phone management... -
Page 11: Navigation
Navigation You can move through menus with your fingertips or with a stylus. Tap or double-tap an item to select or open it. You can also switch between running applications. Main menu You can access menus from Menu. Tap a menu to open it. You can display menus by list or by grid, create your own folders, or move contents between folders. - Page 12 The icon for some standby views, for example, the Album view, may change according to the content displayed on the standby screen. These five views are only available when Sony Ericsson is selected as the default standby theme. To switch between standby views •...
- Page 13 To change the wallpaper of a standby view Touch and hold a view icon and select an option: • Empty – no wallpaper. • Picture – display a picture as wallpaper. • Adobe Flash – use an Adobe™ Flash™ file as wallpaper. •...
-
Page 14: Using Other Networks
To set a photo as the wallpaper of a view Tap a photo and select Set as wallpaper. Select a view. To send a photo or video clip Tap a photo or video clip and select Send as. Select a sending method. To view a full-size photo in Media Tap a photo and select View in Media. -
Page 15: Status Icons
Status icons Status icons appear at the top of the screen. You can tap status icons to view more information or change settings. Battery fully charged Network signal strength Messages in the outbox GSM available Missed call Handsfree connected Call forwarded Text message received New email received Headphone inserted... -
Page 16: Calls
Calls Making and receiving calls You need to turn on your phone and be within range of a network. To make a call Select to open the dialler and enter a phone number (with international country code and area code, if applicable). Press You can call numbers from your contacts and call lists. -
Page 17: More Calling Features
To make an emergency call Select , enter 112 (the international emergency number) and press • Call list You can view information about recent calls. To call a number from the call list Press and select a tab. Select a name or a number and press Speed dial Speed dialing lets you select eight contacts you can dial quickly from standby. -
Page 18: Handling Two Voice Calls
To activate call waiting Select Menu > Settings > Telephony > Call settings > Call waiting > Activate. • To make a second call During a call, select Keypad. This puts the ongoing call on hold. Enter the number to call, and press To answer a second call •... -
Page 19: Call Time And Cost
To restrict calls Select Menu > Settings > Telephony > Call blocking. Select an option. Select Activate. Enter your password and select OK. Call time and cost During a call, the phone shows how long you have been talking for. You can also check on the duration of your last call, your outgoing calls and the total time of all your calls. -
Page 20: Entering Text
Entering text You can enter letters, numbers and special characters using the slideout keyboard, on- screen keyboards or handwriting recognition. You can switch between these input methods. To enter text using on-screen keyboards or handwriting recognition Tap any text input field. For example, select Menu > Messaging > Messages > New message and tap in the area of the screen under the To field. -
Page 21: Using On-Screen Keyboards
Using on-screen keyboards You can tap a text input field to activate the on-screen keyboard. You can switch between three types of keyboards: • Full QWERTY keyboard – keyboard in landscape mode. • Alphanumeric keypad – traditional keypad for alphanumeric characters. Alphanumeric keypad Close –... - Page 22 To enter text using the multitap method is displayed in the text input indicator, tap and select Predictive text > Off to change to multitap text input. – repeatedly until the desired letter appears. To add a space, tap To add punctuation marks or symbols, tap When using a text input method, you can enter digits by tapping and holding down the number keys.
- Page 23 To change the writing language Select Options > Writing language. • When the text input window is open, you can also tap and select Writing language. To copy and paste text Tap to place the cursor at the beginning of the text you want to select for copying. Then drag your fingertip or stylus to the end of the text.
-
Page 24: Address Book
Address Book You can save names, phone numbers and personal information in Address Book. Information can be saved in the phone memory or on the SIM card. To open Address Book • Select Menu > Address Book. To add a new contact Select Menu >... -
Page 25: Messaging
Messaging Before you use Messaging Before you can send or receive messages other than text messages, you need to set up the necessary accounts. You can use the Internet and email wizards provided in the phone to download settings or set up the accounts manually. Messaging overview The following icons appear in Messaging: New message... -
Page 26: Conversations
To delete a read message Select a read message. Select To delete the message, select Yes. To save a sender’s contact details Select Menu > Messaging > Messages > Inbox. Tap the sender’s message. Select Options > Save to Address Book > Create new. Enter the sender’s phone number, name or email address. -
Page 27: Viewing Messages
Receiving email messages Email messages are downloaded from your email server via the Internet or at your office. You can download your email manually or set when your phone should check for new email. To download email messages offline Select Menu > Messaging > Messages and select a mailbox. To open a connection to the remote mailbox, select Options >... -
Page 28: Service Commands
To view a cell broadcast message Select Menu > Messaging > Messages > Options > Cell broadcast. Select the message to view. Service commands You can use service commands to enter and send service requests, such as activation commands for network services, to AT&T. Service requests are also known as USSD (Unstructured Supplementary Service Data) commands. - Page 29 To create a new folder Select Menu > Messaging > Messages > My folders. Select Options > New folder. Enter a name for the folder. Tap OK. Templates To view a template Select Menu > Messaging > Messages > My folders > Templates. Select a template.
-
Page 30: Media
Media With the Media application you can manage media files, such as photos, music, other audio tracks and video clips. You can also manage photos and video clips in albums on the web. The main application features are: • Photo – view, edit, send or blog your photos and video clips. •... -
Page 31: Mark Mode
• finish a media file transfer to your phone using a USB cable. • disconnect a USB cable to exit Mass Storage mode. insert a memory card into your phone. • • select an invalid file. If the content saved on the memory card has not changed since the last update, the update process will not start. -
Page 32: Camera Album
To view a photo in full screen Select Menu > Media > Photo. Select a view option and tap a thumbnail to view the photo. To view the next or previous photo, flick left or right. Latest photo In Latest photo you can view all photos and video clips shot by your camera, in chronological order starting with the most recent. - Page 33 Web albums In Web albums, you can manage photos and video clips in albums you create online. You can also add comments to your content or see comments from other people. Select View demo to learn more about the basic functions in Web albums. You need the correct Internet settings to use this feature.
-
Page 34: Viewing Pictures
To delete photos from an online photo album When viewing photo thumbnails in an online album, tap in the touchbar. Tap to select the photos you want to delete. and confirm. When viewing a photo in an online photo album, you can also delete it by tapping in the touchbar. -
Page 35: Editing Photos
Zoom the photo Print the photo Edit the photo Set the photo as a contact picture Set the photo as wallpaper Set the photo as a call image Tag the photo View photos as a slideshow To view photo information •... - Page 36 To adjust photo sharpness When viewing a photo, tap > . Select Options > Add effect. and drag the slider to adjust the sharpness. Select OK to confirm. To decrease the size of a photo When viewing a photo, tap >...
- Page 37 To insert text into a photo When viewing a photo, tap > . Select Options > Add effect. and enter the text. To move the text, select Options > Move text and tap the place you want to move the text to. To increase or decrease the text size, select Options >...
-
Page 38: Music
To pause a slideshow When viewing photos in a slideshow, tap the screen and select Pause. • To resume a slideshow • When the slideshow is paused, tap the screen and select Continue. To stop a slideshow • When viewing photos in a slideshow, tap the screen and select Stop. To zoom a photo in a slideshow When viewing photos in a slideshow, select Stop. - Page 39 Play Touch and hold to rewind. Tap to go to the previous track Touch and hold to fast forward. Tap to go to the next track Additional music controls The following music controls may appear in your music player: Turn on shuffle to play tracks in the current playlist in a random order Turn off shuffle Repeat all tracks in the current playlist Repeat the current track several times...
- Page 40 Go to the music library Adjust the volume View more commands Delete the current track Send the current track Set the current track as your ringtone Add the current track to a playlist View track information Minimize the music player To delete a track When the music player is open, tap >...
-
Page 41: Video
Video In Video, you can browse and play video clips saved in your phone and on your memory card. The following features are available: • YouTube – a direct link to the YouTube™ web site and a wide range of video clips. Shop Videos –... - Page 42 Set the volume View more options Delete the current video clip Send the current video clip View video clip information Repeat the current video clip Disable the repeated playback of video clips This is an Internet version of this publication. © Print only for private use.
-
Page 43: Camera
Camera Using the camera Your phone has touch capture, face detection, smile detection, light, and image stabilizer functions. To activate the camera • To activate the photo camera, press To activate the video camera, press • Viewfinder Zoom in or out Enter video mode and shoot video clips Enter photo mode and take photos To turn off the camera... -
Page 44: Camera Icons And Settings
To record a video clip Press Press fully down to start recording. To stop recording, press fully down. The video is saved automatically. To use the zoom • Press the volume key up or down. The zoom rate reverts to default when you change the shoot mode or switch between photo mode and video mode. - Page 45 To take a panorama photo To activate the camera, press > appears at the top of the screen. To take the first photo, press To take the second photo, move the camera left or right until the indicator fits into and becomes fully green.
-
Page 46: White Balance
Self-timer You can use the self-timer to take photos and film video clips with a time delay. This helps to avoid blurred photos. You can also use this function to take photos of yourself. Off * – turn off the self-timer On, 2 s –... -
Page 47: Shutter Sound
Daylight – adjusts the color balance for outdoor use Cloudy – adjusts the color balance for a cloudy sky * No icon appears when this function is activated. To set the white balance in photo mode Activate the camera and tap Select Photo >... -
Page 48: Auto Review
Auto rotate When this function is on, a photo appears in the same orientation (landscape or portrait) as when it was originally taken. To turn on auto rotate Activate the camera and tap Select Setup > Auto rotate > On. Reset You can reset your camera to the factory default settings. - Page 49 Sending photos or video clips You can send photos and video clips in a multimedia message or you can use other connection methods, such as Bluetooth wireless technology. You can also upload photos and video clips to a compatible online album. To optimize the size of the photo or video clip for sending, select the appropriate photo or video quality using the camera settings.
-
Page 50: Location Services
You need a GPS connection to use location services. To use GPS, you need to define a packet data Internet access point. See I cannot use Internet-based serviceson page 77. Sony Ericsson does not warrant the accuracy of any location services, including but not limited to navigational services. -
Page 51: Internet
Internet Before you use the Internet, you may need to define an access point. See To create a new access point on page 65. To start the Internet browser Select Menu > Internet. , and enter a web address. Select Go to. To exit the Internet browser •... -
Page 52: Web Feeds
To view web pages in full screen mode When you browse the Internet, tap > To return to normal view, tap the icon on the bottom right of the screen. Web feeds Using web feeds, you can subscribe to and download frequently updated content, such as news, podcasts or photos. -
Page 53: Tools
Tools File manager You can use File manager in your phone to handle content saved in the phone memory or on a memory card. If the memory is full, delete some content to create space. To find files Select Menu > Tools > File manager. Select Options >... -
Page 54: Calendar
To remove an alarm Select Menu > Tools > Clock > Alarms. Select an alarm and select Options > Delete alarm. To set the alarm tone Select Menu > Settings > Phone > Date and time > Clock alarm signal. Select an option. -
Page 55: Notes
To start a search Select Menu > Tools > Google. Enter your search text in the search field. To view more Google info Select Menu > Tools > Google. To change settings in Google Select Menu > Tools > Google. and select the settings you want to change. -
Page 56: Quickoffice
To view a PDF document Select Menu > Tools > Adobe PDF. Select a folder. Select a PDF document. To zoom a PDF document • When you open a PDF document, select To search text in a PDF document When you open a PDF document, select Options > Find. Enter a search string and select Find. -
Page 57: Working Offline
• Check the log. In the log you can find information to help you check the settings or connections. Restart the phone. • • Reset all data in RoadSync. Working offline You can use your phone to work offline when no service is available. For example, you can still use your phone in flight mode, on a plane, to write and send email messages to contacts that are available in your phone. -
Page 58: Applications
Applications Applications on memory card Some of the applications supplied with your phone are stored on the memory card. Applications stored on the memory card need to be installed before they can be used. To install applications from the memory card Select Menu >... -
Page 59: Voice Recorder
Voice recorder You can record a voice memo. Recorded sounds can also be set as ringtones. To record a sound Select Menu > Tools > Record sound > Options > Record sound clip. Select Stop to finish a recording. To listen to a recording Select Menu >... -
Page 60: Transferring And Handling Content
You can connect your phone to a computer using a USB cable to synchronize, transfer and back up phone content, and to use your phone as a modem. Required operating systems You need one of these operating systems to use Sony Ericsson PC software: • ®... -
Page 61: Sending Content To Another Phone
To transfer content using the Media Go™ application Connect your phone to a computer using a USB cable. Computer: Select Media Go™ from the start menu to start the Media Go™ application. Move files between your phone and the computer in the Media Go™ application. Media Go™... - Page 62 To pair your phone with another device or a Bluetooth handsfree Select Menu > Settings > Connectivity > Bluetooth. Tap Options > New paired device. Select a device. Enter a passcode, if required. To receive an item Select Menu > Settings > Connectivity > Bluetooth > Bluetooth > On. When you receive an item, follow the instructions that appear.
-
Page 63: Updating Your Phone
Updating your phone You can update your phone to the most recent software for optimal performance and to get the latest enhancements. You need a USB cable and an Internet-connected PC. To learn how, go to www.sonyericsson.com/update. Remember to back up your phone content before updating. See Backing up and restoring on page 53. -
Page 64: Connectivity
Connectivity You can connect your phone to the Internet, to other compatible devices or to computers. Wi-Fi™ Using Wi-Fi™ you can access the Internet wirelessly with your phone. You can browse the Internet at home (personal networks) or in public access zones (hot spots): •... -
Page 65: Access Points
Set your phone as a media server. After searching the network, the client devices will find your phone and show all possible servers in your wireless network. Select your Sony Ericsson phone as the server. Transfer to and show your phone content on client devices. It may take a couple of minutes to show all the content on the client devices if many photo or music files are saved on the phone. -
Page 66: Synchronizing Using An Internet Service
Synchronizing using an Internet service You can use SyncML™ protocol to synchronize data on your phone with data stored online by an Internet synchronization service. You can also use Microsoft Exchange ActiveSync protocol to sychronize data on your phone with data saved on a Microsoft Exchange Server. Synchronization profiles You can create synchronization profiles to save your synchronization settings. -
Page 67: Settings
Settings You can change some settings in your phone. You can follow the Setup wizard for basic settings, tips and tricks. Some settings may be preset by AT&T, and you may not be able to change them. To use the setup wizard •... -
Page 68: Phone Settings
To go to standby, press To access the shortcuts view, tap Select a shortcut. The shortcuts view is available only when Sony Ericsson is selected as the default theme for the standby screen. See To set themes on page 68. Phone settings You can change the date, time and phone language, or define settings for your applications. -
Page 69: Sensor Settings
To change the alarm settings Select Menu > Settings > Phone > Date and time. To change the alarm signal, select Clock alarm signal. To change the alarm snooze time, select Alarm snooze time. To save your settings, select Back. Languages You can change your phone language and writing language. -
Page 70: Touch Input
To use the turning control Select Menu > Settings > Phone > Sensor settings > Turning control. Select the events you want to use turning control for: • Snoozing alarms – to snooze a ringing alarm, turn the phone upside down. •... -
Page 71: Text Message Settings
Text message settings To edit text message settings Select Menu > Messaging > Messages. Select Options > Settings > Text message. The following settings are available: • Message centers – view a list of all text message centers that have been defined. •... -
Page 72: Cell Broadcast Settings
To create a new mailbox Select Menu > Messaging > Messages. Select Options > Settings > Email. Select Mailboxes > Options > New mailbox. When you name your new mailbox, the default mailbox in the main Messaging view is renamed accordingly. -
Page 73: Certificate Management
Phone and SIM card To access phone and SIM card security settings Select Menu > Settings > Phone > Phone management > Security > Phone and SIM card. You can select from the following: • PIN code request – when active, the PIN code is requested each time the phone is turned on. -
Page 74: Security Module
When the touch screen and keys are locked, the touch screen and the keys are inactive. It is important that you remember your new code. If you forget it, you need to take your phone to your local Sony Ericsson retailer. To turn on the phone lock Select Menu >... -
Page 75: Application Manager
To edit your phone lock code Select Menu > Settings > Phone > Phone management > Security > Phone and SIM card > Lock code. Follow the instructions to enter your old lock code once and your new lock code twice. -
Page 76: Troubleshooting
Troubleshooting This chapter is all about solving possible problems with your phone. To find further suggestions, go to www.sonyericsson.com/support. Select your region, country and phone model to find helpful information. Your phone also includes help texts. In many applications and in some dialog windows, for example, those where you enter important settings, Help is available in the Options menu. -
Page 77: Memory Full
• Check the settings for forwarding or restricting calls. See Forwarding calls on page 17 and Restricted dialing on page 18. • If Emergency calls only is displayed on the screen, you are not allowed to use the network within range but you can make an emergency call using the emergency number. •... -
Page 78: Problems Connecting To A Pc Or Another Device
Problems connecting to a PC or another device Cannot establish a connection using a USB cable • Make sure the USB cable is connected correctly to the computer. • Make sure the phone lock is not active. Cannot transfer items using Bluetooth wireless technology •... -
Page 79: Hearing Aid Compatibility
Hearing Aid Compatibility Your phone is designed for Hearing Aid Compatibility (HAC) and can be used with hearing aids. This product has not been tested using WiFi. Hearing Aid Settings You can choose the setting in the phone to match the setting in your hearing aid before making or receiving calls. -
Page 80: Legal Information
Sony Ericsson does not guarantee the accuracy, integrity or quality of any additional content or any other third party content. Under no circumstances will Sony Ericsson be liable in any way for your improper use of additional content or other third party content. - Page 81 each location-based service to learn how location information will be used and protected. In addition, your AT&T phone may be used to access the Internet and to download, and/or purchase goods, applications, and services from AT&T or elsewhere from third parties. AT&T provides tools for you to control access to the Internet and certain Internet content.
-
Page 82: Index
Index creating new tags ............32 accessories cropping a photo .............36 settings ............70 adding comments to an online photo .....33 date and time ............68 adding new contacts ..........24 default settings ............75 adding words to the dictionary ........22 deleting photos from a web album ......34 Adobe PDF ..............55 deleting tags ............32 alarm... - Page 83 installation files on-screen keypad ...........21 sending ............75 Internet ..............51 phone turning on ............7 key lock ..............11 phone keyguard ..............11 language ............69 keys ................9 phone memory ............8 phone name ............61 phone overview ............9 language ..............68 photo ...............31 light ................46 latest photo .............32 location information ..........47 photo information ..........35 location services ............50...
- Page 84 download ............69 white balance screen ..............69 cloudy ..............46 setup wizard ............67 daylight ............46 shoot mode fluorescent ............46 panorama ............44 incandescent ...........46 smile detection ..........44 Wi-Fi™ ..............64 touch capture ..........44 wizard shortcuts ..............68 setup ...............67 shutter sound ............47 world SIM card clock ..............54 inserting .............6 writing language ............23...
Need help?
Do you have a question about the Vivaz and is the answer not in the manual?
Questions and answers