
Related Manuals for Air Live FE-200CU


Summary of Contents for Air Live FE-200CU
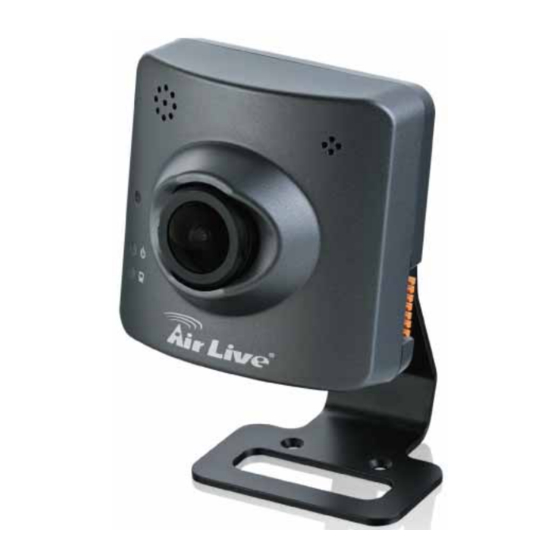
- Page 1 FE-200CU 2-MegaPixel Wall Mount Fish Eye PoE IPCAM User’s Manual AirLive FE-200CU Manual...
- Page 2 Model No. ____________________ Serial No. ____________________ To prevent fire or shock hazard, do not expose the unit to rain or moisture. For AC Adaptor to avoid electrical shock, do not open the cabinet. Refer servicing to qualified personnel only. AirLive FE-200CU Manual...
-
Page 3: Declaration Of Conformity
This device complies with part 15 of the FCC Rules. Operation is subject to the following two conditions: (1) This device may not cause harmful interference, and (2) This device must accept any interference received, including interference that may cause undesired operation. AirLive FE-200CU Manual... - Page 4 We reserve the right to make any modification to this manual or the information contained herein at any time without notice. The software described herein may also be governed by the terms of a separate user license agreement. AirLive FE-200CU Manual...
-
Page 5: Table Of Contents
4. Administrating the Device..................17 4.1 Video: Configure Profile ..................17 4.1.1 General....................17 4.1.2 Advanced....................18 4.2 Camera: Adjust Camera Parameters ..............20 4.2.1 General....................20 4.2.2 Advanced....................22 4.3 Event .........................26 4.3.1 Event Server....................26 4.3.2 Motion Detection..................27 4.3.3 I/O Ports ....................29 4.3.4 Event Configuration .................30 FE-200CU... - Page 6 Appendix D: Bandwidth Estimation................48 Appendix E: Specifications ..................49 Appendix F: Configure Port Forwarding Manually ...........51 Appendix G: DDNS Application ................54 Appendix H: Power Line Frequency ................60 Appendix I: 3GPP ....................61 Appendix J: Enable UPnP of Windows XP ..............62 AirLive FE-200CU Manual...
-
Page 7: Introduction
AirLive FE-200CU includes a fish-eye lens for 360° wide angle view without blind spot. Thus, AirLive FE-200CU is very suitable to view a wide area with only one single camera such as hallway, store, office, and etc. -
Page 8: Package Contents
Windows XP, Vista, 7 1.2 Package Contents A user can find the following items in the package: 1. FE-200CU & Stand 2. Power Adapter dedicates 12V DC electric power output to Network Camera. 3. Installation CD provides installation software, application program, tutorial videos, important information and instructions for operating the Network Camera. -
Page 9: Physical Overview And Connections
Rotate the lens to adjust the focal length to the best image. If necessary, clean the lens with a soft cotton cloth. 4. Speaker: The IP Camera has a built-in internal speaker, which is hidden in the pinhole located on the front panel. AirLive FE-200CU Manual... - Page 10 Please use CAT-5 cable to connect the Network Camera to a 100Mbps Fast Ethernet network switch or hub. Note: ONLY use one power source, either from DC or from 802.3af Power over Ethernet. AirLive FE-200CU Manual...
-
Page 11: Mounting The Camera
/ video event recording. 1.4 Mounting the Camera 1. Take out the camera and accessories from the package: The stand and FE-200CU 2. First, pass the network cable through the hole of the stand, then fasten the screws with stand into the wall. - Page 12 1. Introduction Install the FE-200CU onto the stand, and connect the network cable. 4. You can adjust the silver screw to fix the angle of camera. AirLive FE-200CU Manual...
-
Page 13: Install The Camera In Lan
Once you have installed the camera well and powered it on, the power LED (orange) will turn on later. The power LED turns on, it means the system is booting up successfully. Furthermore, if you have a proper network connection, and access to the camera, the LAN LED (green) will flash. AirLive FE-200CU Manual... -
Page 14: Preparation
Camera’s IP address and set up related parameter in a Camera. 2.1.1 Search When launch the IPWizard II, a searching window will pop up. IPWizard II is starting to search Network Cameras on the LAN. The existed devices will be listed as below. AirLive FE-200CU Manual... -
Page 15: Upnp Of Windows® Xp, Vista Or 7
Please refer to Appendix J to enable UPnP settings only if your operating system of PC is running Windows XP. Note: Windows 2000 does not support UPnP feature. To discover your device, go to your Desktop and click My Network Places. AirLive FE-200CU Manual... -
Page 16: Install The Device Behind A Nat Router
To use UPnP IGD function (NAT traversal), you need to make sure the UPnP function is enabled in your router. Most new home routers should support this function. Some of routers are default enable and others are not. Please check user’s manual of your NAT router for detail. AirLive FE-200CU Manual... -
Page 17: Access The Device From The Internet Explorer For The First Time
2. Type in your login name and password under “USERNAME” and “PASSWORD” textbox. For the first time use (default value), input the User Name: admin Password: airlive After typing in “admin” on the “USERNAME” and “airlive” on the “PASSWORD”, click “OK” button to start the main menu. AirLive FE-200CU Manual... -
Page 18: Logging In As An User
If you log in the Camera as an ordinary User, “Configuration” function will be not accessible. 2.6 Logging in as an Administrator If you log in the Camera as the Administrator, you can perform all the settings provided by the device. AirLive FE-200CU Manual... -
Page 19: Operating The Network Camera
Actual Size Display the actual resolution size of the video when checked. Video Profile The device supports multi-profile function for H.264, MEPG4 and JPEG simultaneously. A user can chose the proper and/or preferred profile which is listed here. AirLive FE-200CU Manual... - Page 20 The PTZ function will display in Broad view, Quad view, Quad with source view, Double view and Triple view of Ceiling Mount. Click on the PTZ icon, the web will popup the control panel to control e-PTZ function of FE-200CU. Broad view PTZ control panel: 1.
- Page 21 The device supports 2-way audio function. A user can choose to enable or disable this function by toggling the icon below. : Disable speaker function. : Enable speaker function. : Disable audio uploading function. : Enable audio uploading function. AirLive FE-200CU Manual...
- Page 22 Select Recording Location to select the save path and file name prefix, select OK to continue. Push to talk Click on the "Push to Talk" button continually, you can talk to the person via speaker of the IP Camera. AirLive FE-200CU Manual...
-
Page 23: Administrating The Device
Customize Provides the user features to customize the outlook of the web user interface 4.1 Video: Configure Profile 4.1.1 General OSD Setting: Enable OSD to display camera name and date/time on the image. AirLive FE-200CU Manual... -
Page 24: Advanced
(bit rate). In spite of the required recording storage estimation, VBR is by way of compensation that adjustable bit rate fits the actual image activity. AirLive FE-200CU Manual... - Page 25 The Frame Rates defines the number of frames that will be displayed per second. The frame rate setting can affect the target bit rate (bandwidth requirement) and storage requirement. Note: While multiple streaming is possible, each stream has its limitation and dependency to other stream. AirLive FE-200CU Manual...
-
Page 26: Camera: Adjust Camera Parameters
Contrast: Set the difference in color and light between parts of an image. Sharpness: Set the sharpness of camera. The 5 parameters above are referring to image appearance in terms of color/vision. These are adjustable from this page. AirLive FE-200CU Manual... - Page 27 Web Snapshot Image Setting: Save Path / File name: Click on the “Browse” button to select the desired path to save the snapshot as well as naming it. Save: Save the changes that have been made. AirLive FE-200CU Manual...
-
Page 28: Advanced
4.2.2 Advanced White balance: Adjustment to compensate for different environments in terms of light source. A user can choose auto/hold/sunny/cloudy /indoor, so FE-200CU can determine the correct color compensation due to different light environment. Exposure: Anti-flicker setting for image sensor to fit the frequency of light (power) source. For instance, the power frequency is 50Hz for most European countries, while 60Hz is typically for US. - Page 29 For Choosing Wall mount type, go back to Live view. There are 4 kinds of video layout to choose, including Original view, Broad view, Quad with source view and Triple view. (1) Original view: (2) Broad view: AirLive FE-200CU Manual...
- Page 30 (3) Quad with source view: (4) Triple view: 2. Ceiling Mount: For Choosing Ceiling mount, go back to live view. There are 2 kinds of video layout to choose from Original view, Quad view. (1.) Original view: AirLive FE-200CU Manual...
- Page 31 For Choosing 720P Wall Mount type, go back to Live view. There are 3 kinds of video layout to choose, including Broad view Double view Double with source view. (1.) Broad view: (2.) Double view: (3.) Double with source view: AirLive FE-200CU Manual...
-
Page 32: Event
Add HTTP Server: Click on the “Add HTTP” to expand HTTP server setting. HTTP Server: Name: Give a name for the HTTP server URL: Input the network address of the HTTP server Username / Password: Input the username and password of the HTTP. AirLive FE-200CU Manual... -
Page 33: Motion Detection
4. Administrating the Device Remove: Click “Remove” to delete selected event servers. 4.3.2 Motion Detection To add a motion detection area: AirLive FE-200CU Manual... - Page 34 4. Select color for detection window. 5. Draw detection window on the image. 6. Once everything is done, click on “Save” to save the configuration made. Configured detection window will be displayed in motion detection list. (Circled in blue) AirLive FE-200CU Manual...
-
Page 35: I/O Ports
2. Motion Detection windows need to be modified if users change video layout. 4.3.3 I/O Ports AirLive FE-200CU supports 1 photo-coupled relay inputs and 1 relay outputs. Refer to “Appendix A: I/O Terminal Connectors” for detail pin description and application. The below table shows the status of the external trigger/alarm devices. -
Page 36: Event Configuration
A user can select which video stream should be recorded, and the size of each sliced file. When the check box is ticked and setting is saved, the recording process starts. Recording files are saved to the Micro SD storage. AirLive FE-200CU Manual... -
Page 37: Storage
4.5 Network 4.5.1 General Device IP configuration, includes DHCP and Static IP setting. “Enable ARP/Ping” enables device to accept ARP or ping packets from the network. Disabling this option may provide extra security from intentional ping. AirLive FE-200CU Manual... - Page 38 A standard builds on Ethernet and Point-to-Point network protocol. It allows your device with xDSL or cable connects with broadband network directly. Then, your device can dial up and get a dynamic IP address. For more PPPoE and Internet configuration, please consult your dealer or ISP. AirLive FE-200CU Manual...
-
Page 39: Advanced
Configure a NTP (Network Time Protocol) server, so that the device system date and time can be synchronized with a specified Time Server or DHCP server. HTTP: Set the HTTP port that will be applied for Web UI access. RTSP: Set the RTSP (Video) port for video data transmission. AirLive FE-200CU Manual... -
Page 40: Smtp (Setup E-Mail Configuration)
Assigned name that will be used for access to the device User Name/Password: Account authentication for logging to this service. Update Time: Periodically, the device updates its access info to sever in the configured time. Response: The device responds the connection info. AirLive FE-200CU Manual... -
Page 41: System
4.6.1 Information Lists - System and Network configurations. Firmware Version: This information shows the firmware version of the device. 4.6.2 User Use this menu to add, update, or remove the usernames and passwords of the Administrator and viewer. AirLive FE-200CU Manual... -
Page 42: Day & Time
Click this option to enable time synchronization with computer time. Synchronize with NTP: Click this option if you want to synchronize the device’s date and time with those of time server called NTP server (Network Time Protocol). AirLive FE-200CU Manual... -
Page 43: Server Maintenance
This action will not reset the network setting. Factory Default (Including Network setting): Recall the device hard factory default settings. Note that click this button will reset all device’s parameters to the factory settings (including the IP address). AirLive FE-200CU Manual... - Page 44 To take a backup of all of the parameters, click this button. If necessary, it will then be possible to return to the previous settings. Upload Setting: Click the “Browse” button to locate the saved backup file and then click the “Upload Setting” button. The settings will be restored to the previous configuration. AirLive FE-200CU Manual...
-
Page 45: Log Service
Use Default Look: The default layout of live/configuration pages. Use Defined Links: Web link(s) will be presented on the live page when enabled. It can be a link to another IP camera for instance, or other preferred web link. AirLive FE-200CU Manual... - Page 46 4. Administrating the Device Use Custom Settings: The allowed modifications are changing of Background / Text Color, Background picture, Title, Description, Logo Link and Logo. AirLive FE-200CU Manual...
-
Page 47: Appendix
(or/and voltage) limitation is specified by the external Relay. Connect to GND to activate, or leave floating (or unconnected) to deactivate. Audio In 2 way Audio connectors , and connect to GND to activate Audio Out AirLive FE-200CU Manual... -
Page 48: Appendix B: Troubleshooting & Frequently Asked Questions
If a firewall exists on the network, port 80 is open for installed and work if a ordinary data communication. The HTTP port and firewall exists on the RTSP port need to be opened on the firewall or NAT network. router. AirLive FE-200CU Manual... - Page 49 If you are experiencing problems, try upgrading with the device to the latest version of Microsoft’s Internet Explorer from the Microsoft webpage. IPWizard II program Network may have trouble. Confirm the parameters fails to save the and connections of the device. network parameters. AirLive FE-200CU Manual...
- Page 50 • The port number assigned in your Network Camera might not be available via Internet. Check your ISP for available port. • The proxy server may prevent you from connecting directly to the Network Camera, set up not to use the proxy server. AirLive FE-200CU Manual...
- Page 51 Internet Explorer are configured properly and then try reloading the device’s home page. Most likely, the ActiveX control did not download and install correctly. Check your Internet Explorer security settings and then close and restart Internet Explorer. Try to browse and log in again. AirLive FE-200CU Manual...
- Page 52 Your Internet connection may not have enough bandwidth to support streaming audio from the device. Image Transfer on • Default Gateway and DNS server address should be e-mail or FTP does not set up correctly. work. AirLive FE-200CU Manual...
- Page 53 White-light LED Miscellaneous Can not play the Have installed Microsoft®’s DirectX 9.0 or later and use recorded ASF file the Windows Media Player 11.0 or later to play the AVI filed recorded by the Device. AirLive FE-200CU Manual...
-
Page 54: Appendix C: Ping Ip Address
Here is a guideline to help you roughly estimate the bandwidth requirements form your device. The required bandwidth depends on content of video source. The slow motion video will produce smaller bit rate generally and fast motion will produce higher bit rate vice versa. AirLive FE-200CU Manual... -
Page 55: Appendix E: Specifications
4:3 Res. @ 15 FPS; 16:9 Res. @ 30 FPS Frame Rate Brightness, Sharpness, Saturation, Exposure, White balance Image Setting control Streaming HTTP, TCP/IP, IPv4, UDP, SMTP, FTP, DHCP, DDNS, NTP, DNS, ARP, RTSP, RTP, Samba Clinet, UPnP Audio Audio Encoder RTSP: G.711 64kbps AirLive FE-200CU Manual... - Page 56 20% ~ 80% (non-condensing) Dimension HxWxD:83 x 83 x 60mm Viewing System Windows® XP, Vista, 7 Browser IE 6.0 or later, Firefox 2.0 or later, Safari Cell Phone With 3GPP player Video Player VLC, Quick Time, Real Player, Core Player AirLive FE-200CU Manual...
-
Page 57: Appendix F: Configure Port Forwarding Manually
Internet. Be sure to uncheck the Reset IP address at next boot button at the top of the screen after modifying the IP address. Failure to do so will reset the IP address when you restart your computer. AirLive FE-200CU Manual... - Page 58 Follow these steps to configure your router’s Virtual Server settings • Click Enabled. • Enter a unique name for each entry. • Select Both under Protocol Type (TCP and UDP) • Enter your camera’s local IP Address (e.g., 192.168.0.100, for example) in the Private IP field. AirLive FE-200CU Manual...
- Page 59 Enter valid ports in the Virtual Server section of your router. Please make sure to check the box on this line to enable settings. Then the device can be access from WAN by the router’s WAN IP Address. By now, you have finished your entire PC configuration for this device. AirLive FE-200CU Manual...
-
Page 60: Appendix G: Ddns Application
DDNS and PPPoE of the Networked Device in order to let the outside administrator be able to access through internet. Application Steps—DDNS & Domain Name (1). Visit the following web site: http://www.dyndns.org/ (2). Click “Account” AirLive FE-200CU Manual... - Page 61 (3). After the columns show up at the left side, click “Create Account”. (4). Fill the application agreement and necessary information. a. Username b. E-mail address and confirmation c. Password and confirmation d. Submit all the input information and finish creating an account AirLive FE-200CU Manual...
- Page 62 Click these two options (5). Check your e-mail mailbox. There will be an e-mail with a title “Your DynDNS Account Information“. Click the hyperlink address to confirm the DDNS service that you just applied. Then DDNS you applied activated. AirLive FE-200CU Manual...
- Page 63 DDNS server. Input your account (7). If the correct username and password are input, you can see the following picture at the top-right of the login page. AirLive FE-200CU Manual...
- Page 64 5. Appendix (8). Click the “Services”. (9). Click the “Dynamic DNS”. (10). Click the “Get Started”. AirLive FE-200CU Manual...
- Page 65 DDNS and PPPoE after the application of DDNS service. Please check the user manual to access the DDNS and PPPoE pages. After saving the modification, restart the device. Then the external users could browse the Networked Device by the input of their domain name. AirLive FE-200CU Manual...
-
Page 66: Appendix H: Power Line Frequency
230V 50 Hz Italy 230V 50 Hz *Eastern Japan 50 Hz (Tokyo, Kawasaki, Sapporo, Yokohoma, and Japan 100V 50/60 Hz* Sendai); Western Japan 60 Hz (Osaka, Kyoto, Nagoya, Hiroshima) Malaysia 240V 50 Hz Netherlands 230V 50 Hz AirLive FE-200CU Manual... -
Page 67: Appendix I: 3Gpp
2. Use the following URL to access: rtsp://host/mpeg4/media.3gp Where host is the host name or IP address of the camera. Compatible 3G mobile phone: Please contact your dealer to get the approved list of compatible 3G phone. AirLive FE-200CU Manual... -
Page 68: Appendix J: Enable Upnp Of Windows Xp
Appendix J: Enable UPnP of Windows XP Use the following steps to enable UPnP settings only if your operating system of PC is running Windows XP. Go to Start > Settings. Click Control Panel Click Add or Remove Programs AirLive FE-200CU Manual... - Page 69 5. Appendix Click Add/Remove Windows Components The following screen will appear: Select Networking Services Click Details AirLive FE-200CU Manual...
- Page 70 5. Appendix Select Universal Plug and Play Click Ok Click Next AirLive FE-200CU Manual...
- Page 71 5. Appendix Please wait while Setup configures the components. Click Finish AirLive FE-200CU Manual...
Need help?
Do you have a question about the FE-200CU and is the answer not in the manual?
Questions and answers