Advertisement
ANT702F
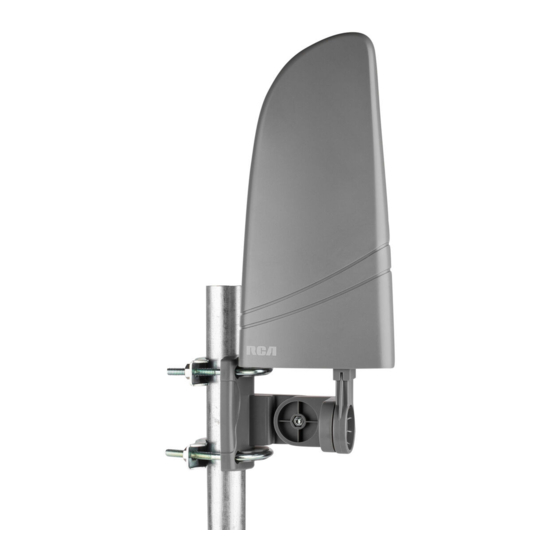
Digital Amplifi ed Indoor/Outdoor Antenna
User's Guide
FCC Statement
This device complies with part 15 of the FCC Rules. Operation is subject to the following two conditions: (1) This device may
not cause harmful interference, and (2) this device must accept any interference received, including interference that may
cause undesired operation.
This equipment has been tested and found to comply with the limits for a Class B Digital Device, pursuant to Part 15 of the
FCC Rules. These limits are designed to this equipment generates, uses, and can radiate radio frequency energy and, if not
installed and used in accordance with the instructions, may cause harmful interference to radio communications. However,
there is no guarantee that interference will not occur in a particular installation. If this equipment does cause harmful
interference to radio or television reception, which can be determined by turning the radio or television off and on, the user
is encouraged to try to correct interference by one or more of the following measures:
• Reorient or relocate the receiving antenna.
• Increase the separation between the equipment and receiver.
• Connect the equipment into an outlet on another circuit.
• Consult the dealer or an experienced radio/TV technician for help.
Caution: Any changes or modifications not expressly approved by the party responsible for compliance could void the user's
authority to operate this equipment.
Industry Canada Regulatory Information
CAN ICES-3 (B)/NMB-3 (B)
Avis d'Industrie Canada
CAN ICES-3 (B)/NMB-3 (B)
Important: This power adapter should be plugged in so that it stays vertical or lays flat.
BEFORE YOU START!!!
Please read the IMPORTANT SAFETY INFORMATION sheet included in
this package.
Getting Started
Remove the antenna and the hardware bag from package. Make sure the
following parts are in the package:
•
Antenna
•
Amplifi er Insert
•
Mounting Base
•
Hardware bag:
(2) U-Bolts
(4) Plastic Anchors
(4) Washer Nuts
(2) Bolts
• Power Adapter
• Mounting Arm
(2) Clamps
(4) Wood screws
(1) Coaxial cable
1
Advertisement
Table of Contents

Summary of Contents for RCA ANT702F
-
Page 1: Before You Start
ANT702F Digital Amplifi ed Indoor/Outdoor Antenna User’s Guide FCC Statement This device complies with part 15 of the FCC Rules. Operation is subject to the following two conditions: (1) This device may not cause harmful interference, and (2) this device must accept any interference received, including interference that may cause undesired operation. -
Page 2: Finding The Right Location
Finding the Right Location Before you mount the antenna, consider the following factors in reception performance: • The antenna performs best when mounted vertically • The antenna should be mounted on the side of your house that faces most of your local broadcast towers. Visit www.antennaweb.org to see the locations of your local broadcast towers. - Page 3 Mounting to a Surface 1. Mount the base to the surface. Find the four wood screws included in this package. Using these screws, attach the base to the surface as shown here. If you’re mounting to concrete, brick, or drywall... You’ll need to use the anchors included in this package.
- Page 4 2. Attach the arm to the base. Find one of the bolts included in this package. First, set the bolt in the base’s mounting well. Then position the arm over the other side of the well. Tighten the bolt to attach the arm to the base.
- Page 5 4. Connect the coaxial cable to the antenna. Connect the coaxial cable to the F-connector on the bottom of the antenna. Cover the connector with the cable’s attached weather boot. To adjust the antenna’s position: 1. Loosen the bolt on either end of the arm. 2.
- Page 6 2. Attach the clamp assemblies to the base. Find the other U-bolt, the four washer nuts, the two clamps, and the antenna base included in this package. Insert each U-bolt into the base as shown here. Then position a clamp and two washer nuts on the end of each U-bolt as shown here.
- Page 7 4. Attach the arm to the base. Find one of the bolts included in this package. First, set the bolt in the base’s mounting well. Then position the arm over the other side of the well. Tighten the bolt to attach the arm to the base as shown here.
- Page 8 The antenna can be mounted either vertically or horizontally. To mount it horizontally, simply rotate the arm clockwise 90 . Try different positions for best performance. 90° Important: These diagrams show the cable that came with this antenna. This cable was designed to fi t under the U-bolt. If you are using a different cable, DO NOT pass it under the U-bolt as shown here.
-
Page 9: Connecting To Your Tv
Connecting to Your TV 1. Run the coaxial cable from the antenna towards your television set. Connect the coaxial cable to the ANT jack on the supplied amplifi er insert. 2. Connect built-in coaxial cable on the amplifi er insert to the antenna input jack on your TV or converter box. - Page 10 Water Damage Prevention: At the point where your coaxial cable lead enters the house, you should allow for some slack in the coaxial cable as a “drip loop. ” This will prevent moisture from running down the coaxial cable and entering the house. Run the coaxial cable approximately six inches below the wall entry point and then turn it upwards towards this spot.
-
Page 11: 12 Month Limited Warranty
U.S.A.: Audiovox Return Center, 150 Marcus Blvd., Hauppauge, NY 11788 CANADA: Audiovox Return Center, c/o Genco, 6685 Kennedy Road, Unit #3 Door Mississauga Ontario L5T 3A5 ©2013 VOXX Accessories Corporation 3502 Woodview Trace, Suite 220, Indianapolis, IN 46268 ANT702F NA IB 01...


Need help?
Do you have a question about the ANT702F and is the answer not in the manual?
Questions and answers