ID Tech MiniMag User Manual
Magnetic stripe reader keyboard wedge
Hide thumbs
Also See for MiniMag:
- Quick start manual (5 pages) ,
- Quick start manual (5 pages) ,
- User manual (4 pages)
Table of Contents
Advertisement
Advertisement
Table of Contents

Related Manuals for ID Tech MiniMag


Summary of Contents for ID Tech MiniMag
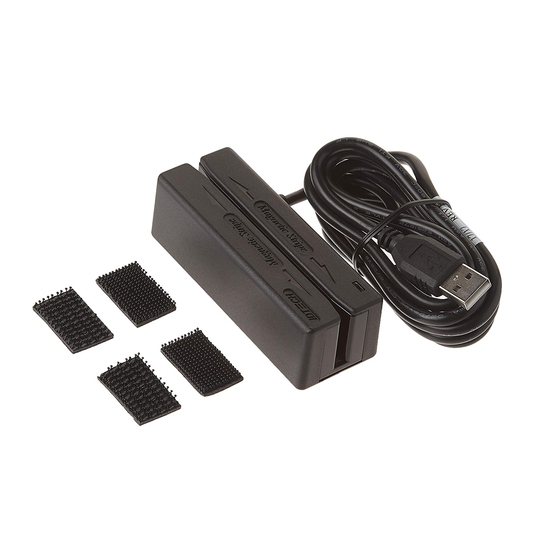
- Page 1 MINIMAG Magnetic Stripe Reader Keyboard Wedge User’s Manual...
-
Page 2: Limited Warranty
Limited Warranty ID TECH warrants to the original purchaser for a period of 12 months from the date of invoice that this product is in good working order and free from defects in material and workmanship under normal use and service. - Page 3 ©2005 International Technologies & Systems Corporation. The information contained herein is provided to the user as a convenience. While every effort has been made to ensure accuracy, ID TECH is not responsible for damages that might occur because of errors or omissions, including any loss of profit or other commercial damage.
-
Page 4: Table Of Contents
Table of Contents Section 1. Introduction Description Section 2. Installation Host Connections Section 3. Configuration Default Settings Configuration Setup Steps General Selections Change to Default Settings Review Settings Message Formatting Selections Magnetic Track Selections Section 4. Data Editing Functions Fields Formulas Setup Commands Search Command... -
Page 5: Section 1. Introduction
Section 1 INTRODUCTION Description The MiniMag™ compact magnetic stripe reader can read 1, 2, or 3 tracks of magnetic stripe information. In addition, it has full data edit- ing capabilities. When connected to the host computer as a keyboard wedge, the Min- iMag is completely compatible with the host’s software. -
Page 6: Section 2. Installation
This makes the reader, as a data source, completely transparent to the host’s application software. In other words, if it is expecting data from the keyboard, that same data can be entered via the MiniMag and make no difference to the host. -
Page 7: Section 3. Configuration
Selections for each group take effect when you press enter. If you unplug the MiniMag while you are in the middle of a command and have not pressed enter, your custom configuration for that com- mand will not be saved. If, however, you press ENTER after a... -
Page 8: Configuration Setup Steps
correct command, but before unplugging the reader, your selections for that command will remain programmed until you change them or reset all commands to default. When entering keyboard commands, type no more than two characters per second. When entering numbers, use the number keys above the alpha keys, not the number pad to the right of the alpha keys. -
Page 9: General Selections
This group of configuration settings define the basic operating param- eters of the scanner. Syntax: /e/d/fa<space>b1b2b3<ENTER> where... Terminal Type Selections The MiniMag can be programmed to interface to a number of different terminal types. The terminal types supported are: b1=0 for PC-AT b1=1 for PS/2 Models 25 and 30... -
Page 10: Change To Default Settings
b3=2 for 10 ms intercharacter delay b3=3 for 20 ms intercharacter delay b3=4 for 25 ms intercharacter delay b3=5 for 50 ms intercharacter delay EXAMPLE To set the terminal type to PC-AT, the beep to high, and the interchar- acter delay to 5 milliseconds, enter: /e/d/fa<space>021<ENTER>... - Page 11 Reading and Decoding Settings This command will turn the MiniMag on or off, and set the decoding directions. If the reader is disabled, no data will be sent to the host. Syntax: /e/d/fu<space>b1b2<ENTER> where... MSR Reading Settings b1=0 MSR Reading Disabled...
-
Page 12: Message Formatting Selections
Message Formatting Selections Terminator Setting Terminator characters are used to end a string of data in some applica- tions. Syntax: /e/d/fb<space>b1<ENTER>where... b1 = 0 for <ENTER> b1 = 1 for <ENTER> b1 = 2 for <ENTER> b1 = 3 for none Preamble Setting Characters can be added to the beginning of a string of data. -
Page 13: Magnetic Track Selections
Magnetic Track Selections Track Selection There are up to three tracks of encoded data on a magnetic stripe. This option selects the tracks that will be read and decoded. Syntax: /e/d/fp<space>b1<ENTER>where... b1=0 for Any Tracks b1=1 for Track 1 only b1=2 for Track 2 only b1=3 for Tracks 1 and 2 b1=4 for Track 3 only... - Page 14 (13 keystrokes). Start/End Sentinel and Track 2 Account Number Only The MiniMag can be set to either send or not send, to invoke the Start/ End sentinel, and to send either the Track 2 account number only, or all the encoded data on Track 2. (The Track 2 account number setting doesn’t affect the output of Track 1 and Track 3.)
-
Page 15: Section 4. Data Editing
Section 4 DATA EDITING The MiniMag has a data editing feature incorporated into its firmware. This feature allows the data read from the magnetic stripe to be sent to the host in the exact format expected by the host software, eliminating the need for modifications to the application software. -
Page 16: Functions
Functions The following editing functions can be performed: Rearrange the Data: The fields within a track, created by established standards, can be transmitted to the host in any order desired, regard- less of the order in which they occurred in the card track. Insert Character Strings into the Output Data Record: Character strings can be defined and inserted at any place in the data output record. -
Page 17: Fields
Fields By separating the input data record into smaller blocks (called “fields”), each block can be edited individually. Additional fields can also be added to the record, allowing specific functions, such as car- riage returns or keyboard function keys, to be inserted at any point. (The field standards for ISO Credit Cards, California driver’s licenses, and AAMVA driver’s licenses are listed in Appendix D.) By separating the input data record into smaller blocks (fields), each... -
Page 18: Formulas
Formulas The set of instructions programmed into the MiniMag to edit data is referred to as the data editing “formula.” More than one formula (to a maximum of four) can be resident in the reader at one time. If more than one formula resides in memory, the reader will apply the first for-... -
Page 19: Setup Commands
Data Editing Setup Commands The following commands are used to set the operating parameters of the data editing feature. Data Editing On/Off, Matched/Unmatched Syntax: /e/d/fe<space> b1b2 <ENTER> where: b1 = 1 Data Editing On b1 = 0 Data Editing Off b2 = 1 if no formula matches card data, send out whole card data b2 = 0 if no formula matches card data, do not send anything Data Editing Added Field... -
Page 20: Search Command
Search Before: For a particular track, the MiniMag will create a data field which contains all characters that come before the specified occurrence of a given character sequence. - Page 21 Syntax: /e/d/fs<space>[length_match]… [string_match]… [search_be- fore]… [search_between]…[search_after]…<ENTER> where: length_match: = a{track_no}(minimum characters)(maximum charac- ters) string_match: = b{Track_no}(offset)(length)(string) search_before: = c{track_no}{field_no}(times) (length)(string) search_between: = d{Track_no}(field_no)(times1) (length1)(string1)(t imes2)(length2)(string2) search_after: = e{Track_no}{field_no}(times)(offset)(field_len) (str_len)(string) track_no: = 1 | 2 | 3 field_no: = a...z Times, Times1, and Times2: Times and Times1 define how many times a specified string is searched from the start of data on a specific track.
- Page 22 The command: /e/d/fs c1a0101? d2b0101=0201= will generate two flexible fields: First Flexible Field: c: Search before method 1a: The first flexible field is in Track1 01: once search; 01: the length of searched string ?: searched string Second Flexible Field: d: Search between method 2b: The second flexible field is in Track2 01: once search...
-
Page 23: Send Command
Data Editing Send Command Send out the field according to the customer-defined order. Syntax: /e/d/ft [ccsmd] [dmvsmd] [aamvasmd] [flexsmd] where: ccsmd: = 7a{field}[{field}]…(credit card) dmvsmd: = 7b{field}[{field}]…(CA driver’s license) aamva: = 7c{field}[{field}]…(AAMVA) flexsmd: = 7d{field}[{field}]…(custom format) field: = {add_fd_tag}{field_no} | {track_no}{field_no} add_fd_tag: = 0 track_no: = 1 | 2 | 3 field_no: = a...z... - Page 24 The last line will generate two formulas, one for Credit Card and the other for DMV card. Example Two: /e/d/fn<CR> /e/d/fe 10<CR> /e/d/fr \cr<CR> /e/d/fs c1a0101? d2b0101=0101=<CR> /e/d/ft 7d1a0a2b0a<CR> The first line “/e/d/fn<CR>” is to clear all previous settings. The second line “/e/d/fe 10<CR>” is to enable the data editing and will not send out original data if it does not match the formula.
- Page 25 Section 5 OPERATION The MiniMag reader is easy to operate. Just follow these simple steps: 1. Make sure the reader is properly cabled and is receiving sufficient power. (See Section 5, Troubleshooting, if there is a cabling or power problem.) 2.
-
Page 26: Section 6. Troubleshooting
Section 6 TROUBLESHOOTING The MiniMag reader is easy to install and use. Most problems encoun- tered can be attributed to: • Incorrect Interface Cabling • Incorrect Configuration Setup • Bad Magnetic Stripe Quality General Procedures The troubleshooting process can be simplified by following these simple diagnostic procedures. -
Page 27: Keyboard Interface Problems
Keyboard Interface Problems Installation of the reader is generally trouble free, but there are some things to watch for if you are experiencing problems. Do you have the proper cable? Most modern computers and terminals use a PC/XT/AT-compatible keyboard. However, the cable connecting it to the keyboard port may have variations in either the signal pins or the connector itself. -
Page 28: Appendix A. Default Settings
Appendix A. Default Settings Table The MiniMag reader is shipped from the factory with the following default settings already programmed: Magnetic Track Basic Data Format Track 1: <SS1><T Data><ES><ENTER>* Track 2: <SS2><T Data><ES><ENTER>* Track 3: <SS3><T Data><ES><Enter>* where: SS1(start sentinel track 1) = % SS2(start sentinel track 2) = ;... - Page 29 Appendix B. Function Code Table Character Keystroke Character Keystroke \end Right \right Left \left Down \down PgUp \pgup PgDn \pgdn \tab Back Tab \btab \esc Enter \enter \ins Home \home Backspace To input the “\” character, type it twice. For example, typing ab\\cd in a preamble string will result in ab\cd as the preamble.
-
Page 30: Appendix C. Non-Printable Ascii Characters
Appendix C: Non-printable ASCII Characters Character Keystroke NULL \nul \soh \stx \etx \eot \enq \ack \bel \dle \dc1 \dc2 \dc3 \dc4 \nak \syn \etb \can \sub \esc... -
Page 31: Appendix D. Magnetic Stripe Standard Data Formats
Appendix D: Magnetic Stripe Standard Data Formats International Standards Organization (ISO) Credit Card Format Track 1 Field ID Contents Length Character Start Sentinel Format Code “B” Account Number 13 or 16 Separator “^” Cardholder Name variable Separator “^” Expiration date Optional Discretionary data variable End Sentinel... -
Page 32: California Driver's License
California Driver’s License Format Track 1 Start Sentinel Format Code Type: C = Commercial S = Salesperson D = Driver I = Identification R = Senior Citizen Name Line 1 Name Line 2 Address Line 1 City End Sentinel Linear Redundancy Check (LRC) Character Track 2 Start Sentinel... -
Page 33: Aamva Driver's License
Track 3 Start Sentinel Class Endorsements State Code Zip Code Hair Eyes Height Weight Restrictions Issue Date Office Employee ID LRE ID Fee Due Year Address Line 2 Reserved Space End Sentinel Linear Redundancy Check (LRC) Character AAMVA Driver’s License Format Track 1 Start Sentinel State or Province... - Page 34 Track 2 Start Sentinel ANSI User Code ANSI User ID Jurisdiction ID/DL Expiration date Birthdate Remainder of Jurisdiction ID/DL End Sentinel Linear Redundancy Check (LRC) Character Track 3 Start Sentinel Template Version # Security Version # Postal Code Class Restrictions Endorsements Height Weight...
-
Page 35: Installation
Appendix E: USB/Keyboard Interface The MiniMag reader is available with a cable that terminates in a Universal Serial Bus (USB) connector. Most new computers have multiple USB ports into which a wide variety of peripherals can be installed. Since USB devices are designed to be “plug and play,” the computer will search for a Human Interface Device (HID) driver when the MiniMag is first connected. - Page 36 You do not have to use Notepad. 4. Click SEND. 5. If the command is accepted, the MiniMag will beep once. If the command is rejected, the MiniMag will beep twice. 6. You can clear the INPUT SETUP STRING window by clicking on CLEAR INPUT.
- Page 37 ID TECH 10721 Walker Street Cypress, California 90630-4720 (714) 761-6368 www.id-tech.net 80030501-001 Rev. A R09/05 #414...
Need help?
Do you have a question about the MiniMag and is the answer not in the manual?
Questions and answers