Table of Contents
Advertisement
Quick Links
Advertisement
Table of Contents

Related Manuals for Hyundai H-LCD2209


Summary of Contents for Hyundai H-LCD2209
- Page 1 H-LCD2209 LCD TV Instruction manual...
-
Page 2: Table Of Contents
Table of contents Table of contents ............................2 Important safety precautions ........................3 General introduction ............................ 5 Accessories..............................5 Controls and connection..........................6 Remote control (RC)............................ 8 General operations ............................10 OSD operations ............................11 Troubleshooting............................16 The causes of interference...........................16 Specifications .............................17... -
Page 3: Important Safety Precautions
Thank you very much for buying our product – the most natural Colour Television Receiver. To enjoy your set to the full from the very beginning, read this manual carefully and keep it for future reference. Important safety precautions Warning Please unplug the power cord from the AC outlet and contact our service personnel to repair under the following conditions: Any obvious abnormality appears in the product, such as smoky, peculiar smell or strange sound. - Page 4 Do not place any vase, potted plant, cup, medicine and any container with water on this product. If the liquid is spilt, it may cause the fire, electric shock or breakdown. Do not install it at the place on the strong magnetic field or current field. It may cause break down. This equipment may be observed deterioration of the picture by electromagnetic radiation in electromagnetic environment.
-
Page 5: General Introduction
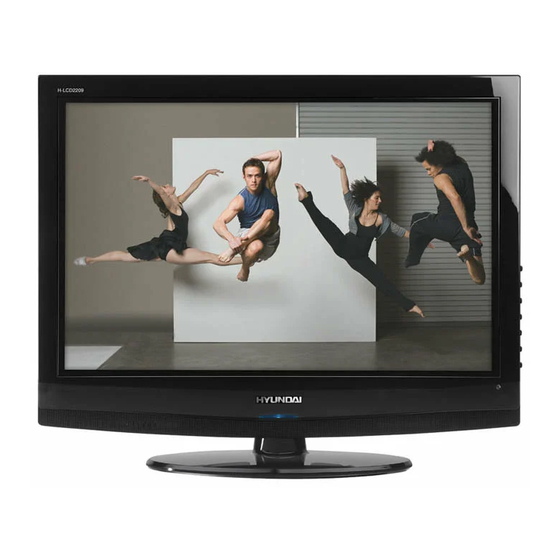
General introduction Size of the screen: 22"/56 cm Aspect ratio: 16:10 Screen resolution: 1680x1050 Brightness: 300 cd/m2 Contrast: 1000:1 Angle of view: 160º/160º Response time: 5 ms TV systems: PAL/SECAM; BG/DK/I/L NICAM stereo Connections: RF antenna, HDMI, S-Video, Composite, SCART, VGA, PC audio input Headphones out Progressive scan Teletext... -
Page 6: Controls And Connection
Controls and connection Front view Back view 16 17 18 19 Power indication light 12. VGA jack Remote sensor 13. SCART jack AV/TV function switch button 14. S-video jack MENU button 15. Video jack VOL-/Left direction button 16. Audio in (Left) jack VOL+/Right direction button 17. - Page 7 Connect the TVRF source with the antenna port. TVRF signal including: You can use 75 coaxial cable to connect the outdoor antenna. Outdoor Antenna Connection: Use 75 coaxial cable plug or 300-75 impedance converter to plug in antenna input terminal on the rear of the cabinet.
-
Page 8: Remote Control (Rc)
Remote control (RC) POWER button. Press to turn on/off the TV set or to switch it to standby mode. MUTE button. Press to turn off/on the sound. Number buttons. Press to input figures. LAST CHANNEL button. Press to switch to the last watched channel. - Page 9 Insert the batteries in the RC Remove the battery cover by pressing the symbol and pulling the cover space in the direction of the arrow. Insert the two 1.5V (AAA size) batteries making sure the polarity (+ or -) of the batteries matches the polarity marks inside the unit.
-
Page 10: General Operations
General operations Press the POWER button on the unit or the remote control to switch on the power; the indication light will be in blue color. Press the POWER button again to switch off the power, and the light will be in red color. -
Page 11: Osd Operations
OSD operations In this manual, the OSD Menu maybe changed and different from your real TV’s screen shown without further notice. Because this manual is just a sample to help you how to operate TV menu setting. PICTURE SETTING Press the MENU button on the remote control to select PICTURE SETTINGS MENU displayed on the screen as below: PICTURE Standard... - Page 12 SOUND SETTING Press the MENU button on the remote control to select SOUND SETTINGS MENU displayed on the screen as below: SOUND Volume Personal Sound Mode Treble Balance Adjust Select Volume Press button firstly to move cursor to this item, then use button to select available volume effect.
- Page 13 Manual Tuning Press button firstly to move cursor to this item, then use button to enter into manual tuning menu, as followed: Manual Tuning Program Sound System Auto Program Label 049.75 MHZ Manual Search Adjust Input Select Program Press button firstly to move cursor to this item, then use button to select lower or upper program.
- Page 14 Move This function allows you change the program of channels in the list: Press button firstly to move cursor to selected current program channel 1. And press button to confirm. Then press button firstly to move cursor to target program channel 2. And press button to confirm.
- Page 15 Child Lock Press button firstly to move cursor to this item, then use button to enter into Child Lock menu. Child Lock Press button firstly to move cursor to this item, then use button to select On/Off. Key Lock This item allows you to lock the button or key on the unit, so that a child could not change accidentally your viewing preferences.
-
Page 16: Troubleshooting
Troubleshooting Before calling a technician, please check the following items to see whether you can easily diagnose and fix the encountered symptoms on your own. Symptoms Possible Cause Correction The power cord is not plugged in. No picture, no Plug the power cord in. Contrast, brightness, sharpness, color and sound, and no Alter the value of contrast, brightness,... -
Page 17: Specifications
Specifications Size (diagonal) 22” (56 cm) Brightness 300 (cd/m Contrast 1000:1 LCD panel items Angle of view 160°/160° Speed response 5 ms Resolution 1680x1050 Aspect ratio 16:10 Color system PAL, SECAM Sound system DK, I, BG, L S-video in Composite video Input Composite video, RGB, Audio L+R SCART... - Page 18 ...............................18 ...........................19 ..........................21 ...........................21 .....................22 ) ....................24 ..........................26 ............................27 ...................30 ............................30 ........................31...
- Page 19 HYUNDAI! –20° +50° .
- Page 20 LCD-...
- Page 21 : 22"/56 : 16:10 : 1680x1050 : 300 ² : 1000:1 : 160º/160º : PAL/SECAM; BG/DK/I/L NICAM : RF , HDMI, S-Video, , SCART, VGA, « » : 110-240B, 50/60...
- Page 22 16 17 18 19 SCART AV /TV - S-Video MENU - VOL-/Left - VOL+/Right - CH-/Down – CH+/Up - POWER - HDMI...
- Page 23 300-75 (DVD, VCDR, CAMCORDER AUDIO ‘L’( ‘R’( PAL, NTSC, SECAM. SCART S-Video S-Video S-Video HDMI HDMI...
- Page 24 POWER. MUTE. LAST CHANNEL. SYSTEM. NICAM NICAM. VOL+/VOL-. CH+/CH-. DISPLAY. ENTER. EXIT. MENU. PMODE. AV/TV. SMODE. SLEEP. TEXT: HOLD: PGDN: PGUP: INDEX: SIZE: REVEAL: SUBPAGE:...
- Page 25 (AAA) (+/-).
- Page 26 POWER POWER POWER VOL -/VOL + ( VOL - VOL +, SLEEP ( SLEEP, CH+, 0-9, -/-- ‘-’ ‘--’, 0-9, PMODE ( PMODE, SMODE SMODE, MUTE ( MUTE, DISPLAY ( DISPLAY, AV/TV AV/TV SCART CVBS S-VIDEO HDMI TELETEXT ( (18)
- Page 27 (OSD). <MENU> < > < > <ENTER>, <MENU>, « » » - » » » VGA PC. » NTSC. » » VGA PC. «DNR» DNR ( « » » – » - » – » – » – « » »...
- Page 28 « » » - » - » - » - «AFT» - » - « » “ ”. “ ”. “ ”. ” “ ”. ”. “ ” “ ”. “ ” “ ”, “ ” “ ” “ ”, “...
- Page 29 – – PIN- – «0000», <ENTER>. » - – – – <ENTER>, <ENTER>, » -...
- Page 30 » CH+/CH- « » » ».
- Page 31 22” (56 300 ( ²) 1000:1 160°/160° 1680x1050 16:10 PAL, SECAM DK, I, BG, L S-Video , RGB, SCART HDMI 110-240 ; 50/60 : LCD...
Need help?
Do you have a question about the H-LCD2209 and is the answer not in the manual?
Questions and answers