Page 1
Digital HDTV receiver with Linux operating system
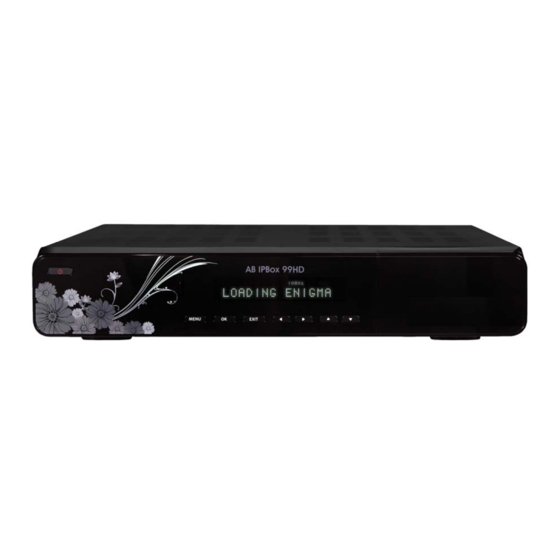
 AB IPBox 9900HD AB IPBox 9900HD plus AB IPBox 99HD AB IPBox 55HD User Manual www.abipbox.com...
Introduction Thank you for purchasing our digital HDTV receiver. The receiver enables you to enjoy world of high definition television with excellent picture details and incredible surround sound. It also brings you an access to large amount of digital radio stations, Internet radios and other services. Thanks to AB Enigma2 HD operating system you can adjust your receiver to suit your personal needs and install new functions and modules. The receiver also enables playback of different multimedia files from built‐in HDD, other connected devices or via network. We wish you many pleasant experiences while using your receiver. ...
Content: Introduction Safety Precautions Technical specifications Physical Description Connection of AB IPBox HD receiver Remote controller Operation Initial Setting Channel list. Program information bar of the channel (infobar) Channels Searching Tuner configuration Automatic Scan Manual scan Adding channels into „Favorite“ lists (bouquets)
Safety Precautions Please read this manual thoroughly before the appliance is operated. Strictly follow all safety precautions! Install you receiver in dry environment, avoid any contact with water and humidity. Do not turn on the receiver after the contact with cold environment – condensated water may affect proper operation of the appliance.
Technical parameters of the AB IPBox 9900HD Plus and AB IPBox 9900HD are the same. The only difference is that the AB IPBox 9900HD model is standardly equipped with just one DVB-S2 tuner and is equipped with connector for connecting another tuner: DVB-T terrestrial, DVB-C cable or DVB-S2 satellite.
Page 6
ABIPBOX 9900HD Plus Type 266MHz ST40-202 32bit RISC CPU Data/Instruction 32KB/16KB Cache Input Connector IEC169-24 Female(F-type) X 2 Loop through IEC169-24 Female(F-type) X 2 Connector Input Signal Level -65 to -25dBm Frequency Range 950MHz to 2150MHz Vertical 13V(400mA Max) LNB Control...
Page 7
e-SATA (1.5Gbps), 80/120/160/200/320GB and over (User Selectable) Digital interface for HDMI 1.1 with HDCP HDTV SCART I/F TV & VCR (2 Ports) CVBS & Audio R/L Storage & Rear RCA (3 Ports) connector Component Out RCA (3 Ports) (YPbPr) RF-Modulator In &...
Page 8
AB IPBox 9900HD Type 266MHz ST40-202 32bit RISC CPU Data/Instruction 32KB/16KB Cache Input Connector IEC169-24 Female(F-type) Loop through IEC169-24 Female(F-type) Connector Input Signal Level -65 to -25dBm Frequency Range 950MHz to 2150MHz Vertical 13V(400mA Max) LNB Control Horizontal 18V(400mA Max)
Page 9
Input Stream ISO/IEC 13818-2 Specification and H.264 MPEG-2 MP@ML, MP@HL, MPEG4 Profile & Level AP@HL/H.264 level 4.1 Input TS Data Rate 138Mbit/S max. MPEG Transport Aspect Ratio 4:3, 16:9 with pan/scan vector Stream & A/V Decoding 720 x 576(PAL), 720 x 480(NTSC), 1080i, Video Resolution 720P, 480i, 480P Audio Decoding...
Page 10
AB IPBox 99HD Type 266MHz ST40-202 32bit RISC CPU Data/Instruction 32KB/16KB Cache Input Connector IEC169-24 Female(F-type) Loop through IEC169-24 Female(F-type) Connector Input Signal Level -65 to -25dBm Frequency Range 950MHz to 2150MHz Vertical 13V(400mA Max) LNB Control Horizontal 18V(400mA Max)
Page 11
- 0/12V output, - YpBPr and composite A/V output, - e-SATA connector for external HDD, - AB IPBox 55HD is also not equipped with RS232 serial connector and does not support installation of HDD. Both models are equipped with: - just one Conax card reader,...
Page 12
ABIPBOX 55HD Type 266MHz ST40-202 32bit RISC CPU Data/Instruction 32KB/16KB Cache Input Connector IEC169-24 Female(F-type) Loop through IEC169-24 Female(F-type) Connector Input Signal Level -65 to -25dBm Frequency Range 950MHz to 2150MHz Vertical 13V(400mA Max) LNB Control Horizontal 18V(400mA Max) Satellite 8PSK Tuner (DVB-S2) Waveform QPSK, 8PSK(C/KU band compatible)
Page 13
Front Display Alpha numeric style Input Voltage AC100-240V~, 50/60Hz Type SMPS Power Supply Power Consumption 30W (Standby:3W) Protection Separate Internal Fuse and Chassis Size (W x H x D) 340mm x 65mm x 250 mm Physical Specification Weight 3.4Kg Operating 0 ~ 45C Temperature Environment...
Physical description: AB IPBox 9900HD Front panel and control buttons: Card readers (insert card the way that golden chip is Vacuum fluorescent USB 2.0 host STANDBY facing down) alfanumeric display connector MENU EXIT Left Right Common Interface Down (CA) Rear panel: LNB IN Ethernet SCART VCR...
Page 15
This model has almost the same front panel like AB IPBox 9900HD receiver. The difference is behind the doors on the right side of front panel – the AB IPBox 99HD is equipped with just one card reader and USB port.
Page 16
AB IPBox 55HD Front panel and control buttons: This model has almost the same front panel like AB IPBox 99HD receiver. The difference is in using 4 digits LED display and absence of USB port behind the door. Real panel Rear panel consists of (from left side to the right):...
Examples of possible connection of AB IPBox HD receiver: Example 1: flash Basic connection for High Definition display: - Connect your satellite dish to input LNB IN of DVB-S2 Tuner (1). - If the receiver is equipped with second Tuner, connect output from corresponding antenna dish to LNB IN (2) input (terrestrial antenna if it is DVB-T tuner or satellite antenna if it is DVB-S2 tuner).
Page 18
Example 2: Basic connection for older type of TVs without HDMI connector – displays only in SD (Standard Definition) quality! AV 1 Videorecorder TV (AV 1) flash - Connect your satellite dish to input LNB IN of DVB-S2 Tuner (1). - If the receiver is equipped with second Tuner, connect output from corresponding antenna dish to LNB IN (2) input (terrestrial antenna if it is DVB-T tuner or satellite antenna if it is DVB-S2 tuner).
Remote controller description Note: The remote controller is not compatible with older type of AB IPBox receivers (AB IPBox 91HD, 910HD, 9000HD). STANDBY MUTE Files list TV channels Browser ‐ if installed Radio channels EXIT Teletext Cursors: left, right, up, MENU down PAge Up / Down PLAY OK Not used Recording Stop FW ...
Operation: AB IPBox 9900HD PVR with AB Enigma2 HD firmware AB Enigma2 HD firmware was developed to enable simple and comfortable control of all functions of your receiver. Powering Up the receiver a) Before connecting the power cord, connect to the receiver your other components and antenna (see examples in previous chapter).
Page 21
Screen test – “yes”, “no” After setting up the video resolution you will be asked if you want to set up the picture parameters. Select “no” to skip the menu or “yes” to adjust level of Brightness: Follow the instructions displayed on the screen.
Page 22
Basic setting installation menu (preinstalled channel list) appears on the screen. If none setting is available, skip the menu otherwise choose desired one and press OK. Note: You can download Setting from the Internet or install it from your PC. Configuration Mode You can set up your antenna (outside dish) in this menu.
Parental control “yes” – “no” Select “yes” to enter to the menu for setting up the parental control. Menu for inserting PIN code appears – insert preset code (0000). In the following window you can change PIN according to your choice: insert new PIN into first line and write down the same code into second line to confirm.
Page 24
For manual configuration of the network please set the item “Use DHCP” - „no“ Set up appropriate values for parameters IP Address, Netmask, Use a Gateway and Gateway. Netmask value must be the same as it is in your computer; IP Address must differ from IP Address of your PC in last three digits.
Channel list Channel sort, favourites groups - bouquets. Press OK and Blue function button to display „Favourites“ list. Favorites: Select desired Favourite group (e.g. Sport) and use cursor buttons to select desired channel. Press the OK button – selected channel will be displayed (if it is FTA channel or you have the authorization for wathing the channel).
Selection of a channel from favorites Select desired channel in the favourite group (e.g. Eurosport HD) and press OK. List of channels disappears. Selected channel with information bar will be displayed. Program information bar of the channel (infobar) - description of displayed indications Actual date Services symbols Actual time...
Page 27
Selecting a channel from ALL Press OK to display list of channels. Press Red function button to display list of „All“ channels. Use cursor buttons to select desired channel and press OK. Selecting a channel from Satellites list Press OK to display list of channels. Press Green function button (Satellites) to display list of available satellites.
Page 28
Selecting the channel from Provider list Press OK to display list of channels. Press Yellow function button (Provider) to display list of available providers. Use cursor buttons to select desired group (e.g. Skylink) and press OK. Names of providers and groups of channels are created automatically during searching accordingto NIT parameters from satellite and can not be changed.
Select „Service Searching“ and press OK to display „Tuner configuration“ menu. Tuner configuration (Menu – Setup – Service Searching - Tuner configuration) If you use also Tuner 2 in your AB IPBox it must be configurated separatelly. Example shows DVB-T tuner as Tuner 2. Choose Tuner Type and configuration of installed tuners is displayed in this menu.
Page 30
Tuner configuration for motor with USALS (GOTOX) system – example: Configuration Mode – advanced Example: Satellite – All satellites 1 Use cursor buttons to select desired satellite. LNB number is automatically allocated to selected satellite (e.g. LNB 33). All the data essencial for connecting your dish to USALS motor are preset in the table and if you use Universal type of LNB it is not needed to change...
Page 31
Tuner configurations for connection with DiSEqC switch for 4 satellites: Configuration Mode – advanced Selected satellite – 19,2 ASTRA LNB LNB 1 LNB convertor for Astra 19,2E is connected to input 1 = A= AA of DiSEqC switch. DiSEqC mode - selected 1.0. Commited DiSEqC command - Configuration for second satellite: Selected satellite –...
Page 32
Manual configuration of DiSEqC 1.2 motor (Menu – Setup – Service Searching – Positioner setup) This setting is used only for DiSEqC motors without USALS system. Tuner is set for DiSEqC 1,2 , USALS is turned off and satellites to be aimed with motor are selected.
Page 33
Select desired setting and press OK. Use the same way to install other plugins. You can also use DreamboxEdit software in your PC to install and edit the setting.
Automatic Scan (Menu – Setup – Service searching – Automatic Scan) Clear before scan – „yes“: Removes all channels searched before. Scan Tuner A (DVB-S2)-„yes“: Runs searching on all available satellites according to setting of the tuner (if you use a motor it can last several tens of minutes).
Page 35
Satellite Equipment setup (Menu – Setup – Service Searching – Satellite Equipment setup) We strongly recommend not changing the parameters in this menu if you are not an expert! Satfinder (Menu – Setup – Satfinder) Satfinder menu is used to help to adjust alingment of your antenna dish.
Adding channels into „Favorite“ lists (bouquets) These lists (bouquets) are used for common simple orientating among your favorite channels. Select „New“ – new searched channels. New searched channels are automatically added to „All“ list, corresponding „Satellites“ and „Provider“ lists. Press OK to open the channel list. Use color function buttons to display corresponding list: All, Satellites, Providers, Favourites.
Page 37
Changing position of channels in bouquet list OK – Blue button – select a bouquet containing the channel you want to change position in the list – OK. Select the channel to be moved. (The list is always opened on the first channel of the list. Press cursor button Up once to jump on the last channel in the list.) Press MENU button.
Page 38
Direct selection of channel by numeric buttons. Channels from all bouquets are sequenced in „Favorites“ list according to their numbers. It enables their direct calling by entering their number (the number is also shown on infobar). We do not recommend adding the same channel to several bouquets. It will cause that one channel will be stored under several different numbers! If the channel is contained in more bouquets it is possible to use only the number shown on infobar for direct selection.
Press OK after finishing the writting. New bouquet will be added on the end of the list. To change its position in the list activate „move“ mode in service menu. Select the bouquet to be moved and press OK. Use cursor buttons to find a new position and press OK.
Page 40
AV Setting (Menu – System – AV Setting) Select first item in System menu (A/V Setting) and press OK. Menu for setting up audio/video appears. Use cursor buttons to select desired item (parameter) and press OK. Use Left/Right cursor button to set selected parameter.
Page 41
Language (Menu – Setup – System – Language) Use Up/Down cursor buttons to select desired language. Press OK to confirm your selection. Customize (Menu – Setup – System – Customize) This menu contains detailed system settings you can adjust. Do not change the setting of any parameter if you are not absolutely sure.
Page 42
Customize menu - Page 2 Timezone (Menu – Setup – System – Timezone) Use Left/Right cursor buttons to adjust Timezone according your location. Correct setting up of Timezone is essential for correct function of automatic setting of time, EPG and recording timer. RF output (Menu –...
Page 43
Harddisk (Menu – Setup – System – Harddisk) Harddisk setup – set up sleep time for your HDD in minutes. Initialization – select this item and confirm the selection to start formatting of your internal HDD or external USB memory disk (linux ext3). All data will be removed! ...
Page 44
Adapter settings Possible example of setting of network parameters: Use interface: yes Use DHCP: no IP Address: must be from the group used in your network Netmask: the same address as in other devices connected to the network Use a gateway: yes Gateway: IP address of gateway Press OK to confirm...
Page 45
Selection of location of records for instant recordings A device you want to save your recordings on must be active – mounted on your receiver. Use BLUE function button (Remove Bookmark) to remove active path (location). Press OK to confirm and return to the Location menu. Select desired valid memory device and press Blue function button (Add Bookmarks).
Page 46
Skin (Menu - Setup – System – Skin) Use cursor buttons to select a skin – graphical backround of the menu of your receiver. Small overview of particular skin is shown on the right side of the screen. Select desired skin and press OK to activate it. Additional skins can be installed as Plugins.
Page 47
Crashlog settings (Menu – Setup – System – Crashlog settings) Crashlog (system failure extract notes) setting can be done in this menu. There is no purpose for common user to deal with it. Cleanup settings (Menu – Setup – System – Cleanup settings) First line –...
Allinone Panel Aspect Ratio – consequently press Green function button to adjust Aspect Ratio for SD channel. Direct changing the Aspect Ratio = middle button on the second bottom line of your remote controller. Sleep timer – press Yellow unction button to activate menu for setting up Sleep timer (automatic shut down of your receiver after elapsing a set time).
Page 49
Select Var (Menu – Allinone Panel - Select Var) You can set up one of the three memory medias for storage of setting and plugin files (var): Flash – internal memory – usually sufficient for troublefree operation (with limited number of installed plugins).
Page 50
Image Setup (Menu – Allinone Panel - Image Setup) Snapshot and Lcd Setup – not active. It is prepared for further development. Network Setup – opens menu for setting up Ethernet. Software Manager opens menu for management, backup and installation of software. Software Manager (Menu –...
Page 51
Software restore - Image upgrade wizard Follow the instructions on the screen. Select „OK, guide me through...“ and press OK to activate the wizard or select „Exit the wizard“ and press OK to exit. Select memory media for Image upgrade wizard – page 2: storage backup files –...
Page 52
Image upgrade wizard –successful backup message screen: After image upgrade you can restore your settings with „Backup restore“ function. Image Infos (Menu – Allinone Panel - Image Infos) Use cursor buttons and OK button (or numeric buttons for direct selection) to display corresponding information window: = Image Info (firmware information) = Free RAM memory...
Page 53
System Infos (Menu – Allinone Panel - System Infos) Use cursor buttons and OK button (or numeric buttons for direct selection) to display corresponding information window: = DvbSnoop Infos (not active, prepared for future development) = CPU (processor information) = MemInfo (memory information) = Modules = Graphics Mode = Mtd (from mtd0 to mtd4)
(middle button on upper line of RC). Recording The AB IPBox is capable of recording selected programs and saving them on built-in hard disc or connected memory device with sufficient memory capacity. Instant recording of just watched program Press REC button, a confirmation window appears.
Finishing the recording – press REC or TV button to open menu. If recording more programs, select the one to be finished and press OK. Deleting records Press FILES button to open records files list. Use cursor buttons to select particular file and press MENU.
Formatting of USB flash disk Use any of USB connector on your IPBox for connection of USB disk. Enter menu: Menu – Setup – System – Hard disk – Initialization. Select corresponding USB disk in the list and press OK. A confirmation window appears. Select “yes”...
Select desired file from „movie“ folder and press OK to play selected media file. Press STOP button to stop playback and return to the file list. Press EXIT to leave the menu and return watching last watched channel. Timer Enter Timer menu and press GREEN function button to open menu for setting up a new timer.
EPG ( Electronic Program Guide Press Yellow function button to display EPG of actually watched channel (if the channel provides EPG information). Press BLUE function button to open Multi EPG, bouquet list is displayed. Select desired bouquet and press OK...
Page 59
Single EPG Recording of a program through EPG of the channel: Use cursor buttons to select a program you want to record. Press GREEN button (Add Timer), „Input Timer“ window with information from EPG is displayed. Use GREEN button to save the timer. Use RED function button to cancel the timer.
In this menu you can see a list of all set timers showing its status. Use RED function button (Delete) to remove selected timer. Use YELLOW function button (Disable) to disable (deactivate) selected timer. Press YELLOW button again to enable the timer. Use GREEN function button (Add) to add a new timer.
Page 61
VCR scart VCR SCART connector provides video signal only when video resolution is set up on „576“ (PAL). Use first right button at second button line of the remote controller to set up the video output. Press EXIT to exit. Information Service = information about actual received service.
About (Menu – Information – About) At this window you will find information about: - firmware used in your IPBox (Enigma, Image), - used processor - tuners installed in your IPBox - hard disk (type, capacity and free space). Standby / Restart Use the menu or press and hold for a while STANDBY button on your remote controller to open Standby/Restart menu.
6. The IPBox will automatically restart newly installed image. 7. Wait until „Initial Setup Wizard“ menu is displayed. Follow the instructions at the beginning of this manual. We wish you good luck and plenty of great experiences with your AB IPBox receiver. Your ABCOM team.
Copyright The information, images and data contained on this document are copyrighted by AB-COM s.r.o. and may not be distributed, modified, reproduced in whole or in part without prior permission from a representative of AB-COM s.r.o. company. The Slovak, Czech , English and other languages translations of the document is also copyrighted byAB-COM s.r.o.
Need help?
Do you have a question about the 9900HD and is the answer not in the manual?
Questions and answers