Table of Contents
Advertisement
Quick Links
Operating Instructions
AUS
English, 1
K3G11/AUS
K3G11S/AUS
Contents
Installation, 2-7
Positioning and levelling
Table of burner and nozzle specifications
Start-up and use,9-11
Electronic timer
Precautions and tips, 12-13
General safety
Disposal
Care and maintenance, 14-15
Assistance
COOKER
AUS
Advertisement
Table of Contents

Related Manuals for Indesit K3G11/AUS


Summary of Contents for Indesit K3G11/AUS
-
Page 1: Table Of Contents
Table of burner and nozzle specifications Description of the appliance, 8 Overall view Control panel Start-up and use,9-11 Using the hob Using the oven K3G11/AUS Electronic timer K3G11S/AUS Oven cooking advice table Precautions and tips, 12-13 General safety Disposal Respecting and conserving the environment... -
Page 2: Installation
Installation A = 3 × T ! Before operating your new appliance please read where this instruction booklet carefully. It contains A = the minimum free ventilation area (cm important information concerning the safe installation T = the total gas consumption of all and operation of the appliance. -
Page 3: Installation
To install the appliance correctly: Levelling If it is necessary to level the • Place it in the kitchen, dining room or the bed-sit appliance, screw the (not in the bathroom). adjustable feet into the places • If the top of the hob is higher than the cupboards, provided on each corner of the the appliance must be installed at least 200 mm base of the cooker ( see... -
Page 4: Electrical Connection
Fig. A Fig. B Connecting the gas supply If a flexible hose is used, it should be as short as possible with a maximum length of 1.5 metres; HOOD • The flexible connection must be approved to class B or D of AS/NZS1869 as a minimum. Min. - Page 5 Your appliance is supplied with a 13 amp fused plug Disposing of the plug: that can be plugged into a 13 amp socket for Ensure that before disposing of the plug itself, you immediate use. Before using the appliance please make the pins unusable so that it cannot be read the instructions below.
-
Page 6: Adapting To Different Types Of Gas
Adapting to Different Types of Gas Post Installation Checks It is possible to adapt the appliance to a type of gas Perform post installation checks and ensure proper other than the default type (this is indicated on the and safe operation before leaving. Test all burners rating label on the cover). -
Page 7: Technical Data
Directive 2002/40/EC on the label of electric ovens. Standard EN 50304 Declared energy consumption for ENERGY LABEL K3G11/AUS Natural convection Class – heating K3G11S/AUS mode: Static EC Directives: 2006/95/EEC dated 12/12/06 (Low Voltage) and... -
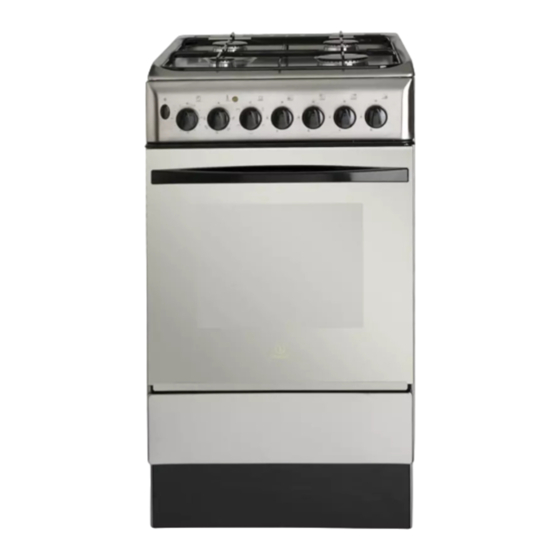
Page 8: Description Of The Appliance
Description of the appliance Overall View Gas burner Containment surface for spills Hob grid GUIDE RAILS Control panel for the sliding racks position 5 GRILL position 4 position 3 DRIPPING PAN position 2 position 1 Adjustable foot Adjustable foot Control Panel THERMOSTAT indicator light SELECTOR... -
Page 9: Start-Up And Use
Start-up and use Using The Hob If the burner still fails to ignite, a match or lighting device can be used, but care must be taken. If the problem persists, contact place of purchase or their Lighting the burners appointed agent for service. For each BURNER knob there is a complete ring If the flame has excessive yellowing, or appears to showing the strength of the flame for the relevant... -
Page 10: Using The Oven
Using The Oven Oven light This is switched on by turning the SELECTOR knob ! The first time you use your appliance, heat the to any position other than “0”. It remains lit as long empty oven with its door closed at its maximum 8 8 8 8 8 as the oven is operating. -
Page 11: Practical Cooking Advice
Practical Cooking Advice Timer* To activate the Timer proceed as follows: ! In the GRILL cooking mode, place the dripping 1. Turn the TIMER knob in a clockwise direction 4 pan in position 1 to collect cooking residues (fat for almost one complete revolution to set the buzzer. and/or grease). -
Page 12: Precautions And Tips
Precautions and tips Installation Warnings ! This appliance has been designed and manufactured in compliance with international safety standards.The following warnings are provided for • The appliance must not be installed outdoors, safety reasons and must be read carefully. even in covered areas. It is extremely dangerous to leave the appliance exposed to weather. -
Page 13: Respecting And Conserving The Environment
Safety With The Cooktop • Periodically check the condition of the gas connection pipe and have it replaced by a • Never leave cooking food unattended. Do not qualified technician as soon as it shows any signs allow the liquid to boil dry of wear or damage. -
Page 14: Care And Maintenance
Care and maintenance Switching The Appliance Off • The accessories can be washed like everyday crockery, and are even dishwasher safe. Disconnect your appliance from the electricity supply before carrying out any work on it. • Stainless steel can be marked by hard water that has been left on the surface for a long time, or by DO NOT TOUCH HOT SURFACES. - Page 15 Burners Assistance • Wait for the cooktop to cool completely. Remove Please have the following information to hand: the burner cap and check the gas outlet holes for • The appliance model (Mod.). blockages. Clean with a soft bristle brush and •...
- Page 16 05/2010 - 195074971.01 XEROX FABRIANO INDESIT PRIORITY SERVICE INDESIT PRIORITY SERVICE INDESIT PRIORITY SERVICE INDESIT PRIORITY SERVICE INDESIT PRIORITY SERVICE AUSTRALIA If you are not completely satisfied with your ARISIT PTY LIMITED ARISIT PTY LIMITED ARISIT PTY LIMITED ARISIT PTY LIMITED...
Need help?
Do you have a question about the K3G11/AUS and is the answer not in the manual?
Questions and answers