Konica Minolta PagePro 1390 MF User Manual
Printer/ copier /scanner
Hide thumbs
Also See for PagePro 1390 MF:
- Manual d'utilisation (114 pages) ,
- User manual (114 pages) ,
- Guía del usuario (114 pages)

Related Manuals for Konica Minolta PagePro 1390 MF


Summary of Contents for Konica Minolta PagePro 1390 MF
-
Page 1: Pagepro 1390 Mf
PagePro 1390 MF ™ Printer / Copier / Scanner User’s Guide 4558-9563-02A 1800791-001C... -
Page 2: Thank You
Thank You Thank you for purchasing a PagePro 1390 MF. You have made an excellent choice. Your PagePro 1390 MF is specially designed for optimal performance in Windows environments. Trademarks KONICA MINOLTA and the KONICA MINOLTA logo are trademarks or regis- tered trademarks of KONICA MINOLTA HOLDINGS, INC. -
Page 3: Software License Agreement
SOFTWARE LICENSE AGREEMENT This package contains the following materials provided by Konica Minolta Business Technolo- gies, Inc. (KMBT): software included as part of the printing system, the digitally-encoded machine-readable outline data encoded in the special format and in the encrypted form (“Font Programs”), other software which runs on a computer system for use in conjunction with the... -
Page 4: Legal Restrictions On Copying
11. Notice to Government End Users: The Software is a “commercial item,” as that term is defined at 48 C.F.R.2.101, consisting of “commercial computer software” and “commercial computer software documentation,” as such terms are used in 48 C.F.R. 12.212. Consis- tent with 48 C.F.R. -
Page 5: For Eu Member States Only
For EU member states only This symbol means: Do not dispose of this product together with your household waste! Please contact the Local Authority for appropriate disposal instructions. In the case of a new device being purchased, the used one can also be given to our dealer for appropriate disposal. -
Page 7: Table Of Contents
Contents 1 Introduction ....................... 1 Getting Acquainted with Your Machine 2 Space Requirements 2 Machine Parts 3 Front View 3 Rear View 4 About the Control Panel 5 2 About the Software ................... 7 Utilities and Documentation CD-ROM 8 Printer Drivers 8 Scanner Driver 8 Utility 8 System Requirements 9... - Page 8 Using the Printer Driver 11 Common Buttons 11 OK 11 Cancel 11 Apply 11 Basic Tab 11 Orientation 11 Copies 11 Effect 12 Paper Tab 12 Paper 12 Layout Tab 12 N-up 12 Output Paper Size 13 Watermark Tab 13 1st Page Only 13 Text Watermark 13 Bitmap 13...
- Page 9 Feeding the Document 34 Placing a Document on the Flatbed Glass 34 Loading a Document into the ADF 35 5 Scanner Operation ..................37 Introduction 38 User Interface Operation 38 TWAIN Driver Settings 39 Scan Method 39 Selecting the Proper Image Type 39 Black and White 39 8-Bit Gray 39 24-Bit Color 40...
- Page 10 WIA Driver Settings 47 Color Picture 47 Grayscale Picture 47 Black and White Picture or Text 47 Custom Settings 47 Adjust the Quality of the Scanned Picture 48 Preview Window 48 Preview 48 Scan 48 Cancel 48 6 Copying ......................49 Entering Copy Mode 50 Loading Original Documents to Copy 50 Setting Copy Options 51...
- Page 11 “Copy Function” Section 60 Copy Setting 61 Copies 61 Scale 61 Printer 61 Collate 61 OK 61 Scanner Setting 61 Advanced Setting 62 “Scan Function” Section 62 Scan To Email 62 Scan To File 62 “User Define” Buttons 63 Target Application 63 Select Scan To Send 63 OK 63 8 Replacing Consumables ................
-
Page 13: Introduction
Introduction... -
Page 14: Getting Acquainted With Your Machine
Getting Acquainted with Your Machine Space Requirements To ensure easy operation, consumable replacement and maintenance, adhere to the recommended space requirements detailed below. 403 mm (15.9") 492 mm (19.4") 100 mm 100 mm (3.9") (3.9") 465 mm (18.3") 100 mm 100 mm 565 mm (22.2") (3.9") -
Page 15: Machine Parts
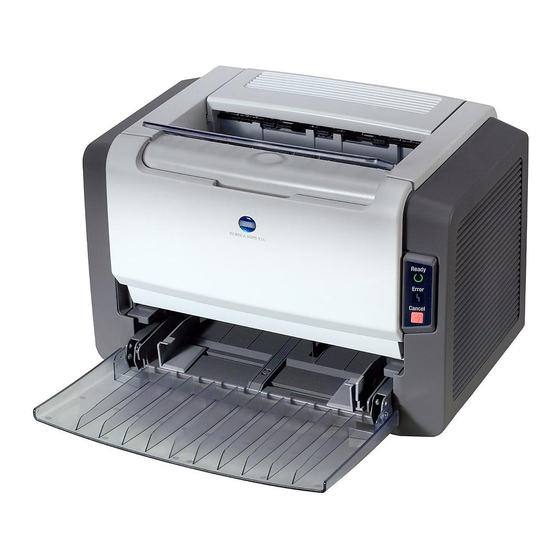
Machine Parts The following drawings illustrate the parts of your Machine referred to throughout this guide, so please take some time to become familiar with them. Front View 1–Automatic document feeder (ADF) input tray 2–Paper stopper 3–Automatic document feeder (ADF) lid 4–Control panel 5–Output tray 6–Front cover... -
Page 16: Rear View
Rear View 1–ADF cover 2–Power switch 3–Power Connection 4–LINE jack 5–EXT. jack 6–Rear cover 7–USB port Getting Acquainted with Your Machine... -
Page 17: About The Control Panel
About the Control Panel 2 3 4 5 7 8 9 10 11 12 13 14 15 Part Name Description Keypad Enters the number of copies. Toner indicator Toner cartridge warning LED. Flashes when the toner cartridge is empty or the drum needs to be replaced. - Page 18 N in 1 key Reduces original images to fit onto one sheet of paper. Prints 1–4 pages reduced to fit onto one sheet of paper. Prints 1–2 pages reduced to fit onto one sheet of paper. Prints 1 page on one sheet of paper. Start key Starts a copy or scan job.
- Page 19 About the Software...
-
Page 20: Utilities And Documentation Cd-Rom
Utilities and Documentation CD-ROM Printer Drivers Drivers Use/Benefit Printer Driver for These drivers give you access to all of Windows XP/2000 the printer features, including finishing and advanced layout. See also Printer Driver for Windows Me/98SE “Displaying Printer Driver Settings” on page 10. -
Page 21: System Requirements
Choose the driver’s properties as follows: – (Windows XP) From the Windows menu bar, select start - Printers and Faxes. Right-click the KONICA MINOLTA PagePro 1390 MF printer icon. Select Printing Preferences - Basic tab. – (Windows 2000) From the Windows menu bar, select Start - Settings - Printers. -
Page 22: Uninstalling The Printer Driver
Click Apply. Click OK to exit from the Properties dialog box. Uninstalling the Printer Driver This section describes how to uninstall the PagePro 1390 MF Printer Driver if necessary. From the Start menu, choose Programs (Windows XP: All Programs), then PagePro1390 MF, and then Uninstall Driver. -
Page 23: Using The Printer Driver
Using the Printer Driver When using Windows Me/98SE, the General tab, Details tab and Sharing tab appear. Specify the necessary settings. Common Buttons The buttons described below appear on each tab. Click to exit the Properties dialog box, saving any changes made. Cancel Click to exit the Properties dialog box without saving any changes made. -
Page 24: Effect
Effect The following resolution settings are available. 600 dpi 1200 × 600 “Print Density” adjusts the density level of the printer document between 1 (lighter) and 7 (darker). “Toner Save” allows you to save toner by using less toner to print a docu- ment. -
Page 25: Output Paper Size
From the “N-up” drop-down list, select the desired page order. Horiz.Ascending Vert.Ascending Horiz.Descending Vert.Descending Output Paper Size Allows you to scale the print job on a page. (25% - 400%) Watermark Tab The following parameters can be set from the watermark tab. You can add a logo or text to your document as a watermark. -
Page 27: Control Panel And Configuration Menu
Control Panel and Configuration Menu... -
Page 28: Introduction
Introduction This machine is designed to be easy to use through message window on-screen programming with the control panel keys. User-friendly program- ming helps you take full advantage of all the menu selections offered. The step-by-step on-screen instructions below guide you through the menu selec- tions and programming options. - Page 29 2.Copy Setup 21.Def Copy Mode Text Photo Mixed 1-7 Levels (4) 22.Def Density 23.Def Zoom Original(100%) Custom(25%-400%) Fit to Paper A4 to Letter Letter to A4 Legal to Letter Legal to A4 24.Def Collate Collate:Off Collate:On 25.Def TonerSave Toner Save: Off Toner Save: On 26.Def Bg Remove Text...
-
Page 30: Entering Menu Mode
Depending on the region, the default setting is A4. This menu is for faxing. For details on the fax functions, refer to the Facsim- ile User’s Guide. Entering Menu Mode Press the Menu key to enter Menu mode. The message window displays the menus. -
Page 31: Using Media
Using Media... -
Page 32: Print Media
Print Media What Sizes of Media Can I Use? Media Size Media Millimeters Inches 210.0 × 297.0 8.3 × 11.7 182.0 × 257.0 7.2 × 10.1 B5 (JIS) 148.0 × 210.0 5.8 × 8.3 215.9 × 355.6 8.5 × 14.0 Legal Letter 215.9 ×... -
Page 33: Media Types
Media Types Before purchasing a large quantity of special media, do a trial print with the same media and check the print quality. Keep media on a flat, level surface in its original wrapper until it is time to load it. For a list of approved media, refer to printer.konicaminolta.com. Plain Paper Capacity Media Tray... -
Page 34: Thick Stock
Keep media between 30% and 65% relative humidity. Toner does not adhere well to moist or wet paper. Layered Adhesive Folded, creased, curled, embossed, warped, or wrinkled Perforated, three-hole punched, or torn Too slick, too coarse, or too textured Different in texture (roughness) on the front and back Too thin or too thick Stuck together with static electricity Composed of foil or gilt;... -
Page 35: Envelopes
Envelopes Print on the front (address) side only. Some parts of the envelope consist of three layers of paper—the front, back, and flap. Anything printed in these lay- ered regions may be lost or faded. Capacity Media Tray Up to 10 envelopes, depending on their thickness Manual Feed 1 sheet only... -
Page 36: Postcard
Postcard Try printing on a sheet of plain paper first to check placement. Capacity Media Tray Up to 50 postcards, depending on their thickness Manual Feed 1 sheet only Tray Orientation Face up Driver Thick Paper Media Type Weight 60 to 163 g/m² (16 to 43 lb bond) Use postcards that are Approved for laser printers DO NOT use postcards that are... - Page 37 Remove transparencies as soon as possible from the output tray to avoid static buildup. You can print continuously with transparencies. However, this could affect the media feed, depending on the media quality, static buildup, and printing envi- ronment. If problems occur, stop the continuous printing and print one sheet at a time.
-
Page 38: What Is The Guaranteed Imageable (Printable) Area
What Is the Guaranteed Imageable (Printable) Area? The printable area on all media sizes is up to 4 mm (0.157") from the edges of the media. Each media size has a specific image- Printable able area, the maximum area on which Area the machine can print clearly and with- out distortion. -
Page 39: Media Storage
Media Storage How do I store media? Keep media on a flat, level surface in its original wrapper until it is time to load it. Media that has been stored for a long time out of its packaging may dry up too much and cause misfeeding. -
Page 40: Loading Media
Loading Media How do I load media? Take off the top and bottom sheets of a ream of paper. Holding a stack of approx- imately 200 sheets at a time, fan the stack to prevent static buildup before inserting it in a tray. Do not fan transparencies. - Page 41 Squeeze the right paper guide and open the paper guides. Load the media lengthwise in the tray with the printing side up. If media is loaded past the media limit mark, it may not be fed correctly. For details on the loading capacity for each type of paper, refer to “Media Types”...
-
Page 42: Manual Feed Tray
Before loading envelopes, press them down to make sure that all air is removed, and make sure that the folds of the flaps are firmly pressed, otherwise the envelopes may become wrinkled or a media misfeed may occur. Squeeze the right paper guide and adjust the paper guides so that both the left and right sides of the media are secure. - Page 43 Open the paper guides. Insert the sheet of paper as far as possible into the manual feed tray with the side to be printed on facing up, and then adjust the paper guides so that both sides of paper are secure. When loading envelopes, load them lengthwise with the side to be printed facing up as shown in the illustration.
-
Page 44: Specifying The Paper Size
Before loading envelopes, press them down to make sure that all air is removed, and make sure that the folds of the flaps are firmly pressed, otherwise the envelopes may become wrinkled or a media misfeed may occur. Slide the paper guides against the left and right sides of the loaded media. -
Page 45: Original Media
Original Media Specifications Documents that Can be Placed on the Flatbed Glass The following types of documents can be placed on the flatbed glass. Document type Sheets or books Maximum document size 216 mm × 297 mm (8.5" × 11.69") Observe the following precautions when placing a document on the flatbed glass. -
Page 46: Feeding The Document
Feeding the Document Placing a Document on the Flatbed Glass Open the ADF lid. Place the document to be cop- ied face down on the flatbed glass. Align the center of the paper with the arrow. Feeding the Document... -
Page 47: Loading A Document Into The Adf
Close the ADF lid. Gently close the ADF lid. Closing it too quickly may cause the document to move on the flatbed glass. Loading a Document into the ADF Place the document in the document feed tray with the side to be copied facing up. Before loading the docu- ment into the ADF, check that no document pages... -
Page 49: Scanner Operation
Scanner Operation... -
Page 50: Introduction
Introduction This machine allows you to scan from a TWAIN-compliant or plug-in applica- tion. Since the scanner driver is not stand-alone software, it has to be started from a TWAIN-compliant application to be able to scan and load an image to your computer. -
Page 51: Twain Driver Settings
TWAIN Driver Settings In the TWAIN driver, the various functions appear as icons. Descriptions of the various functions are provided below. Scan Method You can select how to scan from the Scan Method drop-down list. Flatbed: Use this setting if you are scanning one page at a time using the flatbed glass. -
Page 52: 24-Bit Color
With 8 bits of color information per pixel, the file size of an image is eight times larger than that of a black-and-white image and 1/3 the size of a 24-bit color image. 24-Bit Color A 24-bit color image consists of three 8-bit color channels. The red, green, and blue channels are mixed together to create a combination of one billion colors, which give a more true-to-life quality to the image. -
Page 53: Enhancing The Image
If a resolution higher than 600 dpi was selected, a warning message appears. To automatically set the resolution to 300 dpi and begin scanning, click OK. To begin scanning with the selected resolution, click Cancel. Enhancing the Image Brightness Adjusts the lightness or darkness of an image. The higher the value, the brighter the image. -
Page 54: Preview Auto-Area
Preview Auto-Area Automatically crops the scan area of the previewed document. This then becomes the cropping area for all scanned documents until it is changed again. Original Size Select a size from the Paper Size list of frequently used scan sizes, including card (4 x 2.5 in), Photo (5 x 3.5 in), Photo (6 x 4 in), B5, A5, A4, Letter, or your current scan area, to perform an immediate selection of the scan size. -
Page 55: Color Adjustment
Color Adjustment Makes the Hue / Saturation / Lightness function available. The Advanced Settings button must be clicked in order to use the Hue / Saturation / Lightness function. (See page 44.) Auto Level Adds shadows to reveal more details in an image. Advanced Settings Displays the following six Advanced Settings buttons on the right side of the TWAIN dialog box: Highlight / Shadow Levels, Curves, Color Balance, Hue /... -
Page 56: Curves
Curves Displays a dialog box that allows you to adjust the midtone of the image with- out losing details in the lightest and darkest areas. Click CURVE or LINE, depending on whether you want a curved or an angled line. To change the curve, place the mouse cursor on the line, click the left mouse button, and then drag the line. -
Page 57: Color Drop-Out
Color Drop-out This function is available when “Black and White”, or “8-Bit Gray” is selected from the Image Type drop-down list. Clicking on Color Drop-out displays a dialog box that allows you to remove the R (Red), G (Green), or B (Blue) color channel from the scan. -
Page 58: Configuration Settings
Configuration Settings The Configuration Settings tab allows you to customize some special set- tings. Energy Saving Mode You can specify a time delay in the Minutes box. Click Apply to save the changes. Hint Setting Select “Show Hints” to have flags show the name of an item when you place the mouse cursor on an item in a dialog box. -
Page 59: Preview
Preview Scans the document so you can review the scanned image. This allows you to specify an area to be scanned and any scanning settings to be used for future scans. When a scan setting is changed and applied, the preview image is updated for a real-time view of the change. -
Page 60: Adjust The Quality Of The Scanned Picture
If settings have been specified with Adjust the quality of the scanned picture, Custom Setting is automatically selected. Adjust the Quality of the Scanned Picture Click this button to display the Advanced Properties dialog box. In the Advanced Properties dialog box, settings can be specified for Brightness, Contrast, Resolution, and Picture type (select from color, grayscale or monochrome). -
Page 61: Copying
Copying... -
Page 62: Entering Copy Mode
Entering Copy Mode Copy key Before making copies, make sure that is lit in green. Otherwise, Copy key press the to enter Copy mode. Copy mode is the default setting. Loading Original Documents to Copy Position the document to be copied. -
Page 63: Setting Copy Options
Setting Copy Options The keys on the control panel can be used for all the basic copy options. For details on the control panel, refer to “About the Control Panel” on page 5. Set the following options for the current copy job before pressing the Start key to make the copies. -
Page 64: Reduce/Enlarge
Reduce/Enlarge You can select the following enlargement or reduction ratios. Original 100% Custom (25-400%) Fit To Paper A4 % Letter 94% Letter % A4 97% Legal % Letter 78% Legal % A4 83% Fit To Paper calculates the ratio that fits the size of your media. A docu- ment where the image is printed to the edges of the paper can be slightly reduced so that no part of the image is cut off in the copy. -
Page 65: Copies
Copies Using the Copies key, you can set a number of copies from 1 to 99. Repeatedly press the Copies key count until the desired number appears on the display. Enter the number of copies by using the number keypad. Use the scroll keys to find the desired setting. - Page 66 Place the next document page on the flatbed glass. Press the Start key. The message window displays Next Scan :START Scan End : #. Repeat the previous step to finish scanning all pages of the document. Press the # key on the number keypad to start collating. The machine starts printing according to the selected Collate option.
-
Page 67: To Quit The N In 1 Function
To Quit the N in 1 Function Suppose you selected 2-in-1 and want to quit the N in 1 function after scan- ning the first of two document pages. Place the original document face down on the flatbed glass and align its center with the arrow mark on the glass. -
Page 68: To Update The Default Density Setting
To Update the Default Density Setting Press the Menu key. Press a scroll key until 2.Copy Setup appears on the display. Press the Select key. Press a scroll key until 22.Def Density appears on the display. Press the Select key. Press a scroll key to select the desired Density level. -
Page 69: Using Linkmagic
Using LinkMagic... -
Page 70: Introduction
Starting LinkMagic From the Start menu, choose Programs (Windows XP: All Programs), then PagePro 1390 MF, and then LINKMAGIC. The LinkMagic window appears. “MFP Button Setting” Section Configure the Scan To key in this section to your specific requirements. -
Page 71: Program Name
Program Name Your application’s original name is shown here. Program Name on MFP LCD Enter a name for the application which will appear on the PagePro 1390 MF’s message window. Scan Set all other preferred scanner settings, including Original Image Type, Origi- nal Size, Resolution, Brightness, and Contrast. -
Page 72: Using The Scan To Key On The Control Panel To Scan
The Copy dialog box for the button appears. 2-to-1 and 4-to-1 copying is not possible with LinkMagic from the flat- bed glass. Use the PagePro 1390 MF control panel to print 2-to-1 and 4-to-1 copies from the flatbed glass. -
Page 73: Copy Setting
Selects the number of copies. Scale Increases or decreases copy scaling. Printer Check that KONICA MINOLTA PagePro 1390 MF appears in the drop-down list. Collate Enables the Collate function. If the Collate function is selected, a maximum of 10 document pages can be loaded into the ADF when the resolution is set to 600 dpi. -
Page 74: Advanced Setting
Advanced Setting Use the Preferences dialog box to adjust all other preferred scan settings, including Scan Size, Resolution, Brightness, and Contrast. “Scan Function” Section Scan To Email The “Scan to email” button allows you to scan a page or document directly into the email application Outlook Express as a standard attachment. -
Page 75: User Define" Buttons
“User Define” Buttons There are up to three user-defined buttons in the LinkMagic window. You can set your own preferences and configuration to fit applications of your choice. To configure a “User define” button, right-click it, and then click Configura- tion. -
Page 77: Replacing Consumables
Replacing Consumables... -
Page 78: Replacing The Adf Pad
Replacing the ADF Pad After scanning approximately 50,000 pages through the ADF, the pressure pad may be worn out and you may experience problems with document feed- ing. In this case, it is highly recommended that you replace the pad with a new one. -
Page 79: Installation
Installation Remove the ADF pad from the box. Press both arms of the ADF pad inwardly with your fingers. Place the pad into the holes until it snaps into place. Close the ADF cover. Replacing the ADF Pad... -
Page 80: Replacing The Toner Cartridge
Replacing the Toner Cartridge Open the front cover. Remove the imaging cartridge from the machine. Move the lever on the toner car- tridge in the direction of the arrow. Replacing the Toner Cartridge... -
Page 81: Replacing The Toner Cartridge
Release the toner cartridge as shown. Gently rock the new toner car- tridge from side to side several times to distribute the toner evenly inside the cartridge. Remove the protective cover from the toner cartridge Replacing the Toner Cartridge... - Page 82 Insert the new toner cartridge as shown, until it clicks into place. Install the imaging cartridge. Replacing the Toner Cartridge...
- Page 83 Close the front cover. Replacing the Toner Cartridge...
-
Page 84: Replacing The Drum Cartridge
Replacing the Drum Cartridge Open the front cover. Remove the imaging cartridge from the machine. Move the lever on the toner cartridge in the direction of the arrow. Replacing the Drum Cartridge... - Page 85 Release the drum cartridge as shown. Insert the new drum cartridge as shown, until it clicks into place. Replacing the Drum Cartridge...
- Page 86 Install the imaging cartridge. Close the front cover. Press the Menu key. Press a scroll key until 1.Common Setup appears on the display, and then press the Select key. Press a scroll key until 14.Reset OPC appears on the display, and then press the Select key.
-
Page 87: Maintenance
Maintenance... -
Page 88: Cleaning The Adf
Cleaning the ADF From time to time the ADF pad and feeding rollers may become contami- nated with ink, toner particles, or paper dust. In this case, documents may not feed smoothly. If this occurs, follow the cleaning procedure described below. Moisten a cotton swab with isopropyl alcohol (95%). - Page 89 Note Be careful not to snag or damage the pick springs. Wipe the pad from top to bottom. Be careful not to snag the pick springs. Close the ADF cover. Cleaning the ADF...
-
Page 90: Cleaning The Flatbed Glass
Cleaning the Flatbed Glass The machine is designed to be almost maintenance-free. However, it still needs to be cleaned occasionally to ensure optimum image quality and per- formance. To clean the flatbed glass: Open the ADF lid. Moisten a soft clean cloth with isopropyl alcohol (95%). Gently wipe the flatbed glass and the white sheet under the ADF lid to remove dust or... - Page 91 Close the ADF lid. Cleaning the Flatbed Glass...
-
Page 92: Adjusting The Image Position
Adjusting the image position The print image may not be straight when the ADF is used to scan the docu- ment. If the image is not straight, follow the procedure described below to adjust the image position. Press the Menu key. Press a scroll key until appears on the display. -
Page 93: Troubleshooting
Troubleshooting... -
Page 94: Media Misfeeds
Media Misfeeds Clearing a Media Misfeed Open the front cover. Remove the imaging car- tridge. Media Misfeeds... - Page 95 Remove the jammed media. Reinsert the imaging car- tridge. Media Misfeeds...
- Page 96 Close the front cover. Gently open the rear cover. Media Misfeeds...
- Page 97 Pull out any jammed media. Close the rear cover. Media Misfeeds...
-
Page 98: Clearing A Media Misfeed In The Adf
Clearing a Media Misfeed in the ADF Gently open the ADF cover. Carefully pull the jammed paper out of the ADF. Close the ADF cover. Media Misfeeds... -
Page 99: Error Messages On The Display
Error Messages on the Display For details on the error messages concerning the fax functions, refer to the Facsimile User's Guide. Error state Message window line1 Message window line 2 No paper in printer Paper Empty PLS add paper Front cover open for Front Cover Open PLS close cover printer... -
Page 100: Solving Problems-Printing Quality
Solving Problems-Printing Quality Symptom Cause Solution Blank page The toner cartridge may be Remove the toner cartridge defective. and check it for damage. Replace the toner cartridge, if necessary. Black page The toner cartridge may be Remove the toner cartridge defective. - Page 101 Symptom Cause Solution Print too dark The toner cartridge may be Remove the toner cartridge defective. and check it for damage. Replace the toner cartridge, if necessary. Blurred The toner cartridge may be Remove the toner cartridge background defective. and check it for damage. Replace the toner cartridge, if necessary.
- Page 102 Symptom Cause Solution White or black The toner cartridge may be Remove the toner cartridge lines defective. and check it for damage. Replace the toner cartridge, if necessary. Dark lines on The transfer roller is dirty. Contact your local vendor. the edges.
- Page 103 Symptom Cause Solution There is insuf- The media is moist from Remove the moist media and ficient fusing humidity. replace it with new, dry media. or the image Media with specifications not Use media that is covered by comes off covered by the machine war- the machine warranty.
-
Page 105: Appendix
Appendix... -
Page 106: Specifications
Specifications For details on the fax functions, refer to the Facsimile User’s Guide. Print system B/W Laser (NC-L701 engine) Type Desktop Page Printer Method Image Writing: Laser diode, Polygon mirror Developing: Electro Photographic Printing System Power Supply 220 to 240 V, 50 to 60 Hz +/–3 Hz 110 to 120 V, 50 to 60 Hz +/–3 Hz Power Consumption Operating: 900 W... -
Page 107: Printer Function
Max. Original Size (ADF) 216 mm × 356 mm (8.5" × 14") Std. System Memory 48 MB SDRAM 50 sheets Image Mode Selection Mixed, Text, Photo Zoom Range 25% to 400% 1 to 1 Speed (Flatbed Glass) 18 cpm (Letter) 2 in 1 Quantity Selector 1 to 99... -
Page 108: Consumable Life Expectancy Chart
Bit Depth 16/48 bits Scanning Element CCD image sensor Color Depth 24-bit Levels of greyscale Scanner Driver Support OS Windows XP/2000/Me/98SE Function with the ADF Speed 1 to 1 Speed (Mono): 18 cpm Original Set position Center position Original size 216 mm ×... - Page 109 Index Buttons, printer driver 11 ADF pad, replacing 66 Cleaning 76 Cancel, WIA driver 48 Copying 50 CD-ROM Feeding Documents 35 Utilities & Documentation 8 Scanning 38 Close, TWAIN driver 47 ADF pad, replacing 66 Collate 53, 56, 61 Adjust the quality of the scanned Color Adjustment, TWAIN driver 43 picture, WIA driver 48 Color Balance, TWAIN driver 44...
- Page 110 Copy Function 60 Copy mode 50, 55 Highlight/Shadow Levels, TWAIN Copy Quality 51 driver 43 Copy Setting 61 Hue/Saturation/Lightness, TWAIN Copying driver 44 Collate 53, 56, 61 Copies 53 Copy mode 50, 55 Copy Quality 51 Image type, TWAIN driver 39 Default menu settings, changing 55 Imageable area 26 Density 51, 56...
- Page 111 Transparencies 24 Types 21 Reduce/Enlarge 52 Media misfeed Resolution, TWAIN driver 40 ADF, clearing 86 Printer, clearing 82 Media tray Loading 28 Scan Function 62 Menu mode 18 Scan method, TWAIN driver 39 Menu table 16 Scan To Email 62 MFP Button Setting 58 Scan To File 62 Mirror, TWAIN driver 41...
- Page 112 Mirror 41 Original Size 42 Preview 47 Preview Auto-Area 42 Resolution 40 Scan 47 Scan method 39 Sharpen 42 Units 42 Width/Length/Size 46 Zoom 47 Units, TWAIN driver 42 User Define 63 Utilities & Documentation CD-ROM 8 Watermark tab, printer driver 13 WIA driver Adjust the quality of the scanned picture 48...