Table of Contents
Advertisement
Advertisement
Table of Contents

Subscribe to Our Youtube Channel
Related Manuals for Tecdesk 3500


Summary of Contents for Tecdesk 3500
-
Page 1: User Manual
Fixed Wireless Phones Tecdesk 3500 User Manual tecdesk.com English... -
Page 3: Table Of Contents
CONTENTS INTRODUCTION PACKAGE CONTENTS GETTING TO KNOW YOUR PHONE BUTTON FUNCTIONS STATUS ICONS ALPHANUMERIC KEYPAD CALL FUNCTIONS MENU TREE CONTACTS MESSAGES SETTINGS TROUBLESHOOTING LEGAL INFORMATION HEALTH AND SAFETY DECLARATION OF CONFORMITY... -
Page 4: Introduction
INTRODUCTION Thank you for purchasing the Tecdesk 3500 3G Desk Phone. This phone is designed for use with GSM 900/1800 and UMTS 900/2100MHz networks. You will require a valid SIM card from your network operator. Please refer to your network operator for more information. -
Page 5: Package Contents
PACKAGE CONTENTS Please check the box includes the following components. If there are any items missing please contact your supplier. Tecdesk 3500 USB data cable AC/DC power Lithium-polymer adaptor rechargeable battery Quick Start-Up User Manual Guide PC Suite Quick start-up guide... -
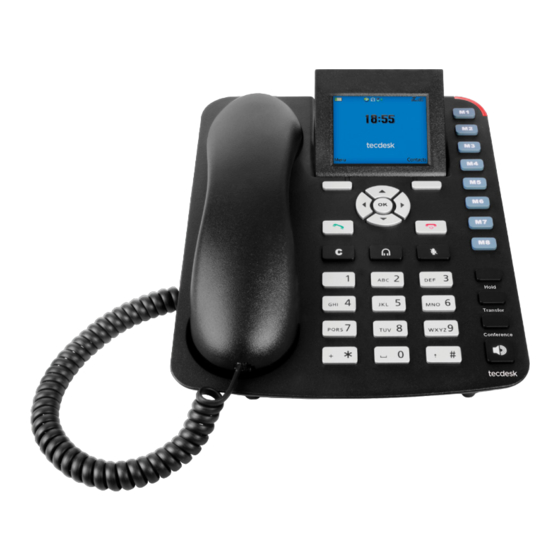
Page 6: Getting To Know Your Phone
GETTING TO KNOW YOUR PHONE Handset/ Receiver LCD screen 21. [ ] Loudspeaker button OK OK/ Centre button 12. Right soft button 22. Security slot ] Left directional button 13. M1 – M8 Memory buttons 23. Wall mount 14. [ ] Up directional / Volume + button ] Dial button 24. - Page 7 LCD Screen Battery indicator Time Signal strength Network Menu shortcut Contacts shortcut Installation Follow the steps below to install the TD3500 Desk Phone. Remove the battery cover with the Allen key, then remove the battery and insert an appropriate SIM card into the device.
- Page 8 Insert the battery into the battery compartment, ensuring the polarity on the battery matches the polarity of the connectors and the cover is re-positioned correctly and secured into place. Insert the aluminium stand in position.
- Page 9 Connect the receiver to the device with the curly cord. Connect one end of the power adaptor to the phone’s power adaptor/ charging port. Plug the power adapter into an AC power outlet. The battery level indicator will stop moving once the device is fully charged. port...
-
Page 10: Charging The Battery
Charging the battery When the battery level is low, there will be a warning tone; a low battery message will be displayed and the empty battery icon will flash. Plug the power adaptor into the device to begin charging. The battery level indicator will flash during charging mode and once it is fully charged, the full battery icon will appear. -
Page 11: Button Functions
BUTTON FUNCTIONS Button Functions Left soft button Corresponds to the function shown by an icon on the lower left hand corner of the LCD screen. In Standby mode, press to enter into the Main menu. Right soft button Corresponds to the function shown by an icon on the lower right hand corner of the LCD screen. In Standby mode, press to enter into the Contacts menu. - Page 12 Button Function Left directional button [ In Standby mode press to enter into the SMS menu. During an active call press to decrease the volume on the handset or speaker. Right directional button [ In Standby mode press to enter into the Profiles menu. During an active call, press to increase the volume on the handset or speaker.
- Page 13 Button Function Conference button Can make Conference call from your phone. During a call with 2 or more callers. Handsfree button [ During an active call, press to enable or disable the speakerphone.
-
Page 14: Status Icons
STATUS ICONS Network signal Battery indicator Text message notification icon Call in progress Missed call notification Phone is connected to a computer via a USB cable Alarm enabled notification Phone is on silent with the exception of media and alarms function Profile status: General Profile status: Meeting Headset connected... -
Page 15: Alphanumeric Keypad
ALPHANUMERIC KEYPAD Refer to the table below when using the alphanumeric keypad. When entering usernames or passwords, you can press the button to tog- gle between numbers (123), lowercase (abc) characters, and uppercase (ABC) characters. Button Lowercase (abc) Uppercase (ABC) . -
Page 16: Call Functions
CALL FUNCTIONS Making a phone call using the alphanumeric keypad ] button to make a call. In Standby mode, enter the phone number using the alphanumeric keypad, and press the [ To end the call, press the Right soft button or the [ ] button. -
Page 17: Remove An Entry
Select the contact you wish to call, and press the [ ] button. To end the call press the [ ] button or replace the handset. Making a phone call using Speed Dial In Standby mode, lift the receiver and press the [ M1 - M8 ] buttons for the speed dialling feature. Please ensure the contact numbers are pre-installed into the memory for this feature to work. -
Page 18: Adjusting The Receiver Volume
Remove All Select one of the [ M1 - M8 ] Speed Dial buttons. Press the Left soft button to enter into the Options menu. Select Remove ALL. Press the [ OK ] button to remove all the contact numbers stored in the [ M1 - M8 ] Speed Dial locations. Answer or silence an incoming call During an incoming call, press the [ ] button or the Left soft button to answer the call. -
Page 19: Menu Tree
MENU TREE Contacts Call Logs Messages Profile My Stu Settings Phone Missed Calls Compose Standard Photos Display Settings USIM Out going Calls Inbox Meeting Sounds Phone Settings Phone & SIM Incoming Calls Sentbox Silent Call settings Groups All calls Outbox New Profile Network Settings Draftbox... -
Page 20: Contacts
CONTACTS This section explains how to manage your Contacts. Creating a New Contact In Standby mode, use the alphanumeric keypad and input a contact number. Press the Left soft button > Save number. Input the following categories for the contact. Save: Use the [ ] buttons to select save to Phone or SIM. - Page 21 Phone & SIM: Displays the contact list stored in the Phone and SIM. Groups: Displays the list of contacts by Group. Select the desired contact from the submenu and press Options to edit the following to manage your contacts. Call: Select a contact to make a call. Send message: Compose a text message to send to the contact.
-
Page 22: Call Logs
Call logs Use this menu to view the information on the calls you have made, received, or missed. In Standby mode, press the Left soft button to access the Main menu > Call Log. Press the [ ] buttons to access your missed calls, outgoing calls, and incoming calls. Missed calls: This menu displays the most recent calls you have missed. -
Page 23: Messages
MESSAGES The Tecdesk 3500 supports Text messages and Voice mail. This section explains how to send and receive messages, and other features associated with messaging. Creating and Sending Messages In Standby mode, press the Left soft button to access the Main menu > Messages. - Page 24 Sentbox View all sent messages. In Standby mode, press the Left soft button to access the Main menu > Messages. Press the Left soft button and use the [ ] buttons to access the submenu. Select Sentbox to view your list of message. In the Options menu, edit the following submenu to manage your text messages in the Sentbox.
-
Page 25: Memory Status
Memory status Displays the memory status of message entries stored on the Phone and SIM card. In Standby mode, press the Left Soft button to access Main menu > Messages. Press the Left soft button and use the [ ] buttons to access the submenu. Select memory status to view the storage capacity on your phone or SIM card. -
Page 26: Settings
SETTINGS In Standby mode, press the Left soft button to access the Main menu > Settings. Press the Left soft button and use the [ ] buttons to access the submenu. Edit the following submenu to define your settings. Display settings Home Screen: Sets up standby menu for your phone. -
Page 27: Security Settings
Security settings This options allows to set up passwords to lock your phone and SIM card to avoid unauthorised use. Phone lock: Allows to lock your phone once the backlight of the screen dims and the phone is in Standby mode. -
Page 28: Troubleshooting
TROUBLESHOOTING Please perform the simple checks in this section below before contacting a service professional. Your phone cannot be switched ON ] button for more than 3 seconds. • Be sure that you pressed and held the [ • Check that the battery is properly connected to your phone. Remove the battery, reinstall the battery, and restart your phone. •... - Page 29 Your correspondent cannot reach you • Ensure that your phone is switched ON and connected to a network. • Ensure that your SIM card is not blocked. • Ensure that your SIM card is within network coverage. • Check that you have not set incoming call barring. Your correspondent cannot hear you speaking •...
-
Page 30: Legal Information
LEGAL INFORMATION Notice The information in this manual is subject to change without notice. Whist every care has been taken in the preparation and design of the manual, statements, recommendations and information, implied or expressed, these do not constitute a warranty of any kind. No part of this manual may be reproduced, quoted or translated by any means or in any form photographically, mechanically or electronically, without the written permission of Tecmobile (International) Ltd. - Page 31 Warranty Disclaimers Although every effort is used to reduce inaccuracies and, except those required by applicable law, no warranties of any kind, either express or implied, and including but not limited to the implied warranties of fitness for a particular use or satisfactory quality, are made in relation to the contents, accuracy or reliability of this manual.
-
Page 32: Health And Safety
HEALTH AND SAFETY RF/SAR information Your phone contains a transmitter and receiver. When powered ON it receives and transmits low-level radio-frequency (RF). Country governments all over the world adopt state security guidelines developed by independent scientific organisations such as ICNIRP and IEEE. -
Page 33: Medical Devices
Medical devices Ensure that you switch OFF your phone in areas near electronic medical equipment that require the phone to be switched OFF: (such as heart pacemakers, hearing aids, etc.). Most medical devices can shield the phone’s RF signal, but some cannot. If you have any doubts, or need to find out more, please consult your doctor or medical device manufacturer. -
Page 34: Declaration Of Conformity
DECLARATION OF CONFORMITY Hereby, we declare under our sole responsibility that this product and in combination with the accessories are in compliance with the appropriate standards 3GPP TS 51.010-1, EN 301908-1/-2, EN 301511, EN 301489-1/-7/-24, EN 60950-1, EN 50360, following the provisions of, Radio Equipment and Telecommunication Terminal Equipment directive 99/5/EC with requirements covering EMC directive 04/108/EC, and Low Voltage directive 06/95/EC. - Page 36 MODEL NO: TD3500...
Need help?
Do you have a question about the 3500 and is the answer not in the manual?
Questions and answers