Ebode IPV38 User Manual
Pan & tilt ip camera
Hide thumbs
Also See for IPV38:
- User manual (86 pages) ,
- Quick start manual (84 pages) ,
- User manual (80 pages)
Table of Contents
Advertisement
Quick Links
Download this manual
See also:
User Manual
Advertisement
Table of Contents

Related Manuals for Ebode IPV38

Summary of Contents for Ebode IPV38
-
Page 1: User Manual
Pan & Tilt IP Camera IPV38 & IPV38WE User Manual User guide Bedienungsanleitung Gebruiksaanwijzing Användarmanual Guide utilisateur Guía del usuario Manual do utilizador Manuale per l’utente Before using our product, please read this documents carefully. -
Page 2: Table Of Contents
2.1.3 Upgrade Device Firmware 2.1.4 Restore Factory Settings 2.1.5 Reboot Device Network Settings Basic Network Settings Wireless LAN Settings ADSL Settings UPnP Settings DDNS Service Settings 2.7.1 To change the camera’s port 2.7.2 DDNS Status March 2013 IPV38 / IPV38WE... - Page 3 3.12.4 IO Pins for IO Alarm Linkage 3.13 Send e-mail on Alarm 3.14 Path Settings 3.15 Server Push Mode (For Safari, FireFox, Google Browser) Sign in mobile phone Compatible Apps for mobile devices Appendix Frequently Asked Questions Specifications Obtaining Technical Support March 2013 IPV38 / IPV38WE...
-
Page 4: Introduction
☆ Supports 3G phone, Smart phone control and surveillance ☆ Supports IE, Firefox, Safari, and Google chrome browsers Packing List Please check that the following items are included: ● IP Camera - 6.0mm Lens (IPV38) or 3.6mm Lens (IPV38WE) ● Power Supply ● Wi-Fi Antenna ● Network Cable ●... -
Page 5: Product Views
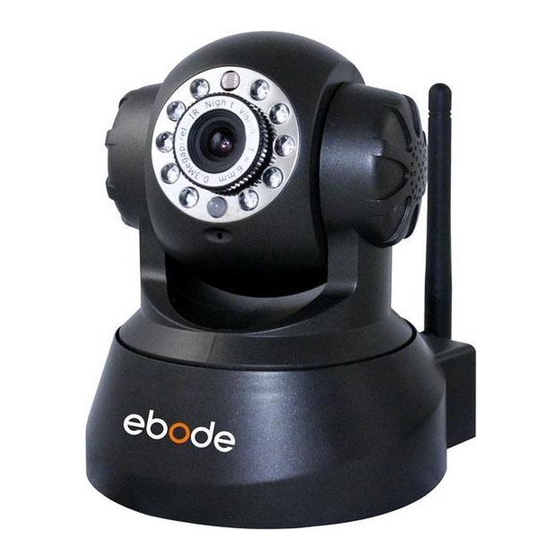
1 Light Sensitive Hole: For light sensitive photocell 2 Infrared LED: 10 LEDs 3 LENS: CMOS sensor with fixed focus lens. (IPV38 has 6.0mm Lens, and the IPV38WE has 3.6mm Lens) 4 Network Indicator LED: If there is network activity, the LED will blink... -
Page 6: Bottom View
PC System Requirements System configuration requirements: CPU: 2.06 GHZ or above. Memory: 256M or above. Network Card: 10M or above. Display Card: 64M or above memory. Recommended Operating system: Windows XP, Windows Vista, Windows 7. March 2013 IPV38 / IPV38WE... -
Page 7: Hardware Installation
(The behavior of the front indicator LED can be controlled by software). Figure 1.4 Software Installation 1. IP Camera Tool: Insert the CD, a popup menu might appear like shown in the picture below. 2. Select “Open Map” and click “OK” March 2013 IPV38 / IPV38WE... - Page 8 3. Open the “ebode IP Vision Software” folder and double click “IPCamSetup.exe” then click next to complete the software installation. (Please note that on some computer systems it might take a few seconds before the “IPCamSetup” icon will appear) March 2013...
- Page 9 The “AppInstall” file is located in the same folder as the “IPCamSetup” file from the previous steps. Please take the following steps: 4. ActiveX: Double click “Appinstall.exe”—“Next”—“Install”—“Finish”. Figure 1.5 Figure 1.6 March 2013 IPV38 / IPV38WE...
- Page 10 IP Camera and avoid warranty. The IPV38 is designed as an Indoor Camera and should be installed indoors only. Do not touch the lens of the IP Camera. The optimum focus range has been set for you. If you turn the lens, it may cause incorrect focus and blurry images.
- Page 11 Your IP camera will not work without unblocking the firewall settings. IP Camera Tool When the Device has been installed properly, you can double-click the Icon “IP Camera Tool” and a dialog box shown in Figure 1.9 will pop up. Figure 1.9 March 2013 IPV38 / IPV38WE...
- Page 12 (Figure 1.3) Please be sure your computer is on the same network as the camera ! Mac Users: Browse to the Mac folder x:\ebode IP Vision software\IP Camera Tool.app\Contents and install the IP Camera Tool. March 2013 IPV38 / IPV38WE...
-
Page 13: Six Options Available
WIFI MAC ID, you can find it on the sticker on the bottom of the camera, you can also login to your WIFI router, check the host status, which will show all the WIFI devices connected to your router, you can also find the IPCAM’s WIFI MAC ID there. Figure 2.1 March 2013 IPV38 / IPV38WE... - Page 14 NOTE: You can find the Subnet Mask, Gateway, DNS Server from your router, or check the local connection status of your computer, to get all the parameters. Normally two DNS servers are optional. Please go to step 3.7.3 (CMD) if you do not know how to find this information. March 2013 IPV38 / IPV38WE...
- Page 15 When cable network and wireless network of the device are fixed IP address .There is a problem you may encounter is can search the camera IP but can’t open the camera web page .you may try to use Flush Arp Buffer. March 2013 IPV38 / IPV38WE...
-
Page 16: Camera Login
To access the camera by IE Browser directly, just type the camera’s IP address, You will find the address of your camera with the Camera Tool (Figure 1.9). For example, if the camera’s IP address is 192.168.1.123: Figure 2.5 March 2013 IPV38 / IPV38WE... -
Page 17: For Ie Browser
(1) “Active Mode” (For IE Browser): available in Internet Explorer 6.0 or above. (2) “Server Push Mode”: available in Firefox, Safari, and Google Chrome browser. (3) “Sign in mobile phone”: available in most recent Mobile Smart Phone`s. March 2013 IPV38 / IPV38WE... - Page 18 The first time you login to the camera, you might get an ActiveX prompt as in the picture above, please click the prompt and choose Run Add-on, refresh and login to the camera again, then will see live video, as below: Figure 2.9 March 2013 IPV38 / IPV38WE...
- Page 19 Level” > “ActiveX control and Plug-ins”, all the ActiveX options set to be “Enable”: Especially: Enable: Download unsigned ActiveX controls Enable: Initialize and script ActiveX controls not marked as safe Enable: Run ActiveX controls and plug-ins March 2013 IPV38 / IPV38WE...
-
Page 20: For Safari, Firefox, Google Browser
Choose Server Push Mode (For Safari, Firefox, Google Browser), and sign in. Server Push Mode doesn’t support ActiveX, so some functions are not available, such as Play, Stop, Record, Audio, Talk etc. if you want to use these functions, please use IE browser. March 2013 IPV38 / IPV38WE... -
Page 21: For Mobile Phone
Mobile phone doesn’t support ActiveX, so only some basic functions are available in this mode. It supports iPhone®, Smart phone, 3G phone, etc. Normally, if the mobile phone supports network video, then it should work with your IP Camera. The ebode IP Vision app for iPhone® supports all features, see step 3.23. -
Page 22: For Visitor
Click this one to view 4 Channels of cameras that are connected, from CH1 to CH4. Click this one to view 9 Channels of cameras that are connected, from CH1 to CH9. NOTE: If you want to view 4/9 channels, you should set the Multi-Device first (See 3.1 Multi-Device Settings). March 2013 IPV38 / IPV38WE... - Page 23 Disabled: Clicking this one means clear the OSD. Color: Can set the OSD text color as black, yellow, red, white, blue etc. Add time stamp on record: if you click this, there will be time OSD on record video files. Figure 3.7 March 2013 IPV38 / IPV38WE...
- Page 24 NOTE: For visitor, if you click other menus which visitors don’t have the right to operate, there will be a pop-up for the login interface (Figure 2.6), please input the user name / password for at least 3 times to login again. March 2013 IPV38 / IPV38WE...
-
Page 25: For Operator
Mirror: Click this icon to see a mirror image. Click again to go back to normal. NOTE: You can choose Reversal and Mirror function when you set up the camera in a special position (upside down for example). Mode, Bright, Contrast Settings Figure 4.3 March 2013 IPV38 / IPV38WE... - Page 26 & transparent arrow on the live video, click left mouse to control direction, eight directions are available. This is very convenient for Pan/Tilt operation. Double click right mouse again to exit. Preset Settings Figure 4.5 March 2013 IPV38 / IPV38WE...
-
Page 27: For Administrator
When you login as Administrator, you can enter the IP Camera for Administrator. Administrator supports all the settings and operations of the camera. There are some special functions only for administrator as below: Figure 4.6 March 2013 IPV38 / IPV38WE... -
Page 28: Multi-Device Settings
Click The 2nd Device and click the item in the Device List in Lan, it will fill the Alias, Host, Http Port automatically, then input the correct user name and password, click Add. Set more devices in the same way, after you’re done, click Submit. Figure 4.7 March 2013 IPV38 / IPV38WE... -
Page 29: Set Multi-Device For Wan
Make sure all these cameras you want to add have been set DDNS successfully. (View 3.7 DDNS Service Settings) And also these cameras work well with DDNS. Login to the first camera by DDNS domain name and port, this camera will be as the host camera. March 2013 IPV38 / IPV38WE... - Page 30 “http://”, it’s not the LAN IP address. If you have several cameras, you can use the same DDNS domain name, just set different port number for each different camera. Figure 5.1 March 2013 IPV38 / IPV38WE...
- Page 31 In this case, you can see all the cameras from a remote position by internet, for example, if you are on a business trip, you can use the first camera’s (Host camera) DDNS to view all the devices via the internet. Figure 5.3 March 2013 IPV38 / IPV38WE...
-
Page 32: Upgrade Device Firmware
Please don’t upgrade unnecessarily, wrong operation or incorrect upgrade bin file can damage the camera. Figure 5.4 2.1.4 Restore Factory Settings Click Restore Factory Settings, will pop-up a prompt, select OK, all the parameter will be returned to factory settings, and the device will reboot. Figure 5.5 March 2013 IPV38 / IPV38WE... -
Page 33: Reboot Device
IP range starting from address 1 to 99. Please choose a static IP between 192.168.0.2 and 192.168.0.99 and make sure no other device has the same static IP to avoid conflicts. March 2013 IPV38 / IPV38WE... - Page 34 3.7.3 (CMD): 1. Control PanelNetwork ConnectionsLocal Area Connections (Lan) Support Details 2. Find the local connection icon , because you might see more than one icon, left click it, choose Support Details March 2013 IPV38 / IPV38WE...
- Page 35 Most routers will support DHCP functions, you can choose “Obtain IP from DHCP Server” to get dynamic IP, however we strongly recommend you to use a Static IP for remote login to the camera (see step 3.3)! Figure 6.0 March 2013 IPV38 / IPV38WE...
-
Page 36: Wireless Lan Settings
Information may vary from type to type of routers. Belgium users that have Telenet as Internet Provider are in most cases not able to login to their router. All changes have to be made on the Telenet.be website. March 2013 IPV38 / IPV38WE... - Page 37 4. Login to the camera with the IPCamera Tool or manual using your Browser. (Figure 2.8) 5. Click “Network”>”Wireless Lan Settings”>”Scan”, please press scan 2 times, then you will find the WLAN from the list, choose the one you use. (Figure 6.2). Figure 6.1.1 Figure 6.2 March 2013 IPV38 / IPV38WE...
- Page 38 10. Wait about 30 seconds, the camera will reboot, after full reboot unplug the network cable. You might have to login to the camera again with the IP Camera Tool to continue with the next steps. March 2013 IPV38 / IPV38WE...
- Page 39 Figure 6.3 Figure 6.4 Figure 6.5 March 2013 IPV38 / IPV38WE...
-
Page 40: Adsl Settings
3.7 DDNS Service Settings. By default UPnP is most likely disabled in your router. Please refer to the router manual to enable UPnP and enable UPnP. Click Network > UPnP Settings to choose Using UPnP to Map Port: March 2013 IPV38 / IPV38WE... - Page 41 Camera`s IP address in your web browser. After you have done this, please skip the next step and continue with step 3.7.1 Third Party DDNS: You might have a DDNS server already, whereafter it is useful to take the next steps. March 2013 IPV38 / IPV38WE...
- Page 42 You have to register an account first, enter the user, password, and host. NOTE: Only one DDNS can be chosen, for example, if you use the manufacturer’s DDNS, the third party one won’t work, if you use the third party DDNS, the manufacturer’s one won’t work. March 2013 IPV38 / IPV38WE...
-
Page 43: To Change The Camera's Port
To change the camera’s port. (Always change your port!) Open the IP Camera Tool from your Desktop select the ebode camera (it will turn blue) and right-mouse click and choose network configuration. The default port of the camera is “80”, please change “80” to any other port you like, such as 81, 82, 83 etc. - Page 44 REMEMBER: Your camera should not be on Port 80. If it is, please go to step 3.7.1 to change the port number. How to discover the default gateway IP address in MS Windows Vista or Windows 7: Click ‘Start’, and type in ‘cmd’, press enter (see image below.) Belgian Telenet users should skip this step! March 2013 IPV38 / IPV38WE...
- Page 45 Next, type in ‘ipconfig’ and press enter. Please refer to below image. Finally, you can see the default gateway address and Subnet Mask as shown in the image below. March 2013 IPV38 / IPV38WE...
- Page 46 2. Enter the username and password from the router 3. The next screen is the interface of your router. Please note that each brand of router has its own interface. This is just an example. March 2013 IPV38 / IPV38WE...
- Page 47 5. Please choose ‘Configure Port Redirection Table’ 6. Now we have to let the router know, on which port the camera is located. Service name: give the camera a recognizable name, i.e. ebode IP Cam Protocol: Select TCP Public Port: You’ve checked this earlier on, please enter the right port for your camera (you can always...
- Page 48 Remember, portforwarding.com is a very useful source of information. TP-LINK: 1. Login the router. 2. Choose “Forwarding”, select “Virtual Servers” 3. Click the Add New button, pop-up below: Figure 7.5 March 2013 IPV38 / IPV38WE...
- Page 49 NOTE: The “public port” & “private port” should be the same as camera’s port, choose the protocol to be “both”. Figure 7.7 Now you are finished setting up your camera. The next steps explain additional features of your camera and FAQ. March 2013 IPV38 / IPV38WE...
- Page 50 Wireless settings and do advanced options like portforwarding. Please contact Telenet if you need any help. Below you will find two pictures of a typical Telenet modem portforward (Please select “Geavanceerd”): March 2013 IPV38 / IPV38WE...
- Page 51 Settings System Settings Figure 8.0 Device Info You can find the information about Device ID, Firmware Version, Embedded Web UI Version, Alias, Alarm Status, DDNS Status, UPnP Status and MSN status. March 2013 IPV38 / IPV38WE...
-
Page 52: Alias Settings
Set the date and time for your camera. Choose the Clock Time zone of your country. You can choose Sync with NTP Server (Figure 8.3) or Sync with PC Time (Figure 8.4). Figure 8.3 Figure 8.4 March 2013 IPV38 / IPV38WE... -
Page 53: Users Settings
6. Rightward patrol speed: Set the speed of cruising rightward. NOTE: Value 0 means the fastest, value 10 means the slowest. In order to protect the camera’s motor, we recommend that setting the speed to value 5. March 2013 IPV38 / IPV38WE... -
Page 54: Indicator Settings
2)Restore: Restore all the IP Camera Parameters, if you want to change the camera’s settings to a certain status which has a backup, click Browse to load the bin file, then Submit it. Figure 8.9 March 2013 IPV38 / IPV38WE... - Page 55 Click System—Device Info to check the MSN status. After you run your MSN, open the chat dialog, type in the word “url?”, after a few seconds, you will get a reply for the remote access IP address for this IP camera. March 2013 IPV38 / IPV38WE...
-
Page 56: Other Settings
SMTP Password: Input correct SMTP password here. NOTE: Please click Submit first before choosing Test. You will see the test result after click Test. March 2013 IPV38 / IPV38WE... - Page 57 When camera is powered on or Internet IP changed, it will send the internet IP by e-mail. (For example: IPCAM's URL is http://121.213.109.69:1008). 3.11 FTP Service Settings Set the FTP Service, you can upload images to your FTP server when motion is detected. Figure 9.3 March 2013 IPV38 / IPV38WE...
- Page 58 NOTE: Here upload image now means it can upload images freely, no alarm trigger needed. Click Submit after these settings. Then click Test. You will see the following picture. Figure 9.5 March 2013 IPV38 / IPV38WE...
-
Page 59: Alarm Service Settings
Enter Alarm Service Settings page to configure Motion Detection function. 3.12.1 Motion Detect Armed If you enable Motion Detect Armed, it will record and make an alarm sound when there is motion detected. Figure 9.7 March 2013 IPV38 / IPV38WE... -
Page 60: Motion Detect Sensitivity
If you want to connect external alarm devices, when it’s an alarm input device, choose Alarm Input Armed to enable it, when it’s an output device, choose IO Linkage on Alarm to enable it. Figure 10.0 March 2013 IPV38 / IPV38WE... - Page 61 Another cool feature for use of the I/O in/output is to connect a X10 SM10 or PH7208 interface. This way you are able to turn on a light or sound an alarm when motion is detected. March 2013 IPV38 / IPV38WE...
- Page 62 If you want the camera to record for every alarm, choose Record on Alarm to enable it. If you do not want the camera to record once the alarm is triggered, cancel it here. Figure 10.6 March 2013 IPV38 / IPV38WE...
-
Page 63: Path Settings
Alarm Record Path: Here you can set the alarm record path. When motion is detected, and record enabled, it will start alarm record automatically, the record file will be saved to the specified path you set here. March 2013 IPV38 / IPV38WE... - Page 64 2. You can also run the IE as administrator, input the IP address of the camera manually. (Figure 11.1). Figure 11.1 3.15 Server Push Mode (For Safari, FireFox, Google Browser) Choose Server Push Mode, login the camera, you will see the main user interface as below: Figure 11.2 March 2013 IPV38 / IPV38WE...
- Page 65 Contrast, Pan/Tilt control, Snapshot, Reversal, Mirror, IO Linkage functions. 4.1 Compatible Apps for mobile devices Recently we introduced our own ebode app for the IP camera. With this app you can remotely view and control your ebode IP camera from your iPad®, iPhone®...
- Page 66 *3G or wireless network connection required. For use outside your home network you'll need to setup port forwarding on your router, see the FAQ. Please, keep checking the App store regularly; soon we will be introducing our own ebode app for the IP camera, which gives you even more functionalities! Search for ebode IPVision!
- Page 67 It also relates to your router’s security settings. So we recommend you do port forwarding manually. You can view your camera via the Internet successfully after you do port forwarding manually in your router. March 2013 IPV38 / IPV38WE...
- Page 68 2. PC performance, network environment and display preference setting (brightness, theme, etc). 3. The number of visitors (too many visitors will slow down the image frame rate). 4. Choice of switch or hub (use a switch for multiple IP Camera Servers rather than a HUB). March 2013 IPV38 / IPV38WE...
- Page 69 Sensor 1/4” Color CMOS Sensor Resolution 640 x 480 Pixels (300k Pixels) IR Lens IPV38 – f: 6.0mm, F 2.0 IPV38WE – f: 3.6mm, F 2.0 Viewing Angle IPV38 – 60 Degree IPV38WE – 90 Degree Minimum Illumination 0.5Lux @ F2.0...
-
Page 70: Obtaining Technical Support
If your camera does not support some special functions shown in this manual, please contact our technical support team to obtain the latest Firmware and WEB UI file for upgrading. March 2013 IPV38 / IPV38WE... -
Page 71: Declaration Of Conformity
DECLARATION OF CONFORMITY Hereby, ebode declares that this IPV38 and IPV38WE are in compliance with the essential requirements and other relevant provisions of the following Directives: 1) Directive 1999/5/EC of the European Parliament and of the Council of 9 March 1999 on radio equipment and telecommunications terminal equipment and... - Page 72 Dansk [Danish]: Dette udstyr er i overensstemmelse med de væsentlige krav og andre relevante bestemmelser i Direktiv 1999/5/EF. Polski [Polish]: Urządzenie jest zgodne z ogólnymi wymaganiami oraz szczególnymi warunkami okreslonymi Dyrektywą UE: 1999/5/EC March 2013 IPV38 / IPV38WE...
- Page 73 Also available from ebode: LightSpeaker The Next Bright Idea The unique ebode LightSpeaker cleverly combines low consumption LED lighting with wireless sound in one easy ‘plug and play’ system that can be hidden away in a lampshade or light fitting. Install it into...
- Page 74 Notes March 2013 IPV38 / IPV38WE...
- Page 75 Notes March 2013 IPV38 / IPV38WE...
- Page 76 March 2013 IPV38 / IPV38WE...
Need help?
Do you have a question about the IPV38 and is the answer not in the manual?
Questions and answers