Table of Contents
Advertisement
Quick Links
Advertisement
Table of Contents

Related Manuals for Ross TRA-8206


Summary of Contents for Ross TRA-8206
- Page 1 Ross Video Limited TRA-8206 Triple MD-SDI Reclocking Amplifier User Manual...
- Page 2 The material in this manual is furnished for informational use only. It is subject to change without notice and should not be construed as commitment by Ross Video Limited. Ross Video Limited assumes no responsibility or liability for errors or inaccuracies that may appear in this manual.
-
Page 3: Important Safety Instructions
Important Regulatory and Safety Notices Before using this product and any associated equipment, refer to the “Important Safety Instructions” listed below to avoid personnel injury and to prevent product damage. Products may require specific equipment, and/or installation procedures to be carried out to satisfy certain regulatory compliance requirements. - Page 4 Notice — Changes or modifications to this equipment not expressly approved by Ross Video Limited could void the user’s authority to operate this equipment. CANADA This Class “A” digital apparatus complies with Canadian ICES-003.
- Page 5 The crossed-out wheeled bin symbol invites you to use these systems. If you need more information on the collection, reuse, and recycling systems, please contact your local or regional waste administration. You can also contact Ross Video for more information on the environmental performances of our products.
- Page 6 Company Address Ross Video Limited Ross Video Incorporated 8 John Street P.O. Box 880 Iroquois, Ontario Ogdensburg, New York Canada, K0E 1K0 USA 13669-0880 General Business Office: (+1) 613 • 652 • 4886 Fax: (+1) 613 • 652 • 4425 Technical Support: (+1) 613 •...
-
Page 7: Table Of Contents
Channel Rate Selection Buttons and LEDs ............3-4 Single, Dual, or Triple Channel Jumper Configurations ........3-5 Control and Monitoring ....................... 3-6 Status and Selection LEDs on the TRA-8206 ............3-6 Factory Default Values..................3-7 Reclocker Rate Selection ..................... 3-8 Reclocker Rate Selection LEDs ................ - Page 8 • Contents TRA-8206 User Manual (Iss. 05)
-
Page 9: Introduction
Congratulations on choosing an openGear TRA-8206 Triple MD-SDI Reclocking Amplifier. Your TRA-8206 is part of a full line of Digital Products within the openGear Terminal Equipment family of products, backed by Ross Video's experience in engineering and design expertise since 1974. -
Page 10: Overview
A special feature of the TRA-8206 is the ability to operate in a number of different channel configurations. The triple channel mode is ideal for applications requiring only 1 or 2 outputs, such as mid-cable signal boosters, router expansion, or signal cleanup. -
Page 11: Functional Block Diagram
Functional Block Diagram This section provides a functional block diagram that outlines the workflow of the TRA-8206. SDI OUT Channel A BNC 2 Equalizer Reclocker BNC 1 BNC 4 BNC 3 Channel C Equalizer Reclocker Crosspoint BNC 10 BNC 5... -
Page 12: Documentation Terms And Conventions
• “Operator” and “User” both refer to the person who uses the TRA-8206. • “Board” and “Card” both refer to the TRA-8206 card itself, including all components and switches. • “System” and “Video system” both refer to the mix of interconnected production and terminal equipment in which the TRA-8206 operates. -
Page 13: Installation
Installation In This Chapter This chapter provides instructions for installing the rear module(s) for the TRA-8206, installing the card into the frame, and cabling details. The following topics are discussed: • Before You Begin • Installing the TRA-8206 • Cabling for the TRA-8206 TRA-8206 User Manual (Iss. -
Page 14: Before You Begin
Unpacking Unpack each TRA-8206 you received from the shipping container and ensure that all items are included. If any items are missing or damaged, contact your sales representative or Ross Video directly. -
Page 15: Installing The Tra-8206
8320AR-030 Full Rear Module (R2-8206) is required. Installing a Rear Module If you are installing the TRA-8206 in a DFR-8310-BNC frame, or if the rear module is already present, skip this section. Use the following procedure to install the rear module in a DFR-8300 series frame: 1. -
Page 16: Board Installation
2. After selecting the desired frame installation slot, hold the TRA-8206 card by the edges and carefully align the card edges with the slots in the frame. -
Page 17: Cabling For The Tra-8206
Connections for the DFR-8310 Series Frames In the DFR-8310 series frame, the TRA-8206 occupies one slot and provides seven SDI outputs and three SDI inputs. Connect the input and output cables according to Figure 2.2. - Page 18 2–6 • Installation TRA-8206 User Manual (Iss. 05)
-
Page 19: User Controls
User Controls In This Chapter This chapter provides a general overview of the user controls available on the TRA-8206. The following topics are discussed: • Card Overview • Output Channel Configuration • Control and Monitoring • Reclocker Rate Selection TRA-8206 User Manual (Iss. 05) -
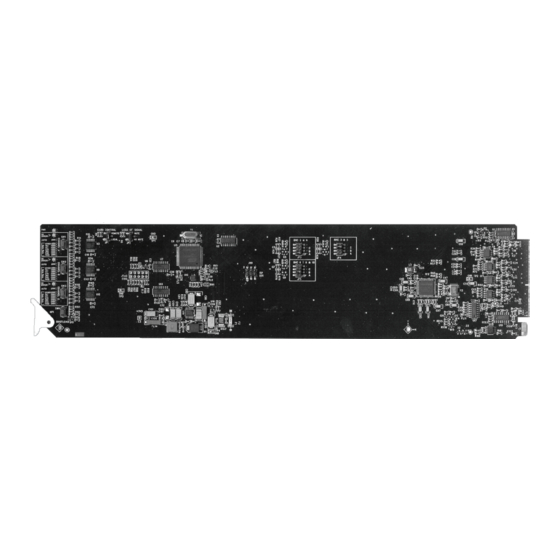
Page 20: Card Overview
Card Overview The following figure and discussions describe the jumpers and controls on the TRA-8206. Figure 3.1 Card-edge Controls 1) Card Control (JP1) 4) Channel B Rate Selection (SW2) 7) BNC 2 and 4 Output Configuration (JP3) 2) Loss of Signal (JP2) - Page 21 A — BNC 2 and BNC 4 will output the signal input on Channel A. • B — BNC 2 and BNC 4 will output the signal input on Channel B (default setting). C — Position C is not used on the TRA-8206 and should not be selected. • •...
-
Page 22: Output Channel Configuration
For applications where only one specific data rate will be used, and the fastest possible lock times are desired, the TRA-8206 can be set and locked to a specific data rate. Press the Channel Rate Selection Button until the AUTO LED is off, and the specific data rate LED is illuminated. -
Page 23: Single, Dual, Or Triple Channel Jumper Configurations
Input Channel C: Output BNCs 3, 5 Input Channel A: Output BNCs 2, 4 Triple Channel 1:2+1:2+1:3 Input Channel B: Output BNCs 3, 5 (default) Input Channel C: Output BNCs 6, 7, 8 TRA-8206 User Manual (Iss. 05) User Controls • 3–5... -
Page 24: Control And Monitoring
Control and Monitoring This section provides information on the card-edge LEDs of the TRA-8206. Refer to Figure 3.3 for the location of the LEDs. PWR LED OK/ERROR LED HD LED Channel A SD LED Channel A Rate Selection OK/ERROR LED... -
Page 25: Factory Default Values
Table 3.2 LEDs on the TRA-8206 Color Display and Description When lit, this LED indicates that the specified channel is Green reclocking a valid signal. Channel # OK/ERROR When red, this LED indicates that the channel cannot reclock due to an invalid signal or rate setting. -
Page 26: Reclocker Rate Selection
Channel set to reclock 360Mbps Channel set to reclock 540Mbps Channel set to reclock 1.485Gbps Channel equalizes, but does not reclock, any SDI signal from 143Mbps to 1.485Gbps = Illuminated LED 3–8 • User Controls TRA-8206 User Manual (Iss. 05) -
Page 27: Menus
In This Chapter This section provides a detailed explanation on using remote control functions with your TRA-8206. The following topics are discussed: • SNMP Monitoring and Control • Dashboard Control System Software TRA-8206 User Manual (Iss. 05) Menus • 4–1... -
Page 28: Snmp Monitoring And Control
Simple Network Management Protocol (SNMP), which is compatible with many third-party monitoring and control tools. Refer to your TRA-8206 Management Information Base (MIB) file for a breakdown of SNMP controls on this card. Refer to the MFC-8300 Series User Manual for additional information on SNMP Monitoring and Control. -
Page 29: Dashboard Control System Software
Dashboard Control System Software This section briefly summarizes the menus, items, and parameters available from the DashBoard Control System™ for the TRA-8206. Parameters marked with an asterisk (*) are the factory default values. The DashBoard Control System™ enables you to monitor and control openGear frames and cards from a computer. -
Page 30: Setup Menus
Setup Menus Table 4.2 summarizes the Setup Menu options available in DashBoard for the TRA-8206. Table 4.2 Setup Menu Items Tab Title Item Parameters Description The card automatically detects the Auto* incoming data rate for the specified channel Channel A Input Rate... -
Page 31: Alarms Menus
Alarms Menus Table 4.4 summarizes the Alarms menu options available in DashBoard for the TRA-8206. Note that if an input channel is not routed to any outputs, the Input Status field ignores any loss of input, and the status is not displayed in DashBoard. - Page 32 4–6 • Menus TRA-8206 User Manual (Iss. 05)
-
Page 33: Specifications
Specifications In This Chapter This chapter provides technical specifications on the TRA-8206. Note that specifications are subject to change without notice. The following topics are discussed: • Technical Specifications TRA-8206 User Manual (Iss. 05) Specifications • 5–1... -
Page 34: Technical Specifications
Technical Specifications This section provides the technical specifications for the TRA-8206. Table 5.1 TRA-8206 Technical Specifications Category Parameter Specification Number of Inputs 143Mbps, NTSC Composite, SMPTE 259M-A 177Mbps, PAL Composite, SMPTE 259M-B 270Mbps, 525/625 Component, SMPTE 259M-C Data Rates and SMPTE... -
Page 35: Service Information
Service Information In This Chapter This chapter contains the following sections: • Troubleshooting Checklist • Warranty and Repair Policy TRA-8206 User Manual (Iss. 05) Service Information • 6–1... -
Page 36: Troubleshooting Checklist
Routine maintenance to this openGear product is not required. In the event of problems with your TRA-8206, the following basic troubleshooting checklist may help identify the source of the problem. If the frame still does not appear to be working properly after checking all possible causes, please contact your openGear products distributor, or the Technical Support department at the numbers listed under the “Contact Us”... -
Page 37: Warranty And Repair Policy
FIVE (5) years from the date of shipment from our factory. In the event that your TRA-8206 proves to be defective in any way during this warranty period, Ross Video Limited reserves the right to repair or replace this piece of equipment with a unit of equal or superior performance characteristics. - Page 38 6–4 • Service Information TRA-8206 User Manual (Iss. 05)
- Page 39 Notes:...
- Page 40 P.O. Box 880, Ross Video Incorporated Ogdensburg, New York, USA 13669-0880 Visit Us Please visit us at our website for: • Company information • Related products and full product lines • On-line catalog • News • Testimonials Ross Video Part Number: 8206DR-004-05...
Need help?
Do you have a question about the TRA-8206 and is the answer not in the manual?
Questions and answers