Hitachi DC 120VA Technical Data And Service Manual
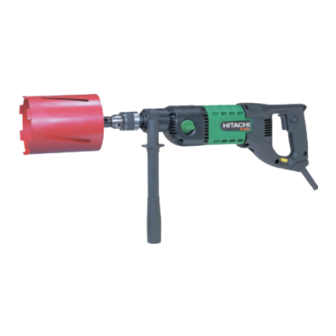
Diamond core drill
Hide thumbs
Also See for DC 120VA:
- Catalog (30 pages) ,
- Handling instructions manual (32 pages) ,
- Handling instructions manual (31 pages)

Related Manuals for Hitachi DC 120VA


Summary of Contents for Hitachi DC 120VA
- Page 1 MODEL DC 120VA POWER TOOLS TECHNICAL DATA DIAMOND CORE DRILL DC 120VA SERVICE MANUAL LIST No. 0192 Jun. 2000 SPECIFICATIONS AND PARTS ARE SUBJECT TO CHANGE FOR IMPROVEMENT...
-
Page 2: Table Of Contents
Notice for use Specifications and parts are subject to change for improvement. Refer to Hitachi Power Tool Technical News for further information. CONTENTS Page [ Business Section ] 1. PRODUCT NAME • • • • • • • • • • • • • • • • • • • • • • • • • • • • • • • • • • • • • • • • • • • • • • • • • • • • • • • • • • • • • • • • • • • • • • • • • • • • • • • • • • • • • • • • • • • • • • • • • • • • • • • • • • • • • • • • • • • • •... -
Page 3: Product Name
(low noise and vibration). Especially, a core drill capable of drilling various types of materials efficiently is demanded. To meet such demand, the Model DC 120VA was developed as an advanced version of the current dry-type Model DC 120V in efficiency and operability. The key features are as follows:... -
Page 4: Selling Points
4. SELLING POINTS Stable gripping and powerful drilling thanks to long side handle and high slip torque mechanism Fast drilling with 1400 W high-power motor (110 V product: 1250 W) Synchronized gear shift mechanism for easy speed switching Vibration-isolating handle reduces operator fatigue Various drilling applications, thanks to the speed control system with 2-speed transmission and variable 5-speed dial... -
Page 5: Selling Point Descriptions
4-1. Selling Point Descriptions 4-1-1. Powerful motor with a power input of 1400 W Although the motor has the same dimensions as the Model DC 120V, the motor of the Model DC 120VA is more powerful thanks to the larger-diameter motor coil. - Page 6 Slip life (cycles) <Slip clutch mechanism> DC 120VA: A claw clutch, which is the same as that of the Model DC 120V, is provided to increase the service life. C: A friction-plate clutch with a belleville spring, which is the same as that of 6300T, is provided.
- Page 7 4-1-5. Constant speed electronic control with stepless variable speed for stable drilling efficiency The Model DC 120VA contains an electronic control circuit which allows the number of revolutions to be steplessly adjustable on the dial. The number of revolutions in the low-speed range is from 400 min...
-
Page 8: Specifications
5. SPECIFICATIONS 5-1. Main Specifications Capacity (with dry-type Brick, block * 152 mm (5 --- 63/64") diamond core bit) Mild steel 13 mm (1/2") Wood 30 mm (1 -- - 1/8") Drill chuck Capacity 1.2 mm (0.047") - - - 13 mm (1/2") Power source 100 V 12 A... -
Page 9: Optional Accessories
5-2. Optional Accessories (1) Diamond core bits Dia. bit Length 22 mm (7/8") 300 mm (11 -- - 11/16") 28 mm (1-7/64") 38 mm (1-1/2") 48 mm (1-57/64") 52 mm (2-3/64") 65 mm (2-9/16") 150 mm (5 -- - 29/32") 78 mm (2-1/16") 91 mm (3-37/64") 107 mm (4-7/32") -
Page 10: Comparisons With Similar Products
6. COMPARISONS WITH SIMILAR PRODUCTS 6-1. Specification Comparisons Maker, Model HITACHI HITACHI DC 120VA DC 120 Item Brick, block 152 (5-63/64") 152 (5-63/64") 152 (5-63/64") Diameter Mild steel 13 (1/2") 13 (1/2") 13 (1/2") Diameter Wood 30 (1-1/2") 30 (1-1/2") 30 (1-1/2") -
Page 11: Precautions In Sales Promotion
7-1. Safety Precautions In the interest of promoting the safest and most efficient use of the Models DC 120VA Diamond Core Drill by all of our customers, it is very important that at the time of sale the salesperson carefully ensures that the buyer seriously recognizes the importance of the contents of the Handling Instructions, and fully understands the meaning of the precautions listed on the caution plate attached to each tool. -
Page 12: Precautions In Usage
(2) Diamond core bits: Diamond core bits applicable to the Model DC 120VA and DC 120V are dry-type diamond core bits for drilling brick, concrete block and similar materials. Instruct the customer not to apply water during the drilling operation. - Page 13 (4) Pressure: Drilling will NOT be accelerated by placing heavy pressure on the drill. Such action will only result in a damaged drill bit, decreased drilling efficiency, and/or shortened service life of the drill. (5) When drilling completely through the material: When the drill bit bores completely through the material, careless handling often results in broken drill bit or damage to the drill body itself due to the sudden movement of the drill.
-
Page 14: Precautions In Disassembly And Reassembly
9. PRECAUTIONS IN DISASSEMBLY AND REASSEMBLY The [Bold] numbers in the descriptions below correspond to the item numbers in the Parts List and exploded assembly diagram. 9-1. Disassembly 9-1-1. Handle cover section and carbon brush (1) Loosen the Tapping Screw (W/Flange) D4 x 20 [48] and remove Handle (B) [49]. (2) Remove the Tapping Screw (W/Flange) D4 x 20 [48] from the Cord Clip [56] and remove the Cord [59] together with the Cord Armor [57]. - Page 15 9-1-4. Nut Wrench The Nut [4] is secured to Spindle (B) Ass'y [20] with a Chuck wrench UN5/8-16 right-handed screw. Insert a metal bar of 3 mm or less diameter in the air vent and fix it. Put a 21-mm wrench on the Nut [4] and turn it to remove the Nut [4].
-
Page 16: Reassembly
9-2. Reassembly Perform reassembly in the reverse order of disassembly while observing the given precautions and taking care of the following points. 9-2-1. Internal wire arrangement Arrange the internal wires as shown in Fig. 6. Be careful not to catch the internal wires when mounting the handle. - Page 17 9-2-2. Reassembly of the gear cover section Fig. 7 shows the assembly drawing. Reassemble the gear cover section according to the following figure. Spring (A) Washer (A) Second Pinion High Speed Gear First Gear Shift Spring Clutch Disc Shift Lever Metal (A) Insert the 4 mm diameter protrusion into the groove of the clutch disc.
-
Page 18: Lubrication
9-3. Lubrication (1) Apply DOUBREX 251 grease to the following parts. • Each gear: tooth portion • Spindle (B) Ass'y [20] (including [17], [18] and [19]) • Clutch Disc [24]: entirely • Shift Lever [15]: 19 mm dia. outer circumference portion and 4 mm dia. convex portion •... -
Page 19: Confirmation After Reassembly
10. CONFIRMATION AFTER REASSEMBLY 10-1. Insulation Tests On completion of disassembly and repair, measure the insulation resistance and conduct a dielectric strength test. Insulation resistance: 7 MΩ or more with DC 500V Megohm Tester. Dielectric strength: AC 4000V/1 minute, with no abnormalities 220 V -- - 240 V •... -
Page 20: Standard Repair Time (Unit) Schedules
11. STANDARD REPAIR TIME (UNIT) SCHEDULES Variable 60 min. MODEL Fixed Work Flow DC 120VA Housing Ass'y Stator Ass'y Cord Switch Gear Cover Controller Handle (A) Dust Seal Handle (B) Ball Bearing (6003VV) Sleeve Spring Clutch Spindle (B) Ass'y Spindle (A) -
Page 21: Assembly Diagram For Dc 120Va
Assembly Diagram for DC 120VA --- 19 ---... - Page 22 ÇDC 120VA PARTS ITEM CODE NO. DESCRIPTION REMARKS USED 950-288 VINYL BAND 930-515 CHUCK WRENCH 10G 950-287 DRILL CHUCK 13WLR (W/SCREW) 309-125 939-556 RETAINING RING FOR D35 HOLE (10 PCS.) 981-572 DUST SEAL 600-3VV BALL BEARING 6003VVCMPS2L 303-281 TAPPING SCREW (W/SP. WASHER) D5X55(BLACK)
- Page 23 DC 120VA PARTS ITEM CODE NO. DESCRIPTION REMARKS USED 301-653 TAPPING SCREW (W/FLANGE) D4X20 (BLACK) 318-720 HANDLE (B) 959-140 CONNECTOR 50091 (10 PCS.) 318-731 CONTROLLER FOR GBR (110V) 318-738 CONTROLLER 305-499 MACHINE SCREW (W/WASHER) M3.5X6 318-730 SWITCH (1P SCREW TYPE) W/LOCK...
-
Page 24: Standard Accessories
DC 120VA STANDARD ACCESSORIES ITEM CODE NO. DESCRIPTION REMARKS USED 309-122 SIDE HANDLE : ALTERNATIVE PARTS 3 --- 00 Printed in Japan (000315 N) --- 22 ---...
Need help?
Do you have a question about the DC 120VA and is the answer not in the manual?
Questions and answers