Sony Handycam FDR-AX1 Operating Manual
Digital 4k video camera recorder
Hide thumbs
Also See for Handycam FDR-AX1:
- Service manual (28 pages) ,
- Specifications (4 pages) ,
- Manual (2 pages)

Related Manuals for Sony Handycam FDR-AX1


Summary of Contents for Sony Handycam FDR-AX1
- Page 1 4-484-004-11(1) Digital 4K Video Camera Recorder FDR-AX1/AX1E Operating Guide Before operating the unit, please read this manual thoroughly and retain it for future reference. © 2013 Sony Corporation...
- Page 2 Owner’s Record The model and serial numbers are located on the bottom. Record the serial number in the space provided below. Refer to these numbers whenever you call your Sony dealer regarding this product. Model No. FDR- Serial No. Model No. AC- Serial No.
-
Page 3: Important Safety Instructions
IMPORTANT SAFETY INSTRUCTIONS SAVE THESE INSTRUCTIONS. DANGER - TO REDUCE THE RISK OF FIRE OR ELECTRIC SHOCK, CAREFULLY FOLLOW THESE INSTRUCTIONS. • Read these instructions. • Keep these instructions. • Heed all warnings. • Follow all instructions. • Do not use this apparatus near water. •... - Page 4 Representative plug of power supply cord of countries/regions around the world. A Type B Type BF Type B3 Type C Type SE Type O Type (American (British Type) (British Type) (British Type) (CEE Type) (CEE Type) (Ocean Type) Type) The representative supply voltage and plug type are described in this chart. Depend on an area, Different type of plug and supply voltage are used.
- Page 5 Oceania Countries/regions Voltage Frequency (Hz) Plug type Australia New Zealand 230/240 North America Countries/regions Voltage Frequency (Hz) Plug type Canada Central America Countries/regions Voltage Frequency (Hz) Plug type Bahamas 120/240 Costa Rica Cuba 110/220 Dominican (rep) El Salvador Guatemala Honduras Jamaica Mexico 120/127...
- Page 6 BATTERIES • Be sure to charge the battery pack using a Lithium-Ion batteries are genuine Sony battery charger or a device that recyclable. can charge the battery pack. You can help preserve our • Keep the battery pack out of the reach of small environment by returning your children.
- Page 7 Manufacturer: Sony Corporation, 1-7-1 Konan Address: 16530 Via Esprillo, San Diego, CA Minato-ku Tokyo, 108-0075 Japan 92127 U.S.A. For EU product compliance: Sony Deutschland Telephone No.: 858-942-2230 GmbH, Hedelfinger Strasse 61, 70327 Stuttgart, This device complies with Part 15 of the FCC Germany Rules.
- Page 8 life to the applicable collection point for the Disposal of Old Electrical & recycling of electrical and electronic equipment. Electronic Equipment For all other batteries, please view the section on (Applicable in the European how to remove the battery from the product Union and other European safely.
-
Page 9: Table Of Contents
Table of Contents Overview Location and Function of Parts ..........12 On-Screen Indications ............19 LCD/viewfinder screen ..........19 Preparations Power Supply ................21 Charging the battery pack ..........21 Setting the Clock ..............23 Attaching Devices ..............23 Attaching the lens hood with lens cover ...... 23 Adjusting the LCD screen and viewfinder .... - Page 10 Thumbnail Screens Thumbnail Screens ..............36 Configuration of the screen .......... 36 Playing Clips ................37 Playing the selected and subsequent clips in sequence ................37 Clip Operations ............... 37 Operations of the thumbnail menu ....... 37 Displaying the detailed information of a clip ....38 Deleting clips ...............
- Page 11 Appendices Important Notes on Operation ..........52 Recording time of movies ..........52 Using your camcorder abroad ........54 Formats and Limitations of Outputs ........59 Video formats and output signals ......... 59 Error/Warning Indications ............ 61 Error indications ............61 Warning indications .............
-
Page 12: Location And Function Of Parts
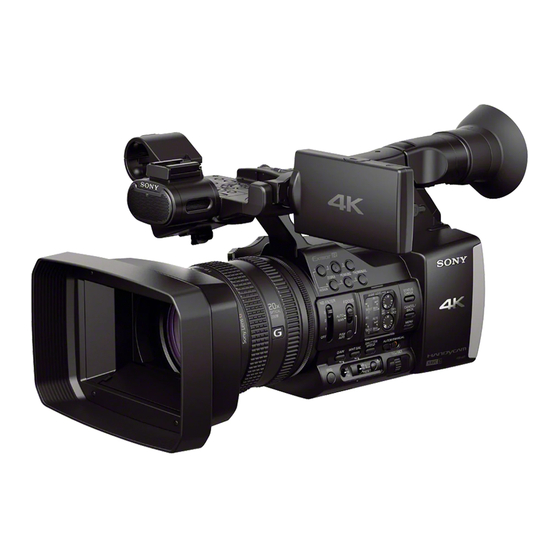
Overview Location and Function of Parts For functions and usage, see the pages in parentheses. Hook for shoulder strap (15) ASSIGN 7/FOCUS MAGNIFIER button (35) Microphone holder* IRIS PUSH AUTO button Power zoom lever (27) * When you use the microphone, refer to the operating instructions supplied with the microphone. - Page 13 Lens (23) ** MENU button has a raised tactile bar for your convenience in locating the button. Lens hood with lens cover (23) Internal microphone (33) Front recording lamp (46) The recording lamp flashes if the remaining capacity of recording media or battery is low. ASSIGN 4/ZEBRA button ASSIGN 1 button ASSIGN 2 button*...
- Page 14 AUDIO OUT connectors/VIDEO OUT connector (48, 60) HDMI OUT connector (48) UTILITY SD slot (To be supported by future upgrade.) Handle zoom lever (27) START/STOP button When the lever is set to the HOLD position, the START/STOP button is not operable. INPUT2 connector INPUT1 connector Cable holder...
- Page 15 To attach a shoulder strap Hook for shoulder strap Attach a shoulder strap (sold separately) to the Focus ring (28) hooks for a shoulder strap. Lens cover lever (23) Zoom ring (27) Iris ring (30) GAIN button (30) WHT BAL button* (32) SHUTTER SPEED button (31) AUTO/MANUAL switch (30) (headphones) connector...
- Page 16 OPTION button (37) Bottom THUMBNAIL button (36) Playback control buttons (PREV, PLAY/ PAUSE*, NEXT, STOP, F REV, F FWD) (28) DATA CODE button (To be supported by future upgrade.) DISPLAY button (19) LCD screen (24) Handle zoom switch (27) Viewfinder (24) Large eyecup Viewfinder lens adjustment lever (24) Viewfinder release lever (57)
- Page 17 Camera status screen Video output status screen Displays the electronic shutter settings or the Displays the HDMI and video output settings. status of the lens. HDMI Output picture size Output On/Off Gain<H> Setting value of Gain <H> level Video Output picture size Gain<M>...
- Page 18 Remaining Remaining capacity of the capacity of recording media inserted in Media B the slot B, expressed in GB Media Media icon displayed when information of recording media is inserted in the UTILITY SD the UTILITY SD slot card Protect Protect icon displayed when information of the UTILITY SD slot is write-...
-
Page 19: On-Screen Indications
On-Screen Indications LCD/viewfinder screen While recording, standing by to record, or playback, the statuses and settings of this unit are superimposed on the LCD/viewfinder screen. The statuses and settings of this unit can be turned on/off using the DISPLAY button. Information displayed on the screen while recording Shutter mode/shutter speed indication White balance mode indication (page 31) - Page 20 System frequency and scan method indication Recording format (picture size) indication (page 30) Displays the picture size that is recorded on an XQD memory card. Information displayed on the playback screen The following information is superimposed on the playback picture. Clip no./total number of clips Playback mode Playback format (picture size)
-
Page 21: Power Supply
Preparations Power Supply Remove the battery pack from the Charger when Charging the battery pack the charge is completed. You can charge the “InfoLITHIUM” battery pack Attaching the battery pack (L series) with the supplied Charger. Press the battery pack against the back of your Notes camcorder and slide it down. - Page 22 Storing the battery pack If the battery pack is not in use for a while, run down the battery and store it. See page 55 for details on storage of the battery pack. Charging time Approximate time (minute) required when you charge a fully discharged battery pack.
-
Page 23: Setting The Clock
Setting the Clock Attaching Devices When you turn the camcorder on for the first time Attaching the lens hood with lens after purchasing or the backup battery has cover completely discharged, the Initial Setting display appears on the viewfinder screen and LCD screen. -
Page 24: Adjusting The Lcd Screen And Viewfinder
You can switch the brightness of the viewfinder Adjusting the LCD screen and backlight with “VF Backlight” of “VF Setting” in viewfinder the LCD/VF menu (page 45). LCD screen Open the LCD screen 180 degrees (1), then rotate it to the best angle to record or play back (2). -
Page 25: Using Xqd Memory Cards
About XQD memory cards Selecting the memory card slot to be used for recording Use the following Sony XQD memory cards. Press the A or B button of the memory card slot XQD memory card S series where the memory card you want to record on is XQD memory card H series inserted. -
Page 26: Formatting An Xqd Memory Card
Replacing an XQD memory card Formatting an XQD memory card • If the available time on two cards in total If an XQD memory card is not formatted, or was becomes less than 5 minutes, the warning formatted with another system, the message message “Media Near Full”... -
Page 27: Basic Operation Procedure
Recording Basic Operation Procedure To use the power zoom lever Basic recording can be performed with the Move the power zoom lever D slightly for a following procedures. slower zoom. Move it further for a faster zoom. Make sure that the necessary devices Wide view: (Wide angle) are attached to the camcorder and power is supplied to them. - Page 28 For focusing manually Notes • It is easier to focus on the subject when you use • Turn the zoom ring C at a moderate speed. If you turn the zoom function. Move the power zoom lever it too fast, the zoom speed may lag behind the zoom towards T (telephoto) and adjust the focus, then, ring rotation speed, or the operation sound of the zoom may also be recorded.
- Page 29 Search for the desired clip by pressing Clip (recording data) PREV or NEXT button. When you stop recording, video, audio and subsidiary data from the start to end of the Press the PLAY/PAUSE button. recording are recorded as a single clip on an The playback image appears on the XQD memory card.
-
Page 30: Changing Basic Settings
During recording or standby, set the AUTO/ MANUAL switch H to MANUAL. Changing Basic Settings When the iris is automatically adjusted, press the IRIS button E. You can make changes to the settings based on The iris value appears. When the iris value is the intended usage of the recorded video or automatically adjusted, “A.Iris”... -
Page 31: Adjusting To Natural Color (White Balance)
Notes Adjusting the volume of light • When you set AUTO/MANUAL switch H to AUTO, (ND filter) other manually adjusted items (iris, shutter speed, white balance) also become automatic. You can record the subject clearly by using the ND FILTER switch B when the recording Adjusting the shutter speed environment is too bright. - Page 32 You can adjust and fix the white balance • You can change the color temperature. Set according to the lighting conditions of recording “Color Temp.” in “Preset White” in “White” of environment. the Paint menu, and the white balance memory You can store white balance values in memory A switch B to PRESET, then press the (one...
-
Page 33: Audio Setup
• If the recording level is low, set “INT MIC Audio setup Sensitivity” in “Audio Input” of the Audio menu to “High” (page 44). The following connectors, switches and dials • To reduce wind roar, set “INT MIC Wind allow you to set the sound to be recorded. Filter”... - Page 34 When the CH1 switch is set to INT MIC During recording or standby, turn the AUDIO LEVEL dial (G or H) of the Input source and recorded channel to be adjusted. channel switch setting To restore automatic adjustment Set the AUTO/MAN switch (F or I) of the INT MIC (L) manually adjusted channel to AUTO.
-
Page 35: Useful Functions
Useful Functions Assignable buttons The camcorder has seven assignable buttons (pages 12, 13) to which you can assign various functions for convenience. Changing functions Use “Assignable Button” (page 46) in the System menu. The assigned functions can be viewed on the assignable button status screen (page 17). -
Page 36: Thumbnail Screens
Thumbnail Screens Thumbnail Screens When you press the THUMBNAIL button (page 16), clips recorded on the XQD memory card are displayed as thumbnails on the screen. You can start playback from the clip selected on the thumbnail screen. The playback picture can be seen on the LCD/viewfinder screen and external monitors. -
Page 37: Playing Clips
Playing Clips Clip Operations On the thumbnail screen, you can operate the Playing the selected and clips or confirm the subsidiary data for clips using subsequent clips in sequence the thumbnail menu. The thumbnail menu appears when you press the OPTION button Turn the SEL/SET dial (page 16) to (page 16) on the thumbnail screen. -
Page 38: Displaying The Detailed Information Of A Clip
Displaying the detailed information of a clip Select “Display Clip Properties” from the thumbnail menu. Image of the current clip Recording format Video Codec: Video codec Timecode Size: Picture size Duration: Duration of the clip FPS: Frame rate/bit-rate Date of recording/modifying Audio Codec: Audio codec Ch/Bit: Number of the recorded audio channel/ Currently selected memory card... -
Page 39: Deleting Clips
Deleting clips You can delete clips from the XQD memory card. Select “Select Clip” from “Delete Clip” on the thumbnail menu. You can select multiple clips to be deleted. Press the OPTION button (page 16) after selecting the clip to be deleted. Changing information on the thumbnail screen You can change information of the clip/frame that... -
Page 40: Setup Menu Operations
• When you select an item that you must confirm Settings before execution, the menu display temporarily Setup Menu Operations disappears, and a confirmation message is displayed. Follow the instructions of the message, and specify whether to execute or The Setup menu allowing you to perform various cancel. -
Page 41: Setup Menu List
Setup Menu List The functions and available settings of menus are listed below. The default settings set at the factory are shown in bold face (example: 18dB). Camera menu Camera Menu items Sub items and setting values Contents Gain Gain<H> Sets the preset value <H>... -
Page 42: Paint Menu
Paint menu Paint Menu items Sub items and setting values Contents White Preset White Selects the type to be used as the preset. Outdoor / Indoor / Color Temp. Setting for white balance Color Temp. <Preset> Displays and sets the color temperature of white balance that 2300K to 15000K (3200K) is stored in the white memory. - Page 43 Paint Menu items Sub items and setting values Contents Skin Detail Setting Turns the skin detail compensation function on/off. On / Off Adjusting the skin detail Area Detection Detects the color for the skin detail compensation. compensation Execute/Cancel Execute: Executes this function. Area Indication Turns on/off the function that displays the zebra pattern in the On / Off...
-
Page 44: Audio Menu
Audio menu Audio Menu items Sub items and setting values Contents Audio Input INPUT1 Reference Selects the reference input level for when the INPUT1 switch –60dB / –50dB / –40dB is set to MIC. Setting for audio inputs INPUT2 Reference Selects the reference input level for when the INPUT2 switch –60dB / –50dB / –40dB is set to MIC. -
Page 45: Lcd/Vf Menu
Video Menu items Sub items and setting values Contents Output Display HDMI Selects whether to add the menu or status on the HDMI On / Off output signal. Setting for the output signal VIDEO Selects whether to add the menu or status on the video output On / Off signal. -
Page 46: Media Menu
Media menu This menu is not available when the media is not loaded. Media Menu items Sub items and setting values Contents Format Media Media(A) Formats the XQD memory card in the slot A. Execute / Cancel Execute: Executes format. Formatting a memory Media(B) -
Page 47: Thumbnail Menu
System Menu items Sub items and setting values Contents Language Select Sets the language to be displayed. SET: Execute this function. Setting the language Clock Set Time Zone Sets the time-zone difference from UTC in steps of 30 UTC –12:00 Kwajalein to UTC minutes. -
Page 48: Connecting External Monitors And Recording Devices
External Devices Connection Connecting External Monitors and Recording Devices To display recording/playback pictures on an external monitor, select the output signal and use an appropriate cable for the monitor to be connected. An output signal from the camcorder can be recorded when a recording device is connected. -
Page 49: Managing Clips With A Computer
With Windows, check that the memory Managing Clips with a card is displayed as a removable disk in My Computer. Computer With Macintosh, check that a “NO NAME” or “Untitled” folder was created on the desktop. (The Macintosh folder name can be changed.) Connecting with a USB cable Notes To use an XQD card reader (sold... -
Page 50: Playing Images On A Computer
OS has been upgraded or in a multi- “PlayMemories Home” can be downloaded from boot environment. the following URL. *2 Starter (Edition) is not supported. http://www.sony.net/pm Notes Notes • Operation with all computer environments is not • An Internet connection is required to install assured. -
Page 51: Editing Images On A Computer
• If the “PMB (Picture Motion Browser)” software is installed on your computer, it will be overwritten by the “PlayMemories Home” software. In this case, you cannot use some functions that were available with “PMB” with this “PlayMemories Home” software. To disconnect your camcorder from the computer Click the... -
Page 52: Appendices
Appendices Important Notes on Operation Recording time of movies Estimated duration of recording and playback Recording time Approximate time available when you use a fully charged battery pack. (unit: minute) Continuous Typical recording recording time time LCD screen 165 (30P) 155 (60P) 75 (30P) 70 (60P) - Page 53 Notes • Available recording time may vary depending on the recording conditions, subject conditions, etc. • You can record movies to a maximum of 9,999 scenes in total. • The maximum continuous recording time of movies is approximately 13 hours. •...
-
Page 54: Using Your Camcorder Abroad
Do not leave the camcorder with the lenses Using your camcorder abroad facing the sun Direct sunlight can enter through the lenses, be Power supply focused in the camcorder, and cause fire. You can use your camcorder in any country/ region using the AC Adaptor or Charger supplied Shipping with your camcorder within the AC 100 V to... - Page 55 About battery life • Be sure to set the POWER switch to OFF when not recording or playing back on your • Battery capacity decreases over time and camcorder. The battery pack is also consumed through repeated use. If decreased usage time when your camcorder is in recording standby or between charges becomes significant, it is playback pause.
- Page 56 Sony dealer before operating it • When you bring your camcorder from an air any further. conditioned car or room into a hot place outside.
- Page 57 LCD screen On charging the pre-installed rechargeable battery • Do not exert excessive pressure on the LCD screen, as it may cause damage. Your camcorder has a pre-installed rechargeable • If your camcorder is used in a cold place, a battery to retain the date, time, and other settings residual image may appear on the LCD screen.
- Page 58 Remove dust inside the eye piece and Note on the display viewfinder with a blower. • Pictures on the LCD screen and viewfinder screen may be distorted by the following operations: —Changing the video format —Starting playback from the Thumbnail screen —Reversing the LCD screen •...
-
Page 59: Formats And Limitations Of Outputs
1920×1080 25P 50 1920×1080P 1920×1080 50P 1920×1080i 1920×1080 50i 720×576P 720×576 50P * Compatible with the Sony transmission system. You can connect the camcorder to a Sony 4K television, or a 4K monitor. Picture resolution is Y:Cb:Cr=4:2:0. Formats and Limitations of Outputs... - Page 60 Output formats from the VIDEO OUT connector Signals to the VIDEO OUT connector cannot be output when “HDMI” in “Output Format” of the Video menu is set to “3840×2160P.” Video output signal Setting for the region where the camcorder is used VIDEO output “NTSC/PAL Area”...
-
Page 61: Error/Warning Indications
2 Disconnect the power source, attach the power source again E:62:ss/E:92:ss/ after about 1 minute, and turn the camcorder on. E:94:ss/E:95:ss 3 Contact your Sony dealer or local authorized Sony service facility. Warning indications When one of the following indications is generated, follow the message to resolve the problem. - Page 62 Warning indication Buzzer Recording Cause and measures on LCD/viewfinder lamp Unknown Media(A)* A partitioned memory card or one that contains recorded Please Change clips exceeding the number permitted with this camcorder is loaded. This card cannot be used with this camcorder. Remove it and load a compatible card.
-
Page 63: Licenses
Color temperature “Indoor” (3 200K) Open software licenses “Outdoor” (5 600K) “Color Temp.” (2 300K - 15 000K) On the basis of license contracts between Sony Minimum illumination and the software copyright holders, this product 60P (NTSC Area): uses open software. - Page 64 AUDIO OUT connectors Dimensions (approx.) Pin connectors Camcorder body only (including the -10 dBu (at load impedance 47 kΩ projecting parts): (kilohms)), Output impedance with less than 189 mm × 193 mm × 362 mm 2.2 kΩ (kilohms) (7 1/2 in. × 7 5/8 in. × 14 3/8 in.) (w/h/d) (0 dBu = 0.775 Vrms) When recording (including the projecting HDMI OUT connector...
-
Page 65: Package Configuration
CD-ROM “License” (1) Operating Guide (2) On trademarks • “Handycam” and registered trademarks of Sony Corporation. • “XAVC S” and are trademarks of Sony Corporation. • XQD, and are trademarks of Sony Corporation. • “InfoLITHIUM” is a trademark of Sony Corporation. Specifications... -
Page 66: Index
Index Handle Zoom Handle zoom Handle zoom lever Handle zoom switch AC Adaptor 48, 59 HDMI OUT connector All Reset Headphones connector 35, 46 Assignable Button Hook for shoulder strap Audio Hours Meter Audio Input Audio menu Audio Output Indoor Auto Exposure “InfoLITHIUM”... - Page 67 Output signal Wall outlet (wall socket) Warning Indications Paint menu White Peaking White balance Power cord (mains lead) White balance memory switch Power zoom lever WHT BAL button Pre-installed rechargeable battery Wide angle PUSH (lens hood release) button PUSH AUTO button Push auto focus XQD Memory Cards Rec Format...
- Page 68 Additional information on this product and answers to frequently asked questions can be found at our Customer Support Website. Printed in China...
Need help?
Do you have a question about the Handycam FDR-AX1 and is the answer not in the manual?
Questions and answers