Table of Contents
Advertisement
Advertisement
Table of Contents

Related Manuals for Toyota Prius ZVW30 Series


Summary of Contents for Toyota Prius ZVW30 Series
- Page 1 Gasoline-Electric Hybrid Synergy Drive ZVW30 Series...
- Page 2 Foreword This guide was developed to educate and assist dismantlers in the safe handling of Toyota Prius gasoline-electric hybrid vehicles. Prius dismantling procedures are similar to other non-hybrid Toyota vehicles with the exception of the high voltage electrical system. It is important to recognize and understand the high voltage electrical system features and specifications of the Toyota Prius hybrid, as they may not be familiar to dismantlers.
-
Page 3: Table Of Contents
Table of Contents About the Prius ............................1 Prius Identification ............................ 2 Exterior ................................. 3 Prius Identification (Continued) ......................4 Interior ................................4 Engine Compartment ............................ 5 Hybrid Component Locations & Descriptions ..................6 Specifications ..............................7 Hybrid Synergy Drive Operation ......................8 Vehicle Operation ............................ -
Page 5: About The Prius
About the Prius The Prius continues into its 3 generation as a gasoline-electric hybrid vehicle. Hybrid Synergy Drive means that the vehicle contains a gasoline engine and electric motors for power. The two hybrid power sources are stored on board the vehicle: Gasoline stored in the fuel tank for the gasoline engine. -
Page 6: Prius Identification
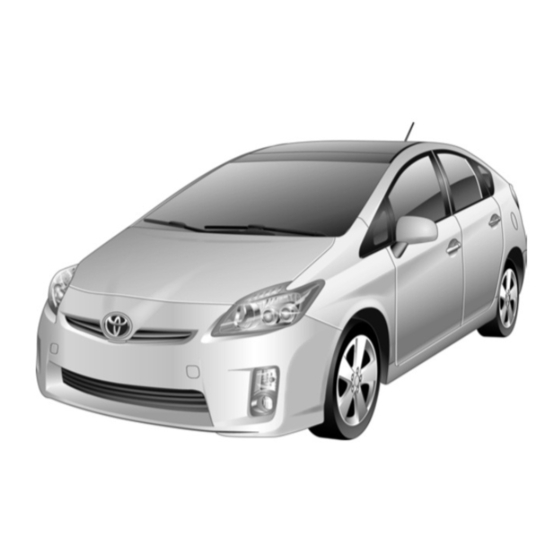
Prius Identification In appearance, the 2010 model year Prius is a 5-door hatchback. Exterior, interior, and engine compartment illustrations are provided to assist in identification. The alphanumeric 17 character Vehicle Identification Number (VIN) is provided in the front windshield cowl and on the driver door pillar. JTDKN3DUA82020211 or JTDKN36UA82020211 Example VIN: A Prius is identified by the first 8 alphanumeric characters JTDKN3DU or JTDKN36U. -
Page 7: Exterior
Prius Identification (Continued) Exterior logos on the back door. Gasoline fuel filler door located on driver side rear quarter panel. logo on each front fender. Exterior Driver Side View Exterior Front View Exterior Rear View ... -
Page 8: Prius Identification (Continued)
Prius Identification (Continued) Interior Instrument cluster (speedometer, READY light, shift position indicators, warning lights) located in center of the dash and near the base of the windshield. Hint: If the vehicle is shut off, the instrument cluster gauges will be “blacked out”, not illuminated. -
Page 9: Engine Compartment
Prius Identification (Continued) Engine Compartment 1.8-liter aluminum alloy gasoline engine. High voltage inverter/converter assembly with logo on the cover. Orange colored high voltage power cables. Engine Compartment View Power Cables... -
Page 10: Hybrid Component Locations & Descriptions
Hybrid Component Locations & Descriptions Component Location Description 12 Volt Passenger Side of A lead-acid battery that supplies power to the low voltage Auxiliary Battery Cargo Area devices. Hybrid Vehicle Cargo Area, 201.6 Volt Nickel Metal Hydride (NiMH) battery pack (HV) Battery Pack Mounted to Cross consisting of 28 low voltage (7.2 Volt) modules connected... -
Page 11: Specifications
Hybrid Component Locations & Descriptions (Continued) Specifications Gasoline Engine: 98 hp (73 kW), 1.8-liter Aluminum Alloy Engine Electric Motors 80 hp (60 kW), Permanent Magnet Motor Transmission: Automatic Only (electrically controlled continuously variable transaxle) HV Battery: 201.6 Volt Sealed NiMH Battery Curb Weight: 3,080 lbs/1,397 kg Fuel Tank: 11.9 gals/45.0 liters Fuel Economy... -
Page 12: Hybrid Synergy Drive Operation
Hybrid Synergy Drive Operation Once the READY indicator is illuminated in the instrument cluster, the vehicle may be driven. However, the gasoline engine does not idle like a typical automobile and will start and stop automatically. It is important to recognize and understand the READY indicator provided in the instrument cluster. -
Page 13: Hybrid Vehicle (Hv) Battery Pack And Auxiliary Battery
Hybrid Vehicle (HV) Battery Pack and Auxiliary Battery The Prius features a high voltage Hybrid Vehicle (HV) battery pack that contains sealed Nickel Metal Hydride (NiMH) battery modules. HV Battery Pack • The HV battery pack is enclosed in a metal case and is rigidly mounted to the cago area floor pan cross member behind the rear seat. -
Page 14: Hv Battery Pack Recycling
Hybrid Vehicle (HV) Battery Pack and Auxiliary Battery (Continued) HV Battery Pack Recycling • The HV battery pack is recyclable. Contact either your Toyota Distributor as mentioned on HV battery Caution Label (see page 28) or the nearest Toyota dealer. Auxiliary Battery •... -
Page 15: High Voltage Safety
High Voltage Safety The HV battery pack powers the high voltage electrical system with DC electricity. Positive and negative orange colored high voltage power cables are routed from the battery pack, under the vehicle floor pan, to the inverter/converter. The inverter/converter contains a circuit that boosts the HV battery voltage from 201.6 to 650 Volts DC. -
Page 16: Service Plug Grip
High Voltage Safety (Continued) Service Plug Grip • The high-voltage circuit is cut by removing the service plug grip (see page 15). 12 Volts Volts DC Hybrid Vehicle Computer Auxiliary Battery Compressor Electric Inverter/ Generator Converter Electric... -
Page 17: Precaution To Be Observed When Dismantling The Vehicle
Precaution to be observed when dismantling the vehicle WARNING: The high voltage system may remain powered for up to 10 minutes after the vehicle is shut off or disabled. To prevent serious injury or death from severe burns or electric shock, avoid touching, cutting, or opening any orange high voltage power cable or high voltage component. -
Page 18: Spills
Spills The Prius contains the same common automotive fluids used in other non-hybrid Toyota vehicles, with the exception of the NiMH electrolyte used in the HV battery pack. The NiMH battery electrolyte is a caustic alkaline (pH 13.5) that is damaging to human tissues. The electrolyte, however, is absorbed in the cell plates and will not normally spill or leak out even if a battery module is cracked. -
Page 19: Dismantling The Vehicle
Dismantling the vehicle The following 2 pages contain general instructions for use when working on a Prius. Read these instructions before proceeding to the HV battery removal instructions on page 18. WARNING: The high voltage system may remain powered for up to 10 minutes after the vehicle is shut off or disabled. - Page 20 Instead, wash the eye(s) with a dilute boric acid solution or a large amount of water and seek medical care. With the exception of the HV battery, remove parts by following procedures which are similar to conventional Toyota vehicles. For the removal of the HV battery, refer to the following pages.
-
Page 22: Removal Of Hv Battery
Removal of HV battery WARNING: Be sure to wear insulated gloves when handling high-voltage parts. Even if the vehicle is shut off and the relays are off, be sure to remove the service plug grip before performing any further work. Power remains in the high voltage electrical system for 10 minutes even after the HV battery pack is shut off because the circuit has a condenser that stores power. - Page 23 Disconnect the cable from the auxiliary battery negative (-) terminal. Disconnect the cable from the auxiliary battery positive (+) terminal. (6) Remove the 12volt auxiliary battery. 4. Remove the service plug grip. HV battery Caution: Wear insulated gloves for the following 3 steps.
- Page 24 6. Check the voltage at the terminals in the inspection point in the power control unit. Caution: Wear insulated gloves. To prevent serious injury or death, do not proceed with dismantling of the HV system until the voltage at the terminals in the inspection point is 0 V.
- Page 25 9. Remove the rear side seatback assembly (1) Remove the bolt. (2) Disengage the guides and remove the rear side seatback assembly RH. 10. Remove the rear seatback assembly LH. (1) Fold the rear seatback assembly LH forward. (2) Disengage the fastener.
- Page 26 (3) Remove the 2 bolts and rear seatback assembly LH. 13. Remove the rear seatback assembly RH. (1) Fold the rear seatback assembly LH forward. (2) Disengage the fastener. (3) Remove the 2 bolts and rear seatback assembly LH. 14. Remove the rear No. 1 floor board sub-assembly.
- Page 27 15. Remove the rear No. 2 floor board sub-assembly. Disengage the 2 claws and 2 clips, and remove the rear No. 1 floor board sub-assembly. 16. Remove the rear No. 1 floor board. Remove the bolt. (2) Disengage the 2 claws and 2 clips, and remove the rear No.
- Page 28 Remove the 2 bolts. (3) Disengage each guide and remove the 2 luggage hold belt striker assemblies. (4) Remove the screw. (5) Disengage the 7 claws and 2 clips, and remove the deck trim side panel assembly RH. 18. Remove the rear floor board spacer.
- Page 29 19. Remove the No. 1 hybrid battery exhaust duct. Caution: Wear insulated gloves for the following 2 steps. Using the service plug grip, remove the battery cover lock striker. Hint: Insert the projecting part of the service plug grip and turn the button of the battery cover lock striker counterclockwise to release the lock.
- Page 30 (2) Disconnect the battery cooling blower assembly connector and clamp. (3) Remove the 2 bolts, nut and battery cooling blower assembly. 22. Remove the 2 bolts and child restraint seat anchor bracket sub-assembly LH. 23. Remove the 2 bolts and child restraint seat anchor bracket sub-assembly RH.
- Page 31 26. The HV battery pack is recyclable. Contact your Toyota distributor (if included on the HV battery caution label) or contact the nearest Toyota dealer (see the next 2 pages for samples of the HV battery caution label). Caution: After removing the HV battery, do not reinstall the service plug grip to the HV battery.
-
Page 32: Hv Battery Caution Label
HV Battery Caution Label For U.S.A. For CANADA... - Page 33 For Europe...
Need help?
Do you have a question about the Prius ZVW30 Series and is the answer not in the manual?
Questions and answers
Is a ZVW30 model saloon car or SUV?
The Toyota Prius ZVW30 Series is a saloon car (sedan), not an SUV.
This answer is automatically generated