
Subscribe to Our Youtube Channel
Related Manuals for Defender Security 812BF


Summary of Contents for Defender Security 812BF
- Page 1 Operation Guide 2.4GHz Wireless Camera with Detecting Recorder Model No.: 812BF Version No.: 1.0 Please read this user Manual carefully before using this product!
-
Page 2: Table Of Contents
CONTENTS 1. Overview 2. Features 3. Packing List 4. Connection Diagram 5. Structure 6. Installation 7. Receiver Operation 8. Specifications 9. FCC & EU Back Cover... -
Page 3: Overview
Overview The wireless SDR harddisk recorder is a general harddisk recorder launched for civil security market. Designed with such new technologies as wireless transmission, motion detection, and SD card recording. It is one of the most advanced harddisk recording systems on the market.Provided with such features as high integration, complete auxiliary products, ease of use, high security, and competitive price. -
Page 4: Packing List
2.4GHz Wireless Camera x 1 2.4GHz Wireless Receiver x 1 Antenna for Receiver x 1 Adapter for Receiver x 1 Adapter for Camera x 1 Video Cable x 2 * 812BF means GP-812T + GB7301 Connection Diagram Camera adapter Camera Receiver adapter Monitor/TV... -
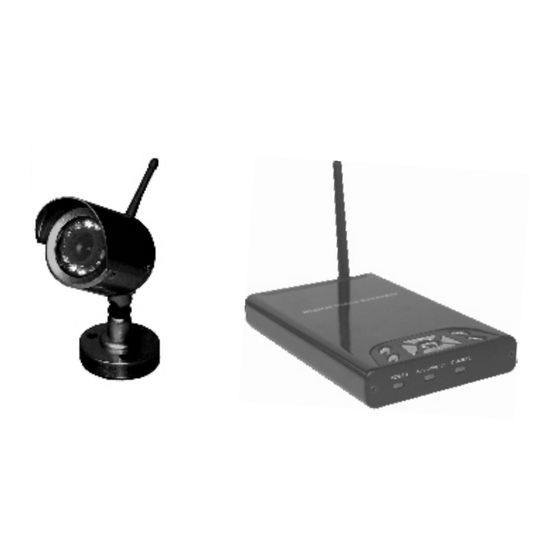
Page 5: Structure
Structure Camera GP-812T Antenna Infrared Lights Lens Universal Bracket Power Jack... - Page 6 Receiver Antenna Up Button OK Button Down Button Right Button Left Button Menu Button Channel Switch Record Button Play Button Channel Indicator Automatic Detection /Recording Indicator Power Indicator Video In Power Socket Power ON/Off SD Card Slot Video Out...
-
Page 7: Installation
Installation 1. Locate the camera to a specific position and then adjust it to a suitable angle. 2. Connect the adapter to the camera. 3. Connect the antenna to the receiver. - Page 8 4. Connect the receiver to a monitor/TV with AV cable. AV Cable 5. Connect the adapter for receiver to the receiver. 6. Please insert SD Card to SD Card Slot of receiver. Usable capacity:32M-2G 1G-2G recommended...
- Page 9 If the SD Card is inserted incorrectly or is not inserted, the monitor/TV will display SD Card not plug in , and only real-time monitoring is available at this time. Notes : * Make sure the protection switch on SD Card is turned on. * Never touch the metal part of the SD Card with bare hands for static electricity of human body may cause permanent damage to the SD Card.
- Page 10 Press Channel Button continuously, the Channel Indicator lights up.If the Channel Indicator flashes once, the channel is channel 1. If the Channel Indicator flashes twice continuously, the channel is channel 2. If the Channel Indicator flashes three times continu- ously, the channel is channel 3. If the Channel Indicator flashes four times continuously, the channel is channel 4.
-
Page 11: Receiver Operation
Receiver Operation 1. Menu Key Operation You are recommended to press menu key to set before its first use. Monitor/AV displays picture as follows, Press <Left/Right> key to select and press OK key to enter setting. Date/Time set up: Press the <Left/Right> and <Up/Down>... - Page 12 Advanced setup: Picture displays as follows, Press <Left/Right> key to select and press OK key to enter setting. A. TV setup: Press OK key to choose PAL or NTSC. B. Quality setup: Press OK key to choose High or Low. High (high quality) is recommended.
- Page 13 2. Shortcut keys on monitoring /Motion Detection Mode Monitor/TV window as following: 2008 / 07 / 24 16 : 08 : 26 :the icon indicates that the SD Card is inserted; : the icon indicates the motion detection function is on, if this function off, the icon will not display.
-
Page 14: Specifications
SPECIFICATIONS Items 812BF Imaging Sensor CMOS 720 480 (NTSC); 720 576(PAL) Total Pixels Modulation Type Transmission Frequency ISM 2,400~2,483MHz Transmission Power 2mW/FCC,10wm/CE 0 Lux Minimum Illumination Night Vision range Bandwidth 18MHz Power Supply Consumption Current(Max.) 160mA&250mA Dimensions(W x D x H) - Page 15 FCC INFORMATION This device complies with part15 of the FCC Rules. Operation is subject to the following two conditions: (1) this device may not cause harmful interference, (2) this device must accept any interference received, including interference that may cause undesired operation. Changes or modifications not expressly approved by the party responsible for compliance could void the user s authority to operate the equipment.
Need help?
Do you have a question about the 812BF and is the answer not in the manual?
Questions and answers