Table of Contents
Advertisement
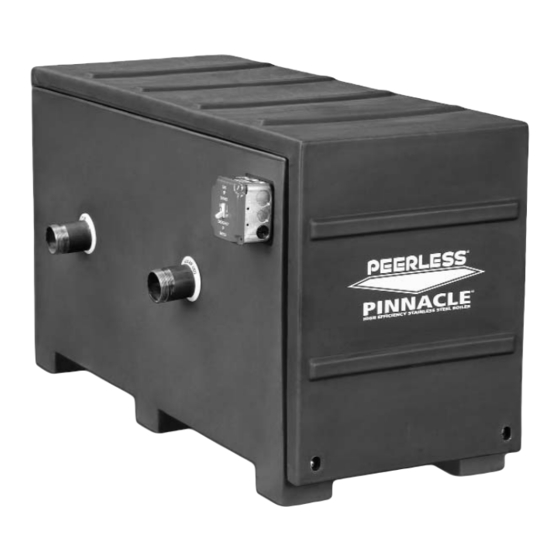
Peerless
Stainless Steel
WARNING
If the information in this manual is not
followed exactly, a fire or explosion may
result causing property damage, personal
injury or loss of life.
– Do not store or use gasoline or other
flammable vapors and liquids in the vicinity
of this or any other appliance.
– WHAT TO DO IF YOU SMELL GAS
• Do not try to light any appliance.
• Do not touch any electrical switch;
do not use any phone in your building.
• Immediately call your gas supplier from
a neighbor's phone. Follow the gas
supplier's instructions.
• If you cannot reach your gas supplier,
call the fire department.
– Installation and service must be performed
by a qualified installer, service agency or
the gas supplier.
Pinnacle
®
Gas Boilers PI-399
I n s t a l l a t i o n ,
O p e r a t i o n &
M a i n t e n a n c e
M a n u a l
®
Rev 2
Advertisement
Table of Contents

Related Manuals for PEERLESS Pinnacle PI-399


Summary of Contents for PEERLESS Pinnacle PI-399
- Page 1 Peerless Pinnacle ® ® Stainless Steel Gas Boilers PI-399 Rev 2 WARNING If the information in this manual is not followed exactly, a fire or explosion may result causing property damage, personal injury or loss of life. – Do not store or use gasoline or other flammable vapors and liquids in the vicinity of this or any other appliance.
-
Page 2: Table Of Contents
TABLE OF CONTENTS TABLE OF CONTENTS F. EXHAUST TAPPING FOR VENT USING THIS MANUAL SAMPLE ......20 A. -
Page 3: Using This Manual
USING THIS MANUAL USING THIS MANUAL A. INSTALLATION SEQUENCE DANGER Follow the installation instructions provided in this Indicates a condition or hazard which will cause manual in the order shown. The order of these severe personal injury, death or major property instructions has been set in order to provide the installer damage. -
Page 4: Preinstallation
A. GENERAL the installation must conform to the Standard for Controls and Safety Devices for Automatically Fired 1. Pinnacle boilers are supplied completely assembled Boilers, ANSI/ASME CSD-1. as packaged boilers. The package should be inspected for damage upon receipt and any damage... -
Page 5: Accessibility Clearances
PREINSTALLATION C. ACCESSIBILITY CLEARANCES E. PLANNING THE LAYOUT 1. The Pinnacle boiler is certified for closet installations 1. Prepare sketches and notes showing the layout of the with zero clearance to combustible construction. In boiler installation to minimize the possibility of... -
Page 6: Boiler Set-Up
BOILER SET-UP 2. BOILER SET-UP A. GENERAL 1. Pinnacle boilers are to be installed in an area with a floor drain or in a suitable drain pan. Do not install any boiler where leaks or relief valve discharge will cause property damage. -
Page 7: Water Piping And Controls
B. OPERATING PARAMETERS due to corrosion. 1. The Pinnacle boiler is designed to operate in a closed loop hydronic system at approximately 15 psi. A WARNING pressure limit in the boiler header will prevent the... - Page 8 For a PI-399 with a design temperature difference of 20°F the 10. Circulator: The boiler circulator is to be sized to...
- Page 9 Table 3.3 shows the pressure drop (in feet of NOTICE water) for a flow rate which gives a 20°F temperature difference for the PI-399 boiler. The circulator sizing given is for primary/secondary installations only. The system circulators must be Table 3.3 –...
-
Page 10: System Piping
WATER PIPING AND CONTROLS 6. Due to increased flow rate and fluid viscosity the D. SYSTEM PIPING circulator head requirement will increase. Contact the pump manufacturer to correctly size the circulator for 1. Figure 3.3 shows a single boiler with one heating a particular application based on the glycol zone and a Peerless Partner indirect water heater. - Page 11 WATER PIPING AND CONTROLS...
- Page 12 WATER PIPING AND CONTROLS...
- Page 13 WATER PIPING AND CONTROLS...
- Page 14 WATER PIPING AND CONTROLS...
- Page 15 WATER PIPING AND CONTROLS...
- Page 16 WATER PIPING AND CONTROLS Figure 3.8: Boiler in conjunction with a Chilled Water System Figure 3.9: Boiler Connected to a Heating Coil in a Forced Air System...
-
Page 17: Gas Piping
0.50 0.55 0.60 0.65 0.70 0.75 Model Natural Gas LP Gas Gravity PI-399 Correction 1.10 1.04 1.00 0.96 0.93 0.90 Factor *Natural gas input rates are based on 1000 Btu/ft ³ , LP input rates are based on 2500 Btu/ft ³ . -
Page 18: Gas Supply Piping - Operation
7. Figure 11.1 shows the gas shutoff valve (item 8) for the gas supply to be interrupted for service. the Pinnacle Boiler. This valve is to be used in addition to the gas service valve shown in Figure 4.1. D. GAS SUPPLY PIPING - OPERATION 1. -
Page 19: Main Gas Valve - Operation
Remove the manometer tube from the pressure 1. Figure 4.2 shows an illustration of the gas valve/venturi tap fitting and turn the screw to close the internal assembly for the Pinnacle PI-399. valve. a. The throttle screw on the valve should not be adjusted without a means to measure carbon i. -
Page 20: Venting, Intake Air & Condensate
Maximum distance between air intake and exhaust vent is 6 feet (1.8 m). Minimum distance between exhaust vent and air intake on single Pinnacle is 8" (0.2 m) center-to-center. Minimum distance between vents and intake on multiple Pinnacles is 8" (0.2 m) center-to-center. See... -
Page 21: Exhaust Vent And Intake Air Pipe Sizing
45° elbow and 10 feet of PVC pipe, the SIZING following calculation applies: 1. For the PI-399 Boilers the exhaust vent and air Air Intake Pipe Equivalent Length = (2x3)+1+10=17 feet intake pipes should be 4" Schedule 40 or 80. -
Page 22: Exhaust Vent And Air Intake Pipe Installation
Drill a 21/64" diameter hole in the vent pipe just above the first elbow. 1. On the PI-399 the 4" exhaust vent connection is b. Tap the hole with a 1/8" NPT Pipe Tap. located on the rear of the boiler and the air intake is higher and toward the left side when the boiler is c. - Page 23 PI-399 Sidewall Venting with 4" Pipe (Exhaust Termination at Higher Elevation than Air Intake). Figure 5.4: PI-399 Sidewall Venting with 4" Pipe (Air Intake and Exhaust on the same Elevation). WARNING All exhaust vent pipes must be glued, properly supported, and pitched at a minimum of ¼" per foot back to the boiler.
- Page 24 VENTING, INTAKE AIR AND CONDENSATE Figure 5.5: PI-399 Sidewall Venting with 4" Pipe (Stainless Steel Vent Kit). Figure 5.6: PI-399 Vertical Venting with 4" Pipe. WARNING All exhaust vent pipes must be glued, properly supported, and pitched at a minimum of ¼" per foot back to the boiler.
-
Page 25: Condensate Drain Installation
VENTING, INTAKE AIR AND CONDENSATE H. BOILER REMOVAL FROM COMMON VENTING SYSTEM 1. At the time of removal of an existing boiler from a common venting system, follow these steps with each appliance that remains connected. These steps are to be completed while all components which remain connected to the common venting system are not in operation. -
Page 26: Electrical
ELECTRICAL 6. ELECTRICAL Install all electrical wiring in accordance with the National A. WIRING Electrical Code, ANSI/NFPA 70, and local requirements. 1. Refer to Figure 6.1 for connecting the power supply to the boiler. NOTICE 2. Connect boiler to a 110 volt, single phase, 60 hertz This unit when installed must be electrically electrical supply line with a fused disconnect switch. -
Page 27: Sequence Of Operation
ELECTRICAL 4. Wire the burner service switch in the hot line to the B. SEQUENCE OF OPERATION boiler as shown in Figure 6.1. 1. System Power-Up: 5. Make sure to maintain correct polarity on the incoming a) When power is first applied to the boiler, the power supply wires. - Page 28 ELECTRICAL Figure 6.3: P825 Control Board with Molex ® Connector & Pin Designations...
-
Page 29: Safety Interlocks
ELECTRICAL d) Once the pre-purge cycle is complete, the fan j) If an indirect limit is connected between two light speed decreases to the programmed ignition blue (DHW) wires, the boiler will run the same as speed. described in 2.a through i except it will use the Indirect (DHW) setpoint. -
Page 30: Control Functions
Supply Set 50°F to 201°F 180°F D. CONTROL FUNCTIONS Point (10°C to 94°C) 1. This Pinnacle boiler is equipped with a P825 Control Set Point 5°F to 30°F 30°F Board. This control board with display module has Differential (3°C to 17°C) - Page 31 ELECTRICAL 4. Error Codes: The LED Display will display error codes 7. Service Mode: The Pinnacle boiler can be operated if the boiler is in a temporary fault condition. Table 8.1 in Service Mode to allow the installer to manually set shows Error Codes and descriptions.
-
Page 32: Heating Curve
ELECTRICAL c. Table 6.3 shows the Parameter numbers and • If this temperature is below the mild weather boiler Functions. Press S3 "Program" to advance through reference temperature, the boiler will continue to the parameters and use the S1/- and S2/+keys to target lower temperatures as the outdoor change the function values. - Page 33 ELECTRICAL Figure 6.6: Central Heating Curve (Factory Defaults) Figure 6.7: Central Heating Curve (Installer Settings)
-
Page 34: Start-Up Procedures
START-UP PROCEDURES 7. START-UP PROCEDURES 8. If a supply pressure check is required, isolate the A. COMPLETING THE INSTALLATION boiler and gas valve before performing the pressure test. If the supply pressure is too high or too low, 1. Confirm that all water, gas and electricity are contact the fuel gas supplier. -
Page 35: Lighting/Operating Procedures
START-UP PROCEDURES B. LIGHTING AND OPERATING PROCEDURES Figure 7.1: Lighting and Operating Instructions... -
Page 36: Check-Out Procedure
START-UP PROCEDURES b) Place the probe of a combustion analyzer with C. CHECK-OUT PROCEDURE carbon dioxide (CO2) and and carbon monoxide After Starting the boiler, be certain that all controls are (CO) reading capability (Testo Model 325-M or working properly and that combustion is properly set up. equivalent) into the combustion test port. - Page 37 START-UP PROCEDURES f) To exit Service Mode, press the S1/- and S2/+ 4. Turn off the automatic fill to the boiler and drain keys simultaneously and hold them until the some water to drop the system pressure below 10 display shows the outlet temperature. psig.
-
Page 38: Troubleshooting
TROUBLESHOOTING 8. TROUBLESHOOTING A. BOILER ERROR DANGER 1. When an error condition occurs the controller will When servicing or replacing components that are in display an error code on the display module. direct contact with the boiler water, be certain that: •... - Page 39 TROUBLESHOOTING Table 8.2: P825 Control Board Fault Codes Fault Description Corrective Action Code 1. Check circulation pump operation. 2. Assure that there is adequate flow through the boiler by accessing the status menu and confirming that there is less than a 50°F rise from the return thermistor to the supply thermistor.
-
Page 40: Maintenance
MAINTENANCE 9. MAINTENANCE WARNING Product Safety Information Refractory Ceramic Fiber Product This appliance contains materials made from refractory ceramic fibers (RCF). Airborne RCF, when inhaled, have been classified by the International Agency for Research on Cancer (IARC), as a possible carcinogen to humans. After the RCF materials have been exposed to temperatures above 1800°F (980°C), they can change into crystalline silica, which has been classified by the IARC as carcinogenic to humans. -
Page 41: General (With Boiler In Use)
The following annual inspection must be performed INSTRUCTIONS by a qualified service technician. 1. Turn the thermostat down or off so the Pinnacle will not cycle and then follow the steps below. 1. Check boiler room floor drains for proper a. -
Page 42: Combustion Chamber Coil Cleaning Instructions
(available online www.rydlyme.com) or "CLR" may result in severe personal injury or death. (available at most hardware stores) f. Turn the power to the Pinnacle on. Observe the 1. Shut the boiler down and access the heat exchanger display module to assure proper operation. -
Page 43: Boiler Dimensions & Ratings
BOILER DIMENSIONS & RATINGS 10. BOILER DIMENSIONS & RATINGS A. BOILER DIMENSIONS 1. Figure 10.1 shows the dimensions of the PI-399. Figure 10.1: PI-399 Dimensions... - Page 44 BOILER DIMENSIONS & RATINGS Table 10.1: Boiler Ratings Peerless Pinnacle Shipping Input, MBH Net I=B=R Weight, Gross Thermal Combustion Model Ratings Output, Efficiency, Efficiency, Number Water¹ ², ’ PI-399 93.4 95.1 Net I=B=R ratings are based on an allowance of 1.15.
- Page 45 This page intentionally left blank.
-
Page 46: Repair Parts
Repair parts are available from your installer or by contacting PB Heat, LLC, 131 S. Church, Bally, PA 19503. Use the Figures and Tables on Pages 44-45 to assist in ordering parts. Note: Remember to include boiler model number and serial number when ordering parts. Figure 11.1: Pinnacle P399 Repair Parts... - Page 47 Screw 1/4-20 x 3/4" Phil Rd Hd Gasket – Flame Sensor / Ignitor 91491 Mounting Panel – Control Board Electrode Spark 91550 Control Board w/ Fuse PI-399 91569 Screw M4-070 x 8 mm Phil Rd Hd Low Voltage Wiring Harness (Not Shown) 91578 Flame Sensor...
-
Page 48: Appendix A. Startup Combustion Record
STARTUP COMBUSTION RECORD APPENDIX A. STARTUP COMBUSTION RECORD Peerless ® Pinnacle ® Startup Combustion Record Contact: Company Name: Address: Phone Number: Fax Number: Email Address: Jobsite Data Job Name: Jobsite Address: Boiler Data Boiler Model: Boiler Serial No.: Manufacture Date:... - Page 49 NOTES...
- Page 50 NOTES...
- Page 51 Pinnacle ® ® Stainless Steel Gas Boilers PI-399 Rev 2 I n s t a l l a t i o n , O p e r a t i o n & M a i n t e n a n c e...
Need help?
Do you have a question about the Pinnacle PI-399 and is the answer not in the manual?
Questions and answers
when the green light flashes 4 times. what is the correction?
When the green light on the Peerless PI-399 flashes 4 times, it indicates a "Loss of Flame Signal." This means the boiler attempted to ignite but lost the flame signal during operation. The boiler will try to relight 4 times before going into lockout.
This answer is automatically generated