
Related Manuals for Storage Options CCTV SECURITY SYSTEM


Summary of Contents for Storage Options CCTV SECURITY SYSTEM
- Page 1 CCTV SECURITY SYSTEM INSTRUCTION MANUAL For the latest, up-to-date manual, please visit www.storageoptions.com...
- Page 2 IMPORTANT SAFEGUARD All lead-free products offered by the company comply with the requirements of the European law of the Restriction of Hazardous Substances (RoHS) directive, which means our manufacturing processes and products are strictly “lead-free” and without the hazardous substances cited in the directive. The crossed-out wheeled bin mark symbolizes that within the European Union the product must be collected separately at the product’s end-of-life.
-
Page 3: Table Of Contents
TABLE OF CONTENTS OVERVIEW PACKAGE CONTENTS INSTALLATION 3.1 – Mounting Cameras 3.2 – Connecting Cameras to the DVR 3.3 – Connecting the DVR to a Monitor 3.4 – Connecting the DVR to the Mains Supply BASIC OPERATION 4.1 – Power On / Off 4.2 –... -
Page 4: Overview
OVERVIEW Key Features Storage Options presents a complete CCTV solution for home or office security, featuring up to four high-quality cameras, internal HDD, easy setup and configuration, alarm triggers, and network connectivity. Stand-alone DVR with H.264 compression High quality video recording and playback ... - Page 5 Search and Playback Search by date / time or list Normal / alarm-triggered search 4 Channel Playback Synchronised playback of 2 channel or 4 channel AV Transport: Fast forward, fast rewind, pause, single frame, previous track, next track, track head, track end Alarm Function ...
-
Page 6: Package Contents
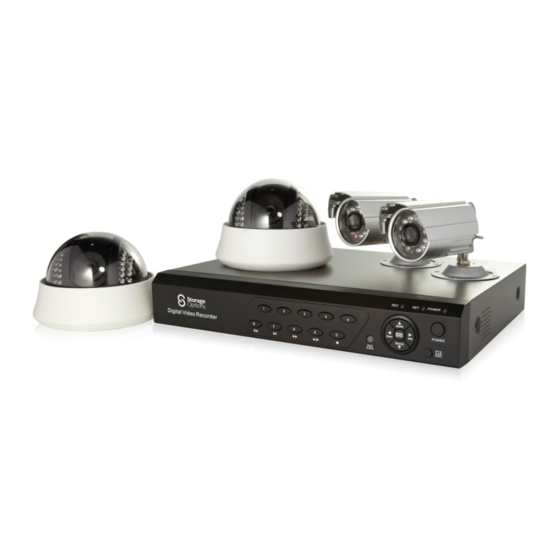
PACKAGE CONTENTS Digital Video Recorder Mains adapter Mains splitter cable Remote control Mouse 2x AAA batteries Cables Manual Outdoor Camera Camera Video / power combo cable Mounting kit (screws & plugs) Wall bracket Dome Camera Camera Video / power combo cable Mounting kit (screws &... -
Page 7: Installation
INSTALLATION 3.1 – Mounting Cameras The cameras are supplied with mounting kits for attaching to a wall. Before you affix the cameras in position, please ensure the cable is of adequate length to reach the DVR. To mount each camera on a wall or ceiling, follow these instructions: Outdoor Camera 1. - Page 8 While holding the locking mechanism in the unlocked position, flip the camera over and twist the ceiling mount unit (large black plastic) anti- clockwise to unlock and release it. Ensure the surface you want to mount the camera on is solid and can support the weight.
-
Page 9: Connecting Cameras To The Dvr
3.2 – Connecting Cameras to the DVR Each of the four cameras connects directly to the DVR via the DB25 interface cable. Black BNC: 4x video input – connect to cameras Yellow BNC: 1x video output to BNC monitor Red RCA: 1x audio output (not applicable) White RCA: 4x audio input (not applicable) Connect a camera to each of the four black BNC cables and securely attach the DB25 cable to the DB25... -
Page 10: Connecting The Dvr To The Mains Supply
3.4 – Connecting the DVR to the Mains Supply Please connect the included multi mains adapter to the “DC12V5A” connection on the back of the DVR and to each camera as explained in the diagrams below. A: 4x power plugs connect to each camera cable B: 1x power plug to connect to “DC12V5A”... -
Page 11: Basic Operation
BASIC OPERATION 4.1 – Power On / Off To power on the DVR, press the button once on the main unit, or press the button on the remote control. To power off the DVR, press the button once and a message stating “Press POWER again to shut down” will appear on-screen. -
Page 12: Playback
4.4 – Playback To play previously recorded video, you must first use the search function to find a date and approximate time to view. To do this: ↓ 1. Press the “Search” ( ) button to access the Search menu. 2. -
Page 13: Remote Control Functions
4.6 – Remote Control Functions The remote control provides easy access to a variety of commands on the DVR system. Please insert 2x AAA batteries before use. Switches the DVR system on / off Switches audio on / off Starts and stops continuous recording ALERT Turns on / off the alert function. -
Page 14: Menu Functions
BASIC MENU FUNCTIONS 5.1 – Accessing the Menu To access the DVR menu, press the “Menu/Enter” button on the front panel or remote control. You will be prompted to give a pass code. By default the pass code for the administrator account is “88888888” (you can change this to something more suitable if you wish). -
Page 15: Basic
Choose from 14 languages. Brightness: Choose system-wide brightness for the DVR, scale from 0 - 100% (default 50%). If you have more than one Storage Options DVR, you can give the unit an identification DVR ID: number here. Enable System Log: If checked, the DVR will write system events to a log file. -
Page 16: Live
5.3 – Live Under the live menu you can adjust the settings of individual cameras. Settings on this page refer to an individual camera. Please choose the camera you wish to Channel: change settings for from the Channel menu. Name: Type a unique, descriptive name for the selected camera. -
Page 17: Record
5.4 – Record This menu allows you to change multiple image quality settings for each camera. The "Copy To" function can be used to apply the settings from one camera to another or all cameras connected to the system. Video Resolution: Choose the image resolution, CIF (lowest quality) to 4CIF (highest quality). -
Page 18: Network
5.5 – Network Here you can choose how the DVR connects to your network. Please connect the DVR via RJ45 LAN cable before changing these settings. The following settings only need to be configured if you choose "Static IP". "DHCP" allows the DVR to automatically receive network settings. Set to "Static IP" if you IP Config: would like to configure these settings manually. -
Page 19: Alarm Set
5.6 – Alarm Set This page is for advanced users only, and allows the DVR to be connected to a building alarm system to provide automatic activation when the DVR's own alarm (e.g. motion detection) is triggered. Due to the nature of connected alarms all being configured differently, we cannot provide support on this feature. -
Page 20: Ptz
5.8 – PTZ The cameras within the Storage Options CCTV System are static and designed to be mounted facing a specific direction. As such, they do not feature Pan / Tilt / Zoom functionality, so this page is not applicable. -
Page 21: User
5.10 – User This page allows the user to make changes to accounts and access levels. You may set up multiple users to have access to different features of the DVR. User: Choose the account you would like to edit. Current Pwd: Only enter the current password here if you intend to change it in the next field. -
Page 22: Backup
5.11 – Backup This page allows the user to backup video recordings from all four cameras to a USB device, such as flash drive or portable HDD. Before using this feature, please connect your USB device to one of the ports on the back of the DVR. From: Select a date and time to start the backup from. -
Page 23: Tools
5.12 – Tools This page contains various system tools which enable the administrator to manage the DVR. Loads default configuration values for the DVR. Please only select if you wish to reset Load Default: configuration to factory settings! For advanced users only. Enter the network location of a firmware update file to update the Update Firmware: system. -
Page 24: Network Functions
NETWORK FUNCTIONS 6.1 – Connecting the DVR to a Network The Storage Options CCTV System can be connected to a network and many of it’s functions can be used on a computer. Network 1. Connect an RJ45 network cable to the “Network” port on the back of the DVR. -
Page 25: View And Record Live Cameras
6.2 – View and Record Live Cameras Once connected to the camera’s Web server, you can view all four camera feeds and also perform other functions. 1. Click the “Home” icon on the menu bar. 2. Double-click or drag each camera to the main window (3) to display the live feed on screen. 3. -
Page 26: Playback Of Recordings On The Dvr
6.3 – Playback of Recordings on the DVR Recordings that have been made on the DVR can be viewed on a computer via the browser interface. 1. Click the “Playback” icon on the menu bar. 2. Choose the required camera from the list. 3. -
Page 27: Viewing Logs
6.4 – Viewing Logs The system log is a list of all actions taken on the DVR, such as start / stop record, errors, alarms, account logins, etc. 1. Click the “Log” icon on the menu bar. 2. Select which log type you would like to view, as well as the dates and times to restrict the search to. 3. -
Page 28: Remote Dvr Configuration
6.5 – Remote DVR Configuration Configuration for the DVR (covered in section 5 – Menu Functions) can also be done via a computer, across the network. From the main interface in your Web browser, click the top menu button (see image, right) to open the Remote DVR Configuration window. - Page 29 Alarm Config This page is for advanced users only, and allows the DVR to be connected to a building alarm system to provide automatic activation when the DVR's own alarm (e.g. motion detection) is triggered. Due to the nature of connected alarms all being configured differently, we cannot provide support on this feature.
- Page 30 6.6 – Setting Local Folders The “Local Set” window allows you to set the default folders for video and frame captures to be saved to. Click the “Local Set” button (pictured right) to open the settings menu. Set the folder to save video transfers (from DVR to computer). Storage Path: See section 6.3 –...
-
Page 31: Using Zmeye For Android
Enter the settings menu (see above) Change camera group (1-4, 5-8, 9-12, 13-16). Only cameras 1-4 are applicable on the Storage Options DVR. Shows information about the ZMEye software. Select the camera you wish to view. ZMEye is also available for Apple iPhone products. Please visit the iTunes store to download. -
Page 32: Troubleshooting
If not, please check the monitor is turned on and that the VGA / BNC cable is connected securely. Check the monitor is connected to a mains supply. Why do my recorded videos have no audio? The outdoor and dome cameras included in the Storage Options CCTV System do not have audio capabilities. Page 32... -
Page 33: Appendix - Product Specifications
APPENDIX - PRODUCT SPECIFICATIONS Digital Video Recorder (DVR) Compression Standard: H.264 Video Input: 4 channel Video Output: 1 channel Audio Input: 4 channel Audio Output: 1 channel Resolution (Display / Record): PAL: 704 x 576 / 352 x 288; NTSC: 704 x 480 / 352 x 240 Video Frames: PAL: 25fps;... - Page 34 APPENDIX - PRODUCT SPECIFICATIONS Outdoor Camera Image Sensor: 1/4” SONY Super HAD CCD Effective Pixels: PAL: 500(H) x 582(V); NTSC: 510(H) x 492(V) Signal System: PAL / NTSC Horizontal Resolution: 420 TV Lines Lens: 6mm Standard Minimum Illumination: 0 Lux (IR on) Video Output: 1.0V p-p 75Ω...
- Page 35 APPENDIX - PRODUCT SPECIFICATIONS Dome Camera Image Sensor: 1/3" SONY Super HAD CCD Effective Pixels: PAL: 500(H) x 582(V); NTSC: 510(H) x 492(V) Signal System: PAL / NTSC Horizontal Resolution: 420 TV Lines Lens: 3.6mm Standard Minimum Illumination: 0 Lux (IR on) Video Output: 1.0V p-p 75Ω...
- Page 36 Storage Options Analogue CCTV System Made in Taiwan Page 36...
Need help?
Do you have a question about the CCTV SECURITY SYSTEM and is the answer not in the manual?
Questions and answers