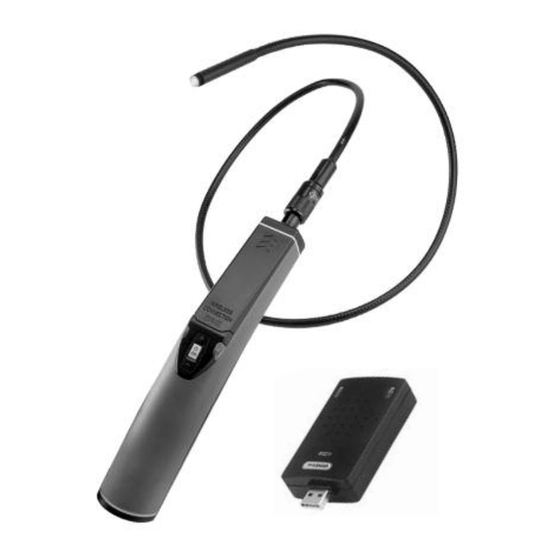
Summary of Contents for General DCS100
- Page 1 EEKER ™ USER’S MANUAL DCS100 WIRELESS USB VIDEO INSPECTION SYSTEM Please read this manual carefully and thoroughly before using this product.
-
Page 2: Table Of Contents
TABLE OF CONTENTS Introduction ......3 Two Main Components ....3 – 4 Key Features . -
Page 3: Introduction
Inspection System from General Tools & Instruments. We strongly suggest that you read this user’s manual carefully before using the product. The Seeker 100 is a unique member of General’s award-winning Seeker family of video inspection system. Its wireless USB connection and Skype ™... -
Page 4: Key Features
The unit ships with a 12mm (0.47 in.) diameter probe that is water, oil and dustproof. However, the grip also can accept 9.0mm and 5.5mm probes available from General, as well as extensions that increase the maximum overall probe length to 5m (about 10 ft.). -
Page 5: System Introduction
SYSTEM INTRODUCTION 1. THE SEEKER 100 SYSTEM The Seeker 100 system (the grip and a 1m long, 12mm diameter probe) comes fully assembled in a custom carrying case along with the following components: • The RCV100 Wireless USB Video Receiver and its components and user’s manual •... -
Page 6: The Rcv100 Usb Wireless Usb Video Receiver Components
2. THE RCV100 WIRELESS USB VIDEO RECEIVER COMPONENTS The RCV100 ships with an installation CD, a 3 ft. long USB extension cable and a video input cable. 1. Wireless receiver 2. Installation CD 3. USB extension cable 4. Video cable 3. - Page 7 The battery of a new Seeker 100 is VIDEO PORT CHARGING PORT possibly in a fully discharged state. To charge it, plug one end of the supplied AC adapter into a 120-V socket and the other into the jack at the upper right of the base of the grip labeled “DC 5.5V”...
-
Page 8: Install The Software
INSTALL THE SOFTWARE 1. Place the installation disk CD in your computer’s CD/DVD drive and close the drawer. After the CD loads, the “Welcome to the Scope View Setup Wizard” screen will appear. Click Next to continue. (Using the ScopeView Setup Wizard) In addition to installing the ScopeView application, you can also use the ScopeView Setup Wizard to: •... -
Page 9: Install And Sync The Hardware
7. Show your desktop. Note that the installation has placed a icon on your desktop. Also note that a ScopeView folder containing applications, application extensions and drivers has been added to your ProgramFiles folder. INSTALL AND SYNC THE HARDWARE 1. Run ScopeView. Before plugging in the RCV100, run ScopeView, either by double-clicking its desktop icon or by following the path “Start”->“All Programs”->“ScopeView”and clicking on the application’s icon. - Page 10 When you click Connect, the main screen of ScopeView should begin showing a live video feed from your Seeker 100 that looks like this: Note that once the RCV100 is connected, the green LED below the General logo will light, indicating its readiness to receive video and photos.
-
Page 11: Operating Instructions
OPERATING INSTRUCTIONS NORMAL OPERATION In most cases, you will perform some or all of the following steps each time you use the Seeker 100 and RCV100 for an inspection session: • Start ScopeView • Power on your Seeker 100 and sync it to the RCV100 •... - Page 12 To start capturing video, click the icon on the toolbar. When you do so, note that on the right side of the status bar the word “Connected” changes to “Capturing…” and that a stopwatch begins running at its right. To stop capturing video, click the icon again.
-
Page 13: Wired Option
To view a captured photo in the main window, double-click its icon in the Preview Pane. Note that when a picture is displayed in the main window, the Photo Control bar also appears below it. Use the controls on the bar to zoom in or out on the picture or rotate it 90º... -
Page 14: Using Skype To Stream Video
USING SKYPE TO STREAM VIDEO 1. Make sure that your Windows computer is connected to the Internet 2. Download the Skype application (be sure it is version 4.2.0.169 or later) from www.skype.com 3. Install the Skype software on your computer, complete the user profile and set up a Skype account 4. -
Page 15: Specifications
SPECIFICATIONS The Seeker 100 DCS100 Image size 320 x 240 pixels Minimum focal distance 4 in. (102mm) Viewable angle 60° Probe length 1m (3.28 ft.) Probe diameter 12mm (0.47 in.) Wireless transmission range 10m (33 ft.), greater with no obstacles Transmission frequencies 2.414 GHz, 2.432 GHz,... -
Page 16: Maintenance Tips
MAINTENANCE TIPS The Seeker 100 requires no routine maintenance other than periodic cleaning. To clean the instrument, use a soft dry cloth. Never use a wet cloth, solvents or water. Although the probe and camera head are water, dust and oil proof, refrain from immersing them in liquids or allowing them to come into contact with corrosive chemicals. -
Page 17: Warranty Information
Subject to certain restrictions, General will repair or replace this instrument, if after examination, it is determined by General to be defective in material or workmanship. - Page 18 NOTES ____________________________________________________ ____________________________________________________ ____________________________________________________ ____________________________________________________ ____________________________________________________ ____________________________________________________ ____________________________________________________ ____________________________________________________ ____________________________________________________ ____________________________________________________ ____________________________________________________ ____________________________________________________ ____________________________________________________ ____________________________________________________ ____________________________________________________ ____________________________________________________...
- Page 19 NOTES ____________________________________________________ ____________________________________________________ ____________________________________________________ ____________________________________________________ ____________________________________________________ ____________________________________________________ ____________________________________________________ ____________________________________________________ ____________________________________________________ ____________________________________________________ ____________________________________________________ ____________________________________________________ ____________________________________________________ ____________________________________________________ ____________________________________________________ ____________________________________________________...


Need help?
Do you have a question about the DCS100 and is the answer not in the manual?
Questions and answers