Table of Contents
Advertisement
Advertisement
Table of Contents

Subscribe to Our Youtube Channel
Related Manuals for InFocus IN1112A


Summary of Contents for InFocus IN1112A
- Page 2 This device complies with part 15 of the FCC Rules. Operation is subject to the following two InFocus reserves the right to alter product offerings and specifications at any time without conditions: (1) This device may not cause harmful interference, and (2) this device must notice.
-
Page 3: Table Of Contents
Table of Contents Maintenance Cleaning the lens Introduction Using the security lock Positioning the projector Replacing the projection lamp Connecting a computer source VESA connection HDMI connection Power connection Optional computer connections Displaying an image Adjusting the image Video device connections Composite video connection HDMI 1.4 connection VESA connection... - Page 4 Locate the projector at least 4' (1.2 m) away from any heating or cooling vents. • Only genuine InFocus lamps are tested for use in this projector. InFocus is not liable for the performance, safety or certification of any other lamps. The use of other lamps violates the projector warranty and voids all certification marks on this projector.
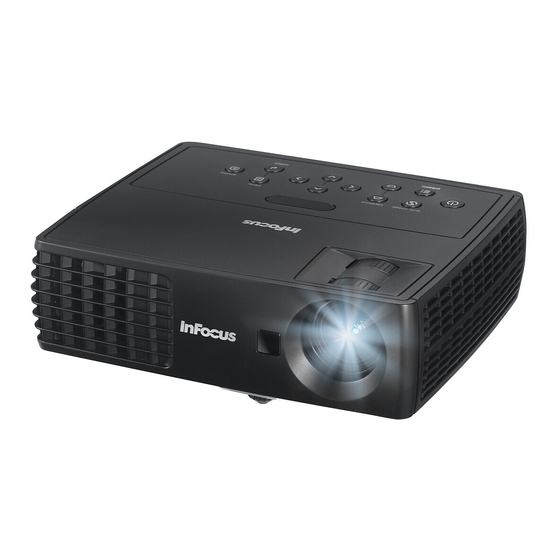
- Page 5 Your new digital projector is simple to connect, easy to use, and straightforward to push-button keypad maintain. The IN1110a has native XGA 1024x768 resolution, and the IN1112a has WXGA 1280x800 resolution. This guide applies to all products. They are compatible with a wide variety of computers and video devices.
- Page 6 Connector panel • Composite video The projector provides the following connectors: • Mini USB Type B: Used for advancing slides, Display over USB, saving files to internal memory and software upgrades. • USB Type A: Used to display photos, videos and other files from a USB source device.
-
Page 7: Positioning The Projector
The image exits the projector at a given angle. IN1110a image offset is 115%; Table 2: (IN1112a) IN1112a image offset is 112.4%. This means that if you have an image 10’ high, the bottom of the image will be 1.5' (IN1110a) and 1.24' (IN1112a) above Range of distance to the screen for a given screen size the center of the lens. -
Page 8: Vesa Connection
Connecting a computer source VESA connection connect computer cable multimedia Connect one end of the provided computer cable to the Computer connector on the ® projector and the other to the VESA connector on your computer. If you are using a desktop computer, you will need to disconnect the monitor cable from the computer’s video port first. -
Page 9: Displaying An Image
Displaying an image press Power button Touch the Power button. The Power indicator blinks green and the fans start to run. When the lamp comes on, the start up screen displays and the Power indicator is steady green. It can take a minute for the image to achieve full brightness. -
Page 10: Adjusting The Image
Adjusting the image release button adjust height If necessary, adjust the height of the projector by pressing the elevator foot release button to extend the foot. If necessary, rotate the leveling foot located at the rear of the projector. Avoid placing your hands near the hot exhaust vent at the side of the projector. elevator foot Position the projector the desired distance from the screen at a 90 degree angle to the screen. -
Page 11: Video Device Connections
No video cables are provided with the projector. You can order cables from VESA adapter can be used. Plug the component cable into the video device. Plug InFocus or provide your own. the other end of the component cable into the adapter and plug the adapter into the Computer connector. -
Page 12: Shutting Down The Projector
The Status Indicator Panel on top of the projector indicates the state of the projector the projector on again. Visit and can help you troubleshoot. www.infocus.com/support to contact service. Lamp Turn off the projector and wait one minute, then turn the projector on again. - Page 13 Problem Solution Result No start up screen Plug power cord into the projector and press the Correct image power button multimedia ® Only start up screen appears Computer image projected Press the Source button activate laptop’s external port Restart laptop...
- Page 14 Problem Solution Result No computer image, just the words “Signal out Press the Auto Image button on the keypad. Adjust computer Computer image projected of range” refresh rate (Windows 7: Control Panel > Display > Screen Resolution > Advanced Settings > Monitor tab). Varies per operating system.
- Page 15 Problem Solution Result Image fuzzy or cropped Change the computer's "Resolution" setting to match the Image clear and not cropped projector's resolution (Windows 7: Control Panel > Display > Screen Resolution). Varies per operating system. Image not centered on screen Move projector, adjust zoom, adjust height Correct image audio in...
- Page 16 Problem Solution Result Image not square Adjust Keystone on keypad Square image Image not sharp Adjust Sharpness in the Basic menu Correct image Image does not fit 4:3 or 16:9 screen Change aspect ratio to 4:3 or 16:9 in the Basic menu Correct image...
- Page 17 Problem Solution Result Image reversed left to right Turn off Rear Project in Advanced > Setup > Image Position Correct image menu Projected colors don’t match source Adjust color, tint, brightness, contrast in the Basic menu Correct image COLOR COLOR The video embedded in my PowerPoint Turn off the internal LCD display on your laptop Embedded video plays correctly...
- Page 18 Problem Solution Result Lamp won’t turn on, Temperature light is on Make sure vents aren’t blocked, turn off the projector and Lamp turns on allow it to cool for one minute Temperature light “Replace lamp” message appears at startup, Lamp must be replaced (see page 48) Lamp turns on lamp won’t turn on, Lamp light is turned on Lamp light...
- Page 19 Still need assistance? If you need assistance, visit our website at www.infocus.com/service or call us. Check out our HOW TO section there for additional information. See the Quick Start Booklet for support contact information. This product is backed by a limited warranty. An extended warranty plan may be purchased from your dealer.
-
Page 20: Using The Remote Control
Using the remote control Troubleshooting the remote • Make sure the batteries are installed in the proper orientation and are not dead. The remote uses two (2) AA batteries (batteries not included). They are easily • Make sure you’re pointing the remote at the front of the projector or at the installed by removing the cover from the remote’s back, aligning the + and - ends of screen, not the computer, and are within the remote range of 30 feet (9 m). -
Page 21: Using The Audio
Using the audio connect audio cable Using the projector’s speaker To use the projector's speaker, connect the audio source to the projector's Audio In multimedia connector. ® To adjust the volume, press the Volume buttons on the keypad or remote. Troubleshooting Audio If you aren’t hearing the audio, check the following: •... -
Page 22: Using The Keypad Buttons
Using the keypad buttons Most buttons are described in detail in other sections, but here is an overview of their functions: Power–turns the projector on and off (page 8). Auto Image–resynchronizes the projector to the source (page 26). Presets–cycles through the available preset settings (page 29). Keystone–adjusts squareness of the image (page 9). -
Page 23: Optimizing Computer Images
Optimizing computer images Presentation features Several features are provided to make giving presentations easier. Here is an After your computer is connected properly and the computer’s image is on the overview, details are found in the menu section. screen, you can optimize the image using the onscreen menus. For general information on using the menus, see page 24. -
Page 24: Optimizing Video Images
Optimizing video images Customizing the projector After your video device is connected properly and the image is on the screen, you You can customize the projector for your specific setup and needs. See page 27 to can optimize the image using the onscreen menus. For general information on using page 28 for details on these features. -
Page 25: Using The Menus
Using the menus menu navigation buttons To open the menus, press the Menu button on the keypad or remote. (The menu automatically closes after 60 seconds if no buttons are pressed.) Use the up and down arrow buttons to highlight the desired menu option and then press the Select or right arrow button. -
Page 26: Basic Menu
Basic menu To change the following menu settings (or enter the Advanced menu), highlight the desired menu option and press the Select or right arrow button. Use the left and right arrow buttons to scroll through the options and make adjustments. To save your adjustments, press Select. -
Page 27: Advanced > Image Menu
Advanced > Image menu Video: 3D Control: • Closed Captions: controls closed caption display while audio is not muted. • Overscan: removes noise around the video image. • 3D: toggles between on and off. Turn it on to display the image in 3D. •... -
Page 28: Advanced > Setup Menu
Advanced > Setup menu Audio Setup: • Power Sounds: controls whether the projector makes a sound when powered on and off. • Volume: adjusts the volume level. Image Position: • Ceiling Mount: turns the image upside down for ceiling-mounted projection. •... - Page 29 Keypad/Remote: • Blank Key: selects what to display when the Blank Key on the remote is pressed: your custom snapshot, a solid color screen (blue, black or white), the factory logo screen, a timer, or test patterns. The timer option is useful for classroom tests or break times during meetings.
- Page 30 Press the Select button (or up/down arrow keys) to select the highlighted option. Verify the new PIN. If you lose or forget your custom PIN: Contact InFocus support. Go to www.infocus.com/support • PIN Protect: the PIN (personal identification number) feature allows you to password protect your projector.
- Page 31 Source: • Power-up Source: determines which source the projector checks first for active video during power-up. • Search Screen: allows you to display a blank screen instead of the default screen at startup when no source is detected. Options include the factory logo screen, a custom Snapshot, or a blue, black or white screen.
-
Page 32: Advanced > Status/Service Menu
Advanced > Status/Service menu Source Info: a read-only display of current source settings. Projector Info: a read-only display of current projector settings. Reset Lamp Hours: resets the lamp hours used counter in the Projector Info menu to zero. Do this only after changing the lamp. Factory Reset: restores all settings to their default. -
Page 33: Multimedia Ez Suite Menu
Multimedia EZ Suite Menu EZ Media Viewing Photos To view photos and other images, navigate to EZ Media and press the right arrow or Select key. Using the up and down arrows, highlight Internal Memory if your images are stored on the projector or USB if you are using a storage device attached to the USB-A connector. - Page 34 To display a control bar to control the photos: Next: Press the Select key or down arrow to display the next image. Start Slideshow: Press the Select key or down arrow to start the Slideshow. Press the Menu key on the remote or keypad. Slideshow must be enabled in Photo Settings menu.
- Page 35 Viewing Videos To view videos and other audiovisual files, navigate to EZ Media and press the Table 4: Compatible Image Types right arrow key. Image Type Sub Type Encode Type Max Pixels Using the up and down arrows, highlight Internal Memory (if your images are stored on the projector) or USB (if you are using a USB-A storage device).
- Page 36 To open the video control bar while the movie is playing, press the Menu key. To stop the video and return to the video list screen press the Select key. Press the Menu key to return to the EZ Suite menu. Note: You can adjust whether the audiovisual files play once or if they play continuously, and whether the audiovisual file aspect ratio displays as full screen or original, by adjusting the Video Settings in the Settings menu.
- Page 37 Table 11: Compatible Video Types File Type Video Resolution Bit Rate Frame Rate Audio Code Comment No support VC-1 AP AC3, DTS, MPEG1/2/ XVID, MPEG4, H.264, AVI, MKV 1080P 20Mbps 30fps 3, PCM, ADPCM, H.264 supports less M-JPEG, WMV3 than 4 reference frames H.264 supports less AC3, AAC, MPEG1/2/...
- Page 38 Listening to Audio Files Press the right arrow or the Select key to open the file. To listen to audio files, navigate to EZ Media and press the right arrow or the Select key. Using the up and down arrows, highlight Internal Memory (if your images are stored on the projector) or USB (if you are using a USB-A source).
- Page 39 • To go to the next audio file: Press the right arrow key twice within one Displaying Documents second. To view document files, navigate to EZ Media and press the right arrow key. Press the Menu key to close the audio file and return to the audio file list. Using the up and down arrows, highlight Internal Memory (if your images are Note: You can adjust whether your audio files play once or repeat, by adjusting the stored on the projector) or USB (if you are using a USB-A source).
- Page 40 Press the right arrow or the Select key to open the file. Table 16: Compatible Document Types Microsoft Office Supported Versions File Extension Application .doc Word .docx Microsoft® Office 95, .ppt Microsoft® Office 97, PowerPoint .pptx Microsoft® Office 2000, Microsoft® Office 2003, Microsoft®...
-
Page 41: Ez Display
EZ Display also allows you to display over USB from your PC or MAC. EZ Mobile allows you to connect wirelessly to a media server and DLNA enabled devices. For more information about the applications EZ USB, EZ WiFi, and EZ Display, review these manuals at www.infocus.com/support: • EZ USB Display Manual(Win+Mac)-V2.03 •... - Page 42 WiFi can be configured with your browser. Table 17: EZ WiFi/LAN Icons Icons Description Remove the user Display the user full screen Multiple users connected via the EZ WiFi/LAN application can be controlled with your browser. Display the user on the left side Display the user on the right side Display 4 users in different quadrants Pause user display...
-
Page 43: Settings
Settings System Submenu Version: This is the version of EZ Suite software on your projector. This is a read- To configure the System, Video, Photo, Audio or WiFi settings, navigate to only field. Settings and press the right arrow or the Select key. Language: Displays the current OSD (on-screen display) language. - Page 44 Video Submenu Photo Submenu To adjust the Video Display Ratio: Highlight Display Ratio and use the left and To adjust the Photo Display Ratio: Highlight Display Ratio and use the left and right arrow keys to select the desired mode. Press the Select key to enable. Options right arrow keys to select the desired mode.
- Page 45 Audio Submenu AP Mode To adjust the Audio Repeat mode: Highlight Repeat mode and use the left and To setup a peer-to-peer network: right arrow keys to select the desired mode. Press the Select key to enable. When Highlight AP mode and press the Select key. Repeat Mode is set to Repeat, the audio files will continue to play until you manually stop them.
- Page 46 Auto: Auto channel switching is not supported. Client Mode Save the configuration by highlighting the checkmark and press the Select key. If you want to exit without saving either press the Menu key or highlight the X and press the Select key. The AP mode icon will display in the upper right corner of the projected image.
- Page 47 EZ Remote Allows you to control the projector from your Android or iOS device. Note: A wireless connection must be established to operate this feature. To activate, press the Select key and use the up and down arrows to highlight On. Press the Select key again.
-
Page 48: Table Of Contents Maintenance
Maintenance Cleaning the lens Apply a non-abrasive camera lens cleaner to a soft, dry cloth. • Avoid using an excessive amount of cleaner, and don’t apply the cleaner directly to the lens. Abrasive cleaners, solvents or other harsh chemicals might scratch the lens. Lightly wipe the cleaning cloth over the lens in a circular motion. -
Page 49: Connecting A Computer Source 7 Replacing The Projection Lamp
• NOTE: You can order new lamps from www.infocus.com (in select areas), your retailer or your dealer. Only genuine InFocus lamps are tested for use in Lamp hours this projector. InFocus is not liable for the performance, safety or certification of any other lamps. - Page 50 Turn off the projector and unplug the power cord. Wait 60 minutes to allow the projector to cool thoroughly. Turn the projector upside down on a soft cloth so that the lamp door is facing you. loosen screw Loosen the two captive screws on the lamp door and lift the door off. Loosen the two captive screws that attach the lamp housing to the projector.
- Page 51 INDEX MINI USB Type B connector 5 Numerics VESA computer 5 3D Control Contacting InFocus 18 3D 26 Custom key 22 3D Sync Invert 26 Customer service contact information 18 Customizing the projector 23 Advanced > Image > 3D Control Menu 26...
- Page 52 Status Indicator Panel 11 Maintaining the projector 47 Troubleshooting problems 11 Menu usage 24 Registering your projector 4 Optimizing images 22 Remote control 19 Optimizing video 23 Auto Image 19 Overscan 26, 27, 28, 29, 30 Blank 19 Custom 19 PC 26 Mute 19 Force Wide 26...
- Page 53 Volume button 20 Warranty 18 Zoom 9...
Need help?
Do you have a question about the IN1112A and is the answer not in the manual?
Questions and answers