Haier HBU-42CH03 Operation & Installation Manual
Cassette type air conditioner (indoor unit)
Hide thumbs
Also See for HBU-42CH03:
- Installation instructions manual (14 pages) ,
- Installation instructions manual (15 pages) ,
- Manual (282 pages)
Table of Contents
Advertisement
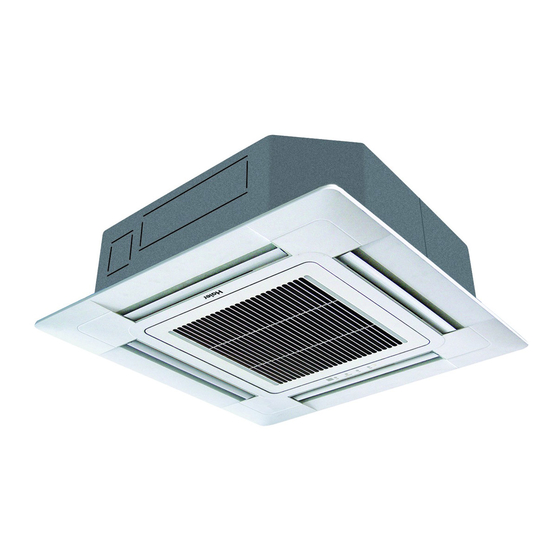
CASSETTE TYPE AIR CONDITIONER
Operation & Installation Manual
Indoor Unit
No.0150500604
C
Please read this operation manual before using the air conditioner.
Please keep this manual carefully and safely.
HBU-28CH03
HBU-28HH03
HBU-36HH03
HBU-42CI03
HBU-42CH03
HBU-42HI03
HBU-48CH03
HBU-48HJ03
HBU-48CK03
Advertisement
Table of Contents

Subscribe to Our Youtube Channel
Related Manuals for Haier HBU-42CH03


Summary of Contents for Haier HBU-42CH03
-
Page 1: Indoor Unit
CASSETTE TYPE AIR CONDITIONER Operation & Installation Manual Indoor Unit HBU-28CH03 HBU-28HH03 HBU-36HH03 HBU-42CI03 HBU-42CH03 HBU-42HI03 HBU-48CH03 HBU-48HJ03 HBU-48CK03 No.0150500604 Please read this operation manual before using the air conditioner. Please keep this manual carefully and safely. -
Page 2: Table Of Contents
Contents Cautions ................... Introduction to Spare Parts ..............Maintenance ................... Trouble Shooting ................9-10 When Trouble Happens ..............11-12 Customer Need-to-know ..............Installation Procedure ..............14-24... -
Page 3: Cautions
Cautions Disposal of the old air conditioner Consult your local authorities for the name and address of the waste materials collecting Before disposing an old air conditioner centers and waste paper disposal services that goes out of use, please make sure it's nearest to your house. - Page 4 Model piercing or perforating the air conditioner's 3G 4.0mm HBU-28CH03 HBU-28HH03 tubes with sharp or pointed items, crushing HBU-36HH03 HBU-42CH03 or twisting any tubes, or scraping the 5G 2.5mm HBU-42CI03 HBU-42HI03 coatings off the surfaces. If the refrigerant HBU-48CH03 HBU-48HJ03...
- Page 5 Cautions Safety cautions Carefully read the following information in order to operate the airconditioner correctly. Below are listed three kinds of Safety Cautions and Suggestions. WARNING! Incorrect operations may result in severe consequences of death or serious injuries. CAUTION! Incorrect operations may result in injuries or machine damages; in some cases may cause serious consequences.
- Page 6 Cautions CAUTIONS! Don't operate the air-con- Conditioner should not be used for any other ditioner with damp hands. purpose other than airconditioning. Otherwise will be shocked. Don't use air-conditioner for any other special purposes, e.g. the preservation and protection Only use correctly-typed fuse. of food, animals, plants, May not use wire or any other pecision apparatus as well...
- Page 7 Cautions Installation Please ask the dealer or specialist to install, never try by the users themselves. After the installation please be sure of the following conditions. WARNING ! Please call dealer to install the air-conditioner. Incorrect installation may cause water leaking, shock and fire hazard. CAUTION ! Air-conditioner can't be installed in the Connect earthing wire.
-
Page 8: Introduction To Spare Parts
Introduction to Spare Parts Air ourlet blade (adjust air outlet direction by the air direction adjusting button on remote controller) Suction grill Air filter (located in the suction grill) -
Page 9: Maintenance
Maintenance [Clean air filter] NOTE When having to clean, don't dismantle air-filter,otherwise may cause faults. In the environment where there is too much dust, air filter should be cleaned for more times. (about half a year one time) (B) Wash with water. 1. - Page 10 Maintenance Seasonal Reserve Post-season Care Operate the unit with FAN mode on a fair day for about half a day to dry the inside of the unit well. Stop operation and turn off the power supply switch .Electric power is consumed even the air conditioner is in stop. Clean the air filter, indoor unit and outdoor unit,and cover the unit with dustcoat.
-
Page 11: Trouble Shooting
Trouble Shooting The followings are not malfunction Water flowing sound is heard When the air conditoner is started, when the compressor starts or stops during operation or when the air conditioner is stopped,it sometimes sounds "Bi- Bi-"or "Godo-Godo". It is the flowing sound of the refrigerant , not a malfunction. - Page 12 Trouble Shooting Air does not blow or the fan speed cannot In DRY mode, when room temperature be changed during drying. becomes 2 higher than temperature setting, unit rill run intermittently at LO speed regardless of FAN setting Water or vapor generated from the outdoor unit during heating.
-
Page 13: When Trouble Happens
When Trouble Happens Insufficient cooling or heating The operation controller Air filter too dirty ? Horizontal swing louver adjusted as required upward ? (in HEAT mode) Any obstacle exists at the air Door or window left opened ? inlet or outlet? Insufficient cooling Too crowed in the room ? Sunlight direct into the... - Page 14 When Trouble Happens Failure code list Failure code Power lamp flash failure description Reasons on wired times/LED on controller PCB flash times Fault in drain system Float switch is open Indoor ambient Sensor broken down or short circuit for temp. sensor failure more than 2m continuously Indoor pipe Sensor broken down or short circuit for more...
-
Page 15: Customer Need-To-Know
Customer Need-to-know Customer Need-to-know Please install the air conditioner according to the requirements specified in this manual to ensure the air conditioner work well. Be careful not to scratch the surface of the case during moving the air conditioner. Please keep the installation manual for future reference when maintenance and changing installation place. -
Page 16: Installation Procedure
Installation Procedure Installation tools The installation tools listed in the following sheet can be used as required. 1. Screw driver 2. Hacksaw 3. Drill with a diameter of 60mm 4. Inner hexagon spanner,shifting spanner 5. Spanner (14, 17, 19, 24, 27mm) 6. - Page 17 Installation Procedure CAUTIONS: To ensure proper installation,read"Cautions" carefully before working.After installation,start the unit correctly and show customers how to operate and maintain the unit. Meanings of Warning and Cautions: Warning! Serious injury or even death might happen,if it is not observed. Caution! Injury to people of damages to machine might happen, if it is not observed.
-
Page 18: Selection Of Installation Place
Refer to paper pattern for place which need be reinforced) Installation space Unit:mm Air outlet Air outlet Air outlet Air outlet Air inlet Air inlet 1500 Over 1500 Over 1500 Over 1500 Over Model Model HBU-36HH03 HBU-42CH03 HBU-28CH03 HBU-28HH03 HBU-42CI03 HBU-42HI03 HBU-48HJ03 HBU-48CK03 HBU-48CH03... - Page 19 (Distance between suspending bolts) 840(Indoor unit) HBU-28CH03 890(Ceiling opening) HBU-28HH03 950(Ornament panel) HBU-36HH03 HBU-42CH03 HBU-42CI03 HBU-42HI03 Note: HBU-48CH03 Dimension of ceiling opening marked with * can be aslarge as 910mm, but the matching part of ceiling Suspending bracket with ornament panel shall be over 20mm.
-
Page 20: Installation Of Indoor Unit
Installation Procedure (2) Cut an opening in ceiling for installation if necessary. (when ceiling already exists.) Refer to paper pattern for dimension of ceiling hole. Connect all pipings (refrigerant, water drainage), wirings (inter unit cable) to indoor unit, before installation. Cut a hole in ceiling, may be a frame should be used to ensure a smooth surface and to prevent vibration. - Page 21 Installation Procedure Screws at the piping outlet is fixed at the corner of drain pan. Center of ceiling hole Paper pattern Paper pattern Screw (accessory) Screw (accessory) [Fix the paper pattern] Refrigerant piping (As for outdoor piping, please refer to installation Manual of outdoor unit.) Outdoor is precharged with refrigerant.
-
Page 22: Installation Of Water Drainage Pipe
Installation Procedure Installation of water drainage pipe (1) Install water drainage pipe Pipe dia, shall be equal or larger than that of unit piping.(pipe of polyethylent; size: 25mm; O.D:32mm) Drain pipe should be short, with a downward slope at least 1/100 to prevent air bag from happening. If downward slope can't be made, take other measures to lift it up. - Page 23 Installation Procedure (2) Check if water drainage is smooth after installation. Charge, through air outlet or inspecting hole, 1200ccd water to see water drainage. (Just take HBU-28HH03 for example. For HBU-42CH03, HBU-42HI03, HBU-48CH03 there is no inspecting hole). After wiring Method of water charging Check water drainage in cooling operation.
-
Page 24: Wiring Example
Installation Procedure Wiring All supplied parts. materials and wiring operation must in appliance with local code and regulations.Use copper wire only. When make wiring, please refer to wiring diagram also.All wiring work must be done by qualified electricians. A circuit breaker must be installed, which can cut power supply to all system. Connecting of unit (Take HBU-28HH03 For example). - Page 25 Installation Procedure 2. Mounting on high ceiling Side of ornament panel Side of indoor unit Swing motor 3. Install ornament panel on indoor unit. For indoor unit installation, please refer to Installation Manual. Check whether indoor unit is horizontal with leveler or polythene pipe filled with water , and check that the dimension of the ceiling opening is correct.
- Page 26 Installation Procedure 4. Installation of inlet grill . Installation of inlet grill. Install in reversed order of "Prepare ornament pandl". Inlet grill can be adjusted into four directions by turning inlet grill. Inlet grill position can be adjusted as per customers request.
Need help?
Do you have a question about the HBU-42CH03 and is the answer not in the manual?
Questions and answers