Table of Contents
Advertisement
Advertisement
Table of Contents

Subscribe to Our Youtube Channel
Related Manuals for MULTIQUIP RX 1510-C

Summary of Contents for MULTIQUIP RX 1510-C
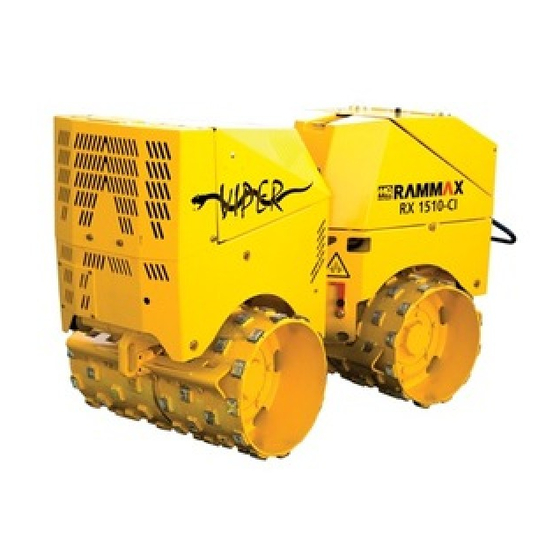
- Page 1 OperatiOn Manual raMMaX viper MODel rX 1510-C/-i/-Ci viBratOrY trenCH rOller (lOMBarDini lDW 1003) Revision #0 (10/20/10) To find the latest revision of this publication, visit our website at: www.multiquip.com THIS MANUAL MUST ACCOMPANY THE EQUIPMENT AT ALL TIMES.
- Page 2 proposition 65 warning Diesel engine exhaust and some of...
- Page 3 RX 1510-C/-I/-CI Identification: Product identification: Type: RX 1510 Model: -C/-I/-CI Series number: Production date: Manufacturer: Rammax Maschinenbau GmbH Gutenbergstraße 33 72555 Metzingen Telephone 07123/9223-0 Telefax 07123/9223-50 E-Mail: Service@Rammax.de Germany Customer service: Rammax Maschinenbau GmbH Gutenbergstraße 33 72555 Metzingen E-Mail: Service@Rammax.de...
- Page 4 Identification: RX 1510-C/-I/-CI Identification of the machine On transfer of the machine, please complete: Type of machine Series number Engine type 12345 Motor number One of our staff or a dealer will instruct you Always indicate the machine series number when on use and maintenance of the machine at ordering spare parts.
- Page 5 RX 1510-C/-I/-CI General: General information The practical development and construction, as well as the experience of many years in manufacturing vibration trench rollers, guarantee that you have a high-quality and extremely reliable machine. The following operating and maintenance instruction comprise: •...
-
Page 6: Spare Parts List
General: RX 1510-C/-I/-CI Structure of the documentation: Operating and Spare parts list Service Maintenance and maintenance Instructions instructions The machine documentation is divided into 3 individual document groups: • The operating instructions contain: All information necessary for operating the machine. - Page 7 RX 1510-C/-I/-CI Important notes on the operating instructions: The individual chapters of the operating instructions contain the following topics: Chapter 1: • Description of the machine • Technical data • Features • Accessories Chapter 2: • General safety instructions •...
- Page 8 Important notes on the operating instructions: RX 1510-C/-I/-CI Used font weights/typeface Arial 14Pt Bold Chapter heading: Arial 12Pt Bold Section heading: Subsection: Arial 10Pt Bold Main text: Arial 10Pt Regular Marginal notes and cross references: Arial 10Pt Italic Passages to be observed:...
- Page 9 RX 1510-C/-I/-CI Important notes on the operating instructions: Safekeeping and completeness of the operating instructions These operating instructions are a firm component of the machine and must be available for the user of the machine, in order to look up. It must always be kept within reach.
-
Page 10: Table Of Contents
Table of Contents: RX 1510-C/-I/-CI Table of Contents Description of the machine Important notes on the machine 1.1.1 Orientation on the machine 1.1.2 Description 1.1.3 Areas of application 1.1.4 Intended use 1.1.5 Workplace 1.1.6 Danger areas 1.1.7 Modifications to the machine Technical data 1.2.1... - Page 11 RX 1510-C/-I/-CI Table of Contents: Additional dangers Emergency measures Construction and function Introduction 3.1.1 Basic information on soil compaction Mechanical construction Opening and closing of the hoods 3.3.1 Opening the cockpit hatch 3.3.2 Turning down the control unit 3.3.3 Opening and closing of the engine hood 3.3.4...
- Page 12 Table of Contents: RX 1510-C/-I/-CI Start-up Safety instructions Examination before start-up 5.2.1 Checking hydraulic oil level 5.2.2 Checking engine oil level 5.2.3 Checking cooling water level 5.2.4 Checking the contamination degree of the air filter 5.2.5 Checking fuel level / Tanking fuel 5.2.6...
- Page 13 RX 1510-C/-I/-CI Table of Contents: Maintaining the machine Safety instructions 8.1.1 General 8.1.2 Refuelling fuel 8.1.3 Working on the engine 8.1.4 Working on electrical system components 8.1.5 Working on the fuel system 8.1.6 Cleaning work 8.1.7 After completing maintenance work 8.1.8...
-
Page 14: Description Of The Machine
Important notes on the machine RX 1510-C/-I/-CI Description of the machine Important notes on the machine 1.1.1 Orientation on the machine The most important areas of the machine are described here, in order to facilitate orientation on the machine. Specifications in the text concerning situation and position are based on the following principle: All specifications on situation or... -
Page 15: Description
RX 1510-C/-I/-CI Important notes on the machine 1.1.2 Description Our long experience in the development and construction of vibratory trench rollers is the basis for the new development of the infrared and/or cable controlled RX 1510-CI. The enormous degree of operating convenience, which provides both for cable and infrared control, permits the user to make even more flexible... -
Page 16: Gutenbergstraße
Important notes on the machine RX 1510-C/-I/-CI Verdichtung EG-Konformitätserklärung EC-Declaration of Conformity / Déclaration ”CE” de Conformité Dichiarazione di conformità CE gemäß Maschinen-Richtlinie 98/37/EG, Anhang II A und der Outdoor Richtlinie 2000/14/EG as defined by the Machinery Directive 98/37/EC Annex II A and Noise directive 2000/14/EG conformément à... -
Page 17: Technical Data
RX 1510-C/-I/-CI Specifications: Technical data 1.2.1 Main dimensions Ø525 1912 7,5° 7,5° 7,5° 7,5° 30° 30° – 17 –... -
Page 18: Turn Radius
Specifications: RX 1510-C/-I/-CI 1.2.2 Turn radius 85 cm 63 cm – 18 –... - Page 19 RX 1510-C/-I/-CI Specifications: RX 1510 Main dimensions drum narrow drum wide Dimensions: Working width: Overall width: Overall length: 1912 Overall height: 1175 Distance between axles: Drum diameter: Weights: Operational weight: 1470 1530 Axle load front: Axle load rear: Static line load:...
-
Page 20: Operating Fluids
Specifications: RX 1510-C/-I/-CI RX 1510 Main dimensions drum narrow drum wide Gradeability w. / w/o. vibration: 50/60 inner: 2,98 2,76 Turn radius outer: 4,25 4,47 1.2.3 Operating fluids Quantity Specification Recommendation Fuels: Diesel fuel: Hydraulics: DIN 51524-2 HLP 46 Hydraulic oil:... -
Page 21: Noise And Vibration Specifications
RX 1510-C/-I/-CI Specifications: Quantity Specification Recommendation Use drinkable tap water for making the water/ethylene glycol mixture. Do not use rainwater or distilled water, since this can create foam. The water/ethylene glycol mixture should be used all year round in a concentration of at least 35% by volume. -
Page 22: Equipment Of The Machine
Equipment: RX 1510-C/-I/-CI Equipment of the machine 1.4.1 Variations of the machine/machine types View of the operating unit from the worlplace. RX 1510-C: Articulated trench roller with cable control. Start Stop RX 1510-I: Articulated trench roller with infrared control. RX 1510-CI: Articulated trench roller with infrared and cable control. -
Page 23: Stowage Plan
RX 1510-C/-I/-CI Stowage plan 15.1 Position of the hoods and hatches The machine is equipped with hoods and hinged components in order to be able to access all important parts. Motor hood Operating panel Radiator hatch Cockpit cover – 23 –... -
Page 24: Safety Instructions
Safety instructions RX 1510-C/-I/-CI Safety instructions – 24 –... -
Page 25: Representation And Meaning Of The Used Safety Instructions
RX 1510-C/-I/-CI Safety instructions Representation and meaning of the used safety instructions 2.1.1 Situation-specific safety instructions Situation-specific safety instructions are safety instructions, which directly refer to the following activity or situation. They are represented as follows: DANGER indicates a dangerous situation, which if it is not avoided can result in death or severe injuries. -
Page 26: Chapter And Section-Specific Safety Instructions
Safety instructions RX 1510-C/-I/-CI NOTE refers to situations, which can result in damages to property, describes the consequences, if these situations cannot be avoided and indicates possibilities to avoid the damages. Example safety instruction: Meaning: NOTE RISK LEVEL Transport protection is still active... -
Page 27: Used Symbols
RX 1510-C/-I/-CI Safety instructions 2.1.3 Used symbols Imperative instructions: Symbol: Meaning: Use hearing protection. – 27 –... - Page 28 Safety instructions RX 1510-C/-I/-CI Prohibitions: Meaning: Symbol: Do not drive on slopes diagonally Do not transport persons Turn engine off in closed areas Do not use steam jets – 28 –...
- Page 29 RX 1510-C/-I/-CI Safety instructions Warning signs: Symbol: Meaning: Danger Special specifications and/or imperative instructions and prohibitions, in order to prevent injury to persons or substantial damages to property are marked with the represented pictogram. The appropriate symbol is placed in front, if the source of danger can be indicated...
- Page 30 Safety instructions RX 1510-C/-I/-CI Electricity This sign is placed before activities, during which there is the risk of a possibly lethal electric shock. Risk of chemical burns This sign is placed before activities, during which there is the risk of chemical burns by battery acid.
- Page 31 RX 1510-C/-I/-CI Safety instructions Risk of being run over Risk of overturning Observe distance to articulated joint Danger caused by pressurised liquids escaping Risk for limbs by rotating belts – 31 –...
- Page 32 Safety instructions RX 1510-C/-I/-CI Danger caused by flying around parts Risk caused by inhalation of toxic gases or vapours – 32 –...
- Page 33 RX 1510-C/-I/-CI Safety instructions Waste oil disposal/waste oil collecting point Battery disposal/pollutant collecting point – 33 –...
-
Page 34: Intended Use/Product Safety
Safety instructions RX 1510-C/-I/-CI Intended use/Product safety The vibration roller RX 1510 is built according to the state-of-the-art and the recognised safety-related regulations. Nevertheless the use can in danger life and health of the user or third parties and/or impair the machine and other material assets: •... -
Page 35: Observing Danger Warnings On The Machine
RX 1510-C/-I/-CI Safety instructions 2.3.3 Observing danger warnings on the machine • Ensure that the safety labels and signs are complete and readable. • Observe the rules and abide by them. • Immediately renew damaged and illegible safety signs and labels. All signs and labels can be reordered from the spare parts list. - Page 36 Safety instructions RX 1510-C/-I/-CI Use hearing protection. – 36 –...
-
Page 37: Organisational, Personal Matters
RX 1510-C/-I/-CI Safety instructions Organisational, personal matters • Machine operation is only admissible after proper instruction and in observance of this manual. • The safety regulations described in these safety regulations must be observed, likewise the guidelines of the Civil Engineering Professional Association "Safety regulations for the operation of road rollers and soil compactors"... -
Page 38: During Maintenance Work
Safety instructions RX 1510-C/-I/-CI • The vibration function of the machine causes the soil in the area of the drum to vibrate considerably. Persons should not be exposed to these vibrations. • When applying the vibration function, loose material, such as stones and clumps of earth, can be hurled through the air. -
Page 39: Additional Dangers
RX 1510-C/-I/-CI Safety instructions • Disconnect the battery before working on electrical system components and cover with insulating materials. • Never insert fuses with a higher amperage or repair fuses. Fire danger! • The machine is operated with Diesel fuel. • When carrying out work on the fuel system, never smoke or expose to a naked flame. -
Page 40: Construction And Function
Construction and function RX 1510-C/-I/-CI Construction and function Introduction 3.1.1 Basic information on soil compaction Subsoil compaction is achieved by the constant effect of vertical impact forces. These are created by a rotating exciter shaft. The unequal weight distribution of the exciter shaft cross section displaces the exciter shaft and thus vibrates the drum. -
Page 41: Opening And Closing Of The Hoods
RX 1510-C/-I/-CI Construction and function Opening and closing of the hoods 3.3.1 Opening the cockpit hatch The cockpit hatch is kept closed by two fixtures made of rubber and two bolts as counterparts. In order to open the cockpit hatch, pull it briefly and jerk it upward. -
Page 42: Unlocking And Opening The Radiator Cap
Construction and function RX 1510-C/-I/-CI Caution When closing the engine hood and there is the danger of crushing fingers and hands! In order to close the engine hood push the support bushing of the gas-filled shock absorber to the cylinder, while pressing the hood downwards. -
Page 43: Components
RX 1510-C/-I/-CI Construction and function 3.3.5 Components Front car Rear end Control unit / Cockpit Articulation Underframe Drive unit Functional description The drive unit consists of a diesel engine, vibration, and driving pump. It provides the required hydraulic performance for the driving, steering, and vibration functions. -
Page 44: Safety And Monitoring Equipment
Safety and monitoring equipment RX 1510-C/-I/-CI Safety and monitoring equipment 3.5.1 Shut down yoke The shutdown yoke is attached to the rear of the machine below the operating unit. At the rear end below the mounting of the shutdown yoke is a proximity switch. The shutdown yoke is activated and the proximity switch triggers, if the machine drives against an obstacle. -
Page 45: Inclination Indicator
RX 1510-C/-I/-CI Safety and monitoring equipment max. 20 m 3.5.4 Inclination indicator The machine control is equipped with an inclination indicator. This triggers starting from an inclination angle of 45°. The engine switches itself off in this case automatically. The machine cannot be started as long as the inclination indicator is triggered. -
Page 46: Automatic Switch-Off Cooling Water Temperature
Safety and monitoring equipment RX 1510-C/-I/-CI 888888 3.5.7 Automatic switch-off cooling water temperature The machine is equipped with an automatic switch-off. The temperature warning light lights up, if the cooling water temperature exceeds the limit value. The machine is shut down after the warning light has lit up for 4 seconds. -
Page 47: Display And Operating Elements
888888 888888 Ignition lock Connection for cable manual control Display for: (only available for cockpit 3-68562 ► only • Operating hours RX 1510-C and RX 1510-CI) • Function code • Error code Ignition positions: Ignition „On” / Ignition „Off” Starting Stand-by –... -
Page 48: Warning Signals
Display and operating elements: RX 1510-C/-I/-CI Warning signals All warning lights light up when switching the ignition on. Troubleshooting is necessary, if one of the warning lights does not light up. If the cause is a defective warning light, this only affects machine safety in as far as a defect will not be indicated by the machine controller and therefore not immediately recognised by the operator. -
Page 49: Display Elements
RX 1510-C/-I/-CI Display and operating elements: 888888 • Inclination indicator / Oil deficiency shutdown The machine control is equipped with an inclination indicator. This triggers starting from an inclination angle of 45°. The engine switches itself off in this case automatically. - Page 50 Display and operating elements: RX 1510-C/-I/-CI Display Meaning Lights up: • If an operator function is carried out. • Always combination with Stands for function a numerical value, which represents the function type. (see page 52 Section 4.4.2 Function codes) •...
-
Page 51: Operating Elements
RX 1510-C/-I/-CI Display and operating elements: 1 2 3 4 5 6 Code numbers are indicated from position 3 to 6. • Four-digit code numbers are displayed in combination with "F" (function) which ▼▼▼▼▼▼ 888888 respectively stand for a driving or vibration function. The code numbers for "F"... -
Page 52: Function Codes During Operation With Cable Control
Display and operating elements: RX 1510-C/-I/-CI The function keys for vibration with direction of rotation forward, vibration with direction of rotation backwards and fast gear are equipped with a locking function. The key functions remain active until they are actuated again. The respective diode on the key lights up when the function is active. -
Page 53: Cockpit Display With Cable Control
RX 1510-C/-I/-CI Display and operating elements: Example display function: • F H 1100 Driving left forward with vibration forward 1000 FH I I00 Start Stop 4.4.3 Cockpit display with cable control Start / Stop function Control mode Code Meaning: number: 4010 "Start"... - Page 54 Display and operating elements: RX 1510-C/-I/-CI Driving functions Display Executed functions F H 0010 Driving Right forward F H 0011 Driving Right forward High speed F H 0020 Driving Right backward F H 0021 Driving Right backward High speed F H 0100...
-
Page 55: Infrared Transmitter
RX 1510-C/-I/-CI Display and operating elements: 4.4.4 Infrared transmitter The infrared control is used to operate the machine with infrared control. Solar cells supply the electrical current. Therefore, no batteries are required to operate the infrared transmitter. The infrared transmitter is equipped with freely selectable addresses, in order to transmit the transmitter signal. -
Page 56: Function Codes During Operation With Infrared Control
Display and operating elements: RX 1510-C/-I/-CI 4.4.5 Function codes during operation with infrared control The function codes displays in the cockpit are made up of the code numbers for the individual function keys. Adding the code numbers results in the indicated function codes. -
Page 57: Cockpit Display With Infrared Control
RX 1510-C/-I/-CI Display and operating elements: 4.4.6 Cockpit display with infrared control Start / Stop function Characteristic Control mode Code Meaning: number: 4010 Toggle switch„Start” is activated. ► Starting procedure is initiated. 4020 The motor has started. ► Release toggle switch „Start”. - Page 58 Display and operating elements: RX 1510-C/-I/-CI Vibration functions Display Executed functions 1000 Vibration forward 1010 Vibration forward Driving right forward 1020 Vibration forward Driving right backward 1100 Vibration forward Driving left forward 1110 Vibration forward Driving left forward right forward...
-
Page 59: Start-Up
RX 1510-C/-I/-CI Start-up Start-up Safety instructions Only qualified and appropriately trained specialised personnel, with a minimum age of 18 years, may operate the machine. Persons acting under the influence of drugs, medicines or alcohol may not operate the machine. Examination before start-up Before putting the machine into service every day or before a long work period, the following checks must be performed. -
Page 60: Checking Engine Oil Level
Start-up RX 1510-C/-I/-CI NOTE If it is determined during the daily oil level check that hydraulic oil is missing, immediately examine all aggregates, lines, and hoses for leaktightness and fill up missing hydraulic oil before beginning work. Refilling hydraulic oil: 1) Open cap. -
Page 61: Checking Cooling Water Level
RX 1510-C/-I/-CI Start-up CAUTION Danger of burning! The engine and its detachable parts are hot during and immediately after operation. Before touching the engine or the detachable parts first allow these to cool down. 2) Pull the dipstick out. 3) Wipe the dipstick with a dry, fibre-free rag. -
Page 62: Checking The Contamination Degree Of The Air Filter
Start-up RX 1510-C/-I/-CI 1) Open the engine hood. 2) The unlocking screw is to the right above the radiator. Unscrew this. ► The radiator cap opens. The filler opening of the radiator is located under the radiator cap. 3) Open the radiator cap. -
Page 63: Checking Fuel Level / Tanking Fuel
RX 1510-C/-I/-CI Start-up 5.2.5 Checking fuel level / Tanking fuel The sight glass for the examination of the fuel level is located under the operating panel. The operating panel must be folded back, in order to refuel. Fuelling procedure: 1) Open the tank lid 2) Put the tank lid cap with the top downwards on a clean surface. - Page 64 Start-up RX 1510-C/-I/-CI (only for machines with infrared control) Setting the transmitter address on the machine controller: 1) Fold the operating panel back. 2) Remove the plug from the machine controller with a screwdriver entfernen. 3) Set in the required address by turning the arrow with a screwdriver.
-
Page 65: Starting The Machine
RX 1510-C/-I/-CI Start-up Starting the machine The machine only reacts to the control mode with which your engine was started. The machine only reacts to control impulses of the manual control, if the engine has been started with the manual control. The machine only reacts to control impulses of the infrared control, if the engine has been started with the infrared control. -
Page 66: Stand-By Mode
Start-up RX 1510-C/-I/-CI 5.3.2 Stand-by mode The machine reverts to the standby mode, if it is not started within 30 seconds. The machine can nevertheless be started in this state with one of the control modes or with the ignition key. -
Page 67: Starting The Machine With The Manual Control Device
RX 1510-C/-I/-CI Start-up NOTE The ignition start switch has a starter anti-repeat function. The starter is not activated anymore, if the engine is running. ► At the most 15 seconds continuous starting and in between breaks of approx. 1 minute. -
Page 68: Starting The Machine With The Infrared Control
Start-up RX 1510-C/-I/-CI NOTE The ignition start switch has a starter anti-repeat function. The starter is not activated anymore, if the engine is running. ► At the most 15 seconds continuous starting and in between breaks of approx. 1 minute. - Page 69 RX 1510-C/-I/-CI Start-up NOTE The ignition start switch has a starter anti-repeat function. The starter is not activated anymore, if the engine is running. ► At the most 15 seconds continuous starting and in between breaks of approx. 1 minute.
-
Page 70: Switching Machine Off
Start-up RX 1510-C/-I/-CI Switching machine off 5.4.1 Switching the machine off at the ignition lock ► Turn the ignition key to position "0". The following code is displayed: „F 4100”. The LEDS for generator and oil pressure drop are active. The stop procedure is initiated. -
Page 71: Switching The Machine Off With The Manual Control Device
RX 1510-C/-I/-CI Start-up 5.4.2 Switching the machine off with the manual control device ► Press the "Stop" key on the manual control. ► The following code is displayed: „FH 4100”. The LEDS for generator and oil pressure drop are active. The stop procedure is initiated. -
Page 72: Switching The Machine Off With The Infrared Control Device
Start-up RX 1510-C/-I/-CI 5.4.3 Switching the machine off with the infrared control device ► Move the toggle switch "Start-Stop" on the infrared control from the switch position "Neutral" to the right to switch position "Stop". CAUTION The transmitter is ready for use as long as the toggle switch "Start-Stop" is in the switch position "Neutral". -
Page 73: Using The Machine
RX 1510-C/-I/-CI Operation: ► End of the stop procedure. „F I 4300” is displayed. The operating hour meter is secured. The machine shuts down. Restarting is only possible after the end of this stop sequence. F I 4300 Using the machine Safety instructions 6.1.1... -
Page 74: Before Operating The Machine
Operation: RX 1510-C/-I/-CI 6.1.2 Before operating the machine Make sure that: • The fill levels of the operating fluids, hydraulic oil, coolant and engine oil are at a sufficient level. • All safety equipment is working. • All control elements and display elements are working. - Page 75 RX 1510-C/-I/-CI Operation: 3) Depending upon required compaction force, switch the large or small vibration Start Stop Start Stop 4) Drive over the area to be compacted several times, until it is completely compacted. 5) After completing the compaction work drive the machine to a level area where it is not an obstacle.
-
Page 76: Parking The Machine
Operation: RX 1510-C/-I/-CI Parking the machine If possible, park the machine on a level ground. Parked machines which could represent an obstruction must be safeguarded by clearly identifiable measures. WARNING Safeguard the machine before leaving against use by unauthorised persons. -
Page 77: Loading And Transporting The Machine
RX 1510-C/-I/-CI Loading and transporting the machine Loading and transporting the machine Safety instructions 7.1.1 General • Only qualified and appropriately trained specialised personnel, with a minimum age of 18 years, may participate in loading the machine. • Persons acting under the influence of drugs, medicines or alcohol may not may not be involved in loading the machine. -
Page 78: Using The Transport Protection
Loading and transporting the machine RX 1510-C/-I/-CI Using the transport protection 1) Straighten the articulated steering of the machine. ► The transport lock cannot be applied, if the machine has not been aligned straight. 2) Loosen knurled screw. 3) Withdraw split pin Fold out transport protection. -
Page 79: Loading The Machine With Ramps
RX 1510-C/-I/-CI Loading and transporting the machine 7.3. Loading the machine with ramps The machine can be loaded by driving over a suitable ramp. Do not thereby exceed the maximum climbing ability of the machine. 50% max. Loading the machine with hoisting gear The transport protection must be applied before loading with hoisting gear. -
Page 80: Securing The Machine For Transport
Loading and transporting the machine RX 1510-C/-I/-CI Securing the machine for transport 1) Check whether the transport protection is applied. ► If not, apply the transport protection. 2) Check whether the shutdown yoke is in the transport position (activated). ► If... -
Page 81: Maintaining The Machine
RX 1510-C/-I/-CI Maintaining the machine Maintaining the machine Safety instructions 8.1.1 General • Maintenance work may only be performed by suitably qualified and trained personnel. • Keep unauthorised persons away from the machine. • Never carry out maintenance work on a moving machine or with the engine running. -
Page 82: Working On The Fuel System
Maintaining the machine RX 1510-C/-I/-CI Work on the battery – When carrying out work at the battery, never smoke or expose to a naked flame. – Do not let acid get on to hands or clothes. In the case of injuries by acid rinse with clear water and consult a physician. - Page 83 RX 1510-C/-I/-CI Maintaining the machine • Check the tightness of all connections and screw connections after accomplishing any type of work (on a pressure-free system!!). • Hydraulic lines may not be swapped. • Hydraulic lines must be visually checked regularly.
-
Page 84: Maintenance Plan
Maintaining the machine RX 1510-C/-I/-CI Maintenance plan No.: Description: Remarks: Page: Every day –Check engine oil level – Observe gauge marking - Check machine for external damages - Visual inspection 9.10 - Check hydraulic oil level - Oil level eye... -
Page 85: Checking Engine Oil Level
RX 1510-C/-I/-CI Maintaining the machine Checking engine oil level The dipstick (OS) is located on the right side of the engine underneath the cooling water tank. The engine has been filled in the factory with engine oil, viscosity class 15W40. If there is the need to change to a different viscosity class (e.g.: permanent extreme outdoor temperatures), the oil must be changed. -
Page 86: Exchanging Engine Oil
Maintaining the machine RX 1510-C/-I/-CI Exchanging engine oil The engine oil must be exchanged after the first 50 working hours and thereafter every 75 working hours, at the latest after one year. The oil filter must also be exchanged when replacing the engine oil. Only original spare parts may be used, in order to maintain the functional capacity of the diesel engine. - Page 87 RX 1510-C/-I/-CI Maintaining the machine 7) Unscrew oil filter. ENVIRONMENT Leaking lubricating oils pollute the soil! ► Collect leaking engine oil and dispose together with the oil filter in an environmentally friendly manner! ► Do not spill engine oil. ► Collect leaking fuel, do not let it seep into the ground.
-
Page 88: Checking The Contamination Degree Of The Air Filter
Maintaining the machine RX 1510-C/-I/-CI Checking the contamination degree of the air filter The air filter is located the rear end of the front car, near to the articulation of the machine. The engine hood must be opened, in order to access the air filter. The removable lid of the air filter is accessible on the left side of the machine. -
Page 89: Emptying The Fuel Tank
RX 1510-C/-I/-CI Maintaining the machine 1) Loosen hexagonal bolt on the filter holder and remove the fuel filter Take off fuel hoses and insert new fuel filter. Exchange fuel hoses, which are leaking or porous. Mount the fuel filter in reverse order and check for leaks. -
Page 90: Checking Hydraulic Oil Level
Maintaining the machine RX 1510-C/-I/-CI ENVIRONMENT Leaking fuel pollutes the soil! ► Collect any leaking fuel and dispose of in an environmentally responsible manner together with the fuel filter! ► Do not spill fuel. ► Collect leaking fuel, do not let it seep into the ground. -
Page 91: Hydraulic Oil Change/ Hydraulic Filter Change
RX 1510-C/-I/-CI Maintaining the machine Hydraulic oil change/ Hydraulic filter change Maintenance work on the hydraulic system is limited to filters and hydraulic tanks. All other aggregates do not require maintenance. The hydraulic pipework should however be examined in regular intervals for leaktightness. Do not spray hydraulic hoses with paint. - Page 92 Maintaining the machine RX 1510-C/-I/-CI ENVIRONMENT Leaking hydraulic oils pollute the soil! ► Collect leaking hydraulic oil and dispose together with the hydraulic oil filter in an environmentally friendly manner! ► Do not spill hydraulic oil. ► Collect leaking hydraulic oil, do not let it seep into the ground.
-
Page 93: Checking Cooling Water Level
RX 1510-C/-I/-CI Maintaining the machine 8.10 Checking cooling water level Work may only be carried out on the cooling system when the diesel engine has cooled down. The machine must be parked on a level ground. The cooling water level is examined directly at the radiator. The compensating tank only serves as a buffer in order to take up water during expansion by the thermal effect and keep it in the cooling circuit. -
Page 94: Draining /Refilling Cooling Water
Maintaining the machine RX 1510-C/-I/-CI 8.11 Draining /refilling cooling water DANGER Risk of scalding! The engine extremely heats up the cooling water. The coolant circuit is under pressure. When opening the coolant circuit the pressure can escape suddenly and the hot cooling water can cause severe scalding! ►... -
Page 95: Exchanging Drums
RX 1510-C/-I/-CI Maintaining the machine 8.12 Exchanging drums The machine must be lifted with appropriate hoisting gear, in order to change the drums. The hoisting gear must have sufficient carrying capacity. The machine may only be lifted at the intended transport handles 1) Attach transport protection. -
Page 96: Adjusting Stripper
Maintaining the machine RX 1510-C/-I/-CI 8.13 Adjusting stripper NOTE The strippers must be reset or renewed in case of wear. 1) Loosen all three screws on the stripper and push stripper toward the drum. ► The distance from stripper to drum must be at least 2 cm. - Page 97 RX 1510-C/-I/-CI Maintaining the machine WARNING Battery acid is extremely caustic and can cause severe chemical burns if touched. ► Do not let acid get on to hands or clothes. ► Immediately rinse the part concerned after contact with acid and consult a doctor.
-
Page 98: Tightening Torques
Tightening torques: RX 1510-C/-I/-CI Tightening torques: Tightening torques for bolts with standard metric thread Tightening torques Nm Tightening torques ft-lb Bolt Bolt dimension dimension 10.9 12.9 10.9 12.9 1000 1200 1050 1480 1774 1092 1308 1420 2010 2400 1047 1482 1770 Strength classes for bolts with untreated, unlubricated surface. -
Page 99: Troubleshooting Table
RX 1510-C/-I/-CI Troubleshooting table 10.0 Troubleshooting table Fault: Possible cause: Remedy: Engine running, machine does Insufficient hydraulic oil in the hydraulic • Check hydraulic oil level not move! oil tank. • Check the hydraulic system for leaks Engine does not start! Too little fuel in the fuel tank. - Page 100 Maintaining the machine RX 1510-C/-I/-CI Error codes and meanings Error code: Meaning: Possible cause: Troubleshooting: Err 22 Safety opening is actuated. Safety opening is actuated. Unlatch safety yoke/ (Only RW deactivate. 1503) No further errors or functions Unlatch yoke before...
- Page 101 © COPYRIGHT 2010, MULTIQUIP INC. Multiquip Inc and the MQ logo are registered trademarks of Multiquip Inc. and may not be used, reproduced, or altered without written permission. All other trademarks are the property of their respective owners and used with permission.
Need help?
Do you have a question about the RX 1510-C and is the answer not in the manual?
Questions and answers