Table of Contents
Advertisement
Advertisement
Table of Contents

Related Manuals for HP PhotoSmart 812


Summary of Contents for HP PhotoSmart 812
- Page 1 photosmart digital camera user's manual...
-
Page 3: Trademark And Copyright Information
Pentax® is a registered trademark of Asahi Optical Co. Ltd. Corporation. The SD logo is a trademark of the SD Card Association. Materials disposal This HP product contains the following materials that might require special handling at end-of-life: Alkaline manganese dioxide-zinc or lithium-iron disulfide AA batteries. -
Page 5: Table Of Contents
Table of Contents 1-Getting started ......9 Camera Parts ......10 Setup . - Page 6 Setup ......34 4-Using HP Instant Share ....35 Using HP Instant Share to Print Pictures .
- Page 7 Finding help on the web ....68 Contacting HP Customer Support ... 68 Hardware repair services ....69 Obtaining support in the United States .
- Page 8 812 user’s manual...
-
Page 9: 1-Getting Started
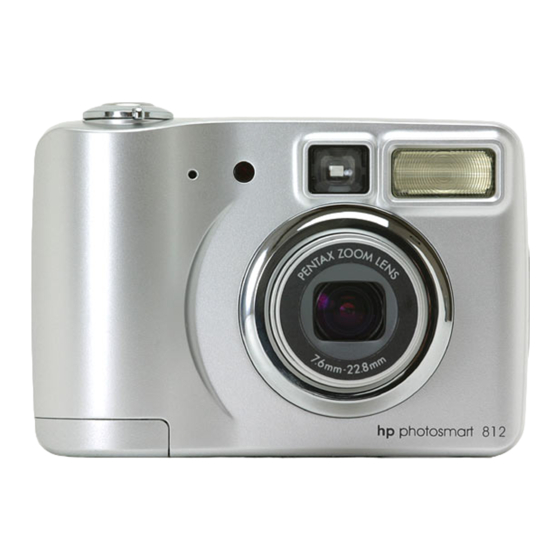
Getting started The HP Photosmart 812 digital camera is a compact 4 Mega- pixel camera with a 3x optical zoom. This camera has an exciting new feature called HP Instant Share technology. You can use the Share menu to select images that you want to print or e-mail. -
Page 10: Camera Parts
Sets the camera mode to Still, Self- Timer, or Video mode Provides camera sounds and plays recorded audio Records audio clips hp photosmart 812 user’s manual... - Page 11 Provides flash illumination Allows you to connect a USB cable or an optional TV cable to the camera Allows you to connect an HP AC power adapter to the camera to operate the camera without batteries, or to charge optional...
- Page 12 Solid red light indicates the camera is capturing a video clip Selects the Flash setting. The current setting is shown by the lights above this button (No light indicates Auto Flash) hp photosmart 812 user’s manual...
-
Page 13: Macro Button
Zooms the lens to telephoto position and off Allows you to move through menus and pictures, and then select choices Turns the Main menu, shown on the Display, on and off Turns HP Instant Share menu on and off... - Page 14 Wrist strap attachment Allows access to insert or remove the memory card Allows access to the batteries Connects the camera to the optional camera dock camera is not in camera dock Allows tripod mounting hp photosmart 812 user’s manual...
-
Page 15: Setup
Setup Attaching the wrist strap Attach the wrist strap as shown in the illustration. NOTE It is easiest to install the wrist strap by inserting it from the bottom. Installing the batteries Open the Battery Door on the bottom of the camera. Insert the batteries according to the markings on the metal contacts located on the door. -
Page 16: Turning On Power
Press the Left/Right arrows on the Controller to move to the other sections and repeat steps one and two until the correct date and time are set. Press OK when the proper values are entered. ON/OFF hp photosmart 812 user’s manual... -
Page 17: Installing The Software
For Windows computers, the HP Photo Imaging software needs at least Internet Explorer 5.0 (Service Pack 2) in order to function properly. Windows Insert the HP Photosmart 812 CD into the CD-ROM drive of your computer. The installation window automatically appears. NOTE... - Page 18 Macintosh Insert the HP Photosmart 812 CD into your computer’s CD-ROM drive. Double-click the CD icon on the desktop. Double-click the appropriate language folder, and then double-click the installer icon. Follow the instructions on the screen to install the software.
-
Page 19: 2-Taking Pictures
Taking pictures Taking still pictures You can take a picture any time the camera is on, no matter what is showing on the Display. To take still pictures: Select Still on the Capture Mode selector. Frame the subject you want to photograph using the optical viewfinder. -
Page 20: Instant Review
60 seconds is reached or the memory card is full. NOTE Video files can be very large and use a lot of space on the memory card. on the Capture hp photosmart 812 user’s manual ON/OFF... -
Page 21: Taking Self-Timer Pictures
Taking self-timer pictures In Self-Timer mode, the camera locks automatic exposure and focus and then takes the picture 10 seconds later. To use Self-Timer mode: Secure the camera to a tripod or set it on a stable surface. Select Self-Timer Capture Mode selector. -
Page 22: Using Live View
In Live View, the following icons provide information about current camera settings. ICON Function current image Counts audio or video recording Appears when an audio clip is recorded Displays the quality setting for the Shows the camera is set to Video mode hp photosmart 812 user’s manual... -
Page 23: Using Zoom
ICON Function Appears when the camera is set to Self- Timer mode and blinks during countdown Shows current flash setting if other than Auto Appears when the camera is set to Macro Displays the battery condition Digital Displays the boundaries of the picture taken crop in Digital Zoom setting Focus... -
Page 24: Using Macro Setting
Auto focus is limited to a range of 0.5 m to infinity (default setting). Amber macro light is on when the camera is set to Macro.The focus range is limited to <0.7 m. hp photosmart 812 user’s manual button until... -
Page 25: Using Flash Settings
Using flash settings When the camera is on, the Flash is automatically set to Auto. To change the setting, press the Flash button. The Flash setting button moves through the flash settings in the following order. Setting Light Description Auto None The camera measures light and flashes if necessary. -
Page 26: Managing Batteries
Batteries have >1/3 life remaining Batteries have <1/3 life remaining Battery low and camera will shut down soon. Live View is disabled. “Blinking” battery is empty and the camera shuts down. Camera is powered by AC. hp photosmart 812 user’s manual... -
Page 27: Recharging Batteries
Turn the camera off (the camera charges only during the Sleep state or while it is off). Plug in the HP AC adapter or place the camera in the HP camera dock. The Power/Memory light blinks a slow green light while the batteries charge. -
Page 28: Power/Memory Light
Slow blinking green Camera is in Sleep state or off and Fast blinking red Amber light indicates Indication Camera is on. charging batteries. Camera has insufficient power and is shutting down. Camera is reading from or writing to the memory card. Camera is off. hp photosmart 812 user’s manual... -
Page 29: 3-Managing Images In The Camera
Managing images in the camera Viewing images To review pictures you have taken, press the OK button with the Display off or from Live View. The last picture taken appears on the Display. Icon Description Displays for first few seconds to allow you to scroll through other pictures you have taken. -
Page 30: Main Menu
Up/Down arrows to highlight the menu options on the left of the Display. Highlight your choice and press the OK button to select it. Press the Menu return to viewing images. button displays the Main menu. Use the button again to exit the menu and hp photosmart 812 user’s manual... - Page 31 Icon Description Plays an audio clip Plays a video clip Deletes the current image, all images, or formats the memory card Magnifies the displayed image Manually rotates displayed image Allows you to adjust camera settings Shows battery condition Shows the current image number from the total number on the memory card date/ Shows the date and time that the current image...
-
Page 32: Play
Press OK to choose the highlighted selection. Cancel returns to Main menu. This Image deletes the current image. All Images deletes all the images in the camera. Format Card deletes all images and files on the memory card. hp photosmart 812 user’s manual... -
Page 33: Magnify
Magnify Selecting this option in the Main menu allows you to enlarge the image on the Display. This option is only for viewing an image on the Display; it does not permanently alter the image. Pressing the OK button selects this option and magnifies the image 4x and causes four arrows to appear on the screen. -
Page 34: Rotate
90 degrees and the Main menu reappears. NOTE If the image is a video clip, you cannot select this option. Setup For information on Setup, refer to Adjusting camera Chapter 6, Settings hp photosmart 812 user’s manual... -
Page 35: 4-Using Hp Instant Share
HP’s e-mail service. When the camera connects to your computer, the selected images are uploaded to an HP website, and e-mail is sent to family or friends that point to the location of your pictures. To use the HP Instant Share feature, press the Share on the camera. - Page 36 Share menu with specific addresses. You must customize the Share menu before using it to send e-mail. Check mark indicates the destination has been selected for the currently displayed image. (You can select more than one destination per image.) hp photosmart 812 user’s manual...
-
Page 37: Using Hp Instant Share To Print Pictures
Using HP Instant Share to Print Pictures Turn the camera on, then press the Share Use the Left/Right arrows to scroll to the image that you want to print. Use the Up/Down arrows to scroll to the print option that you want. -
Page 38: Using The Hp Instant Share E-Mail Service
If you are using a Macintosh computer, skip to step 7. If you are using a computer running Windows, you will be asked to sign in to HP’s Passport program. HP Passport allows you to use HP’s free e-mail service and other services that may be available in the future. - Page 39 Once you have successfully registered, sign in to the HP Passport program, and then the Photo E-mail Setup screen will appear. Here, you can enter an e-mail address and specify how you want it to appear in the camera’s Share menu.
-
Page 40: Selecting Images To Be E-Mailed
The next time you connect the camera to your computer, images are unloaded to your computer, and the images you selected for e-mail will be uploaded to the special HP website. An e-mail message will be sent to every address that you had selected for each image. -
Page 41: 5-Connecting
USB cable. NOTE You can also connect your camera to a computer by using the optional HP camera dock. See the HP camera dock NOTE If you are using a Macintosh computer, switch the camera to Disk Drive in the USB Configuration menu found in the Setup menu. -
Page 42: Connecting To A Printer
Connecting to a printer You can connect the camera directly to HP DeskJet and Photosmart printers that have a USB connection. You can then print images selected from the Share menu or all images in the camera. Your camera came with a special USB cable for connecting the camera to a printer. -
Page 43: Connecting To A Television
Connecting to a television NOTE If you have the optional the HP camera dock, see Connecting to the HP camera dock To connect the camera directly to a television, you must first purchase a custom cable (HP #Q2146-61601). This cable is listed in the accessory catalog included in the camera box. -
Page 44: Connecting To The Hp Camera Dock
NOTE The camera dock does not work without AC power. Be sure to use ONLY the HP AC adapter and the cables that came with the camera dock. Follow the setup instructions provided with the HP camera dock. This includes installing the Camera Dock Insert onto... - Page 45 The camera dock has a light near the top front that provides battery charging status. A blinking light indicates that batteries are charging. There are two buttons on the front that light to show that the camera is connected to the associated device. —This button activates the connection to the computer or the printer, depending on which of those devices is connected to the dock.
-
Page 46: Unloading Images To A Computer Using The Dock
Setup menu. Check that the HP camera dock is connected to your computer. Place the camera in the HP camera dock. It will turn on automatically. Press the process. The HP Image Unload software will launch on your computer, and the images in the camera will automatically unload to the computer. -
Page 47: Displaying Images On A Tv Using The Dock
Displaying images on a TV using the dock Check that the HP camera dock is connected to your TV. Refer to the documentation for your television to determine how to set the television to take video input from your camera instead of the antenna or cable. - Page 48 812 user’s manual...
-
Page 49: 6-Adjusting Camera Settings
Adjusting camera settings You can personalize the camera settings by using the Setup menu. Press the Menu button on the back of the camera to display the Main menu. Select the Setup menu option using the Up/Down arrows. When you select the Setup option, a two page screen appears showing the following choices. -
Page 50: Setting Still Image Quality Level
1/4 resolution with a medium compression rate. 12.7x17.8cm (5x7”) maximum print size Lowest quality level. Image is saved at 1/4 resolution with a high compression rate. 8.9x12.7cm (3x5”) maximum print size (best for e-mail and web) hp photosmart 812 user’s manual... -
Page 51: Setting Automatic Audio Recording
Setting automatic audio recording You can choose to turn automatic audio recording on or off. Select Audio Record in the Setup menu. The Audio Record screen appears. Using the Up/Down arrows, select either on or off and then press OK. For more information on Audio, see Chapter 2. -
Page 52: Changing Date And Time
Disk Drive — connects to a computer as a USB Mass Storage Device Class (MSDC) and appears as a disk drive in the computer’s file structure. (Use this setting for automatic unloading and sharing features on a Macintosh computer.) hp photosmart 812 user’s manual... -
Page 53: Changing The Tv Configuration Setting
This selection sets the format of the video signal for displaying camera images on a television with an optional cable or HP camera dock. Select TV Configuration in the Setup menu. The TV Configuration screen appears. Using the Up/Down arrows, make one of the following two choices and then press OK. - Page 54 812 user’s manual...
-
Page 55: 7-Troubleshooting
If you want to use battery power, disconnect the HP AC adapter from the camera. If you want to use HP AC power, connect the HP AC adapter to a working electrical outlet. - Page 56 Reinstall the batteries and try again. Check the Capture Mode selector. Remove the camera from the camera dock. Press the Shutter button all the way down until you hear a click and see your image on the camera Display. hp photosmart 812 user’s manual...
- Page 57 7-Troubleshooting Use the optical viewfinder instead of Live View to take pictures. Use an HP AC power adapter to power the camera when you are using the Display for an extended period of time and when you are unloading several images to your computer.
- Page 58 In dim light the camera requires a longer exposure. Use a tripod to hold the camera steady, improve the lighting conditions, or use the flash. Switch to Still mode. hp photosmart 812 user’s manual...
- Page 59 Problem Possible cause Solution My image is Your subject blurry. was too close to the camera lens. The subject wasn’t centered in the frame or the subject did not provide enough contrast for the camera to focus properly. You moved the camera while you took the...
- Page 60 Use Flash On setting to brighten the subject when there is a bright light such as the sun or a window behind your subject. Be sure to move your fingers away from the flash when you take a picture. hp photosmart 812 user’s manual...
- Page 61 Problem Possible cause Solution My image is The flash too bright. provided too much light. A natural or artificial source other than the flash provided too much light. You were too close to the subject to use the flash. 7-Troubleshooting Change the flash setting to Flash Off.
- Page 62 Turn on the camera. Make sure that the cable is firmly connected at both ends. Connect the camera directly to a USB port on the computer. Change the USB Configuration setting to Disk Drive. hp photosmart 812 user’s manual...
-
Page 63: Error Messages
Error messages Error messages on the Display Message Unable to focus Focus too far Focus too close Low light 7-Troubleshooting Possible cause Solution The subject did You can lock the focus by not provide pointing at your subject enough contrast and then pressing and for the camera holding the Shutter... - Page 64 There are no Take some pictures. images in the camera and you are trying to review them. You are Install a memory card. attempting to use the camera without a card installed. hp photosmart 812 user’s manual...
- Page 65 Message Card full Card is unformatted Card has wrong format Unable to format The card is 7-Troubleshooting Possible cause Solution You are Unload the pictures from attempting to the camera, delete take pictures unwanted pictures, or when the card replace the card with a is full.
- Page 66 A supported Make sure the camera is printer is either connected to a supported turned off or not printer and that the connected to printer is turned on. the camera. hp photosmart 812 user’s manual...
-
Page 67: Error Messages On The Computer
7-Troubleshooting Possible cause Solution The printer is Either purchase a printer not supported with Direct Print by HP Direct capability or connect the Print capability. camera to a computer and print from there. The camera is Make sure you are... -
Page 68: Getting Assistance
Contacting HP Customer Support In addition to the Web, you can contact HP by telephone or mail for support and service for your camera. Prices, availability, and hours of support are subject to change without notice. -
Page 69: Hardware Repair Services
Customer Support Center, which can help determine if service is required and direct you to a service site. Otherwise, contact the store where you purchased the product. Or, visit www.hp.com/cpso-support/guide/psd/repairhelp.html for the nearest sales and service office. Service is free of charge during the warranty period. Beyond the warranty period, service will be charged. -
Page 70: Obtaining Support Worldwide
180 days of product purchase. HP will determine the hardware service offering based upon the outcome of system self-test programs run by the customer through the initial call to the HP Customer Care Center. If during your technical support call it is determined that your product needs replacement, HP will ship you this replacement product next business day free of charge. - Page 71 HP phone support are subject to change without notice. Please check for the latest information and conditions at www.hp.com/cposupport/loc/regional.html Alternatively, you can ask your dealer or call HP at the phone number listed in this document. For English support in Europe, contact +44 (0) 207 512-52-02.
- Page 72 +421 2-6820-8080 South Africa 086-000-1030 (RSA) +27 11-258-9301 (outside RSA) Spain +34 902-321-123 Sweden +46 (0)8 619-2170 Switzerland +41 (0)848-80-11-11 Taiwan 0800-010055 +82 (2) 3270-0700 (Seoul) 0-80-999-0700 (outside Seoul) +7 095-797-3520 (Moscow) +7 812-346-7997 (St. Petersburg) hp photosmart 812 user’s manual...
-
Page 73: Hewlett-Packard Limited Warranty Statement
Replacement products may be either new or equivalent in performance to new. HP warrants to you that HP software will not fail to execute its programming instructions after the date of purchase, for the period specified above, due to defects in material and workmanship when properly installed and used. - Page 74 HP has marketed this product. The level of warranty service you receive may vary according to local standards. HP will not alter form, fit or function of the product to make it operate in a country for which it was never intended to function for legal or regulatory reasons.
-
Page 75: Appendix
Appendix Camera specifications Feature Description Sensor 3.92 MP effective pixel, 4.13 total, 1/1.8-inch CCD Color depth 30-bit (10 bits x 3 colors) Resolution 3.92 MP (2280x1720 effective pixel count) 4.13 MP (2384x1734 total pixel count) 3.89 MP (2272x1712 file size) Memory type One SD card slot. - Page 76 Flash settings Auto, flash off, auto w/red-eye, flash on Flash working Wide zoom—0.5 to 2.8m distances Telephoto zoom—0.5 to 2.0m Wide – 7.6 mm Telephoto – 22.8 mm Wide – 2.6 Telephoto – 4.8 hp photosmart 812 user’s manual...
- Page 77 Feature Description Focus TTL auto focus Normal: 0.50m to infinity Macro: 0.14m to 0.70m (wide focal) Auto (ISO 100 - 400) (Sensitivity) Metering Average White Automatic Balance Self-Timer 10 second delay Viewfinder Zooming optical viewfinder Flash guide Built in flash with range up to 2.5 meters @ number wide Color LED Backlit, 1.5”polysilicon TFT LCD...
- Page 78 Feature Description Power 2 AA batteries (included) or optional HP AC adapter Slow trickle recharging in camera with optional HP AC adapter or HP camera dock (100% in 15 hours) Automatic advanced power management The camera has a maximum power consumption of 2.5 A.
- Page 79 External Body Dimensions: 95mm (L) x 41mm (W) x 70mm (H) With lens fully extended 95mm (L) x 60mm (W) x 70 mm (H) Weight 199 grams (without batteries) 7 ounces (without batteries) Warranty HP 1 year exchange warranty Appendix...
- Page 80 812 user’s manual...
- Page 81 19, 28 on dock 45 bonus software 17, 18 buttons on camera 10 on camera dock 45 camera dock. See HP camera dock Capture mode 10 compression format 77 computer connect camera to 41 connect dock to 44...
- Page 82 50 unloading camera to computer 41 unloading using camera dock 46 view 29 install batteries 15 bonus software 17, 18 camera dock 9 memory card 15 software 17 Instant Share. See HP Instant Share hp photosmart 812 user’s manual...
- Page 83 11 automatic conservation 25 indicator 14, 26, 28 insufficient 28 specifications 78 turn on/off 16 print images automatically with HP Instant Share 35 directly from camera 42 using camera dock 46 printer connect dock to 44 connect to camera 42...
- Page 84 43 connect dock to 44, 47 connector 11 unknown device 67 unloading images camera to computer 41 using camera dock 46 change configuration 18, 52 connector, camera 11 connector, camera dock 44 hp photosmart 812 user’s manual...
- Page 85 10 view images in camera 29 viewfinder 11, 12 volume, adjust 32 warranty 70, 73 Web sites for HP 68 wide-angle button and lens 11, Windows computer bonus software 17 install software 17 wrist strap, attach 14, 15...
- Page 88 Printed in Singapore 2002 Q2146-90019...
Need help?
Do you have a question about the PhotoSmart 812 and is the answer not in the manual?
Questions and answers