Table of Contents
Advertisement
TECHNICAL & SERVICE MANUAL
SAP-K77RAX
SAP-K97RAX
SAP-K127RAX
SPLIT SYSTEM AIR CONDITIONER
Indoor Model No.
SAP-K77RAX
SAP-K97RAX
SAP-K127RAX
Indoor Unit
SAP-K77RAX
SAP-K97RAX
SAP-K127RAX
+ SAP-C77RAX
+ SAP-C97RAX
+ SAP-C127RAX
Product Code No.
1 852 350 01
1 852 350 02
1 852 350 03
FILE NO.
Outdoor Model No.
Product Code No.
SAP-C77RAX
1 852 350 04
SAP-C97RAX
1 852 350 05
SAP-C127RAX
1 852 350 06
Outdoor Unit
SAP-C77RAX
SAP-C97RAX
SAP-C127RAX
REFERENCE NO.
Destination: Russia (50Hz)
SM
700754
Advertisement
Chapters
Table of Contents
Troubleshooting

Related Manuals for Sanyo SAP-K77RAX


Summary of Contents for Sanyo SAP-K77RAX
- Page 1 TECHNICAL & SERVICE MANUAL FILE NO. SAP-K77RAX + SAP-C77RAX SAP-K97RAX + SAP-C97RAX SAP-K127RAX + SAP-C127RAX Destination: Russia (50Hz) SPLIT SYSTEM AIR CONDITIONER Indoor Model No. Product Code No. Outdoor Model No. Product Code No. SAP-K77RAX 1 852 350 01 SAP-C77RAX...
-
Page 2: Special Precautions
When Transporting Important! Please Read Before Starting Be careful when picking up and moving the indoor and outdoor units. Get a partner to help, and bend your knees This air conditioning system meets strict safety and when lifting to reduce strain on your back. Sharp edges or operating standards. -
Page 3: Table Of Contents
Table of Contents Page 1. OPERATING RANGE ........................2. SPECIFICATIONS 2-1. Unit Specifications ......................2-2. Major Component Specifications ..................2-3. Other Component Specifications ..................3. DIMENSIONAL DATA ........................4. REFRIGERANT FLOW DIAGRAM 4-1. Refrigerant Flow Diagram ....................5. PERFORMANCE DATA 5-1. - Page 4 Page 9. TROUBLESHOOTING 9-1. Check before and after troubleshooting ................9-2. Air conditioner does not operate.................... 9-3. Some part of air conditioner does not operate..............9-4. Air conditioner operates, but abnormalities are observed............. 10. CHECKING ELECTRICAL COMPONENTS 10-1.
-
Page 5: Operating Range
1. OPERATING RANGE Temperature Indoor Air Intake Temp. Outdoor Air Intake Temp. 32 °C D.B. / 23 °C W.B. 43 °C D.B. Maximum Cooling 19 °C D.B. / 14 °C W.B. 19 °C D.B. Minimum... -
Page 6: Specifications
2. SPECIFICATIONS 2-1. Unit Specifications Indoor Unit SAP-K77RAX Outdoor Unit SAP-C77RAX Power Source 220 to 240V Single-Phase 50Hz Voltage Rating 220-240 V Performance Cooling Capacity 2.10 / 2.10 / 2.10 BTU/h 7,200 / 7,200 / 7,200 Air Circulation (High) Moisture Removal (High) - Page 7 Indoor Unit SAP-K97RAX Outdoor Unit SAP-C97RAX Power Source 220 to 240V Single-Phase 50Hz Voltage Rating 220-240 V Performance Cooling Capacity 2.55 / 2.55 / 2.55 BTU/h 8,700 Air Circulation (High) Moisture Removal (High) Liters/h Electrical Rating Cooling Available Voltage Range 198 to 264 Running Amperes 4.5 / 4.5 / 4.6...
- Page 8 Indoor Unit SAP-K127RAX Outdoor Unit SAP-C127RAX Power Source 220 to 240V Single-Phase 50Hz Voltage Rating 220-240 V Performance Cooling Capacity 3.55 / 3.55 / 3.55 BTU/h 12,100 / 12,100 / 12,100 Air Circulation (High) Moisture Removal (High) Liters/h Electrical Rating Cooling Available Voltage Range 198 to 264...
-
Page 9: Major Component Specifications
2-2. Major Component Specifications 2-2-1. Indoor Unit Indoor Unit SAP-K77RAX Control PCB Part No. CR-K77GAX Controls Microprocessor Control Circuit Fuse 250V 3.15A Remote Control Unit RCS-7S2E-G Type Cross-Flow Q'ty ... Dia. and Length 1 ... D102 / L637 Fan Motor... - Page 10 Indoor Unit SAP-K97RAX Control PCB Part No. CR-K97GAX Controls Microprocessor Control Circuit Fuse 250V 3.15A Remote Control Unit RCS-7S2E-G Type Cross-Flow Q'ty ... Dia. and Length 1 ... D102 / L637 Fan Motor Type AC Motor Model ... Q'ty IBH-884-066B ... 1 No.
- Page 11 Indoor Unit SAP-K127RAX Control PCB Part No. CR-K127GAX Controls Microprocessor Control Circuit Fuse 250V 3.15A Remote Control Unit RCS-7S2E-G Type Cross-Flow Q'ty ... Dia. and Length 1 ... D102 / L637 Fan Motor Type AC Motor Model ... Q'ty IBH-884-066B ... 1 No.
-
Page 12: Outdoor Unit
2-2-2. Outdoor Unit Outdoor Unit SAP-C77RAX Control PCB Compressor Type Single Rotary Compressor Model / Nominal Output C-1R65H5S / 650W Compressor Oil ... Amount SAY-56T ... 350 C - R : 4.68 Coil Resistance (Ambient Temp. 25 °C) C - S : 6.77 Safety Device Type External (OLR) Overload Relay... - Page 13 Outdoor Unit SAP-C97RAX Control PCB Compressor Type Single Rotary Compressor Model / Nominal Output C-1RV162H91AA / 800W Compressor Oil ... Amount SAY-56T ... 280 C - R : 3.65 Coil Resistance (Ambient Temp. 25 °C) C - S : 5.38 Safety Device Type External (OLR) Overload Relay...
- Page 14 Outdoor Unit SAP-C127RAX Control PCB Compressor Type Single Rotary Compressor Model / Nominal Output C-R115H5A / 1,100W Compressor Oil ... Amount SAY-56T ... 520 C - R : 1.962 Coil Resistance (Ambient Temp. 25 °C) C - S : 5.38 Safety Device Type External (OLR) Overload Relay...
-
Page 15: Other Component Specifications
2-3. Other Component Specifications Indoor Unit SAP-K77RAX SAP-K97RAX SAP-K127RAX < Thermistor (Room sensor) > Model PTN-41G-S6Z 5 kohm (at 25 °C) Resistance < Thermistor (Coil sensor) > Model PB2M-41E-S16-1 15 kohm (at 0 °C) Resistance 5.4 kohm (at 25 °C) -
Page 16: Dimensional Data
3. DIMENSIONAL DATA Indoor Unit SAP-K77RAX SAP-K97RAX SAP-K127RAX... - Page 17 Outdoor Unit SAP-C77RAX SAP-C97RAX Wide tube service valve dia.9.52(3/8") Narrow tube service valve dia.6.35(1/4") Unit: mm...
- Page 18 Outdoor Unit SAP-C127RAX Wide tube service valve dia.12.7(1/2") Narrow tube service valve dia.6.35(1/4") Unit: mm...
-
Page 19: Refrigerant Flow Diagram
4. REFRIGERANT FLOW DIAGRAM 4-1. Refrigerant Flow Diagram Indoor Unit SAP-K77RAX Outdoor Unit SAP-C77RAX SAP-K97RAX SAP-C97RAX SAP-K127RAX SAP-C127RAX Wide tube service Compressor Wide tube valve Accumulator Narrow tube service valve Narrow tube Capillary tube Cooling cycle O.D. 6.35 mm (1/4") *1 O.D. -
Page 20: Performance Data
5. PERFORMANCE DATA 5-1. Performance charts Indoor Unit SAP-K77RAX Outdoor Unit SAP-C77RAX < Cooling Characteristics > Indoor inlet air D.B. temp. (°C) Outdoor inlet air D.B. temp. (°C) 1.47 Indoor inlet air 1.38 D.B. temp. (°C) 1.28 1.18 1.08 0.98 0.89... - Page 21 Indoor Unit SAP-K97RAX Outdoor Unit SAP-C97RAX < Cooling Characteristics > Indoor inlet air D.B. temp. (°C) Outdoor inlet air D.B. temp. (°C) 1.47 Indoor inlet air 1.38 D.B. temp. (°C) 1.28 1.18 1.08 0.98 0.89 0.79 0.69 0.59 0.49 0.39 Outdoor inlet air D.B.
- Page 22 Indoor Unit SAP-K127RAX Outdoor Unit SAP-C127RAX < Cooling Characteristics > Indoor inlet air D.B. temp. (°C) Outdoor inlet air D.B. temp. (°C) 1.47 Indoor inlet air 1.38 D.B. temp. (°C) 1.28 1.18 1.08 0.98 0.89 0.79 0.69 0.59 0.49 0.39 Outdoor inlet air D.B.
-
Page 23: Air Throw Distance Charts
5-2. Air Throw Distance Charts Indoor Unit SAP-K77RAX Cooling 27 °C Room air temp. : Fan speed High Horizontal distance (m) : Flap angle 0°, : Axis air velocity 0° : Flap angle 30°, : Axis air velocity 30°... - Page 24 Indoor Unit SAP-K97RAX Cooling 27 °C Room air temp. : Fan speed High Horizontal distance (m) : Flap angle 0°, : Axis air velocity 0° : Flap angle 30°, : Axis air velocity 30°...
- Page 25 Indoor Unit SAP-K127RAX Cooling 27 °C Room air temp. : Fan speed High Horizontal distance (m) : Flap angle 0°, : Axis air velocity 0° : Flap angle 30°, : Axis air velocity 30°...
-
Page 26: Cooling Capacity
5-3. Cooling Capacity Indoor Unit SAP-K77RAX Outdoor Unit SAP-C77RAX 230 V Single Phase 50 Hz RATING CAPACITY 2.10 kW AIR FLOW RATE 430 m EVAPORATOR CONDENSER ENT. TEMP. OUTDOOR AMBIENT TEMP. W.B. D.B. 2.12 2.02 1.93 1.84 1.73 1.59 0.53 0.57... - Page 27 Indoor Unit SAP-K97RAX Outdoor Unit SAP-C97RAX 230 V Single Phase 50 Hz RATING CAPACITY 2.55 kW AIR FLOW RATE 440 m EVAPORATOR CONDENSER ENT. TEMP. OUTDOOR AMBIENT TEMP. W.B. D.B. 2.57 2.46 2.35 2.23 2.10 1.93 0.67 0.73 0.78 0.84 0.95 1.07 1.74...
- Page 28 Indoor Unit SAP-K127RAX Outdoor Unit SAP-C127RAX 230 V Single Phase 50 Hz RATING CAPACITY 3.55 kW AIR FLOW RATE 460 m EVAPORATOR CONDENSER ENT. TEMP. OUTDOOR AMBIENT TEMP. W.B. D.B. 3.58 3.42 3.27 3.11 2.92 2.69 0.92 1.00 1.07 1.15 1.33 1.51 2.34...
-
Page 29: Electrical Data
6. ELECTRICAL DATA 6-1. Electrical Characteristics Indoor Unit SAP-K77RAX Outdoor Unit SAP-C77RAX Cooling Indoor Unit Outdoor Unit Complete Unit Fan Motor Fan Motor Compressor Rating Conditions Running amp. 0.17 0.22 3.21 3.60 Power input 0.028 0.045 0.697 0.770 Full Load Conditions Running amp. -
Page 30: Electric Wiring Diagrams
6-2. Electric Wiring Diagrams Indoor Unit SAP-K77RAX SAP-K97RAX SAP-K127RAX To avoid electrical shock hazard, be sure to WARNING disconnect power before checking, servicing and/or cleaning any electrical parts. EVAPORATOR TERMINAL BASE IN-1 IN-2 GRN/YEL LAMP FLAP FLAP 8P ( WHT ) - Page 31 Outdoor Unit SAP-C77RAX SAP-C97RAX SAP-C127RAX To avoid electrical shock hazard, be sure to WARNING disconnect power before checking, servicing and/or cleaning any electrical parts. TERMINAL BASE (5P) OVERLOAD RELAY CAPACITOR (OLR) GRN/YEL GRN/YEL COMPRESSOR MOTOR MOTOR 8FA2-5250-29800-0...
-
Page 32: Installation Instructions
7. INSTALLATION INSTRUCTIONS 7-1. Installation Site Selection 7-1-1. Indoor Unit To prevent abnormal heat WARNING generation and the possibility of fire, do not place obstacles, 15 cm min. 5 cm enclosures and grilles in front 5 cm min. min. of or surrounding the air conditioner in a way that may block air flow. - Page 33 7-1-2. Outdoor Unit Exhaust fan AVOID: Hot air Heat source heat sources, exhaust fans, etc. (Fig. 4) damp, humid or uneven locations. Outdoor unit choose a place as cool as possible. choose a place that is well ventilated. Fig. 4 allow enough room around the unit for air intake/exhaust and possible maintenance.
-
Page 34: Recommended Wire Length And Diameter
7-2. Recommended Wire Length and Diameter Regulations on wiring diameter differ from locality to locality. For field wiring requirements, please refer to your local electrical codes. Carefully observe these regulations when carrying out the installation. Table 2 lists recommended wire lengths and diameters for power supply systems. NOTE Refer to the wiring system diagram (Fig. -
Page 35: Remote Control Unit Installation Position
7-3. Remote Control Unit Installation Position The remote control unit can be operated from either a non-fixed position or a wall-mounted position. To ensure that the air conditioner operates correctly, do not install the remote control unit in the following places: In direct sunlight Behind a curtain or other place where it is covered More than 8 m away from the air conditioner... -
Page 36: How To Test Run The Air Conditioner
7-4. How to Test Run the Air Conditioner After turning on the power of the air conditioner, use the remote controller and follow the steps below to conduct the test run. (1) Set the remote controller in Test Run mode. (Fig. 8a) ON/OFF Press and hold the ECONOMY button and the 1HR. -
Page 37: Removing And Installing The Grille
7-5. Removing and Installing the Grille Basically, these models can be installed and wired without removing the grille. If access to any internal part is need- ed, follow the steps as given below. How to remove the grille Open the front panel until it is nearly horizontal, grasp the sections near the front panel arms on both sides, and then remove the panel by pushing the arms towards the outside while pulling the panel towards you. -
Page 38: Address Setting Of The Remote Control Unit
7-6. Address Setting of the Remote Control Unit The address can be set in order to prevent interfer- ence between remote controllers when 2 indoor units Jumper wire for are installed near each other. To set a different address switching address, it is necessary to change the address on the second remote controller. -
Page 39: Functions
8. FUNCTIONS 8-1. Room Temperature Control (1) Cooling Room temperature control is obtained by cycling the compressor ON and OFF under control of the room temperature sensor in the indoor unit. NOTE Some informations except for the room temperature are transmitted every 5 minutes by the remote control unit to the controller in the indoor unit. -
Page 40: Dry Operation (Dehumidification)
8-2. Dry Operation (Dehumidification) Dry operation uses the ability of the cooling cycle to remove moisture from the air, but by running at low level to dehumidify without greatly reducing the room temperature. The air conditioner repeats the cycle of turning ON and OFF automatically as shown in the chart below according to the room temperature. -
Page 41: Freeze Prevention (Cooling And Dry)
8-3. Freeze Prevention (Cooling and Dry) This function prevents freezing of the indoor heat exchange coil. When the temperature of the indoor heat exchange coil falls below 2 °C for 2 minutes, the control circuit stops the outdoor fan and compressor (The compressor stops 3 seconds after the outdoor fan stopped). During this period, Indoor fan operates in LL. -
Page 42: Automatic Fan Speed (Cooling And Dry)
8-4. Automatic Fan Speed (Cooling and Dry) This automatically adjust the indoor fan speed by the difference between the room temperature and set temperature. < Cooling > Room temp. T+2 °C T+1 °C T °C Set temp. Indoor fan H:High M:Medium L:Low... -
Page 43: Troubleshooting
9. TROUBLESHOOTING 9-1. Check before and after troubleshooting WARNING Hazardous voltage can cause ELECTRIC SHOCK or DEATH. Disconnect power or turn off circuit breaker before you start checking or servicing. 9-1-1. Check power supply wiring. Check that power supply wires are correctly connected to terminals L and N on the terminal plate in the outdoor unit. -
Page 44: Air Conditioner Does Not Operate
9-2. Air conditioner does not operate. 9-2-1. Circuit breaker trips (or fuse blows). (1) When the circuit breaker is set to ON, it is tripped soon. (Resetting is not possible.) < Failure Cause > There is a possibility of ground fault. There is a possibility of insulation fault. - Page 45 (2) Circuit breaker trips in several minutes after turning the air conditioner on. There is a possibility of short circuit. 1. Check capacity of circuit breaker. Replace with suitable one (larger capacity). 2. Is capacity of circuit breaker suitable ? In case of Heating operation : Measure resistance of outdoor fan Measure resistance of 4-way valve's...
- Page 46 (2) Check remote control unit. 1. Try to run with another remote control unit. 2. Is the operation good ? First remote control unit is defective. In the case that the remote control transmission section is dirty, clean it. In the case that the remote control reception section in front of indoor unit is dirty, clean it.
- Page 47 9-2-3. Only outdoor unit does not run. (1) Check setting temperature. COOL Is room temperature too low ? 1. Try to lower setting temperature by temperature setting button ( button). 2. Does outdoor unit run ? Check to see if inter-unit wiring is correctly connected between indoor and outdoor unit.
-
Page 48: Some Part Of Air Conditioner Does Not Operate
9-3. Some part of air conditioner does not operate. 9-3-1. Only indoor fan does not run. Check fan casing Remove foreign foreign matter on matter or repair. inside. If you turn fan gently once or twice by hand, can the fan turn ? Fan motor winding burnout or foreign Repair or replace. -
Page 49: Only Compressor Does Not Run
9-3-4. Only compressor does not run. Is overload relay (OLR) Check compressor motor working ? capacitor. Is temperature of compressor Measure resistance of abnormally high ? compressor motor winding. Does refrigerant gas shortage ? Charge refrigerant gas (R22). Measure Power supply Rotor may be locked up. -
Page 50: Air Conditioner Operates, But Abnormalities Are Observed
9-4. Air conditioner operates, but abnormalities are observed. 9-4-1. Poor cooling. Is remote control unit placed where Change position of remote it can detect room temperature control unit. properly ? Are wide and narrow tubes between Insulate both wide and narrow indoor unit and outdoor unit tubes separately and then insulated ? -
Page 51: Checking Electrical Components
10. CHECKING ELECTRICAL COMPONENTS 10-1. Measurement of Insulation Ground wire Resistance Clip The insulation is in good condition if the resistance exceeds 2M ohm. Probe 10-1-1. Power Supply Cord Insulation Clamp the grounding wire of power cord with the lead tester clip of the insulation resistance tester and measure the Fig. -
Page 52: Checking Continuity Of Fuse On Pcb Ass'y
10-2. Checking Continuity of Fuse Fuse on PCB Ass'y Remove the PCB Ass'y from the electrical component box. Then pull out the fuse from the PCB Ass'y. (Fig. 5) Check for continuity using a multimeter as shown in PCB Ass'y Fig. -
Page 53: Appendix
APPENDIX INSTRUCTION MANUAL SAP-K77GAX + SAP-C77GAX SAP-K97GAX + SAP-C97GAX SAP-K127GAX + SAP-C127GAX (OI-852-6-4181-018-00-1) - Page 54 FEATURES This air conditioner is equipped with cooling, and drying functions. Details on these functions are provided below; refer to these descriptions when using the air conditioner. • Microprocessor Controlled Operation • Air Sweep Control The interior compartment of the remote control unit This function moves a flap up and down in the air outlet, contains several features to facilitate automatic directing air in a sweeping motion around the room and...
-
Page 55: Product Information
PRODUCT INFORMATION ELECTRICAL REQUIREMENTS If you have problems or questions concerning your Air Conditioner, you will need the following information. 1. All wiring must conform to the local electrical codes. Model and serial numbers are on the nameplate on the Consult your dealer or a qualified electrician for bottom of the cabinet. -
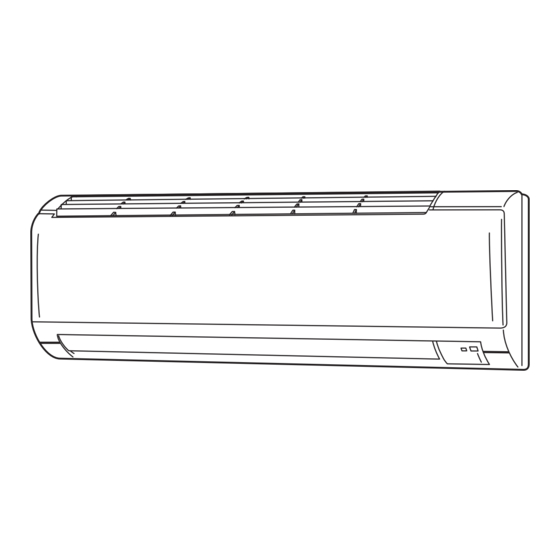
Page 56: Names Of Parts
NAMES OF PARTS UNIT DISPLAY AND OPERATION BUTTON Air intakes INDOOR UNIT INDOOR UNIT REMOTE CONTROL receiver Air outlet OPERATION lamp OPERATION TIMER TIMER lamp Remote control unit OPERATION ON/OFF button (ON/OFF) Drain hose IMPORTANT Refrigerant tubes Avoid using radio equipment such as mobile phone near (within 1 m) the remote control receiver. -
Page 57: Remote Control Unit (Display)
REMOTE CONTROL UNIT (DISPLAY) Displayed when transmitting data Displayed when setting timer Symbols (1) Operation mode (4) Timer COOL ........12-hour ON Timer....MILD DRY ......12-hour OFF Timer....FAN ........1-hour OFF Timer....(2) Fan speed (5) ECONOMY ...... -
Page 58: Remote Control Unit
REMOTE CONTROL UNIT Transmitter When you press the buttons on the remote control unit, the mark appears in the display to transmit the setting changes to the receiver in the air conditioner. Display Information on the operating conditions is displayed while the remote control unit is switched on. - Page 59 ON/OFF operation button This button is for turning the air conditioner on and off. Temperature setting buttons (TEMP.) Press the button to increase the set temperature. Press the button to reduce the set temperature. The temperature setting changes by 1 °C each time one of the TEMP. buttons is pressed. The set temperature appears in the display for only 3 seconds.
-
Page 60: Using The Remote Control Unit
USING THE REMOTE CONTROL UNIT HOW TO INSTALL BATTERIES REMOTE CONTROL UNIT INSTALLATION POSITION The remote control unit may be operated either from a non-fixed position or from a wall-mounted position. To ensure that the air conditioner operates correctly, DO NOT install the remote control unit in the following places: DO NOT •... -
Page 61: Operation With The Remote Control Unit
OPERATION WITH THE REMOTE CONTROL UNIT 1. Operation 2. Adjusting the Fan Speed A. Automatic fan speed Simply set the FAN SPEED selector button to the position. This automatically sets the best fan speed for the room temperature. B. Manual fan speed If you want to adjust fan speed manually during operation, just set the FAN SPEED selector button as desired. -
Page 62: Economy Mode
4. ECONOMY Mode SPECIAL REMARKS ‘‘DRY’’ ( ) Operation How it works? • Once the room temperature reaches the level that was set, the unit repeats the cycle of turning on and off automatically. • During DRY operation, the fan speed is automatically set to Low speed for providing a comfortable breeze. -
Page 63: Using The 12-Hour On And Off Timer
USING THE 12-HOUR ON AND OFF TIMER 1. TIMER ON mode (Example) After the length of time set for TIMER OFF elapses, the unit stops operating. The display depicted at left indicates that the air conditioner will The timer times stop operating in five hours. -
Page 64: Using The 1-Hour Off Timer
USING THE 1-HOUR OFF 2. Combining the 1-Hour OFF Timer and 12-Hour ON Timer TIMER By combining the 1-Hour OFF Timer and 12-Hour ON Timer, it is possible to have the unit operate for just one hour from the present 1. -
Page 65: Adjusting The Airflow Direction
ADJUSTING THE AIRFLOW CAUTION DIRECTION • Use the FLAP button on the remote control to adjust the 1. Horizontal position of the flap. If you move the flap by hand, the flap The horizontal airflow can be adjusted by moving the vertical position according to the remote control and the actual flap vanes with your hands to the left or right. -
Page 66: Care And Cleaning
CARE AND CLEANING Air Clean Filter For safety, be sure to turn the air The air clean filter removes dust and dirt from the air, and reduces conditioner off and also to odors and smoke from tobacco. disconnect the power before cleaning. -
Page 67: Troubleshooting
TROUBLESHOOTING If your air conditioner does not work properly, first check the following points before requesting service. If it still does not work properly, contact your dealer or service center. Trouble Possible Cause Remedy Air conditioner does 1. Power failure. 1. - Page 68 SANYO Electric co., Ltd. Apr. / 2008 R&D center manual...
Need help?
Do you have a question about the SAP-K77RAX and is the answer not in the manual?
Questions and answers