Table of Contents
Advertisement
How to get the best from
Your Range
Contents
Aluminum Foil
21, 23, 25, 30
Anti-Tip Device
2, 3, 35, 43
Appliance Registration
Before You Call for Service 53, 54
Thermostat Adjustment—
Do It Yourself
Care and Cleaning
Clock and Timer
Consumer Services
Important Phone Numbers
Features
Installation Instructions
LP Conversion
Flooring Under Range
Leveling
Model and Serial Numbers
Oven
Baking
Broiling, Broiling Guide
Control Settings
Door Removal
Light; Bulb Replacement 14, 32
Oven Bottom
Oven Vents
2
Roasting, Roasting Guide 21, 22
Self-Cleaning
Shelves
20
Power Outage
28–33
Safety Instructions
12, 13
Surface Cooking
51
Burners
51
Control Settings
6, 7
Cooktop Comparison
34–43
Cookware Tips
44–50
Flame Size
36
Lighting Instructions
43
Warranty
2
14–27
16–19
23, 24
11
31
GE Answer Center
800.626.2000
Use and Care
30
15, 33
& Installation
25–27
15, 16
13
3–5
8–10
8–10
8, 9
8
10
9
8
Back Cover
®
of Models
RGB744
RGB745
Advertisement
Table of Contents

Related Manuals for Hotpoint RGB744


Summary of Contents for Hotpoint RGB744
-
Page 1: Use And Care
15, 16 Power Outage Safety Instructions 3–5 Surface Cooking 8–10 Burners 8–10 Control Settings 8, 9 Cooktop Comparison Cookware Tips Flame Size Lighting Instructions Warranty Back Cover ® GE Answer Center 800.626.2000 Use and Care & Installation of Models RGB744 RGB745... -
Page 2: Installation Instructions
Write down the model and serial numbers. Depending on your range, you’ll find the model and serial numbers on a label on the front of the range, behind the kick panel, storage drawer or broiler drawer. These numbers are also on the Consumer Product Ownership Registration Card that came with your range. -
Page 3: Features
If it is not, there is a possible risk of the range tipping over and causing injury if you or a child stand, sit or lean on an open door. -
Page 4: Baking
Air openings are located at the rear of the cooktop, at the top and bottom of the oven door, and at the bottom of the range under the broiler drawer. • Do not use a wok on models with sealed burners if the wok has a round metal ring that is placed over the burner grate to support the wok. -
Page 5: Shelves
• When flaming foods are under the hood, turn the fan off. The fan, if operating, may spread the flames. • If range is located near a window, do not hang long curtains that could blow over the top burners and create a fire hazard. -
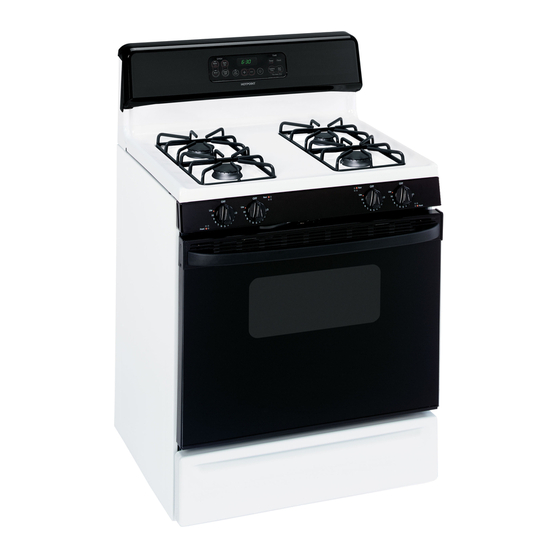
Page 6: Features Of Your Range
Features and appearance vary. Sealed Burners Burner Cap Drip Pan (on some models) Burner Head Your range is equipped with one of the two types of surface burners shown above. RGB745 shown Standard Twin Burners Drip Pan (on some models) Burner... - Page 7 11 Storage Drawer or Kick Panel (depending on model) 12 Broiler Pan and Grid 13 Model and Serial Numbers On front frame of range, behind storage drawer or kick panel. 14 Lift-Off Oven Door Easily removed for oven cleaning. 15 Anti-Tip Device Lower right rear corner on range back.
-
Page 8: Lighting Instructions
In case of a power failure, you can light the surface burners on your range with a match. Hold a lighted match to the burner, then turn the knob to the LITE position. Use extreme caution when lighting burners this way. -
Page 9: Surface Burner Controls
Before Lighting a Burner • If drip pans are supplied with your range, they should be used at all times. • Make sure all grates on the range are in place before using any burner. After Lighting a Burner • After the burner ignites, turn the knob to adjust the flame size. -
Page 10: Surface Cooking
Holder accessory, model JXWK which can be ordered from your appliance dealer. The Wok Holder fits on top of the range grate to provide support and proper air circulation for traditional round bottom woks only. Do not use flat bottomed woks with the Wok Holder. - Page 11 FEATURES OF YOUR OVEN CONTROLS OVEN SET Control Knob The OVEN SET control knob has settings for BAKE, BROIL, TIME BAKE and CLEAN. OVEN SET When you turn the knob to the desired setting, the proper burner is activated for that operation. BAKE—Use this setting for all normal oven operations—for example, for cooking roasts or casseroles.
-
Page 12: Clock And Timer
FEATURES OF YOUR OVEN CONTROLS, Clock and Timer with Press Pads (on some models) COOK TIME CLOCK ON/OFF START TIMER TIME ON/OFF ON/OFF 1. CLOCK. Press this pad before setting the clock. To set the clock, first press the CLOCK pad. - Page 13 Here’s what you do: PUSH TO TURN 1. Make sure both your range clock and the DELAY START dial show the correct time of day. When either the DELAY START dial or STOP TIME dial is pushed in and turned, it will “pop”...
-
Page 14: Before Using Your Oven
Read the information and tips on the following pages. Keep this guide handy where you can refer to it, especially during the first weeks of using your new range. Electric Ignition The oven burner and broil burner are lighted by electric ignition. -
Page 15: Oven Vents
Oven Vents The oven is vented through duct openings at the rear of the cooktop. See the Features section. Do not block these openings when cooking in the oven—it is important that the flow of hot air from the oven and fresh air to the oven burners be uninterrupted. -
Page 16: Pan Placement
How to Set Your Range for Baking To avoid possible burns, place the shelves in the correct position before you turn the oven on. -
Page 17: Aluminum Foil
Baking Guides When using prepared baking mixes, follow package recipe or instructions for best baking results. Cookies When baking cookies, flat cookie sheets (without sides) produce better-looking cookies. Cookies baked in a jelly roll pan (short sides all around) may have darker edges and pale or light browning may occur. -
Page 18: Timed Baking
Automatic Oven Timer (on models with press pads) For models with DELAY START and STOP TIME dials, see the Automatic Oven Timers section in Oven Controls, Clock and Timer. How to Time Bake Do not lock the oven door with the latch during regular timed baking. -
Page 19: Questions And Answers
NOTE: • The low temperature zone of this range (between 150°F and 200°F) is available to keep hot cooked foods warm. Food kept in the oven longer than two hours at these low temperatures may spoil. - Page 20 To Adjust the Thermostat: Note the position of the pointer to the screw Cooler Pull the OVEN TEMP knob off the range and look at the back side. To make adjustment, loosen (approximately one turn), but do not completely remove, the two screws on the back of the knob.
-
Page 21: Use Of Aluminum Foil
Do not lock the oven door with the latch during roasting. The latch is used for self-cleaning only. Roasting is cooking by dry heat. Tender meat or poultry can be roasted uncovered in your oven. Roasting temperatures, which should be low and steady, keep spattering to a minimum. -
Page 22: Roasting Guide
Questions and Answers Q. Is it necessary to check for doneness with a meat thermometer? A. Checking the finished internal temperature at the completion of cooking time is recommended. Temperatures are shown in Roasting Guide. For roasts over 8 lbs., check with thermometer at half- hour intervals after half the time has passed. - Page 23 5. Turn the OVEN SET knob and the OVEN TEMP knob to BROIL. 6. When broiling is finished, turn OVEN TEMP knob to OFF. Remove the broiler pan from the range and serve food immediately. Leave the pan outside the range to cool.
-
Page 24: Broiling Guide
The oven door must be closed during broiling. • Always use the broiler pan and grid that comes with your range. It is designed to minimize smoking and spattering by trapping juices in the shielded lower part of the pan. -
Page 25: Operating The Self-Cleaning Oven
OPERATING THE SELF-CLEANING OVEN Before a Clean Cycle We recommend venting with an open window or using a ventilation fan or hood during the first self-clean cycle. 1. Remove the broiler pan, broiler grid, all cookware and any aluminum foil from the oven—they cannot withstand the high cleaning temperatures. -
Page 26: How To Set The Oven For Cleaning
3 hours is displayed. Models with dials: Set the automatic oven timers: Make sure the range clock is set to the correct time of day. Clear the DELAY START and STOP TIME dials of any... - Page 27 Q. Can I cook food on the cooktop while the oven is self-cleaning? A. Yes. While the oven is self-cleaning, you can use the cooktop just as you normally do. However, be careful when standing in front of the range—oven becomes very hot while self-cleaning.
-
Page 28: Care And Cleaning
Proper care and cleaning are important so your range will give you efficient and satisfactory service. Follow these directions carefully in caring for it to help assure safe and proper maintenance. CAUTION: DO NOT OPERATE THE BURNER WITHOUT ALL BURNER PARTS AND DRIP PANS (IF SO EQUIPPED) IN PLACE. - Page 29 Wipe off surface burners. If heavy spillover occurs, remove the surface burners from the range. Burners lift out for cleaning. Lift up the cooktop and then lift out the surface burners. To remove burned-on food, soak the surface burner in a solution of mild liquid detergent and hot water.
-
Page 30: Cooktop Surface
Don’t put the grates back on the range while they are wet. When replacing the grates, be sure they’re positioned securely over the burners. To prevent rusting on cast iron grates, apply a light coating of cooking oil on the bottom of the grates. -
Page 31: Broiler Pan And Grid
Both the broiler pan and grid can also be cleaned in the dishwasher. Do not store a soiled broiler pan and grid anywhere in the range. Do not clean the broiler pan or grid in the self-cleaning oven. NOTE: Take the shelves out of the oven before you begin the self-clean cycle. -
Page 32: Removable Storage Drawer
Oven Light Replacement (on some models) CAUTION: Before replacing your oven light bulb, disconnect the electrical power to the range at the main fuse or circuit breaker panel. Be sure to let the light cover and bulb cool completely. The oven light bulb is covered with a removable glass cover that is held in place with a bail-shaped wire. -
Page 33: Oven Air Vents
Air openings are located at the rear of the cooktop, at the top and bottom of the oven door, and at the bottom of the range, under the kick panel, storage drawer or broiler drawer (depending on the model). -
Page 34: Installation Instructions
Always use NEW flexible connectors when installing a gas appliance. CAUTION Do not attempt to operate the oven of this range during a power failure (Electric Ignition models only). IMPORTANT Remove all packing material and literature from oven before connecting gas and electrical supply to range. - Page 35 THAN 24 INCHES. The vertical distance from the plane of the cooking surface to the bottom of adjacent overhead cabinets extending closer than 1 to the plane of the range sides must not be less than 18 . (See Dimensions and Clearances illustration in this section.) •...
- Page 36 (see Gas Pipe and Electric Outlet Locations) may be adjusted to meet specific requirements. • The range may be placed with 0 clearance (flush) at the back wall and side walls of the range. LOCATION Do not locate the range where it may be subject to strong drafts.
-
Page 37: Provide Adequate Gas Supply
This range is convertible for use on natural or propane gas, if you decide to use this range on a different type of gas, conversion adjustments must be made by a service technician or other qualified person before attempting to operate the range on that gas. - Page 38 INSTALLATION INSTRUCTIONS CONNECT THE RANGE TO GAS Flexible Connector Hookup for Models Equipped with Sealed Burners Pressure Regulator Gas Flow into Range 90° Elbow (provided) Adapter Installer: Inform the consumer of the location of the gas 1/2 " or 3/4 "...
-
Page 39: Preferred Method
1. Install a manual gas line shut-off valve in the gas line in an easily accessed location outside of the range. Make sure everyone operating the range knows where and how to shut off the gas supply to the range. 2. Install male 1/2 flare union adapter to the 1/2 NPT internal thread elbow at inlet of regulator. -
Page 40: Electrical Connections
Z240/MH Mobile Home Installation Code. before use Electric Disconnect 1. Locate disconnect plug on the range back. 2. Pinch sides of connector and pull out of range back. Usage Situations where Appliance Power You will have this disconnect plug. -
Page 41: Seal The Openings
SEAL THE OPENINGS Seal any openings in the wall behind the range and in the floor under the range when hookups are completed. CHECK IGNITION OF SURFACE BURNERS Surface Burner Ignition Operation of all cooktop and oven burners should be checked after the range and gas supply lines have been carefully checked for leaks. - Page 42 1. Remove the knurled screws holding down rear of the oven bottom. 2. Grasp the oven bottom at finger slots on each side. 3. Lift the rear of the oven bottom enough to clear the lip of the range frame, then pull out.
-
Page 43: Leveling The Range
Anti-Tip device WB02X7909. 1. Mark the wall where the RIGHT EDGE of the range is to be located. Be sure to allow for the countertop overhang if you intend to install the range next to cabinets. -
Page 44: Converting To Lp Gas
HOW TO CONVERT A SEALED BURNER RANGE FOR USE WITH LP GAS OR NATURAL GAS This range leaves the factory set for use with natural gas. If you convert to LP gas, keep these instructions and orifices in case you want to convert back to natural gas. - Page 45 2-digit number and the letter “L” on top. Each orifice spud will also have 1, 2 or 3 grooves on the top, and some will have a painted side, denoting the location on the range where it is to be installed as shown below. Brass...
- Page 46 CONVERTING TO LP GAS 4. To prevent leakage, make sure the orifice spuds are securely screwed into the gas inlet tubes. 5. Put old orifice spuds back in the bag or on the bracket next to the pressure regulator to save for possible future conversion.
-
Page 47: Check For Leaks
CHECK FOR LEAKS When all connections have been made, make sure all range controls are in the off position and turn on the main gas supply valve. Use a liquid leak detector at all joints and connections to check for leaks in the system. -
Page 48: Natural Gas
BURNER RANGE FOR USE WITH LP GAS OR NATURAL GAS This range leaves the factory set for use with natural gas. If you convert to LP gas, keep these instructions and orifices in case you want to convert back to natural gas. - Page 49 4. Replace the burner assemblies. 5. Keep all spuds with your range so you have them if you move or get a different gas hook-up. Top Burner Orifice Drill Size Natural Gas #54 (.0550 Dia.)
- Page 50 CONVERTING TO LP GAS ADJUST LOW FLAME SETTING NOTE: Only valves with these types of knobs are adjustable. 1. Turn all top burners to LOW. 2. Remove all four knobs. 3. With a small flat blade screwdriver, turn the valve set screws clockwise to decrease flame size, counterclockwise to increase flame size.
- Page 51 NOTES...
- Page 52 NOTES...
-
Page 53: Before You Call For Service
BURN EVENLY • Make sure the drip pans are installed correctly. BURNER FLAMES VERY • If range is connected to LP gas, check all steps in the Installation Instructions. LARGE OR YELLOW SURFACE BURNERS • The oven gas shut off valve may have accidentally been moved during... - Page 54 • Oven bottom not securely seated in position. • Oven temperature is too high to set self-clean operation. Allow the range to cool to room temperature and reset the controls. • Door latch handle not moved all the way to the right.
-
Page 55: Parts And Accessories
We’ll Be There With the purchase of your new Hotpoint appliance, receive the assurance that if you ever need information or assistance, we’ll be there. All you have to do is call—toll-free! GE Answer Center® 800.626.2000 Whatever your question about any Hotpoint major appliance, GE Answer ®... -
Page 56: What Is Not Covered
YOUR HOTPOINT GAS RANGE WARRANTY WHAT IS COVERED WHAT IS NOT COVERED Some states/provinces do not allow the exclusion or limitation of incidental or consequential damages, so the above limitation or exclusion may not apply to you. This warranty gives you specific legal rights, and you may also have other rights which vary from state to state/province to province. To know what your legal rights are in your state/province, consult your local or state/provincial consumer affairs office or your state’s Attorney General.
Need help?
Do you have a question about the RGB744 and is the answer not in the manual?
Questions and answers