Table of Contents
Advertisement
Quick Links
How to get the best from
Aluminum Foil 4,5, 17, 18,20,29
Anti-Tip Device
Appliance Registration
Care and Cleaning
Clock and Timer
Consumer Services
Features
Flooring Under Range
Installation Instructions
Leveling
Minor Adjustments
Model and Serial Numbers 2,6,34
Oven
Air Adjustment
Baking
18,20,26
Broiler Pan and Rack
Broiling, Broiling Guide
Control Settings
14, 18,20,22-24
Door Latch
Door Removal
Light; Bulb Replacement
29,31,39
Oven Bottom
Oven Vents
Preheating
3,33,40
2
Roasting, Roasting Guide 18, 19
25-30
Self-Cleaning Instructions 22–24
10, 11
Shelves
47
Thermostat Adjustment
6,7
Power Outage
34
Problem Solver
Safety Instructions
32-44
40
Set the Clock
31
Set the Timer
Surface Cooking
12-24
Burner Grates
31,39
Burners
14-17
Control Settings
Cookware Tips
Flame Size
20,21
Lighting Instructions
Warranty
28
Installation
13,30
GE Answer Center"
800.626.2000
4,5, 13,30
16
&Installation
12, 16,22,27
RGB747GER
13
11, 12
45,46
2-5
10, 11
10, 11
8,9
26
25,26
8
9
9,38,44,45
8
Back Cover
32-44
of Model
Advertisement
Table of Contents

Subscribe to Our Youtube Channel
Related Manuals for Hotpoint RGB747GER


Summary of Contents for Hotpoint RGB747GER
- Page 1 Burner Grates Burners Control Settings Cookware Tips Flame Size Lighting Instructions Warranty Installation GE Answer Center” 800.626.2000 HUTFOINT Use and Care 4,5, 13,30 &Installation of Model 12, 16,22,27 RGB747GER 11, 12 45,46 10, 11 10, 11 25,26 9,38,44,45 Back Cover 32-44...
-
Page 2: Help Us Help You
To obtain service, see the Consumer Services page in the back of this book. To obtain replacement parts, contact GE/Hotpoint Service Centers. We’re proud of our service and want you to be pleased. If for some reason you are not happy with the service you receive, here are three steps to follow for further help. -
Page 3: Important Safety Instructions
IMPORTANT SAFETY INSTRUCTIONS Read all instructions before using this appliance. IMPORTANT SAFETY NOTICE California Safe Drinking Water and Toxic Enforcement Act requires the Governor of California to publish a list of substances known to the state to cause cancer, birth defects or other reproductive harm, and requires businesses to warn customers of potential exposure to such substances. - Page 4 IMPORTANT SAFETY INSTRUCTIONS For your safety, never use your appliance for warming or heating the room. Q Do not use water on grease fires. Never pick up a flaming pan. Turn off burner, then smother flaming pan by covering pan completely with well-fitting lid, cookie sheet or flat tray.
-
Page 5: Baking, Broiling And Roasting
Do not leave plastic items on the ‘--->% ->&- cooktop- they may melt if left too close to the vent. /ent appearance and location vary Do not leave anv items on the co;ktop. The hot air from the vent may ignite flammable items and will increase pressure in closed containers, which may cause them to burst. -
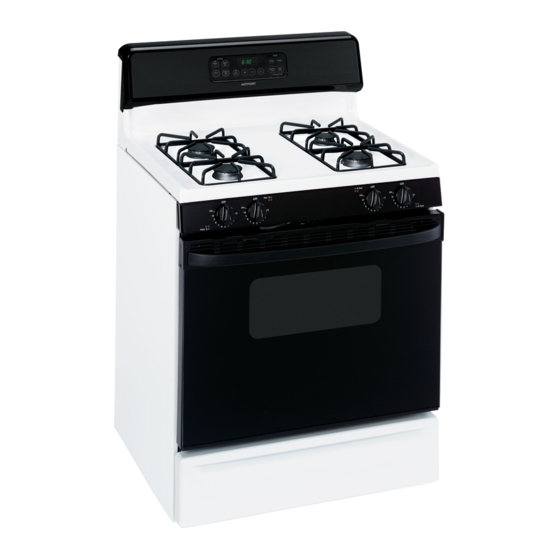
Page 6: Features Of' Your Range
FEATURES OF’ YOUR RANGE ~& Burner Cap ~lcfGQ$;lL;i:ad -. ——. . — models) -“”””’:: .<.? ..,. ? Burner Base ‘\ ..-.-..--LJ &... ,,–..+7 — (B--J-L XL_ \ ‘k... - Page 7 Feature Index 1 Grates, Drip Pans (on models so equipped) and Surface Burners 2 Oven Lamp On/Off Switch 3 Oven Control, Clock and Timer 4 Oven Vents 5 Cooktop 6 Surface Burner Controls 7 Broiler Pan and Rack 8 Oven Shelves (Easily removed or repositioned on shelf supports.) 9 Oven Shelf Supports 10 Air Vent in Oven Door (Top of Oven Door.) 11 Storage Drawer...
-
Page 8: Surface Cooking
Electric Ignition Your surface burners are lighted by electric ignition, eliminating the need for standing pilot lights with constantly burning flames. In case of a power failure, you can light the surface burners on your range with a match. Hold a lighted match to the burner, then turn the knob to the LITE position. -
Page 9: How To Select Flame Size
How to Select Flame Size Watch the flame, not the knob, as you reduce heat. The tlame size on a gas burner should match the cookware you are using. OF ~,..::’ SAFE HANDLING COOKWARE NEVER THE FLAME EXTEND UP THE SIDES OF THE “... - Page 10 FEATURES OF YOUR OVEN CONTROL u~M””LJy)jfr#!r+i15Mu!lof I CLEAR 1. CLEARK)FF. Press this pad to cancel all oven operations except clock and timer. 2. PROGRAM STATUS. Words light up in the display to indicate what is in time display. Programmed information can be displayed at any time by pressing the pad of the operation you want to see.
-
Page 11: Oven Control, Clock And Timer
OVEN CONTROL, CLOCK AND TIMER Clock ;;:’;:m::ay automatic oven timing functions to cannot be changed during a TIME Timer The timer is a minute timer; it does not control oven operations. The maximum setting on the timer is9 hours and 55 minutes. To Reset Timer Press TIMER pad and then press INCREASE or DECREASE pad... -
Page 12: Using Your Oven
Before Using Your Oven Be sure you understand how to set the controls properly. Practice removing and replacing the shelves while the oven is cool. Read the information and tips on the following pages. Keep this book handy where you can refer to it, especially during the first weeks of using your new range. -
Page 13: Oven Vents
Oven Moisture your oven heats up, the temperature change of the air in the oven may cause water droplets to form on the door glass. These droplets are harmless and will evaporate as the oven continues to heat up. Oven Vents The oven is vented through duct openings at the rear of the cooktop. -
Page 14: Timed Baking
Your oven temperature is controlled very accurately using an oven control system. We recommend that you operate the range for a number of weeks to become familiar with your new oven’s performance. If you think an adjustment is necessary, see the Using Your Oven section. How to Set Your Range for Baking Do not lock the oven door with the door latch during baking. - Page 15 How to Set Delay Start and Stop Quick Reminder: 1. Press COOK TIME pad. 2. Press lNCREASE/ DECREASE pad to set cooking time. 3. Press STOP TIME pad. 4. Press INCREASE/ DECREASE pad until desired Stop Time appears in display. 5.
-
Page 16: Baking Pans
For best baking results, follow these suggestions: Oven Shelf Arrange the oven [ shelf or shelves in the desired locations while the oven is cool. The correct shelf position depends on the kind of food and the browning desired. As a general rule, place-most foods in the middle of the oven, on either the second or third shelf from the bottom. -
Page 17: Aluminum Foil
Baking Guides When using prepared baking mixes, follow package recipe or instructions for best baking results. Cookies When baking cookies, flat cookie sheets (without sides) produce better-looking cookies. Cookies baked in a jelly roll pan (short sides all around) may have darker edges and pale or light browning may occur. - Page 18 Do not lock the oven door with the door latch during roasting. This is used for self-cleaning only. Roasting is cooking by dry heal. ‘render IJlca[ or pou]try can be roasted uncovered in youI” oven. Roasting temperatures, which should be low and steady, keep spattering [o a mi ninlul]l.
-
Page 19: Questions And Answers
Questions and Answers Q. Is it necessary to check for doneness with a meat thermometer? A. Checking the finished internal temperature at the completion of cooking time is recommended. Temperatures are shown in Roasting Guide. For roasts over 8 lbs., check with thermometer at half- hour intervals after half the time has passed. -
Page 20: Use Of Aluminum Foil
Broiling is cooking food by intense radiant heat from the upper unit in the oven. Most fish and tender cuts of meat can be broiled. Follow these steps to keep spattering and smoking to a minimum. The oven door should be closed during broiling. Do not lock the oven door with the door latch during broiling. -
Page 21: Broiling Guide
1. Always use broiler pan and rack that comes with your &en. It is designed to minimize smoking and spattering by trapping juices in the shielded lower part of the pan. 2. Broiling should always be done with the oven door closed. -
Page 22: Operating The Self-Cleaning Oven
OPERATING THE SELF-CLEANING OVEN Before a Clean Cycle Quick Reminder: 1. Prepare the oven for cleaning. 2. Close and latch the oven door, pad. 3. Press the CLEAN 4. Press the INCREASE pad. [f you wish to change preset clean time of 4 hours, press the INCREASE or DECREASE pad until desired stop time appears in the display. - Page 23 After a Clean Cycle When the clean cycle is finished, the word “CLEAN” will go out in the display and the oven will begin to cool. When the oven temperature has fallen below the locking temperature the word “LOCK” goes out and the door can be opened.
- Page 24 OPERATING THE SELF-CLEANING OVEN Questions and Answers Q. If my oven clock is not working, can I still self- clean my oven? A. If the clock is not working then the entire control is not working. If the clock is not set to the correct time of day you will not be able to set a delay clean to end at a specific time.
-
Page 25: Care And Cleaning
CARE AND CLEANING Proper care and cleaning are important so your range will give you efficient and satisfactory service. Follow these directions carefully in caring for it to help assure safe and proper maintenance. BE SURE ELECTRICAL POWER IS DISCONNECTED BEFORE CLEANING ANY PART OF YOUR RANGE. -
Page 26: Burner Grates
CARE AND Burner Heads The holes in the burners of your range, ‘-”” and the spark electrodes, must be kept clean at all times for proper ignition and a an even, unhampered flame. You should clean the burner heads routinely, especially after bad spi]lovers, which could clog these holes. -
Page 27: Cooktop Surface
Cooktop Surface To avoid damaging the porcelain enamel surface of’ the cooktop and to :> prevent it from becoming dull, clean up spills right “- Q o away. Foods with a lot of acid ( tomatoes, sauerkraut, fruit juices, etc. ) or foods with high sugar content could cause a dull spot if- allowed to set. -
Page 28: Lift-Off Oven Door
CARE AND CLEANING (continued) Lift-Off Oven Door The oven door is removable but it is heavy. You may need help removing and replacing the door. To remove the door, open it a few inches to the special “stop” position that will hold the door open. Grasp firmly on each side and lift the door straight up and off the hinges. -
Page 29: Removable Storage Drawer
Oven Bottom The oven bottom has a porcelain enamel finish. To make cleaning easier, protect the oven bottom from excessive spillovers by placing a cookie sheet on the shelf below the shelf you are cooking on. You can use aluminum foil if you do not cover the whole shelf. This is particularly important when baking a fruit pie or other foods with a high acid content. -
Page 30: Glass Surfaces
CARE AND CLEANING Oven Air Vents Never block the vents (air openings) of the range. They provide the air inlet and outlet that are necessary for the range to operate properly with --’” correct combustion. Air openings are located at the rear of the cooktop, at the top and bottom of the oven door, and at the bottom of the range, under the storage drawer. - Page 31 Broil and Bottom Burner Air Adjustment The combustion quality of burner flames needs to be determined visually. See the Installation Instructions and the Problem Solver sections in this book. Air adjustment shutters for the top (broil) and bottom (oven) burners regulate the flow of air to the flames. The air adjustment shutter for the top (broil) burner is in the center of the rear wall of the oven.
-
Page 32: Installation Instructions
INSTALLATION INSTRUCTIONS FOR YOUR SAFETY If you smell gas: 1. Open windows. z. Don’t touch electrical switches. 3. Extinguish any open flame. 4. Immediately call your gas supplier. FOR YOUR SAFETY Do not store or use combustible materials, gasoline or other flammable vapors and liquids in the vicinity of this or any other appliance. - Page 33 Avoid placing cabinets above the range. To reduce the hazard caused by reaching over the open flames of operating burners, install a ventilation hood over the range that projects forward at least 5“ beyond the front of the cabinets. hood must be constructed of .
- Page 34 INSTALLATION INSTRUCTIONS GENERAL See Dimensions and Clearances in this section for all rough-in and spacing dimensions. Ilese dimensions must be met for safe use of your range. The location of the electrical outlet and pipe opening (see Gas Pipe and Electric Outlet Locations) may be adjusted to meet specific requirements.
- Page 35 ElpfCOviDEADEOuATE Your range is designed to operate at a pressure of 4“ of water column on natural gas or, if designed for LP gas (propane or butane), 10” of water column. Make sure you are supplying your range with the type of gas for which it is designed. This range is convertible for use on natural or propane gas, if you decide to use this range on a different type of gas, conversion adjustments must be...
-
Page 36: Connect The Range To Gas
INSTALLATION INSTRUCTIONS CONNECT THE RANGE TO GAS Flexible Connector Hookup Pressure Regulator ~ ** -. (..)) 90°Elbow~ ‘.. (provided) Adapter -ll,,:,,/,=!$ Rigid Pipe Hookup Pressure + Regulator (,)) ;;;::::+ r~mm1_90::w Nipple Union Install a manual gas line shut-off valve in the gas line in an easily accessed location outside of the range. -
Page 37: Electrical Connections
ELECTRICAL CONNECTIONS Electrical Requirements 120volt, 60 Hertz, properly grounded branch circuit protected by a 15-amp or 20-amp circuit breaker or time delay fuse. Extension Cord Cautions Because of potential safety hazards associated with certain conditions, we strongly recommend against the use of an extension cord. However, if you still elect to use an extension cord, it is absolutely necessary that it be a UL-listed, 3-wire grounding-type appliance extension cord... -
Page 38: Seal The Openings
INSTALLATION INSTRUCTIONS ELECTRICAL CONNECTIONS (continued) Usage Satiations where Appliance Power Cord will be Disconnected Frequently. Do not use an adapter plug in these situations because disconnecting of the power cord places undue strain on the adapter and leads to eventual failure of the adapter ground terminal. - Page 39 ADJUST BROIL AND OVEN BURNER AIR Air adjustment shutters for the top and bottom burners regulate the flow of air to the flames. The air adjustment shutter for the top (broil) burner is in the center of the rear wall of the oven. The flames for the top (broil) burner should be steady with approximately 1“...
-
Page 40: Leveling The Range
INSTALLATION INSTRUCTIONS LEVELING THE RANGE Remove the storage drawer, broiler drawer or kick panel. 2. Use a 3/16” open- end or socket wrench to back out both rear leveling legs approximately two turns. 3. Use a l%” open-end or adjustable wrench to back out the front leveling legs two turns. -
Page 41: Tools Required
HOW TO CONVERT THE RANGE FOR USE WITH 1P GAS NATURAL GAS TOOLS REQUIRED: T-10 Torxdriver (for sealed burners) 1/2” and 3/4” open-end wrench Flat blade screwdriver (small) Nut drivers or wrenches: 7mm or 5/16” (depending on the size of the spuds) PREPARE RANGE FOR CONVERSION (1) Turn off gas supply at the wall. - Page 42 INSTALLATION INSTRUCTIONS HOW TO CONVERT THE RANGE FOR USE WITH 1P GAS OR NATURAL GAS CONVERTING SURFACE BURNERS Burner Cap Remove grates, burner caps and burner heads. 2. Remove burner bases by unscrewing the 3 small screws in each base. Lift straight out.
- Page 43 prevent leakage, make sure the orifice spuds are securely screwed into the gas inlet tubes. Use a small wrench to hold the inlet tube hex to prevent it from twisting. 6. Put old oritice spuds back in the bag to save for possible future conversion.
-
Page 44: Check For Leaks
INSTALLATION INSTRUCTIONS HOW TO CONVERT THE RANGE FOR USE WITH 1P GAS OR NATURAL GAS CONVERT AIR ADJUSTMENT SHUTTER(S) For LP gas, Phillips head screw and rotate the shutter to the full open position. With Screw baffle in place, flames Air Shutter should have approximately l-inch blue cones and... - Page 45 PROBLEM POSSIBLE CAUSE WILL NOT WORK OVEN c The circuit breaker in your house has been tripped, or a fuse has been blown. c Door left in locked position after cleaning. TOP BURNERS DO NOT LIGHT OR DO NOT BURN EVENLY BURNERS HAVE YELLOW OR YELLOW-TIPPED FLAMES...
-
Page 46: Problem Solver
PROBLEM STRONG ODOR OVEN WILL NOT SELF-CLEAN OVEN DOOR WILL NOT UNLOCK OVEN NOT CLEAN AFTER CLEAN CYCLE “door’’APPEARSONDISPLAJ CONTROLBEEPSAFTER ENTERINGOVENTIME ORSTOPTIME “F’’ANDANUMBER FLASHONDISPLAY If you need more help... call, toll free: GE Answer Center ” 800.626.2000 consumer information service PROBLEM SOLVER (continued) POSSIBLE CAUSE... - Page 47 We’ll Be There With the purchase of your new Hotpoint appliance, receive the assurance that if you ever need information or assis- tance, we’ll be there. All you have to do is call-toll-free! In-Home Repair Service 800-GE-CARES (800-432-27377 our colmrmcr sc]lice prt)fi’ssiotlals...
-
Page 48: What Is Not Covered
Manager—Consumer Affairs, GE Appliances, Louisville, KY 40225 This book is printed on recycled paper Part No. 164D2764P01 5 39-4710 6-92 YOUR HOTPOINT GAS RANGE WARRANTY your sales slip or cancelled check to establish warranty period. FULL ONE-YEAR WARRANTY For one year from date of original...
Need help?
Do you have a question about the RGB747GER and is the answer not in the manual?
Questions and answers