Table of Contents
Advertisement
Quick Links
Download this manual
See also:
Manual Del Usuario
Advertisement
Table of Contents

Related Manuals for VTech ia5829


Summary of Contents for VTech ia5829
-
Page 2: Table Of Contents
Table of Contents Important Safety Instructions..................1 Before You Begin ......................3 Parts Check List ........................3 The Handset Layout......................4 The Base Unit Layout......................5 Getting Started........................6 Setup........................6 Connecting Power to Base Unit ..................6 Installation and Charge of Battery................6 Low Battery Indication ..................7 Battery Care and Maintenance ..................7 Connecting to Phone Line .....................7 Check for Dial Tone....................8 Set Date and Time....................8... - Page 3 Table of Contents About Call History .....................19 Review Call History ..................19 Delete Records from Call History................19 Dial a Displayed Number...................20 Store a Call History Record in the Directory............20 Display Screen Messages.................20 Additional Information....................21 Headset Operation....................21 Maintenance........................22 In Case of Difficulty....................23 Warranty Statement....................25 FCC, ACTA and IC Regulations.................27 Technical Specifications..................30...
-
Page 4: Important Safety Instructions
Important Safety Instructions When using your telephone equipment, basic safety precautions should always be followed to reduce the risk of fire, electric shock and injury, including the following: 1. Read and understand all instructions. 2. Follow all warnings and instructions marked on the product. 3. - Page 5 Important Safety Instructions A. When the power supply cord or plug is damaged or frayed. B. If liquid has been spilled onto the product. C. If the product has been exposed to rain or water. D. If the product does not operate normally by following the operating instructions.
-
Page 6: Before You Begin
4. Telephone Line Cord 8. Wall Mount Bracket To purchase replacement batteries, visit us on the web at www.vtechphones.com or call VTech Communications, Inc. at 1-800-595-9511. In Canada, call VTech Telecommunications Canada Ltd. at 1-800-267-7377. Wall Mount Bracket Base Unit... -
Page 7: The Handset Layout
The Handset Layout Antenna Headset Jack Earpiece 10. Select Key 11. Off Key Left and Right Arrow Keys 12. Hold Key Phone/Flash Key 13. Redial/Pause Key Dialing Keys (0-9,*,#) 14. Prog Key Chan/Delete Key Microphone... -
Page 8: The Base Unit Layout
The Base Unit Layout 1. Message Light 4. Telephone Line Jack 2. Locate Handset Key 5. DC Connector Jack 3. Charging/In use Light... -
Page 9: Getting Started
2. Plug the DC connector to the base. Plug the AC adaptor into an electri- cal outlet. Installation and Charge of Battery 1. Install the battery. Use only VTech batteries. a) Remove battery compartment cover by pressing on the indentation and sliding downward. -
Page 10: Low Battery Indication
• If you repeatedly get a low battery indicator, even after charging overnight, the battery should be replaced. Use only VTech batteries. CAUTION! To reduce the risk of fire or injury to persons or damage to the telephone, read and follow these instructions carefully:... -
Page 11: Check For Dial Tone
Setup Check for Dial Tone After the battery is charged, pick up the handset and press PHONE/FLASH. You should hear a dial tone. Set Date and Time If you subscribe to caller ID service, the date and time will be set automatically with the first incoming call. -
Page 12: Basic Operation
Telephone Operation Handset Operation SELECT / CID • Use SELECT in conjunction • While on a call, press to with PROG during handset decrease the volume. A programming. double beep will sound when you reach the mini- mum setting. • While on a call, press to in- •... -
Page 13: Base Operation
Telephone Operation Base Operation In Use/Charging Indicator Message Waiting • Flashes slowly when Indicator the handset is in use. • Flashes rapidly when a • If you subscribe to tele- call is on hold. phone company voice mail with a visual mes- •... -
Page 14: Handset Ringer Style/Battery Save
Telephone Operation Handset Ringer Style/Battery Save You can select from four different handset ringer styles, or turn the ringer off and extend the battery life. 1. Make sure the handset is off. 2. Press PROG. 3. Press until the screen displays RINGER: and the current selection. 4. -
Page 15: Clear Message Waiting Alert
Telephone Operation MESSAGES WAITING 5/01 5:40 Clear Message Waiting Alert If you wish to manually turn off the message waiting light: 1. Press PROG. 2. Press until screen displays MESSAGES WAITING. 3. Press SELECT, the screen displays: LIGHT OFF: YES 4. -
Page 16: Speed Dial Memory
Speed Dial Memory You can store up to nine telephone numbers with names (up to 15 characters and 24 digits in each location) into the speed dial memory locations you assign (1 through 9). You can also store telephone numbers with names alphabetically in the directory. See Telephone Directory for instructions. -
Page 17: Edit A Number/Name Stored In Memory
Telephone Memory 6. When you finish entering the name, press SELECT or PROG. The screen displays ENTER NUMBER. 7. Enter the telephone number. Use to backspace and make corrections. Press REDIAL/PAUSE to store a pause in the dialing sequence. -OR- Press REDIAL/PAUSE to display the last number dialed from this phone. -
Page 18: Dial A Memory Number
Telephone Memory Dial a Memory Number 1. Press and hold the memory location key (1 through 9) of the entry you wish to dial. 2. Press (phone) / FLASH to dial the displayed memory number. Reassign Locations in Memory 1. Press and hold the memory location key (1 through 9) of the entry you wish to reassign. -
Page 19: Telephone Directory
Telephone Directory Your ia 5829 can store 20 (including nine speed dial entries) telephone numbers with names (up to 15 characters for the name and 24 digits for the number in each location). NOTE: Press at any time to exit directory. (off) Store a Number/Name in the Directory 1. -
Page 20: Edit A Number/Name Stored In The Directory
Telephone Directory first ring. Choose N for a normal ringing pattern. SELECT 8. Press or PROG to confirm your selection. If you chose Y, a will be displayed with the directory entry. NOTE: When memory is full the screen displays MEMORY FULL, an error tone sounds, and you will not be able to store a new number until you delete a stored number. -
Page 21: Dial A Number From The Directory
Telephone Directory Dial a Number from the Directory 1. Press . The screen displays DIRECTORY. 2. Press to scroll alphabetically through entries stored in directory. -OR- Press the dial pad key for the first letter of the entry you want to dial. 3. -
Page 22: Caller Id Operation
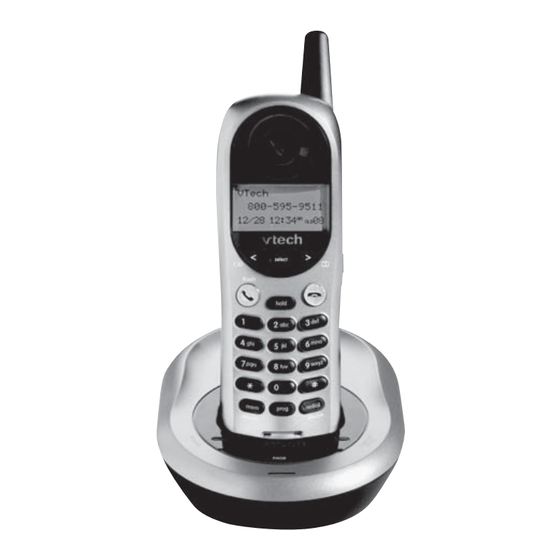
Caller ID Operation Caller’s name VTech Party has called 2 or more times 800-595-9511 Caller’s telephone number 5/01 5:40 Position of call in call history indicate whether the record Date of call Time of call is new or old About Call History (Caller ID) Your ia 5829 can store up to 45 calls in its caller ID (CID) memory. -
Page 23: Dial A Displayed Number
Caller ID Operation Dial a Displayed Number 1. Locate the record in call history that you want to dial. 2. If you wish to change how the number is dialed, press #. The screen displays alternate dialing sequences available for this call (area code + number; 1 + area code + number;... -
Page 24: Additional Information
5829. To purchase a headset, visit us on the web at www. vtechphones.com or call VTech Customer Service at 1-800-595-9511. Once you have a compatible 2.5mm headset, locate the headset jack on the ia 5829 handset. Connect the plug on the headset cord to the jack (under a small rubber flap) on the cordless handset. -
Page 25: Maintenance
Maintenance Taking care of your telephone Your cordless telephone contains sophisticated electronic parts, so it must be treated with care. Avoid rough treatment Place the handset down gently. Save the original packing materials to protect your telephone if you ever need to ship it. Avoid water Your telephone can be damaged if it gets wet. -
Page 26: In Case Of Difficulty
If you have difficulty operating your phone, the suggestions below should solve the problem. If you still have difficulty after trying these suggestions, visit us on the web at www.vtechphones.com or call VTech Communications at 1-800-595-9511. In Canada, call VTech Telecommunications Canada Ltd. at 1-800-267-7377. - Page 27 In Case of Difficulty You hear noise in the Handset, and none of the keys or buttons work • Make sure the power cord is plugged in. Common cure for electronic equipment If the unit does not seem to be responding normally, then try putting the handset in the base.
-
Page 28: Warranty Statement
3. Product to the extent that the problem experienced is caused by signal conditions, network reliability or cable or antenna systems; or 4. Product to the extent that the problem is caused by use with non-VTech electrical accessories; or 5. Product whose warranty/quality stickers, Product serial numbers plates or electronic serial numbers have been removed, altered or rendered illegible;... - Page 29 • If the Product failure is not covered by this limited warranty, or proof of purchase does not meet the terms of this limited warranty, VTech will notify you and will request that you authorize the cost of repair prior to any further repair activity. You must pay for the cost of repair and return shipping costs for the repair of Products that are not covered by this limited warranty.
-
Page 30: Fcc, Acta And Ic Regulations
This equipment is compatible with inductively coupled hearing aids. Should you experience trouble with this telephone equipment, please contact: VTech Communications Inc. CUSTOMER SERVICE at 1-800-595-9511. In Canada, call VTech Telecommunications Canada Ltd. at 1-800-267-7377 for repair/ warranty information. The telephone company may ask you to disconnect this equipment from the line network until the problem has been corrected. - Page 31 FCC, ACTA and IC Regulations 1. Product identifier and REN information The label on the back or bottom of this equipment contains, among other things, an identifier indicating product approval and the Ringer Equivalence Number (REN). This information must be provided to your local telephone company upon request. For equipment approved prior to July 23, 2001, the product identifier is preceded by the phrase “FCC Reg No.”...
- Page 32 FCC, ACTA and IC Regulations feature doesn’t work. b. This feature is provided only as a convenience, and the manufacturer assumes no responsibility for customer reliance upon the memory feature. c. Testing the emergency telephone numbers you have stored is not recommended. However, if you do make a call to an emergency number: •...
-
Page 33: Technical Specifications
Technical Specifications FREQUENCY CONTROL WEIGHT Crystal controlled Handset: 159g (without battery PLL synthesizer pack) Base: 205 gram(without adaptor TRANSMIT FREQUENCY and wallmount) Base: 912.75 - 917.10 MHz Handset: 5863.80 - 5872.50 MHz POWER REQUIREMENTS RECEIVE FREQUENCY Handset: 3.6V 600mAh Ni-MH Base: 5863.80 - 5872.50 MHz Battery... - Page 34 VTECH TELECOMMUNICATIONS LTD. A member of THE VTECH GROUP OF COMPANIES. Distributed in the U.S.A. by VTech Communications, Inc. Beaverton, Oregon, 97008 Distributed in Canada by VTech Telecommunications Canada Ltd. 200-7671 Alderbridge Way, Richmond, B.C. V6X 1Z9. Copyright 2004 for VTECH TELECOMMUNICATIONS LTD.
-
Page 35: Need Help
Congratulations on your purchase of this VTech product NEED HELP? Our representatives are here to help you with any questions concerning the operation of this product, available accessories, or any other related issues. Call Toll Free: 1-800-595-9511 In Canada, Call:... - Page 36 CORDLESS Troubleshooting TAGS 250 De-register and register De-register handset from the E2525, E2600B and E2555 Please take the Handset out of the Base before de-registering. Using the [SOFT] Keys on the Base, press MENU, then press the Down arrow twice until BASE SETTINGS is highlighted.
- Page 37 Additional Handsets will be assigned numbers in the order the are registered (2, 3, 4, etc.) up to a maximum of eight. Keypad Tone Feature - Vtech Telephones When the Keypad Tone Feature is ON but the handset is OFF (i.e. in standby): You will hear loud tones being emitted through the external speaker on the back of the handset when you press any handset button except for the volume key.
- Page 38 button, and the [OFF] button emitted through the external speaker on the back of the handset. 2.You will not hear any tone when you press the [SOUND SELECT] button. Keypad Tone Feature When the Keypad Tone Feature is ON but the handset is OFF (i.e. in standby): You will hear loud tones being emitted through the external speaker on the back of the handset when you press any handset button except for the volume key.
- Page 39 When the Keypad Tone Feature is ON and the Speakerphone on the handset is ON: 1.You will hear the tones from the number buttons ([0] - [9]), the [SOFTKEY] buttons (the three unnamed buttons under the display), the [XFER/INTERCOM] button, the [SPEAKER] button, the [PHONE] button, and the [OFF] button emitted through the external speaker on the back of the handset.
- Page 40 ARS label via US Mail for him or her to ship their original product back at no charge to them. · If this is the case, it will be necessary for you to place an order for the VTech T2406 using the EXCHANGE-IW promo code in COPS and use regular standard shipping. (The...
- Page 41 (no charges will be incurred by the customer). 2.You will need to place a no charge replacement order for the VTech GZ2434 using the CSAT promotion code in COPS and change the shipping method to Free Shipping- Overnight (manager use only) $0.
- Page 42 ·Enter the 15 digit Base ID Code, located on the underside of the Base Unit. The ID Code can include numbers (0-9) and characters (*,#). ·Press OK. The Handset will display: PLEASE WAIT! ·Wait approximately 15 seconds. The Handset will display FOUND BASE. NOTE: Occasionally, it will take longer than 15 seconds for the Handset to find the Base Unit.
- Page 43 SET TIME PONER TIEMPO REGLER L'HEURE CLOCK MODE MODO RELOJ MODE HORLOGE REGISTER REGISTRAR REGISTRE RINGER VOLUME TIMBRE VOLUMEN SONNERIE VOLUME RINGER MELODY TIPO DE TIMBRE SONNERIE MELODIE VIBRATE CONTROL CTRL VIBRACION MODE VIBRATION LOW BATT TONE TONO DE BAT BAJA SON PILE FAIBLE RANGE TONE TONO DE RANGO...
- Page 44 FRENCH CALLS LOG GUEA DE LLAMADAS REGISTRE D'APPEL BASE SETTINGS CONFIG BASE REGLAGES BASE DISPLAY BASE-ID NUMERO DE BASE NUMERO DE BASE RINGER VOLUME TIMBRE VOLUMEN SONNERIE VOLUME RINGER MELODY TIPO DE TIMBRE SONNERIE MELODIE KEYPAD TONE TONO DE DECLADO SON DU CLAVIER TONE/PULSE TONOS/PULSOS...
- Page 45 3.Hold down [PAGE] key for 5 seconds. When the LINE IN USE light begins to flash, release the [PAGE] key. 4.The HANDSET CHARGING light will blink 5 times. Within 5 seconds from when it stops blinking, press [PAGE] once. VT2461 Mk1 DEREGISTER A SINGLE HANDSET 1.Unplug power from the Base.
- Page 46 - Advise the customer that you are sending him or her a brand new replacement set (Cordless 2230 or 2255 whichever the customer has). If the customer does not want the replacement, advise him or her to return their unit to the place of purchase. Stop! If the customer accepts the replacement 2230/2255 continue..
-
Page 47: Conference Calls
9.Hit "Ok". Now "line or Line In" should show up in the master volume control for Recording. Please make sure that there is a check mark in the Select box under the "Line or Line IN 10.Go to Options and Select Properties. 11.There should be an option to adjust Recording or playback volume control. -
Page 48: Operating Range
of line voltage available at the phone and the distance of miles between the two other parties. Customer may consider 3-way calling service (if available through local telco) as alternative. Customer is less likely to experience volume loss due to more direct routing of conference. -
Page 49: Cardiac Pacemakers
This cordless operates in the 900 megahertz frequency band. Radio signals in this band can penetrate small openings and reflect around obstructions more effciently than those of conventional cordless telephones. This alows the unit to operate in areas that are typically difficult for cordless phones. - Page 50 940101B2-7CPS2A (CRS will not accept a slash.) The battery save feature will deactivate the ring approximately 60 seconds after being set. After 60 seconds, the phone will enter "sleep mode". The phone will not ring or display "incoming call" when the extension phones are ringing. If any button on the phone is pressed, this will "wake up"...
-
Page 51: Hearing Aid Compatibility
·If possible advise your callers to leave a message. ·Check with the local telephone company and advise them 7-10 seconds of silence is required for the answering system to disconnect. NOTE: Charges may apply Call Waiting disconnects answering system Answering System senses a fluctuation in line voltage caused by the Call Waiting signal and disconnects. - Page 52 Calling in same Area Code Many LTCO's are changing their dialing sequence to 0 +, or 1 +, 10-digit dialing (0 + 0r 1 + area code + seven-digit phone number) for all long distance calls that are made within the same area code.
- Page 53 5.Replace battery cover. 6.Recradle handset in base for 15 seconds. 7.Pick up handset and press phone. NOTE: Be sure batteries have been charged recently. If not, charge batteries fully for 16 hours. Common Cure If the unit does not seem to be responding normally, then try putting the handset in the base to reinitialize the unit.
-
Page 54: Low Battery Indicator
To determine if telephones ring separately or together: 1.Remove telephones from line. 2.Replace one at a time. ·Line 1 has a higher pitched ring that helps differentiate it from the ring of Line 2. ·Have someone call on each line. ·Let the telephone ring approximately five times and listen to the difference. - Page 55 Ringer Equivalence On the bottom of each telephone or adjunct is a Ringer Equivalence. 1.Find this number for everything connected to your telephone line. 2.Add up all the numbers to get the total Ringer Equivalence. Julian Date NOTE: Contact the telephone company, if required. The Julian date for this unit is found on the bottom of the unit.
Need help?
Do you have a question about the ia5829 and is the answer not in the manual?
Questions and answers