Page 1
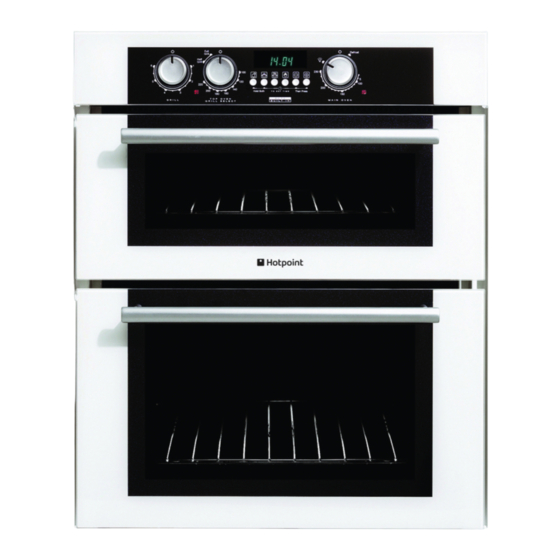
Instructions for Installation and Use BU71 BU72 BU82 To the Installer Before installation fill in the product details on the back cover of this booklet. The information can be found on the rating plate. To the User You must read the instructions prior to installing and using the appliance...
Grill Pan and Handle Using The Top Oven for Solarplus Grilling Guide To Grilling Using the Top Oven as a Convection Oven Using the Main Oven as a Fan Oven Using the Main Oven for Other Functions Temperature Conversion Scale...
To help remove the 'new' smell, heat up the empty ovens to maximum temperature for a minimum of two to three hours keeping the oven doors closed. Ensure that the room is well ventilated (e.g. open a window or use an extractor fan) and that persons who may be sensitive to the odour avoid any fumes.
Always make sure all controls are turned off when you have finished cooking and when not in use. Always stand back when opening an oven door to allow any build up of steam or heat to disperse. Always use dry, good quality oven gloves when removing items from the oven/grill.
Never allow anyone to sit or stand on any part of the appliance. Never store items above the appliance that children may attempt to reach. Never remove the oven shelves whilst the oven is hot. Never heat up unopened food containers as pressure can build up causing the container to burst.
STAY CLEAN LINER MEAT PAN INNER DOOR GLASS TOP OVEN TEMPERATURE & GRILL SELECTION CONTROL CLOCK & OVEN TIMER RATING PLATE – Record the Model No. and the Serial No. on KEY CONTACTS, back page. MAIN OVEN TEMPERATURE & FUNCTION CONTROL...
The heating element and oven fan will not operate until the oven door is closed. Note: It is advisable to check that all oven controls have been switched off when you have finished using the appliance.
AUTOMATIC COOKING The Top Oven and Main Oven can be controlled by the automatic timer. When the timer control has been set for one oven, it is possible to use the other oven only during the same automatic cooking programme.
“Manual” button twice – The “Auto” symbol will go out). Note: If at any time the display shows a ‘KEY’ symbol, it is likely that the timer has been set incorrectly. OVEN COOKING IS NOT POSSIBLE. The ‘KEY’ symbol can be deleted and the cooker returned to manual operation by: Simultaneously pressing the Minute Minder and the Cook Period buttons for a period of approximately 8 seconds.
TIMER OPERATION SETTING THE TIME OF DAY Step 1 Make sure all oven controls are turned Off. Step 2 Check the electricity supply to the cooker is turned on. Step 3 When switched on the display will show 0.00 and Auto symbol will be Step 4 Press &...
(b) To set timer to switch on immediately and OFF automatically after a set cook period. a) TO SET THE TIMER TO SWITCH THE OVEN(S) ON AND OFF AUTOMATICALLY This allows you to cook at a specified time for a chosen period before the oven switches off Automatically.
Page 12
Check that the correct time of day is set, if not follow instructions for setting the time of day. Step 2 Place food onto the correct shelf position in the oven and close the oven door(s). Step 3 Turn the oven control(s) to the required temperature, and if necessary select the appropriate oven function.
Page 13
(d) Press & release the (e) Start the sequence again. 5. If at any time the display shows three flashing zero’s 0.00. It is likely that the electricity supply to the oven has been interrupted. Reset the timer to the correct time of day.
USING THE TOP OVEN FOR GRILLING Top Oven Shelf Positioning for Grilling The shelf can be inserted in two different ways for grilling. The grilling chart will indicate the correct orientation. Orientation A Orientation B Note There should always be at least 25mm (1 inch) between the top of the food and the grill...
If a detachable handle is required, do not replace screw & washers. Note: If a fixed handle is required, the grill pan cannot be kept in the main oven with the door closed but may be stored in the top oven with the door closed, when the top oven is not in use.
Turn off at the control and allow to cool before cleaning. Care must be taken to ensure the grill mesh is not distorted - DO NOT store the grill pan handle on the food grid when the shelf is in the highest position. IMPORTANT GRILLING SHOULD NEVER BE UNDERTAKEN WITH THE GRILL/TOP OVEN DOOR CLOSED.
Step 2 Turn knob (B) clockwise to select grill function setting: Set to: NOTE: As you turn past the end of the oven temperature scale you will feel resistance on the knob – continue turning clockwise until the grill setting position is selected.
WARNING: Items stored in the top oven will get hot when the main oven is in use. DO NOT allow young children near to the appliance when the top oven is in use as the surfaces get extremely hot.
Do Not use: Meat Pans and Baking Trays larger than – 225mm x 300mm (9”x12”) DO NOT use the grill pan or main oven meat pan as a meat pan in the top oven, as the air circulation will be seriously restricted.
At the end of the cooking period there may be a momentary puff of steam when the door is opened. This will disperse in a few seconds and is a perfectly normal characteristic of an oven with a good door seal.
(allowing 5-6 hours per lb.) or at room temperature (allowing 2-3 hours per lb.). Frozen meat or poultry must be completely defrosted before cooking in the oven. However, to decrease the amount of time required to defrost food items, a non-heating fan only setting may be selected for the main oven only.
Page 23
Extra care should be taken when warming bone china, as it may be damaged in a hot oven. DO NOT place food or plates directly on the oven floor as this could damage both the oven lining and the plates which are being warmed.
Remember to reduce cooking temperatures by 10°C from standard recipes when using the top oven. Ensure that the cooking utensil used in the top oven is not larger than 300mm x 225mm (12"x 9"), e.g. Do Not use the main oven meat pan.
MAIN OVEN BASE (a) Base & Rear of Top Oven and Base of Main Oven. Wipe out the oven with a damp soapy cloth. For more stubborn stains on the base of the oven use a well soaped fine steel wool soap pad.
Page 30
Open the oven door and remove the oven shelves. Using a thick cloth, grip the lamp lens, unscrew anti- clockwise and remove the lens.
Page 31
GROMMETS PANEL Fig. 4 1. Position top or main oven door as shown in fig. 1. Note: The door can be wedged open using a towel between the door and the side trim thus leaving your hands free. 2. Grip inner door panel and handle/outer glass assembly.
INSTALLATION ELECTRICAL REQUIREMENTS For your own safety, we recommend that your cooker is installed by a competent person such as one who is registered with NICEIC (National Inspection Council for Electrical Installation Contracting). The cooker should be installed in accordance with the latest edition of the IEE Regulations. Warning: This appliance must be earthed.
Check that the plinth can be fitted. If necessary re - adjust the feet and check that the cooker is level. h. Open the top oven door and fix the cooker to the brackets through the holes in the side trims.
Page 34
INSTALLATION 597mm min 720mm min 565mm 150mm min 170mm max A minimum distance of 25mm should be maintained between the front face of the cabinet side and the front face of the plinth.
Page 35
INSTALLATION Wall Fixing Bracket Cooker 1mm min Cabinet Doors Top View Double pole control switch Hob Cable 2.5mm Cable size to suit heat resistant cable current rating of BS 6141 Table 15 appliance/s Connector Cable...
(a) Check If you find :- Display is blank. Then it is likely that there is no electricity supply to your oven. Check: (i) That the main cooker wall switch is turned on. (ii) Check other appliances to see if you have a power cut.
08701 50 60 70 For further product information All Hotpoint Services are offered as an extra benefit and do not affect your statutory rights. General Domestic Appliances Limited, Morley Way, Peterborough, PE2 9JB PRINTED BY SIMLEX . FOUR ASHES, WOLVERHAMPTON...